
Previously, I gave some general tips and tricks regarding the sentry gun rigging process. In this part, we will finally be animating the sentry gun.
It is recommended to study the sentry gun animations from TF2. Especially for the transformation animation since it's more complicated than other animations.
Introduction
We will be using keyframes for animation. The basic idea is to keyframe the key poses first and then add or edit the in-between frames to enhance the animation further.
We will be using the action editor to store different animations. The NLA(Nonlinear Animation) editor will be used to combine or blend different animations. To tweak the animations, the graph editor will be used.
You can access the different editor windows using the Editor Type button. As for the Action Editor, open up the Dope Sheet editor first, then use the drop-down to switch to the Action Editor.
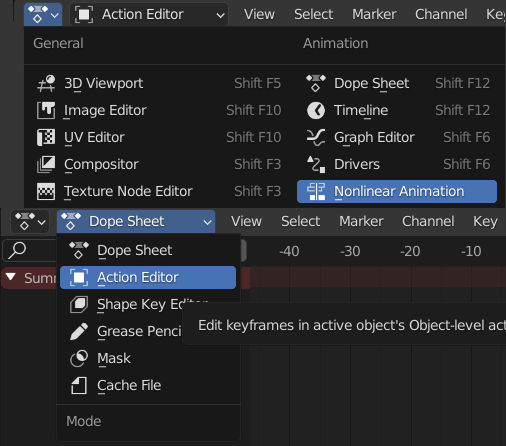
Using the action editor, different animations can be stored in different Actions under various names. Make sure to turn the shield icon on, or you will lose the animation after restarting Blender.

Idle Animation
I will be animating the sentry gun scanning its surroundings for the idle animation. So just animate the neck bone rotating left and right. This animation's key poses are left and right rotation at 45 degrees.
Here is my idle animation:
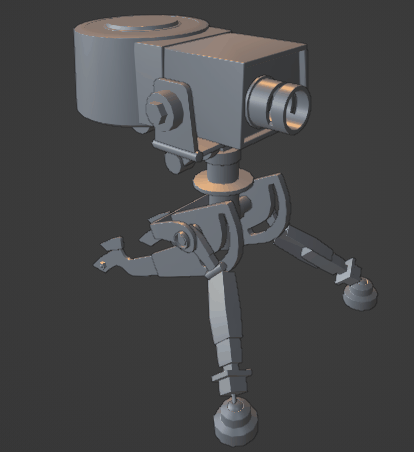
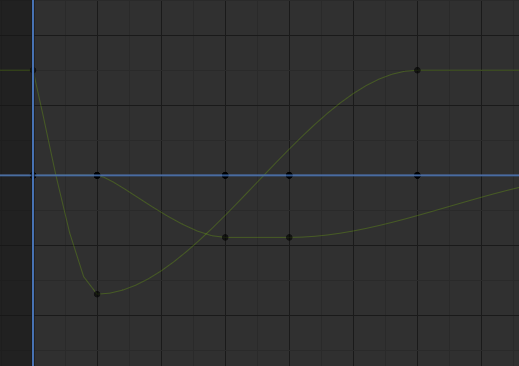
This is a simple animation with only two key poses and a little modification to the keyframe in the graph editor. Interpolation mode is linear, so it loops perfectly, but a little curve is added when the sentry gun reaches 45 degrees to represent slowing down and speeding up of the motion.
Shooting Animation
Next up is the shooting animation. For this, we need to animate the recoil.
Start by animating the barrel, going backwards. This should be a quick motion, and the following motion of the barrel returning to its original position is slower. This will give the recoil animation weight.
To enhance this further, I decided to animate the body moving backwards because of the force from the recoil. This should be done with an offset to the barrel animation, which indicates the transfer of recoil motion from the sentry barrel to the sentry body.
Here is what my final animation looks like:
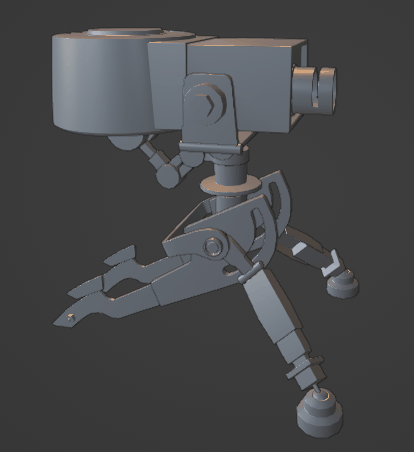
Since only the barrel and head are animated, this animation can be used irrespective of the sentry gun's direction.
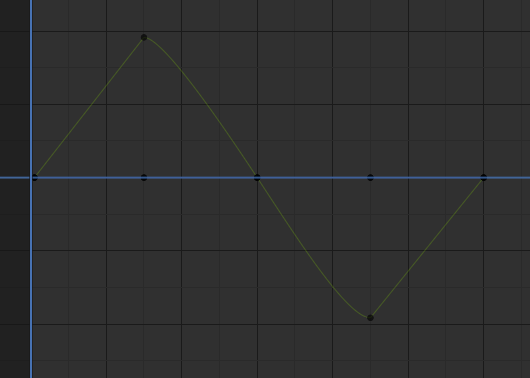
We use linear interpolation for recoil since it happens suddenly and bezier interpolation for recovery since it happens smoothly.
Here is the graph editor view for this animation:
Transform Animation Key Poses
This is a fairly complicated animation compared to the other two animations. The sentry gun has to transform from the head cylinder to the sentry gun shape.
In TF2, the sentry gun transformation animation animates after emerging from a box. We will not worry about the box animation for now and will focus on only the sentry gun animation.
Step 1: Keyframing
I decided to keyframe all the sentry gun bones at the end of the animation first. This way, we can work backwards. In the first frame, the sentry gun will look like a cylinder, and in the last frame, it will transform into the sentry gun we made. These are our two main key poses.
For the first frame, move and rotate the bones around until you are left with only the head cylinder. There is no need to worry about mesh overlaps inside the head cylinder because they will never be seen.
This is the result you should aim for:
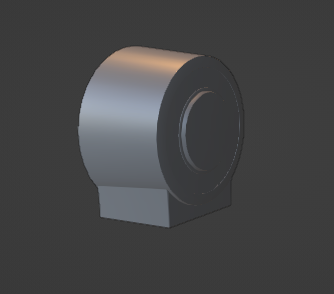
All other mesh of the sentry gun exists inside this head cylinder. And we will be animating the sentry gun components extending from inside the head cylinder to form the sentry gun.
You can try playing the animation to see if there are any unexpected movements and other issues.
The key pose seems to interpolate well between the two poses without any issues.
Step 2: Adding In-between Key Poses
Now we need to add the in-between key poses one at a time before worrying about the weird motion of the current animation. Let's plan the key poses before animating.
The key poses will be in this order: centre cylinder comes out > leg support extends > front legs in position > back legs in position > arm and head rotate while the arm supports the head instead of the neck > neck and neck support in position > and head rests at neck support. So there will be about eight key poses in-between before the transformation.
Conclusion
We have created some basic animations and created plans for the transform animation. Any number and type of animations can be created using the key pose method.
Next, we will be finalizing the sentry animation. So stay tuned, and thank you for reading! Please subscribe so you can read the next part as soon as it comes out!