
Previously, we finalized the sentry gun rig and made it animation ready. But before we move on to animation, I would like to give some general tips and tricks regarding the rigging process.
Bone Groups
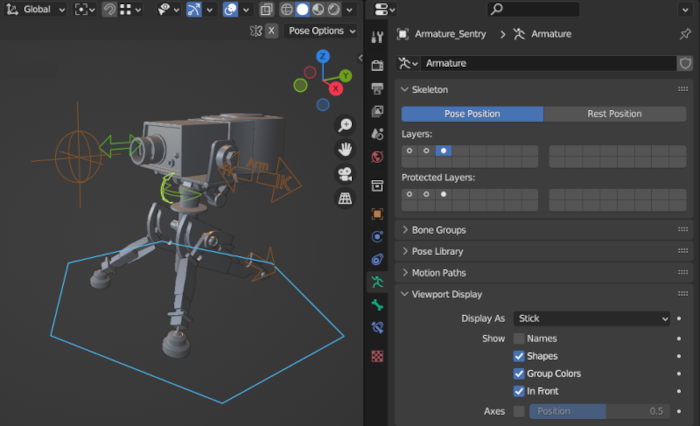
The use of bone groups can help increase the rig's clarity by making selection sets of bones. If you have worked with vertex groups before, bone groups are a similar concept. We can assign selected bones to a group, give them colour and select or deselect bones from that group.
Add or remove groups using the Plus and Minus icons. A bone can only belong to a single group. Set the desired colour for that group using the Color Set option. We can select from predefined themes or create custom ones. You can hover over the colours to see which colour is displayed under what condition from a colour set.
To assign and remove bones from a group, select the desired bones and Assign or Remove them as needed. The Select and Deselect button is used for selecting or deselecting bones from the selected group. We can also select a bone, press Shift+G and select the Group option to select all bones from the selected bone's group.
Here you can see I have colour-coded different bones and assigned them to groups as needed.
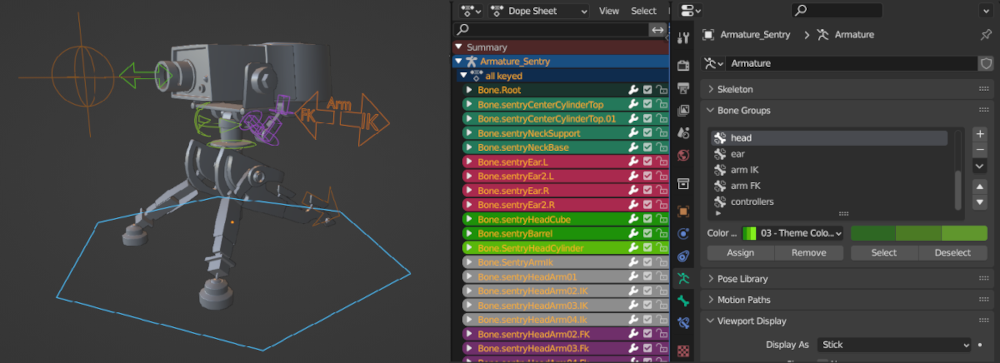
By doing this, we can also see the bone colour in the dope sheet editor and other animation editor windows, making identifying bones easier.
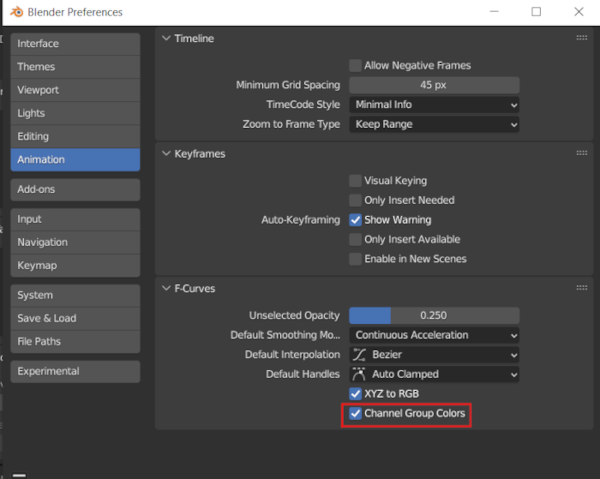
In some blender versions, you may need to enable the Channel Group Colors option from blender preferences to see the colours in the animation editor windows.
Pose Library
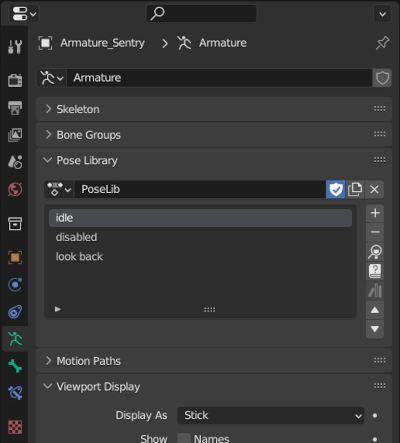
The pose library is useful for saving different poses that can be accessed anytime during the animation process.
Create a new pose and name it, PoseLib in my case. Clicking the shield icon is important; otherwise, you will lose all your poses once you restart Blender.
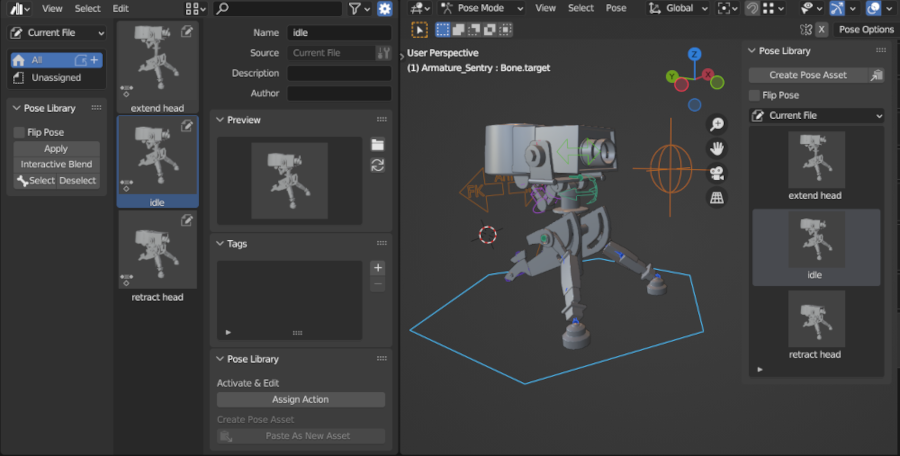
Pose the rig, select the bones you want to save in that pose and add a new pose. Do this for whichever pose you want to save. Now the saved pose can easily be accessed at any time using the magnifying glass icon.
The plugin menu can enable a much better version of the pose library. This has features like thumbnail preview of poses, blending between poses, and many quality of life improvements.
Bone Layers
Bone Layer is another feature that we can use to manage our rig. We can easily hide and unhide different bone groups using layers.
By default, all bones are in a single layer. To move bones to a different layer, select the desired bones, press the M key, and click on the layer box you want to move the bone to.
It is a good idea to separate your controllers, IK and FK bones, and deform bones into separate layers. You can further divide bones into different layers if you want.
Here you can see only the controller bones are displayed when I select the controller bone layer.
Lock And Zero Out Transform
Zeroing out the transform of your bones and mesh is important for the rig to behave properly and for ease of use.
By zeroing out the bone transform, we can get exact results when animating the rig without having to do additional calculations. It is also easier to tell if a bone is in its default position simply by checking whether the bone transform values are all zero.
As an example, say I want to rotate a bone 90 degrees along the y-axis. If the bone's rotation is not zeroed out and has a non-zero value at the default position, I have to do additional calculations to the existing value to rotate it by 90 degrees. But if the default position value is zero then simply giving it a value of 90 in y-axis rotation will do the job.
Locking the Transform of bones along the axis that will never be used can make the rig easier to animate and prevent the rig from breaking in some cases.
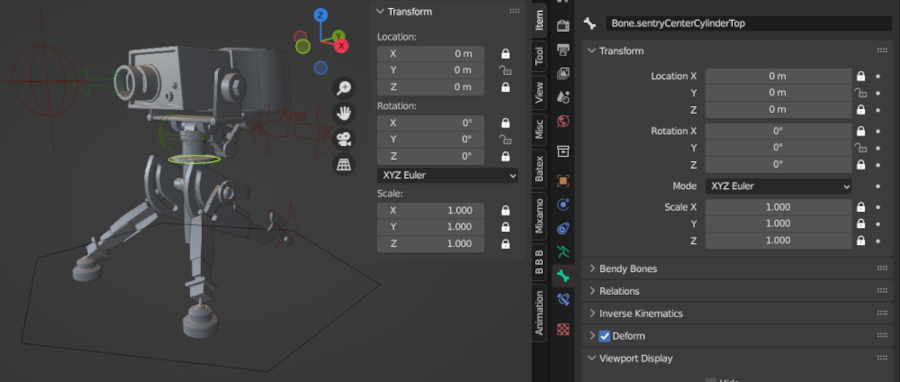
As seen in the image above, I have locked all the transform options of the centre cylinder bone except for the y-axis location and rotation. This will ensure that the bone will only move up and down and rotate along the y-axis.
Setting the primary rotation axis the same on all rig bones makes animating easier. As we only have to animate along one axis primarily. Working in the graph editor is also easier as we have to look for and edit only one axis. I have set my primary axis to be y, but you can use whatever axis you feel comfortable with.
Applying transform of mesh is also important as not doing so we may encounter deformation or skewing issues when animating.
To zero out all transform, select the desired mesh, press Ctrl + A, and select the All Transform option. This will reset location and rotation to 0 and scale to 1.
Other Tips and Tricks
Here, I will list some minor tips and tricks that aren't long enough to be their own heading.
- The wireframe option found under the custom shape option can be used to save some time if you don't want to model wireframe mesh for custom bone shape. However, this only works on simple shapes.
- Test the rig by skinning and animating simplistically when rigging instead of waiting until the rigging process is complete. This will help identify and troubleshoot problems early on.
- If you plan on using any addons, make sure the addon is stable and ready for production.
- Locking controllers is not a good idea unless in rare cases like with IK/FK switch. Because this may confuse the animator and prevent certain motions in some cases. We also want to give animators room to add their own constraints.
- I have said this before, but I cannot stress enough how important properly naming all your objects is. So make sure you do so.
Conclusion
Hopefully, you have learned something useful and this bonus chapter has helped you enhance your rig further. In the next part, we will finally be animating the sentry gun.
So stay tuned, and thank you for reading! You can press the subscribe button below to get notified when a new part of this series is out.