
Previously we created the sentry gun mesh. Now we will create a rig for the sentry gun.
The rigger's job is to make the animater's job as easy as possible. So we need to keep a lot of things in mind when rigging. What is the rig going to be used for? What kind of animations will it need? We also need to keep in mind the limitation of our rig and how sophisticated the rig needs to be.
For this tutorial series, I have decided to animate idle, shoot, and transformation of the sentry gun. So, I will be rigging the sentry while keeping that in mind and not going too overboard or too barebone when creating the rig.
Before we get started, name your sentry objects properly, making the rigging process easier. We will also be naming our rig properly, making animating and rigging easier.
Bone Setup
Start by adding a single bone. This will act as our root bone for the rig. Every other bone will be the child of this root bone.
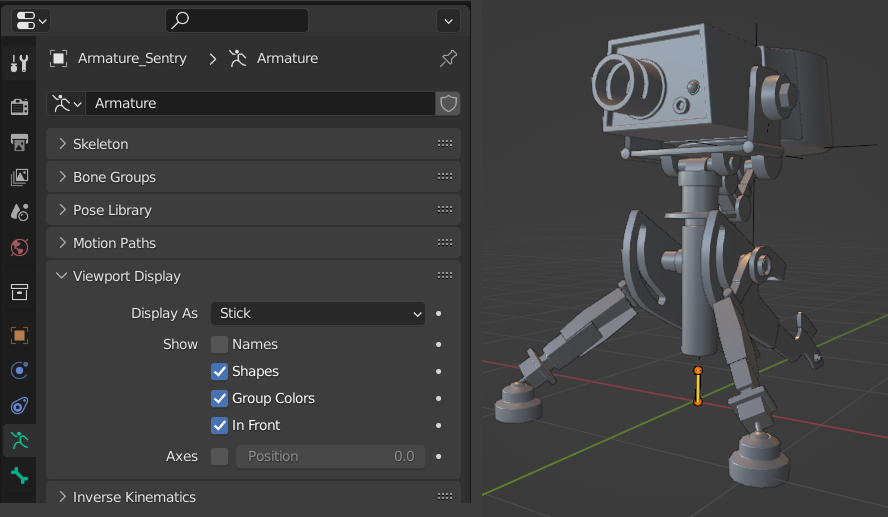
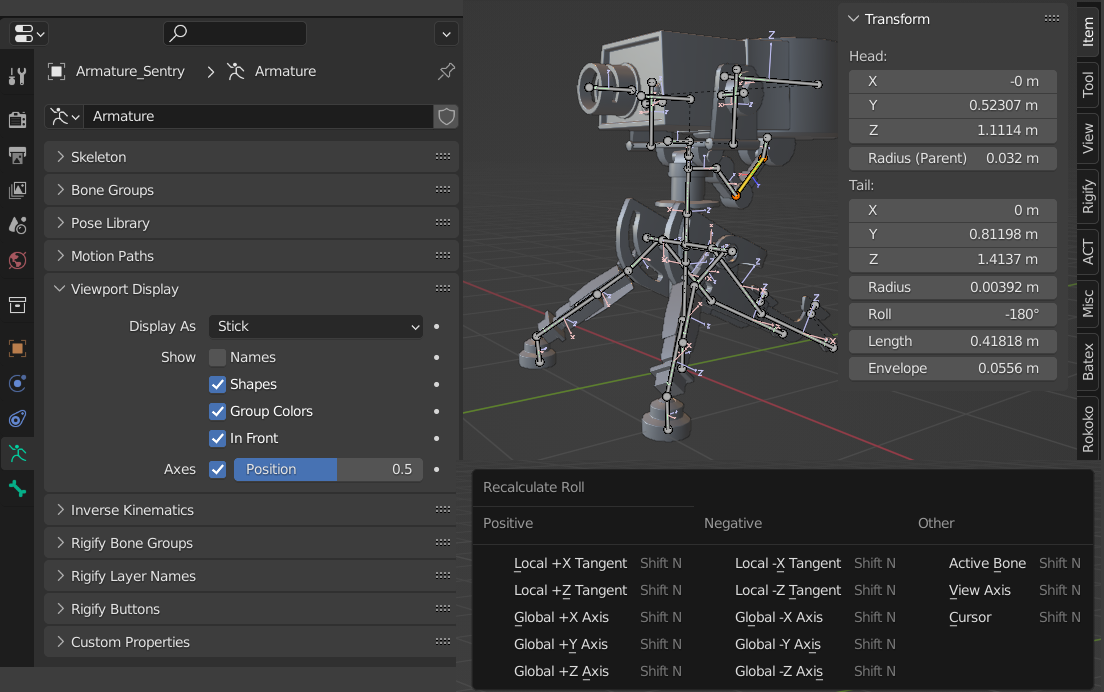
I like changing the bone display mode for clearer visibility. I decided to change the Viewport Display mode to Stick and also turn on the In Front option. This will display the bones in front of our mesh, and the bones will be displayed as simple stick shapes.
Now, it's just a matter of extruding and aligning the bones to the mesh. Align the bones in such a way that rotation or movement of the bones looks natural.
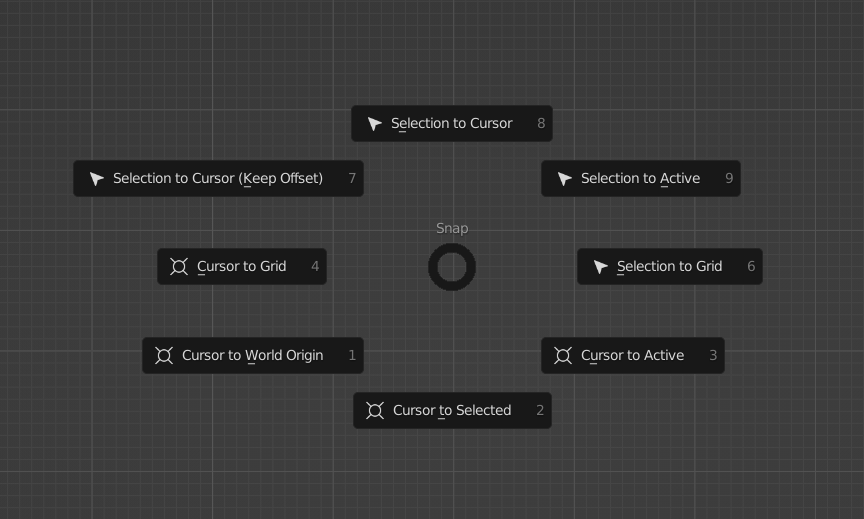
To quickly align the bone to the mesh, select the position on the mesh where you want the bone to be, use Shift + S then Cursor to Selected, then select the bone start or end point as needed, and Selection to Cursor to move the bone in that position.
Don't forget to name your bones properly, as it can get confusing quickly. When naming bones that will be symmetrical, suffix the name with .L for left side or .R for the right side. Only make such bones on either the right side or the left side of the rig. This will come in handy later when we mirror the bones from one side to another.
Here is an example of bone alignment and naming convention for symmetrical bone. Notice the .L suffix at the end of the name and bones positioned to suit proper rotation and transformation of the rig.
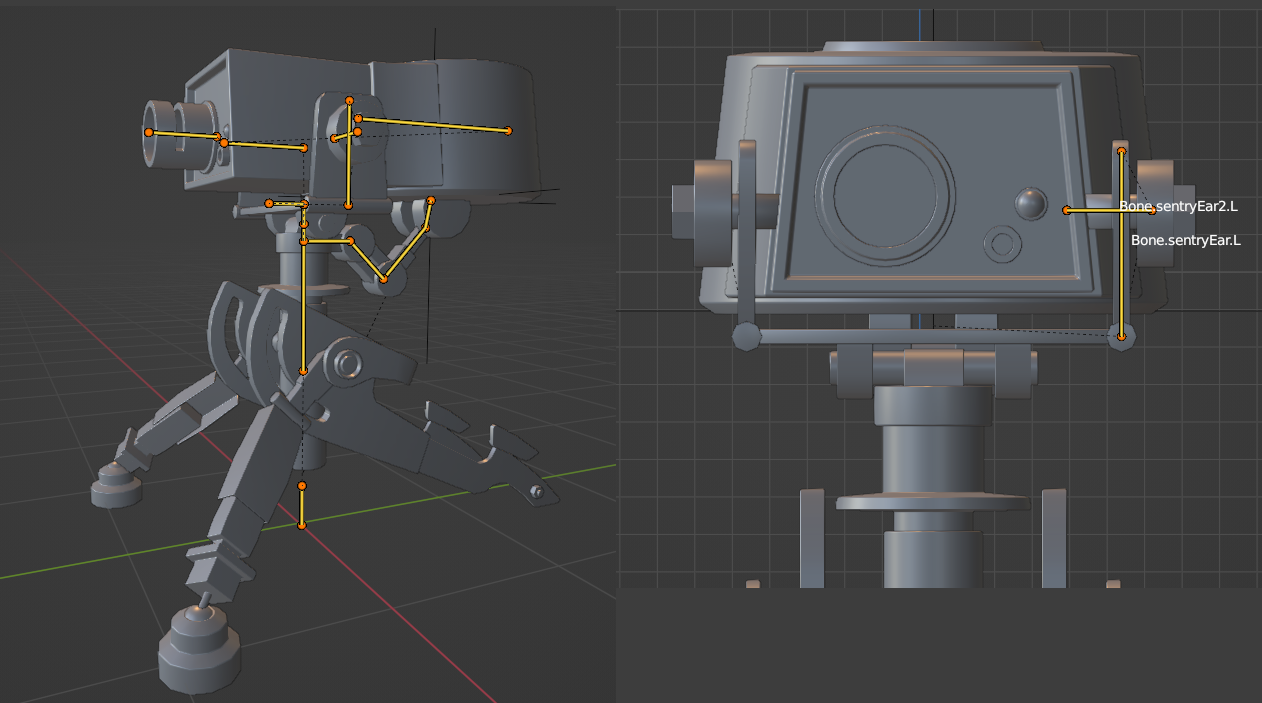
To change the bone Hierarchy, use Ctrl + P to parent and Alt + P to remove parent. We can also select if the bone will be connected or disconnected when parenting or removing the parent bone. Disconnected child bone can be kept at an offset without moving the parent bone. The figure above shows the parent and child relation of disconnected bones as a dotted line.
Add and align bones to the rest of your sentry mesh.
Symmetrise the Rig
Now the naming convention comes in handy. Select all your bones, then Right Mouse Click > Symmetrize. In my case, the bones with suffix .L are mirrored on the right side, along with the suffix .R added automatically. You can also individually select bones and symmetrize the selected ones only.

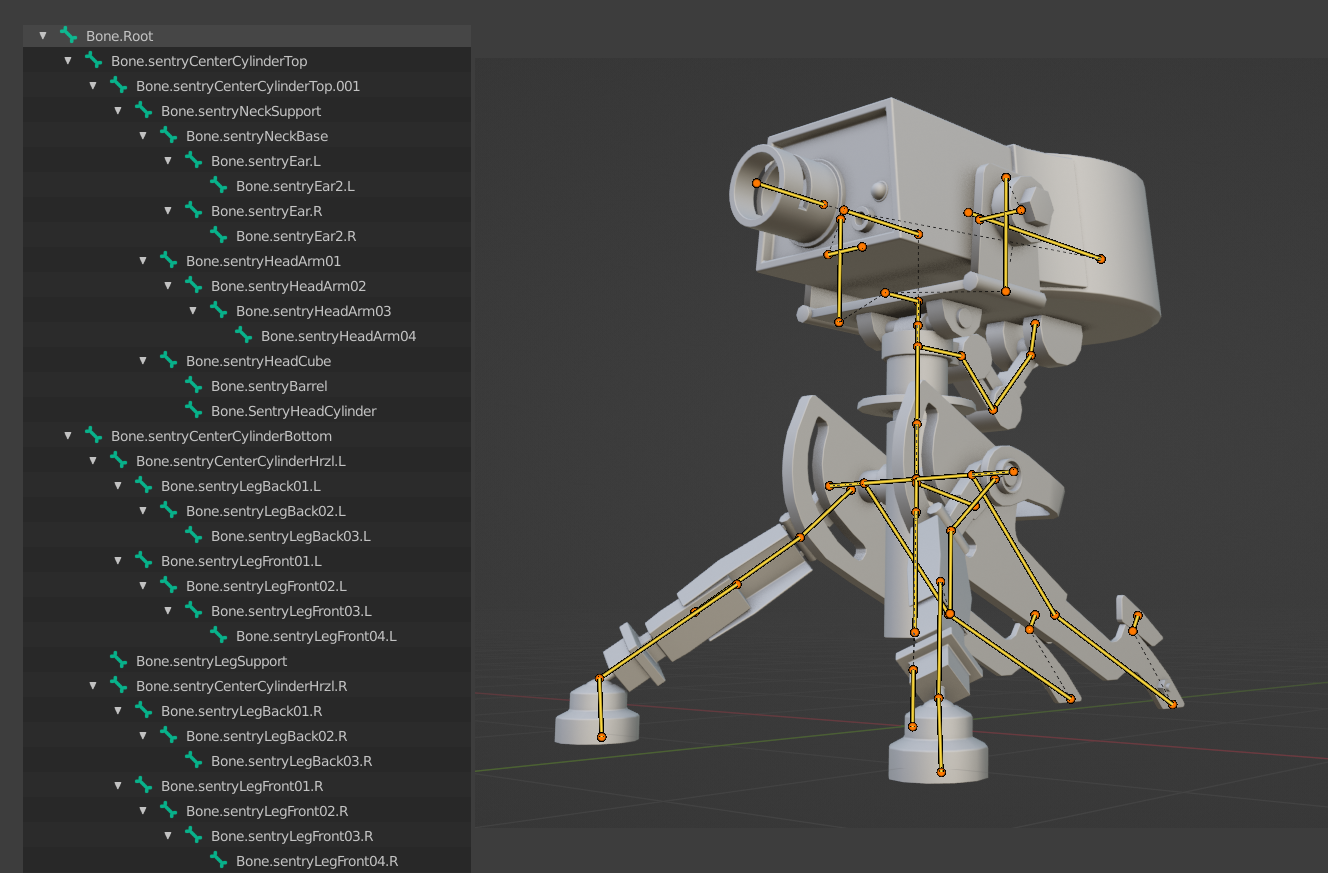
For reference, here is what my rig and rig hierarchy looks like:
Bone Roll Adjustment
Now to adjust the bone roll (the rotation around the Y-axis of the bone). This will make the rig behave in a predictable way when animating.
Enable the Axis option first. You can then see each bone axis in the viewport. We can select a bone and manually roll it from the Sidebar option menu to adjust the roll.
We can also just select all bones, then press Shift + N and recalculate all the bone rolls there. I decided to go with the Global + Y Axis option, but feel free to use any option you feel comfortable in.
Skinning the Sentry Gun
Because we modelled the sentry gun as different separate objects and because it is a purely mechanical mesh, skinning is going to be very easy.
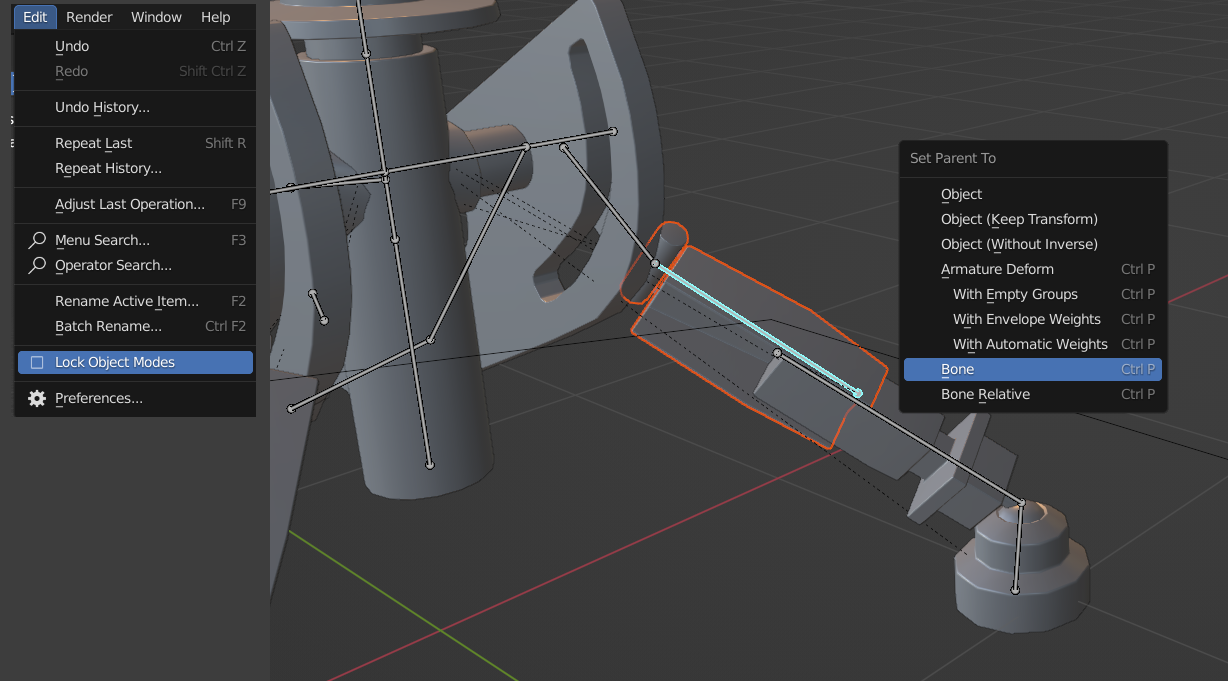
Simply turn off the Lock Object Modes option found under Edit, which will enable the selection of multiple objects under different object interaction modes. Set the armature to Pose Mode. Select the mesh you want to skin, then Shift-select the related bone and press Ctrl + P > Bone. This will parent the selected bone to the selected mesh, and the bone movement will now start affecting the mesh. Repeat this process for all deformation bones.
Conclusion
We have successfully created all the deformation bones and skinned the mesh accordingly. However, animating this rig will be difficult as we haven't done anything that makes the rig behave like a sentry gun would.
So in the next article, we will learn about enhancing the rig by adding constraints and controllers. Stay tuned!