
Previously, we added constraints and controllers to our sentry rig to make it behave more like a sentry gun would. In this article, we will create an IK (Inverse Kinematic) & FK (Forward Kinematic) switch system and learn the basics of animation sequence controllers.
IK/FK Switch System
We added IK to the sentry's arm previously. However, in a few cases, IK might be harder to animate and lose its application when animating certain motions. For this reason, we need to create a system that can let us switch between IK and FK.
Unfortunately, Blender doesn't have any built-in system to switch IK and FK as of the date of this article. So, we have to create our own system.
There are multiple ways to do this. We will be creating a version where FK will snap to IK, and FK will return to its original position using a switch bone which will toggle between these two functions. Additionally, the movement of IK bones will not affect FK bone's movement when the switch is off.
Setting Up the IK/FK Switch
We can now begin setting up the IK/FK switch.
Preparing Model
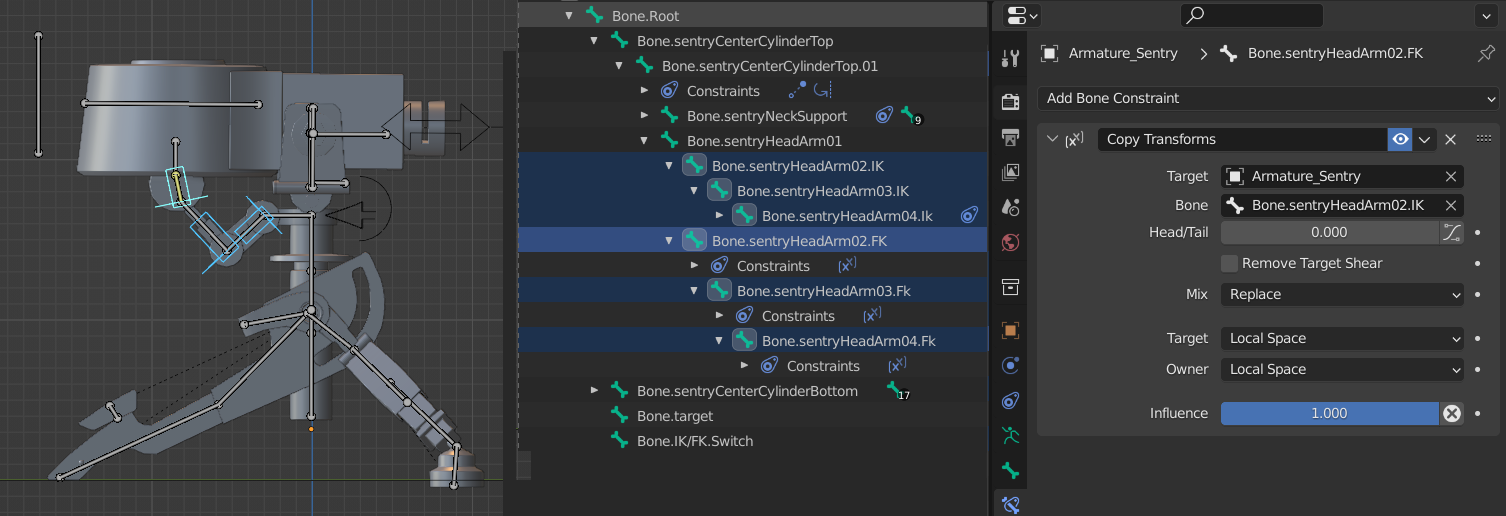
Start by duplicating the bones in the IK chain. Rename the newly created bone by adding the IK suffix and the old ones by adding the FK suffix. Remove the IK constraint on the duplicated FK bones. The FK bones are the ones that will deform the sentry now.
Add copy transform constraints on FK bones and select corresponding IK bones as targets.
Switch Bone Setup
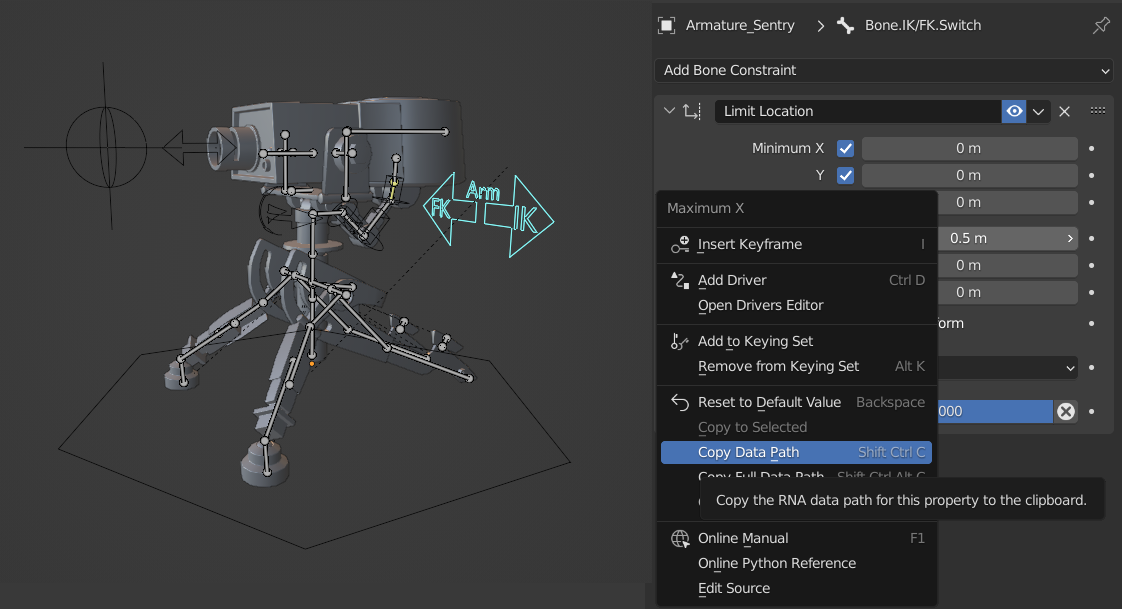
Add a new bone. This bone will act as our switch bone. Add a limit location constraint to it and limit its transform.
We need to copy the Data Path value of the switch bone to use it in the driver later. I am using the data path value of Maximum X because I am moving the switch along with its local x-axis value.
Driver Setup
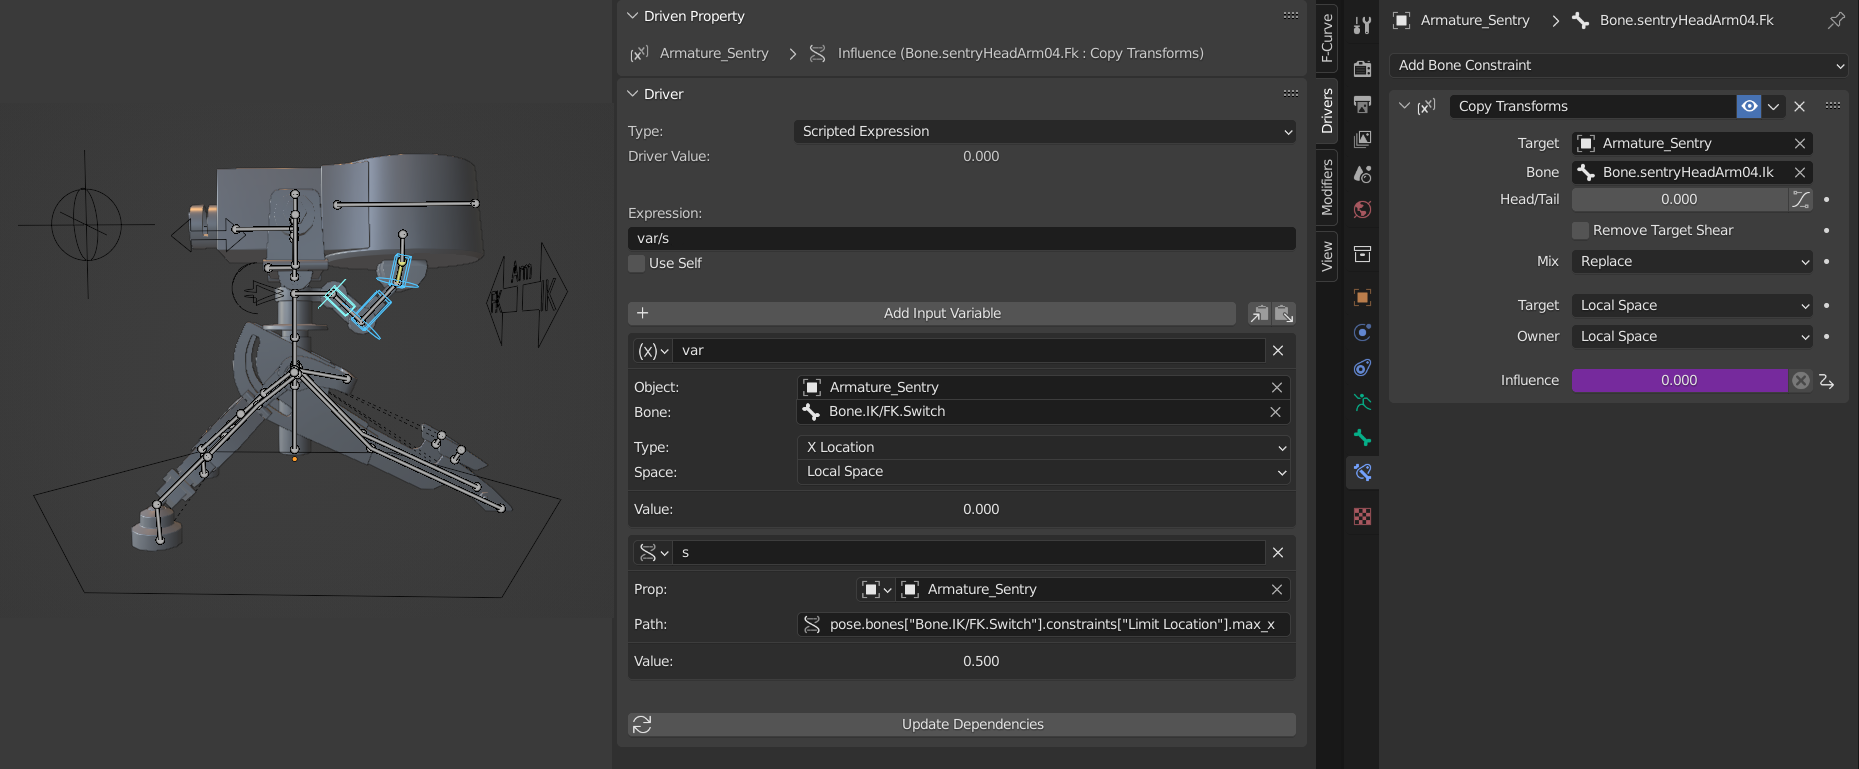
Now to set up the driver. Add a new driver to the Influence option of the Copy Transform constraint. This is because the influence option that controls the FK bones will copy the IK bone's position at a value of 1 and 0.
Under driver properties, create a variable var and select the switch bone and its x location. Create another variable s, select the armature, and paste the copied data path from earlier under the path option. We now have access to two values that will control the influence option's value, i.e. x location value of the switch bone in local space and the maximum x value of the limit location constraint.
The driver's output value is determined by an expression that can be defined under the Expression option. var/s works in my case by giving me a value between zero and one depending on the switch bone's position.
Simply copy this driver and paste it into all other arm FK bones. And don't forget to turn off the Deform option from IK and controller bones.
Result
We can now switch between IK and FK by moving the switch bone. Here is a demo where I modified the FK bones to be in a retracted position while keeping the IK bone in its default position. Using the switch bone, we can toggle between these two poses easily.
In this system, FK bones can be snapped to the IK bone's position using the switch bone. The actual position of the FK bones will remain intact, and the FK bones can be returned to their original position using the switch. Additionally, when the switch is set to FK, any transformation on the IK bone will not affect the FK bone until switched.
This type of IK/FK switch system is useful, especially for mechanical rigs. In our case, this system will come in handy when animating the sentry gun's transformation animation.
Control Animation Sequence Using a Single Controller
There may be some animations that are repeatable or complex in nature. These are exactly the animations we need for an animation sequence controller.
In Blender, any animation sequence created using keyframes is saved as something called Action. We will be accessing this action and triggering it using a controller.
For example, let's create a simple animation sequence and control it using the controller's movement. I animated the back leg retracting. The action should only be a couple of frames as we can control the speed using the controller's movement speed.
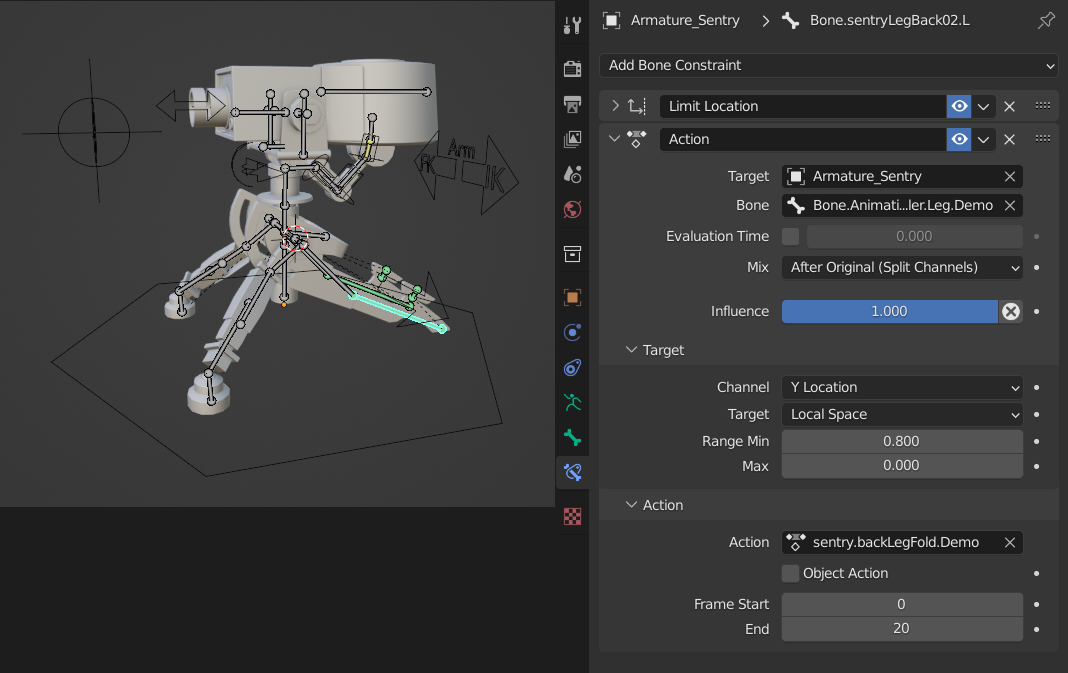
Next, remove the action from the armature and add a controller bone. Then, select one of the animated bones and add an Action Constraint. Also, select the controller bone as the target bone. We will be using the local movement along the y-axis of the controller bone to trigger the action. So we select the Y location as the Channel value. The range value is how much the controller bone should move to trigger the action completely.
Under action, select the animation created earlier and set the same start and end frame you used to create your animation sequence. 0 to 20 in my case. Copy the Action constraint to all other bones that are to be affected.
Now the controller bone can trigger the action on all bones with the Action constraint when moving along the local y-axis.
Here is a demo of the controller controlling the action created.
This can be applied to any necessary actions for the rig. And the best part is additional animation can be layered on top of the action sequence without affecting the underlying animation.
Conclusion
Finally, the rigging is done. We have created a solid rig for the animator to use. It may be necessary to modify the rig further if the requirement changes or any feature request comes in. But this rig should be able to perform the animation and then some that we aimed to create at the start of this series.
In the next part, we will be animating the sentry gun. So stay tuned, and Thank You for reading.