
In this tutorial series, we will be modelling a sentry gun, rigging it, and finally animating its transformation, idle and shoot pose.
For this reason, we need to keep these animations in mind when modelling the sentry gun.
We will focus on how we can model the sentry gun for this first part.
I will not go step by step on how to model the sentry as it will take forever to do so. Instead, I will give you an overview and tips on how we can model the sentry gun. This way, it should also help you with similar hard surface modelling in the future.
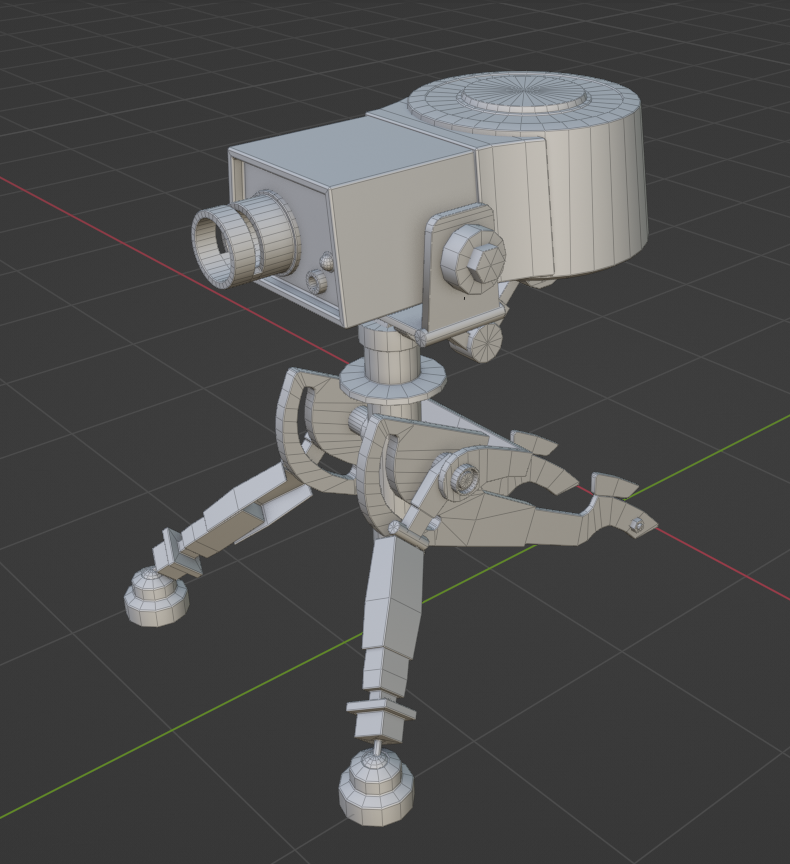
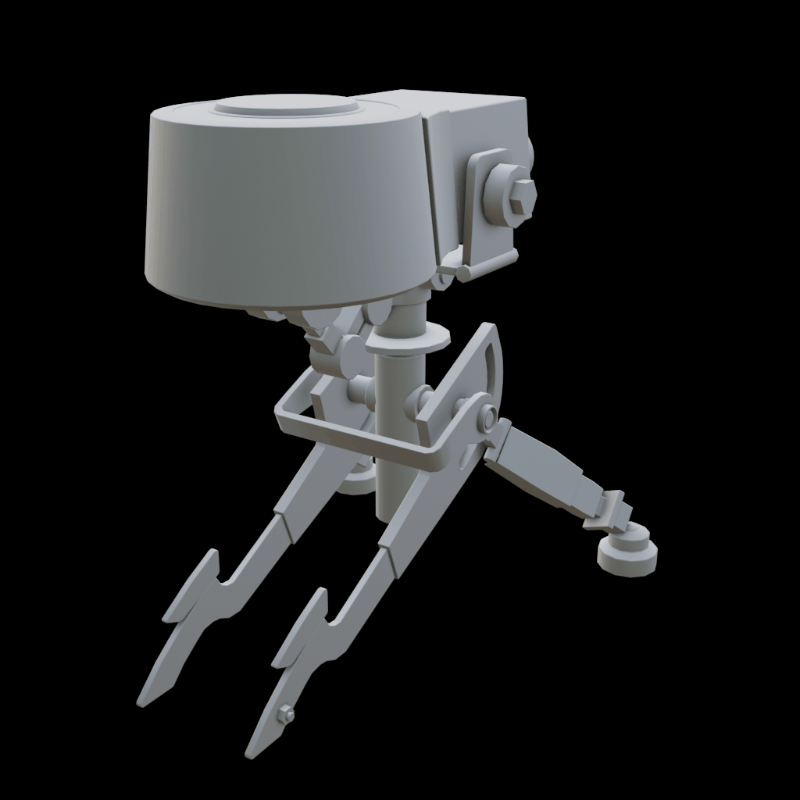
You should be able to create a sentry gun like the one shown below by the end of this tutorial.
Plane Modelling Technique
We use a simple plane with modifiers for most of the leg area or for rectangular shapes.
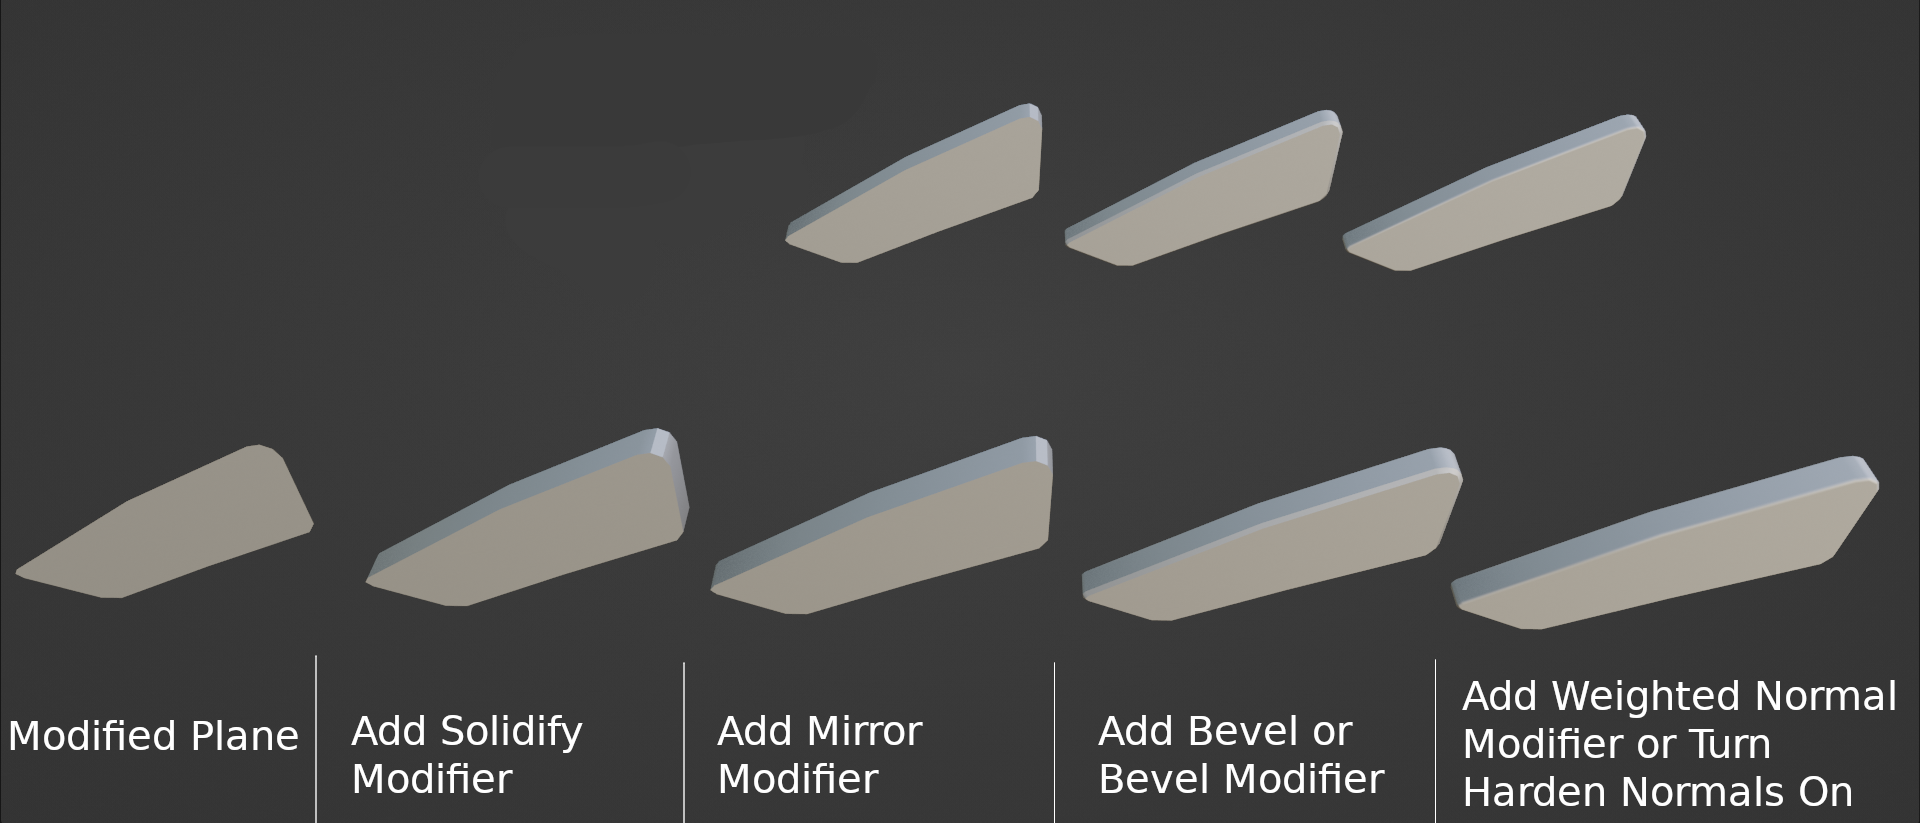
Add a plane and modify it as needed. Then, use a solidify modifier to add depth, an optional mirror modifier, and a bevel or bevel modifier to curve the edges. The resulting geometry can then be modified using smooth or flat shading for the desired look.
We can further tweak the bevelled edges to our liking by playing with the auto smooth angle and weighted normal modifier values. More on this later.
Here is what the modelling process looks like:
It's a good idea to model parts that will move in different directions as separate objects. This will make rigging much easier later on, and we can always join the objects easily if need be.
Here are all the objects I modelled and assembled using the plane modification method.
Modelling by Modifying Primitives
As for the parts that are spherical, cylindrical, or too complicated for the plane modelling technique, we can just modify mesh primitives to get the desired result.
We can also use the plane modelling technique first and then modify the resulting geometry. But you should be careful when applying modifiers as it could result in a destructive workflow. For example, bevelled edges made using bevel modifiers are harder to tweak after applying the modifier.
Here are the parts I modelled by modifying the primitives.
Weighted Normal and Shading Techniques
We will be manipulating normal for optimisation instead of adding more geometry to the mesh for curved edges.
The default smooth shading looks alright in a simple object, but it has a hard time working on a complicated mesh. Using the Weighted normal modifier or Harden Normal option can give us better results, and we also have finer control over the shading look using the Weighted Normal modifier.
Here you can see the different shading styles achieved using different settings and modifiers.
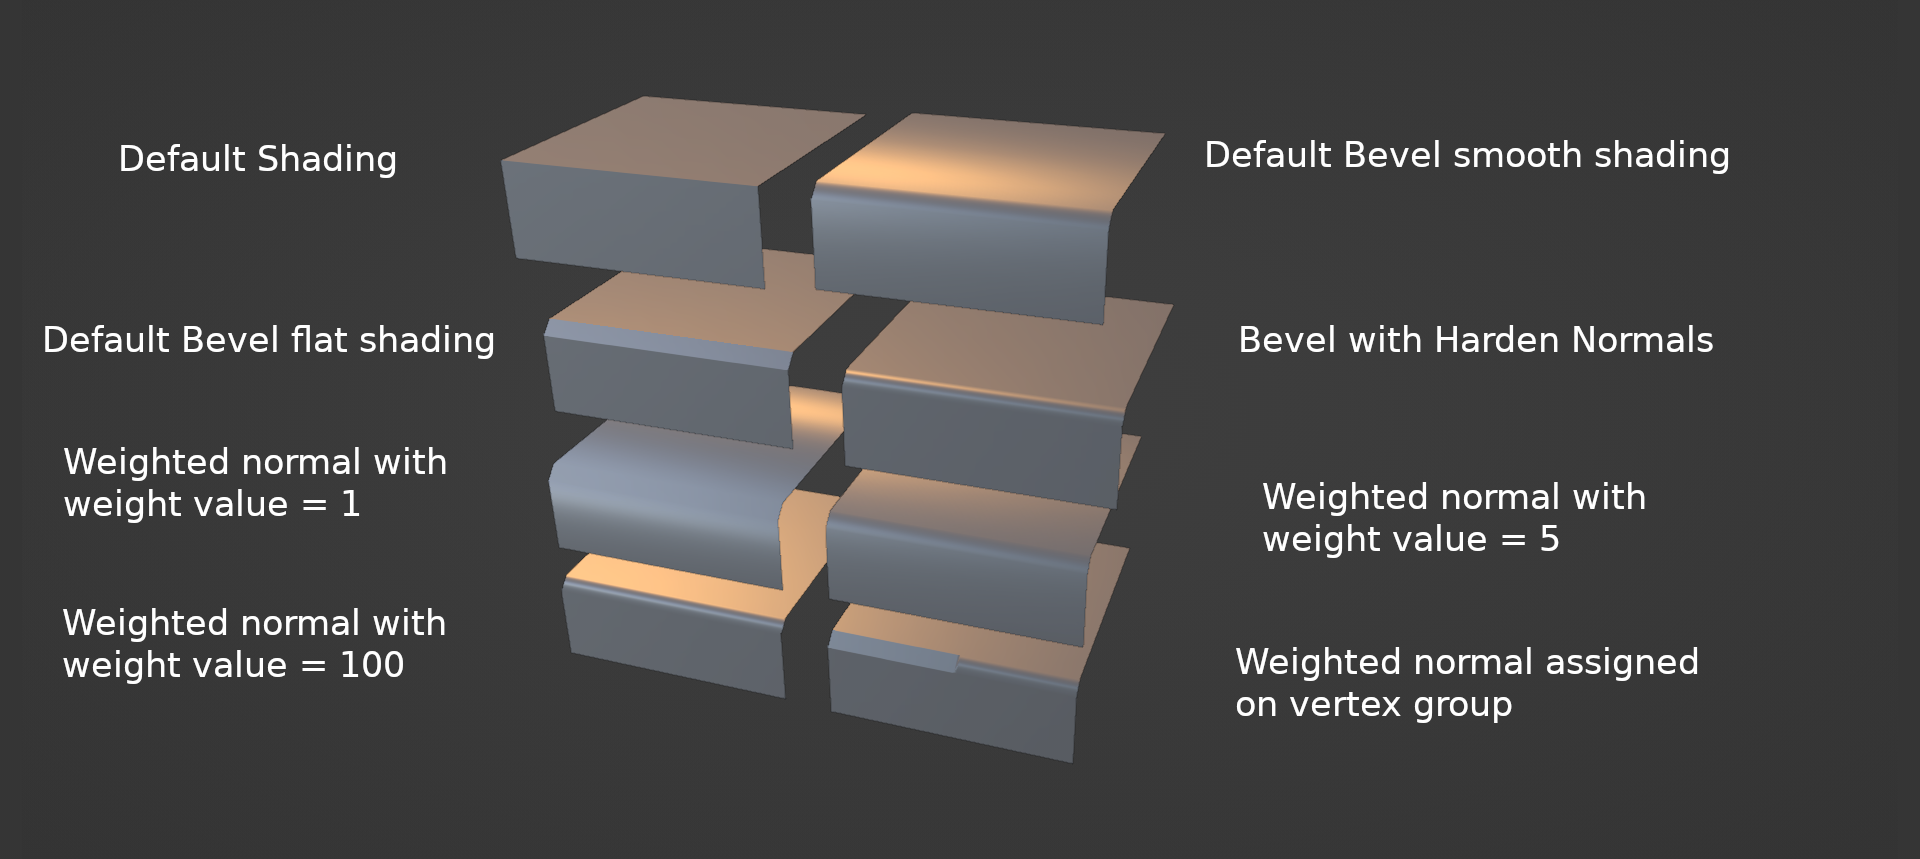
The Harden Normal option of the bevel modifier is an automatic version of the Weighted Normal modifier. Usually, the harden normal option does its job perfectly. However, the Weighted Normal modifier is the way to go for finer control.
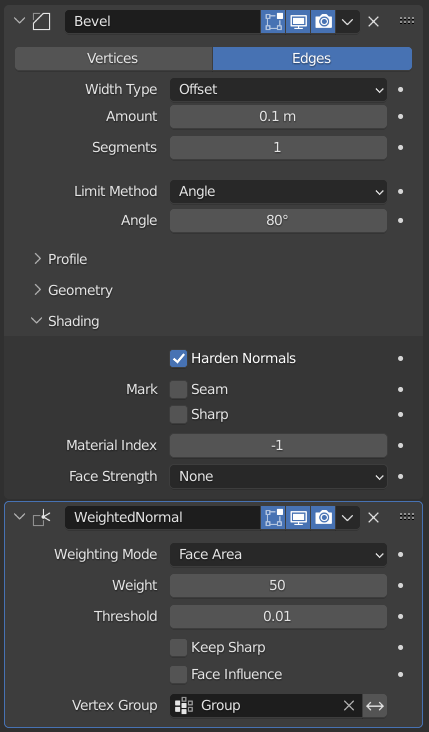
We can also use the Angle value of the bevel modifier to skip beveling an already curved surface. Like in the case of a cylindrical object, we can increase the angle value to only affect the cap of the cylinder. Values above the given angle limit are only bevelled.
The Weight value of the Weighted Normal modifier determines how sharp the smoothing will be. Using the Vertex group option, we can tell the modifier to only affect certain vertex of the mesh.
Conclusion
That is it for the modelling part of the series. We have learned different modelling methods and how to enhance our hard surface models from this article. Hopefully, you have learned something of value and can put together the knowledge from this article on creating similar hard surface models.
In the next part, we will be rigging this sentry gun. Stay tuned!