
Previously, we created all the deformation bones for our sentry rig. In this article, you will learn how we can enhance our rig using constraints and controllers. We will also be altering the looks of selected rig bones for clarity.
Change Bone Display Mode
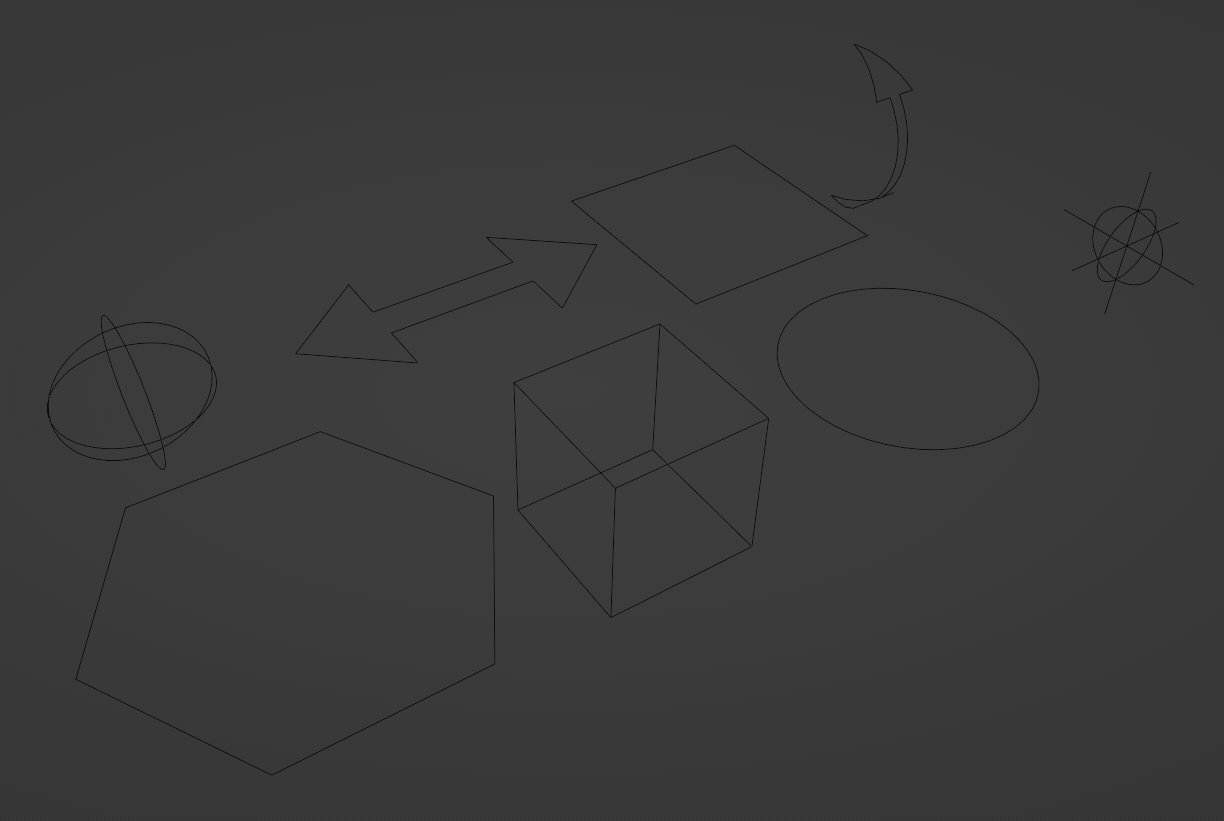
Start by creating the mesh you want to replace the bone display with. I have made some simple geometrical shapes, as seen below.
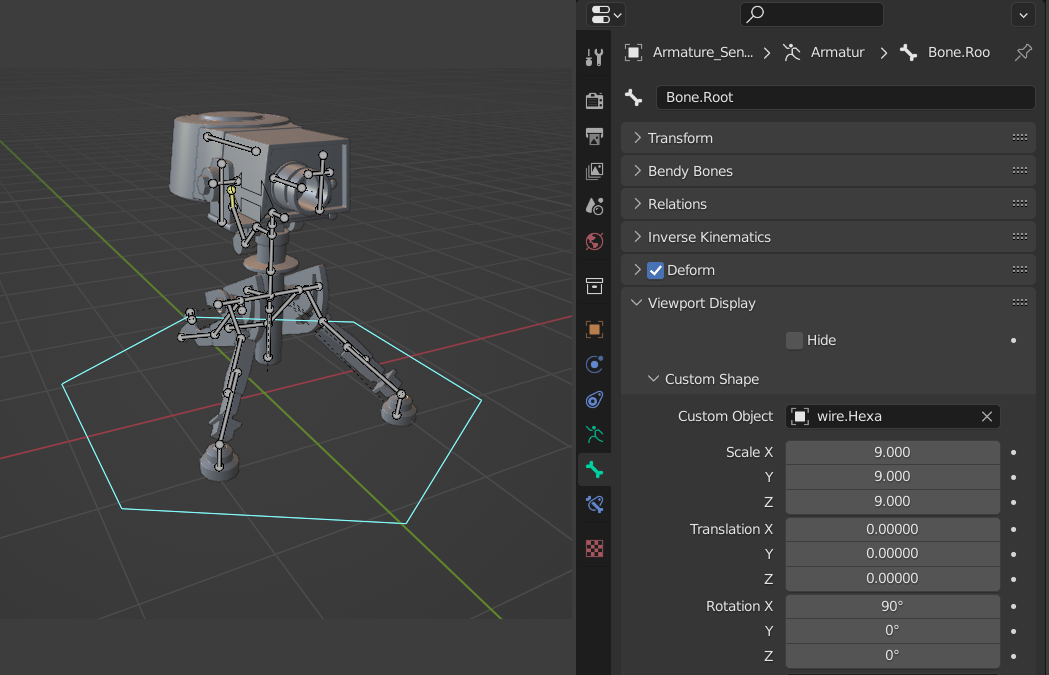
Select the bone you want to change the viewport display of. Then, go to Viewport Display > Custom Object and select your desired mesh.
The bone will now appear as the selected mesh. We can freely adjust the scale, translation, and rotation option without affecting the original bone.
Here, I have altered the root bone display with a hexagonal shape placed at the origin.
Setup Limit Location Constraint
We will be using the Limit Location and Limit Rotation constraint to limit the rig movement in certain ways.
I will give an example of adding a Limit Location constraint to the sentry gun barrel. You can easily figure it out for the rest of the rig once you see this example.
First, change the barrel display to a two-sided arrow, indicating that it will move along that axis both ways. Then add a Limit Location constraint. In my case, the barrel will only move along the Y-axis. So, values for the other axis are set to zero on both minimum and maximum. This will prevent the barrel from moving on those axes.
As for the Y-axis value, you need to test and determine the proper distance value. In my case, the range value of -0.3m and 0.015m seems to work best.
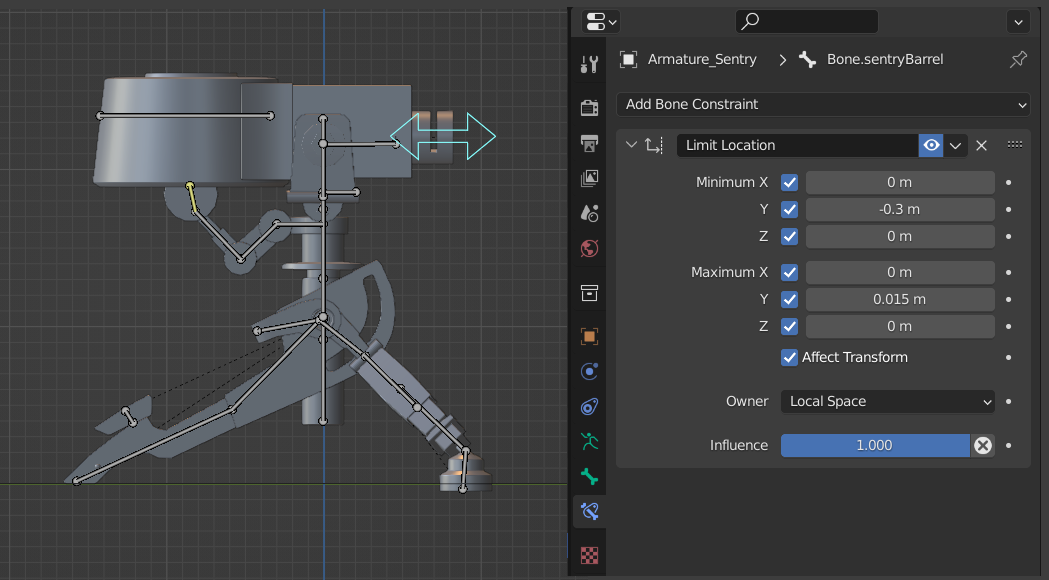
Enabling the Affect Transform option will limit the object's location value after reaching the axis limit values. If this option is not enabled, the bone's location will be limited visually, but the actual transform will change after going past the limit values.
Setting the Owner to Local Space will ensure the limit location constraint works even after altering the rotation or position of parent bones.
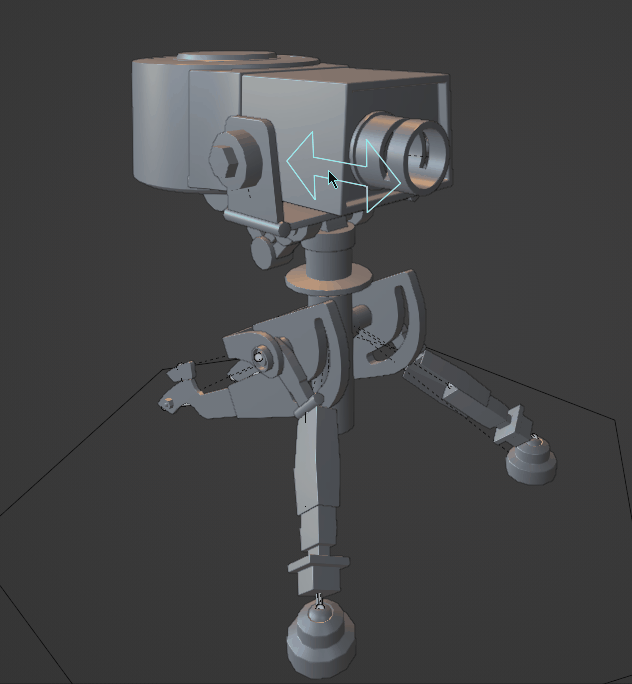
Here is how the movement looks after adding the constraint.
The Limit Rotation constraint works similarly to the limit location constraint, except it works on limiting the bone rotation.
Add these constraints to whichever bones need them.
Setup IK Controller
By default, all our bones are in FK (Forward Kinematic). But for the sentry's arm, we will be using IK (Inverse Kinematic). In FK, the parent bone's movement affects the child bone's movement, and in IK, the movement of the last bone in the IK chain affects all other parent bone's movements in that chain.
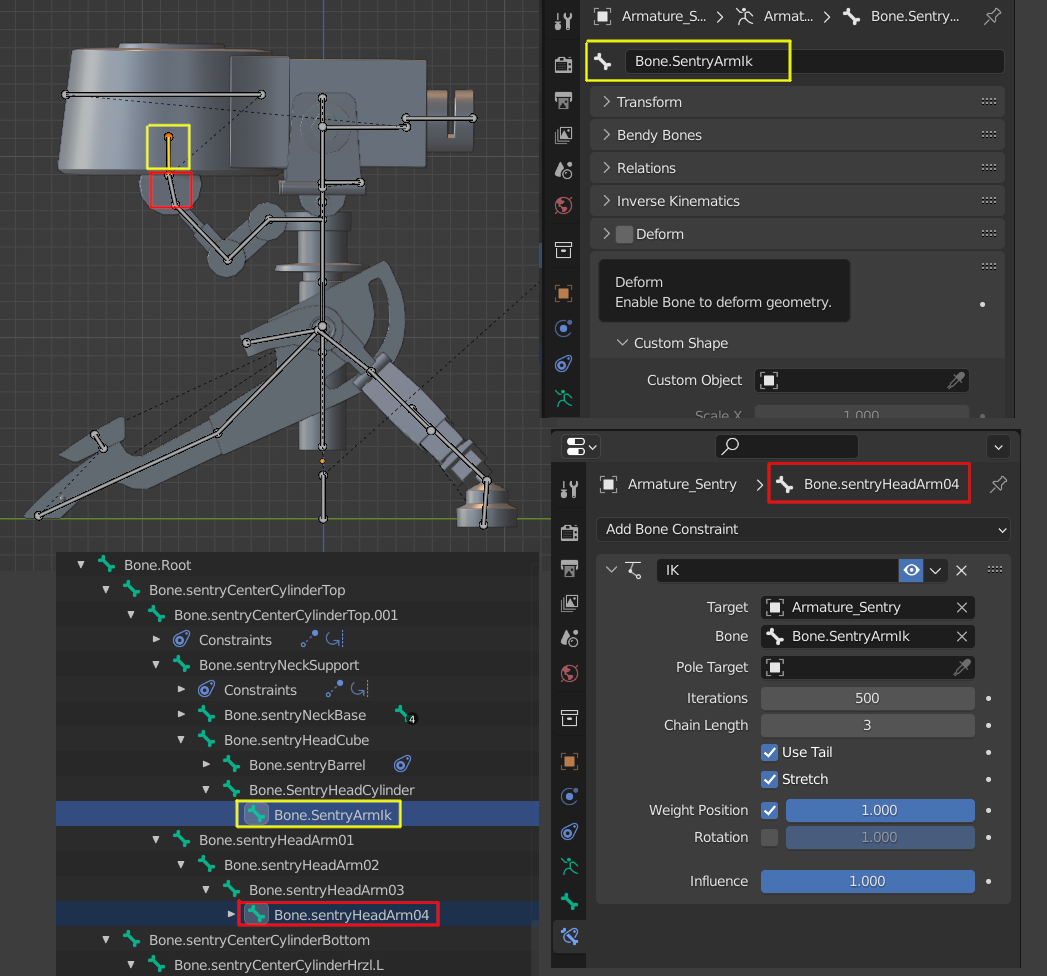
Add a new bone and turn the Deform option off, as this bone will not deform any geometry. This will be our IK controller bone. Position it at the tail of the arm bone Bone.sentryHeadArm04 but child it to the cylinder's bone Bone.SentryHeadCylinder.
Add IK on the arm bone and select the newly created IK bone as the target. Chain Length will determine how many parent bones it affects when moving around. Three in my case.
Refer to this image for any further reference:
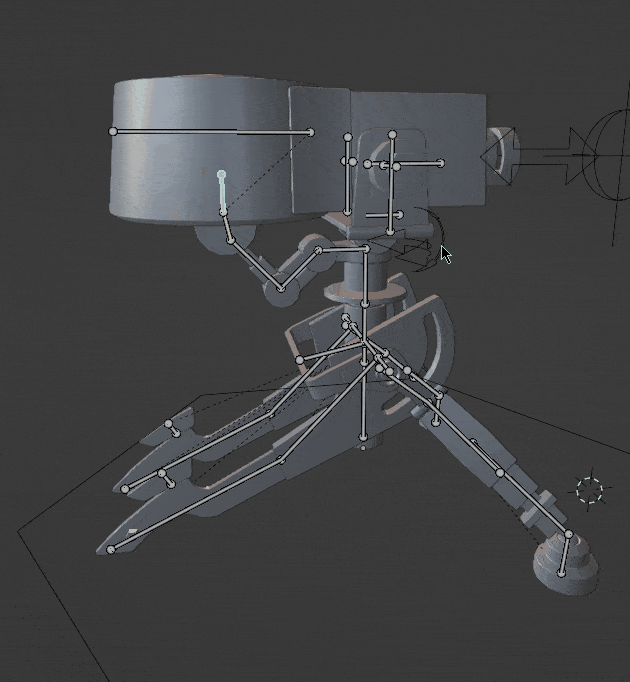
The arm bones will now automatically adjust according to the sentry movement. Here is how the rig movement will look after setting up the IK controller.
Setup Damped Track Constraint
We will use a damped track constraint to make aiming animation easier. This will make the sentry gun look wherever our damped track controller is. This will also make using the sentry gun in a game engine and scripting the aiming animation possible.
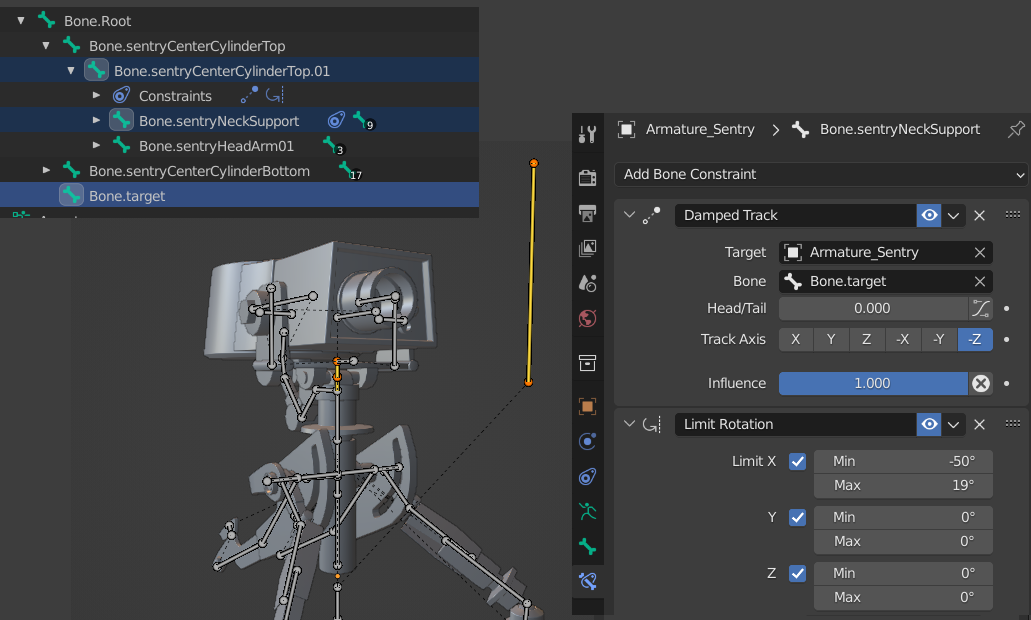
Add a new bone Bone.target as a child of the root bone and turn the deform option off. This is our damped track controller bone.
In this rig, the vertical movement is controlled by the neck bone Bone.sentryNeckSupport and horizontal movement by the base cylinder bone Bone.sentryCenterCylinderTop.01. So, we will use the damped track constraint on these two bones.
Add the Damped Track constraint to both bones and set the target to the newly created controller bone. In my case, Track Axis set to -Z seems to work best. The Limit Rotation constraint should be below the damped track constraint as Blender process them top to bottom.
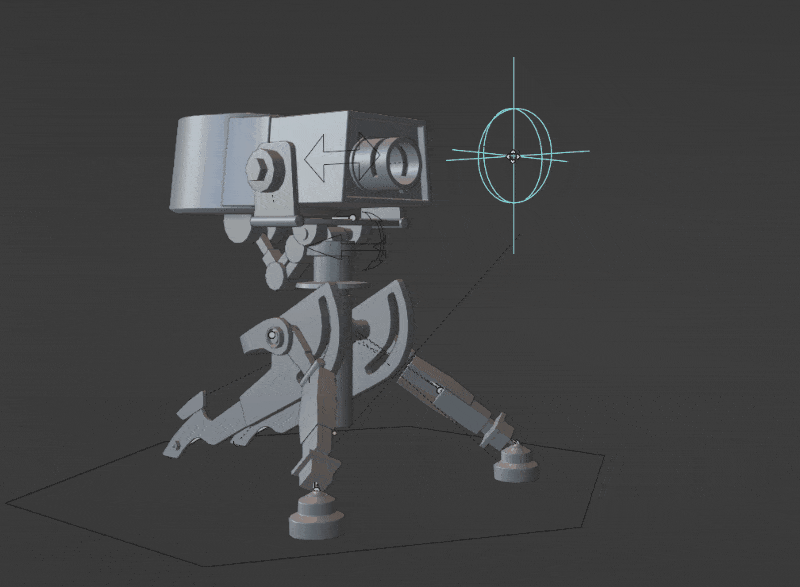
The sentry gun will now aim wherever the target controller is. Here is how the rig behaves:
Conclusion
We have now created a rig that behaves like a sentry gun would. We still need to make an IK/FK switch and an animation sequence controller for the rig. We will be making those in the upcoming parts of this series.
Stay tuned! And thank you for reading.