
In the previous articles, I explained Shape marquee tools, Lasso Tool, Magic Wand Tool, and Color Range. In this part, I will continue with the other two selection tools: the Quick Selection Tool and Focus Area Selection.
- Shape Marquee Tools
- Lasso Tool
- Magic Wand Tool
- Colour Range
- Quick Selection Tool
- Pen Tool
- Focus Area Selection
Quick Selection Tool
The Quick Selection Tool is similar to the Magic Wand Tool, but this tool creates a selection by painting over an area. With this tool, we can easily select small areas and control the area it selects more accurately. Photoshop detects the edges of an image from its similar textures and contrast and makes a selection. It can be used to cut out certain parts from an image and apply effects to it.
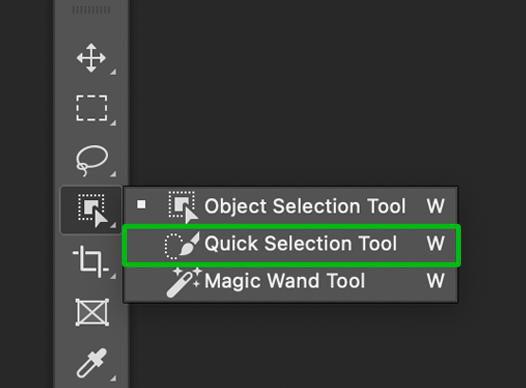
The Quick Selection Tool is located in the toolbar, or you can simply press W. If you do not see it, you can right-click on the Object Selection Tool or Magic Wand Tool to get a drop-down list of selection tools.
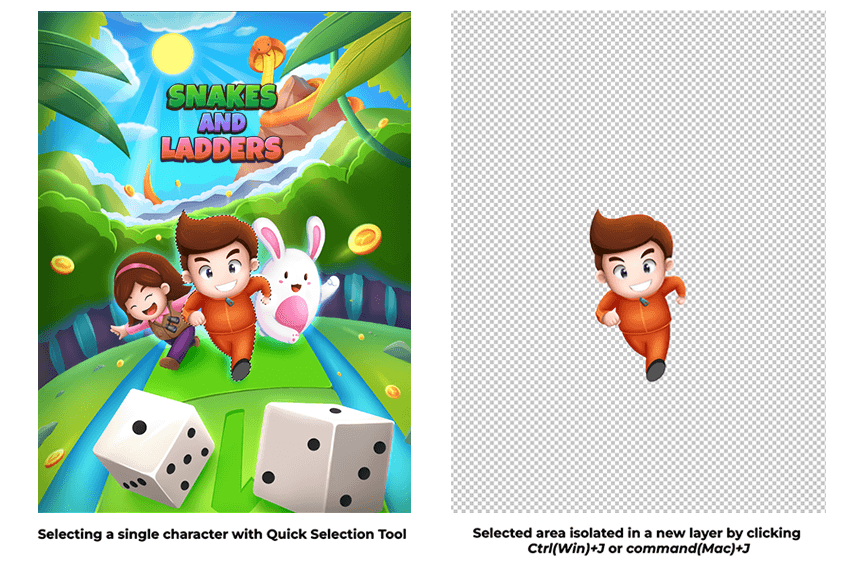
For example, let's say I only want to select one of the characters from the image above. We can use the Lasso Tool to steadily draw the selection around the edges, which takes time and concentration. Alternatively, we can also use Magic Wand Tool (but since it has multiple colours, it will take multiple clicks to select the entire character). This is where the Quick Selection Tool can be more efficient.
- Select the layer you want to select the object from. Click on Quick Selection Tool from the toolbar.
- Click on an area with the Quick Selection Tool to create a small selection area. This tool will already be in "Add to Selection" mode. You can add more areas by clicking and dragging your mouse over the image.
- Similar to other selection tools, you can click on "Subtract from selection" from the options bar to deselect the selection or hold option (Mac) or Alt (Win) while clicking.
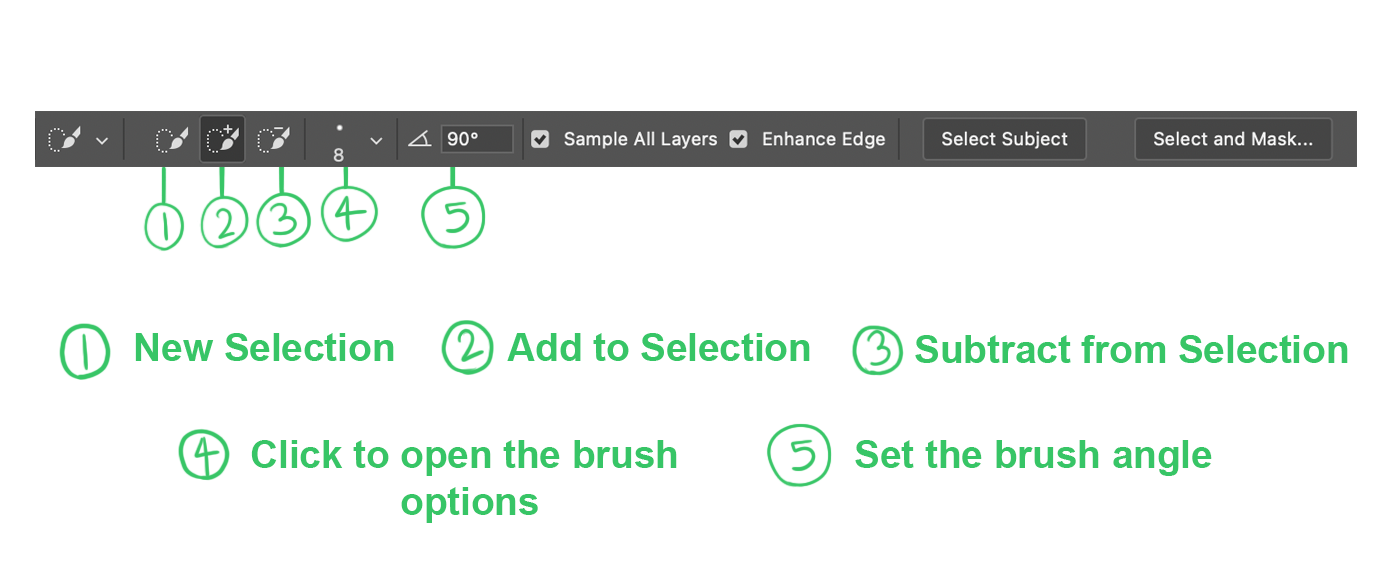
From the options bar, you can increase or decrease the size of the brush cursor used for selecting. A smaller selection brush will help select smaller areas more precisely, whereas the bigger brush can be used to drag over large areas and make selections quickly. Activating the Sample All Layers option will make the selection tool detect edges from all the visible layers in the document. Photoshop will only detect the edges from the selected layer if it is left unchecked.
Activating Enhance Edge will create more refined and smoother edges of the selection. The selection might take longer to process when this is activated.
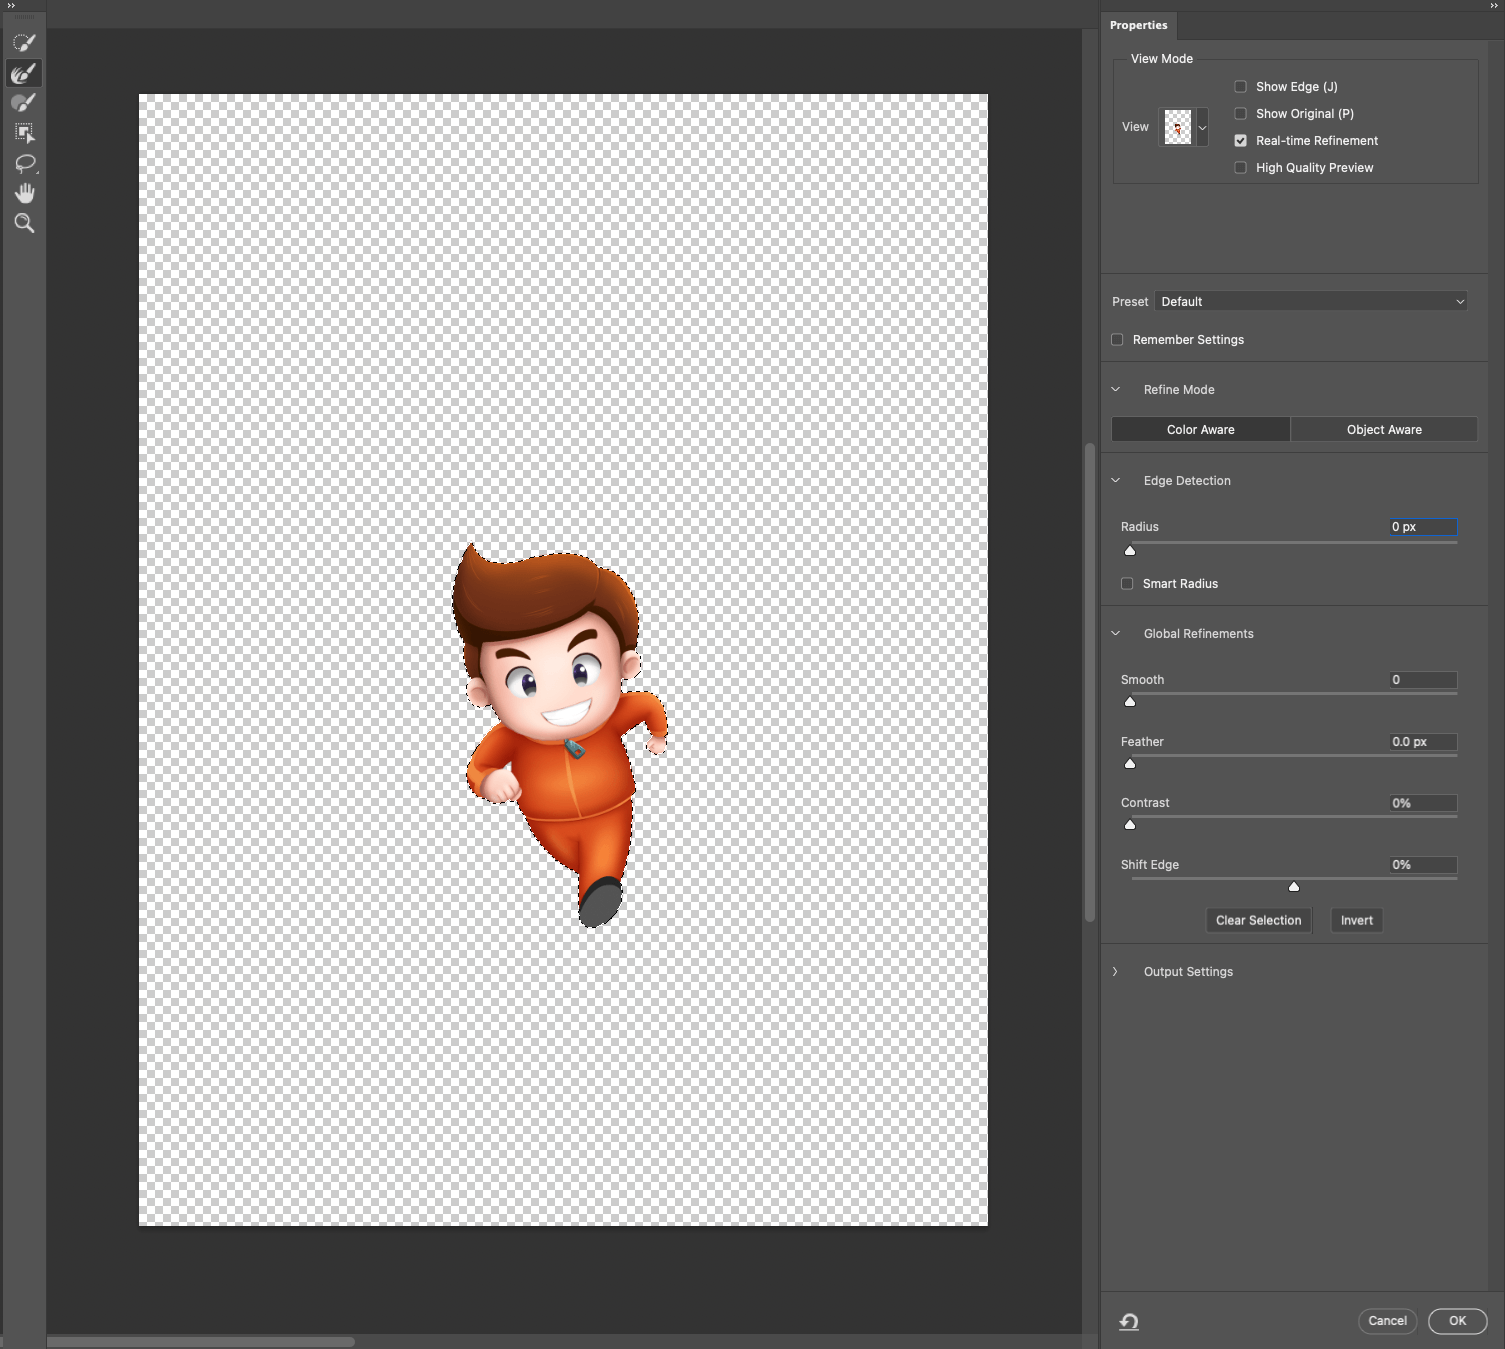
You can fine-tune the edges more with Select and Mask. After clicking the option, a pop-up window will appear. You can see the selection with or without background from the View Mode. The radius slider in Edge Detection will increase the area Photoshop will try to identify as an edge. The sliders in Global Refinements help to smoothen, blur and refine the edges.
Focus Area Tool
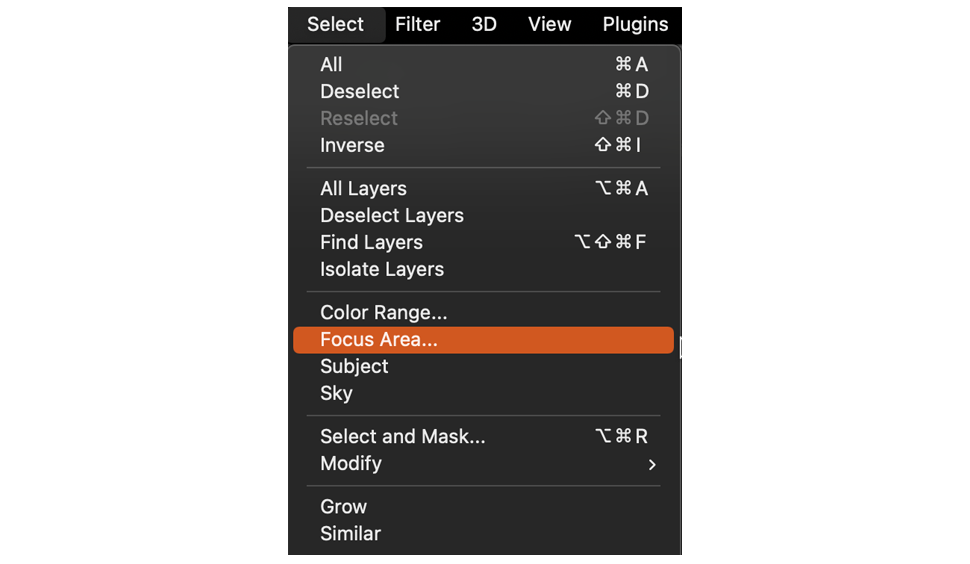
The Focus Area Tool is used to select areas at the focus of an image. Photoshop can detect the subjects in focus if the background is blurred and automatically create a selection. The Focus Area Tool is located below Color Range in the Select menu. With the layer selected, click on Focus Area.
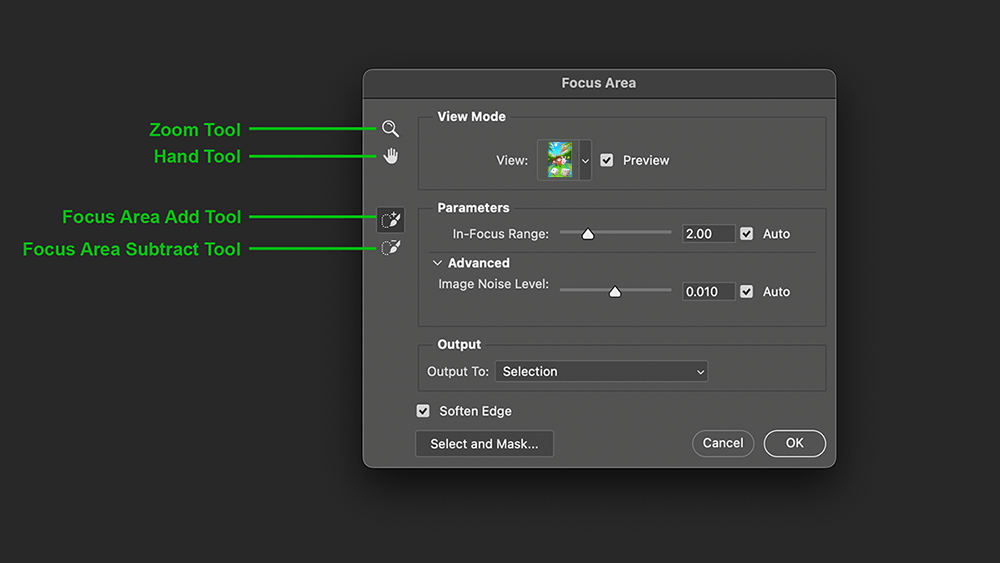
A dialogue box will open to make and edit the selection. In View Mode, similar to how it behaved in Quick Selection Tool, you can view the selection with various backgrounds and modes to check what is selected.
In the Parameters section, the In-Focus Range slider helps to improve the initial selection automatically made by Photoshop. Moving the slider to the left will decrease the selection area by only keeping the most focused areas, whereas moving it to the right will increase the selection area.
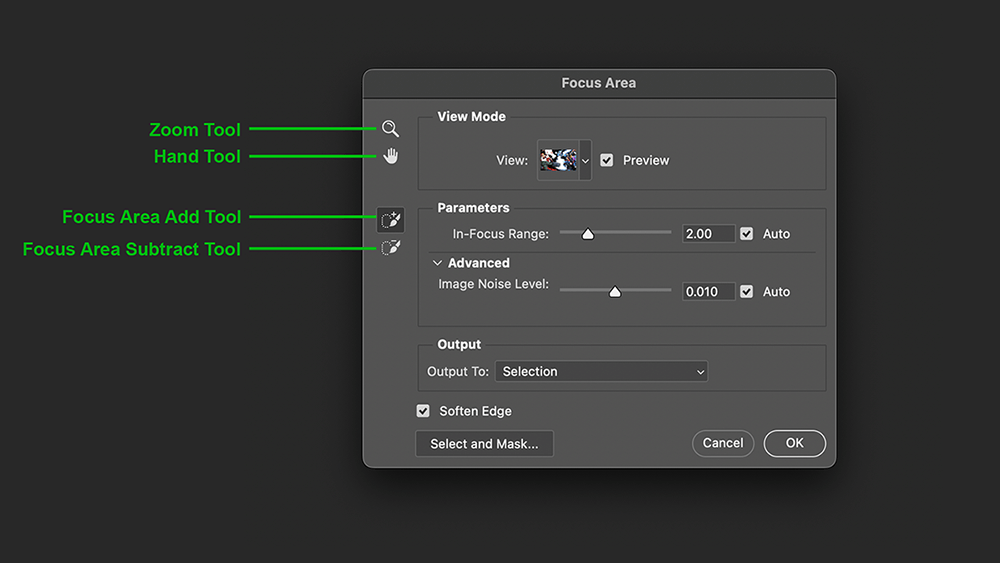
In the Advanced section, changing the Image Noise Level will help to select areas in a noisy image. The two brush icons on the left will help add and subtract selection areas.
With Focus Area Add Tool selected, you can paint over the needed areas and add them to the selection. It's the same process for Focus Area Subtract Tool, where it removes the selection. As the name suggests, activating Soften Edges will blur the selection's edges to soften them.
From Output To, you can output the areas to the selection, layer mask, new layer, or document. After you are satisfied with the selection, click OK, and the dialogue box will close, leaving you with the selection area.
Tip: How to Select Everything in a Layer
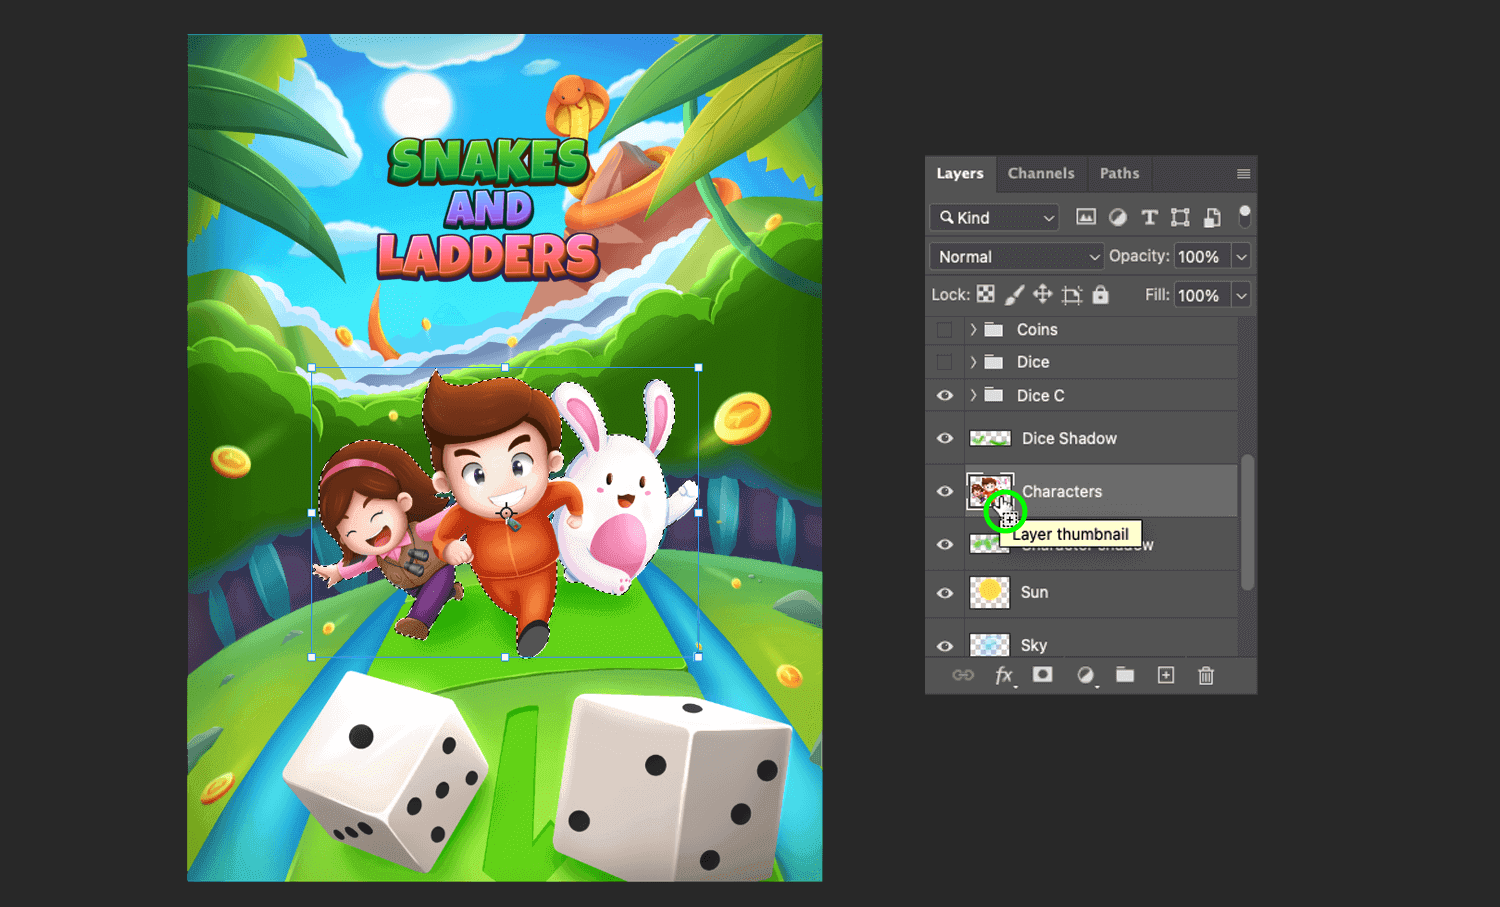
Here is a tip that will be useful when you want to select everything in a layer. Hold ⌘ (Mac) or Ctrl (Win) and click on the thumbnail icon on the left of the layer name to make a whole layer selection.
For example, if you have a character as an image layer, selecting its many colours or creating a selection with Lasso Tool or Magic Wand Tool will be a hassle. With this tip, you can achieve the same result with just two button presses. This will only work if the character or image is already separated from the background in another layer.
These were the basics for six of the selection tools in Photoshop. You can use any of them depending on your need and ease of use. The Pen Tool will be explained some other time as it is not only used for selection but for making shapes and more.
Thank you so much for reading. Hope you found the tips useful. Click the buttons below to stay updated with my blogs!