
In the previous articles, I explained Shape marquee tools and Lasso Tool. In this part, I will continue with the other two selection tools: the Magic Wand Tool and Color Range.
- Shape Marquee Tools
- Lasso Tool
- Magic Wand Tool
- Color Range
- Quick Selection Tool
- Pen Tool
- Focus Area Selection
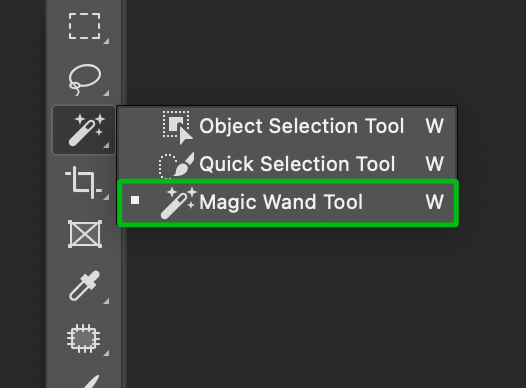
Magic Wand Tool
The Magic Wand tool selects an area based on its colour. It is located inside the drop-down menu of the Quick Selection Tool.
For example, if a blue circle is on a black background, you can click on the blue circle with Magic Wand Tool to select that blue area.
That was a simple example of one colour selection, but what if the object has gradients or shades of colour? Changing the values of Tolerance in the options bar of Magic Wand Tool will help in this situation.
A lower tolerance value will select the exact colour. A higher value will select a wide range of the selected colour's nearby colours, including different shades of colour and brightness levels. In simple words, it will increase the selection range of the tool.
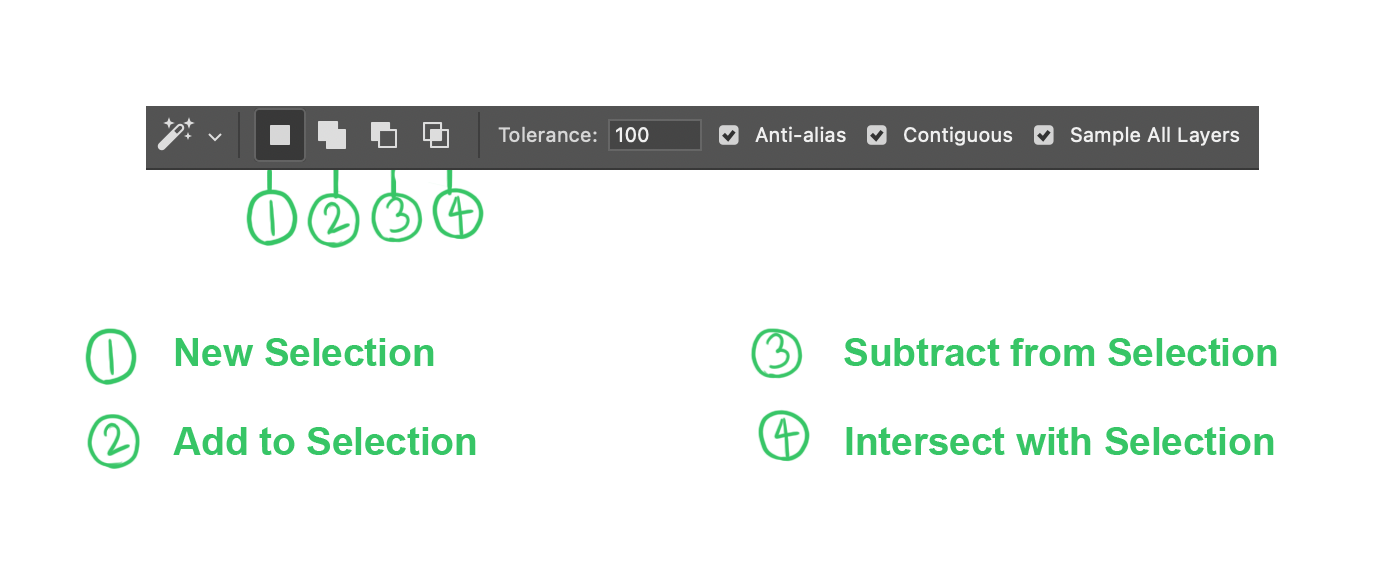
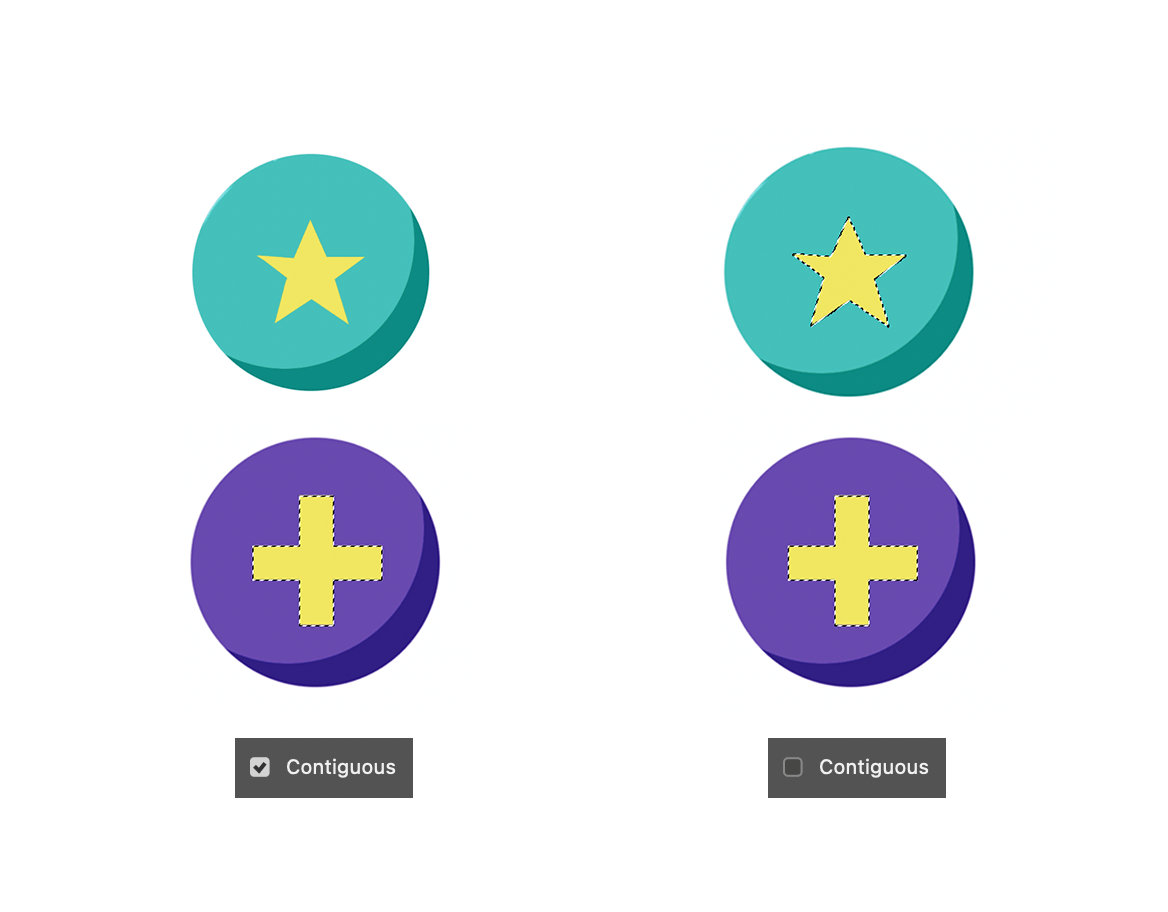
In the options bar, activating Contiguous will make the tool select the pixels of the same colour range near each other. Deactivating it will allow it to select the same colour pixels of the entire layer even if the similar colours are far apart. The Tolerance value will also affect how this option works.
The Anti-alias checkbox in the options bar will slightly blur the edges of the selection so that the edges are not harsh and rough.
Finally, activating Sample All Layers will allow Magic Wand Tool to select objects from all the layers in the document. Disabling it will limit the tool to only making selections from the selected layer.
Like other selection tools, holding Shift and clicking will add to the existing selection, whereas clicking while holding option (Mac) or Alt (Win) will deselect the area.
Color Range
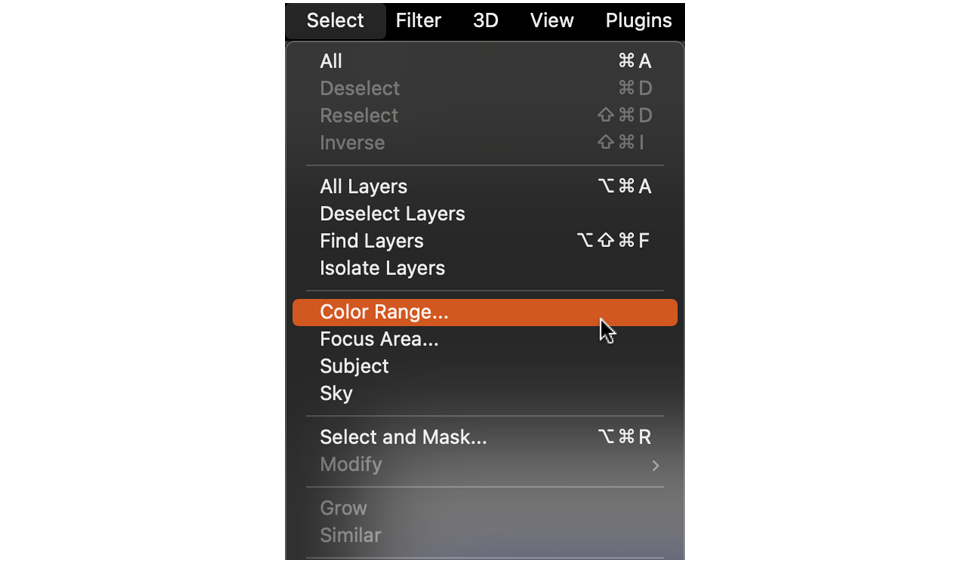
Color Range selects the area based on the picked colour value. It is similar to the Magic Wand Tool, but it is a selection command instead of a tool. You can access it through Select > Color Range. A dialogue box will open up with options to edit the selection.
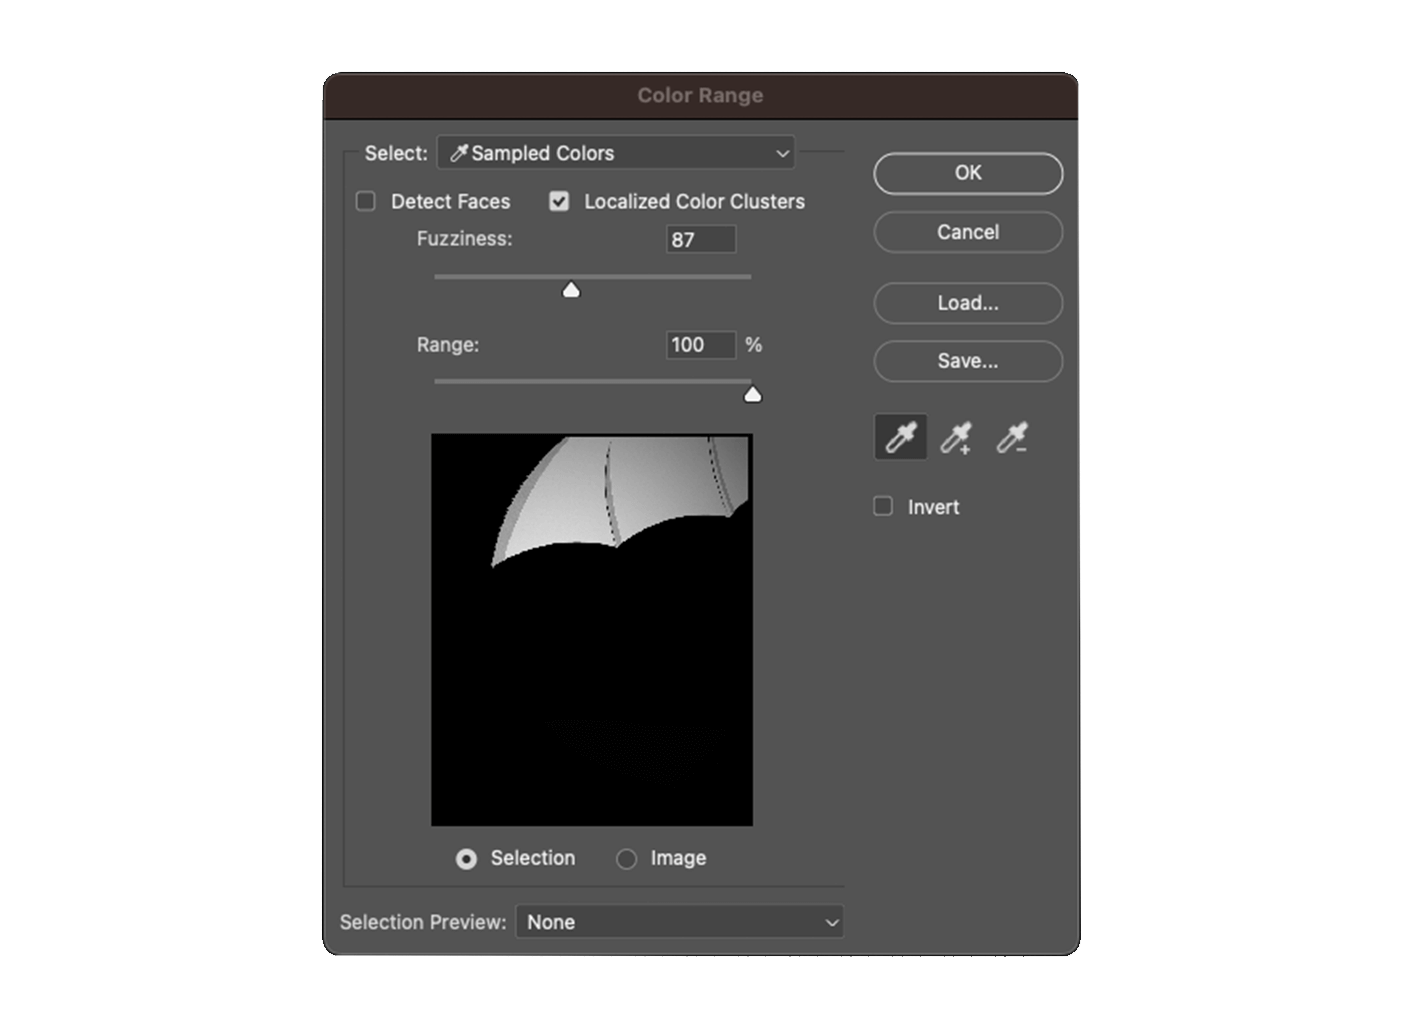
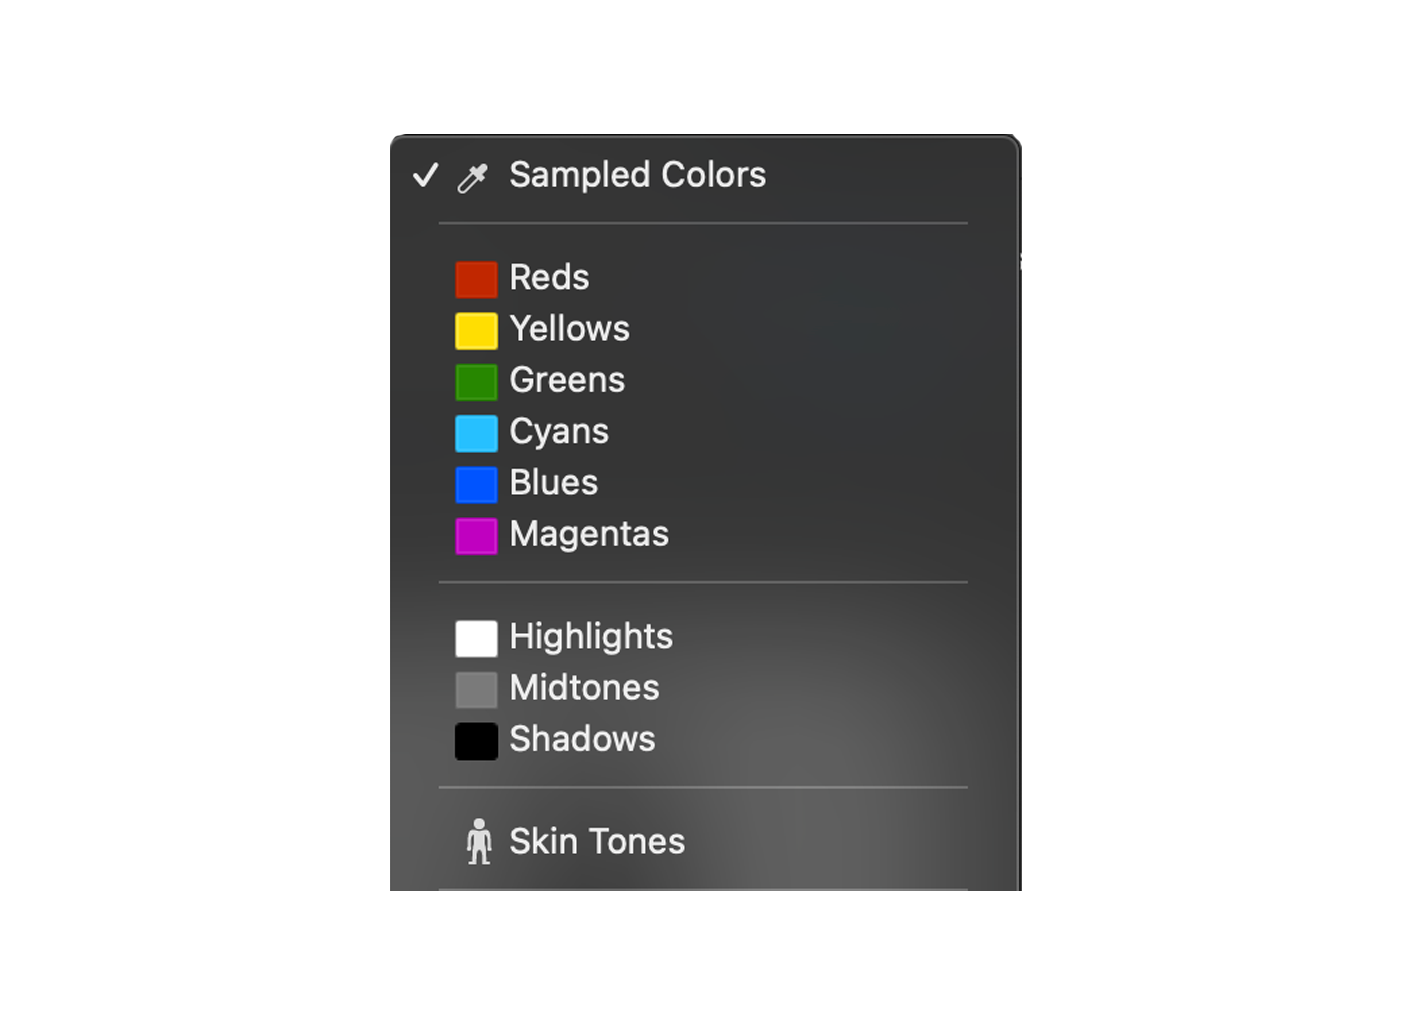
- Select: The Sampled Colors option will be selected by default. This option will select the colours within a particular range of the colour in your selection. You can pick other colour options from the list. For example, if you pick Reds, it will select all pixels within the colour range of red. If you pick Highlights, it will select all the bright pixels. The Skin Tones option will help to select the skin colours easily.
- Eyedropper Tools: These tools pick colours and fine-tune the colour selection. The left-most tool is the basic Eyedropper Tool. It is used to make the first colour selection. Add to Sample Tool is used to add more colours to the selection, and Subtract from Sample Tool will deselect the colours. With the Eyedropper Tool selected, you can simply hold Shift and click to add colours to the selection. You can also hold option (Mac) or Alt (Win) to deselect the colours.
- Fuzziness: This is similar to the Magic Wand Tool's Tolerance option. The higher the Fuzziness value, the more brightness levels of the colour will be selected. If the value is set to 30, it will select pixels of brightness value 30 lighter or darker than the selected colour. The benefit of using Color Range over Magic Wand Tool is that you can keep changing the tolerance/fuzziness values after we have picked the selection. The selection is more adjustable. We can see how the selection will look in the preview window and apply, modify, or cancel it before it is applied.
- Localized Color Clusters: This option limits the area Photoshop looks for matching colours. With this option activated, the Range slider will be unlocked. If the range value is set to 100%, Photoshop will look for matching colours in the entire document. If the range value is set lower, like 30%, it will only look for values around 30% of the nearby area closer to the selected area.
Using Color Range
Now, let's try to use Color Range to make a selection and edit the image.
- Go to
Select>Color Range. - Pick a red colour from the image. Move the Fuzziness and Range sliders so that all red parts of the image are completely selected.
- Click on Invert. This will select everything except the red colours.

- Click OK to close the dialogue box and complete the selection.
- Now to make the image black and white in colour, click on the New Adjustment Layer icon in the Layers panel. Select Black & White from the drop-down list. Now everything is black and white except for the red colour.

Thank you so much for reading the article. Hope you found it helpful.