
In the previous article, I explained Shape marquee tools, editing selections, and what you can do with the selections. In this part, I will continue to explain other selection tools.
- Shape Marquee Tools
- Lasso Tool
- Magic Wand Tool
- Colour Range
- Quick Selection Tool
- Pen Tool
- Focus Area Selection
Using the Lasso Tool
Shape marquee tools like Rectangular Marquee Tool and Elliptical Marquee Tool allow us to select basic shapes like squares and circles, but the Lasso Tool will allow you to select any type of shape you want as long as you can draw it with your mouse. With a graphic tablet, this tool will be even easier with its pen.
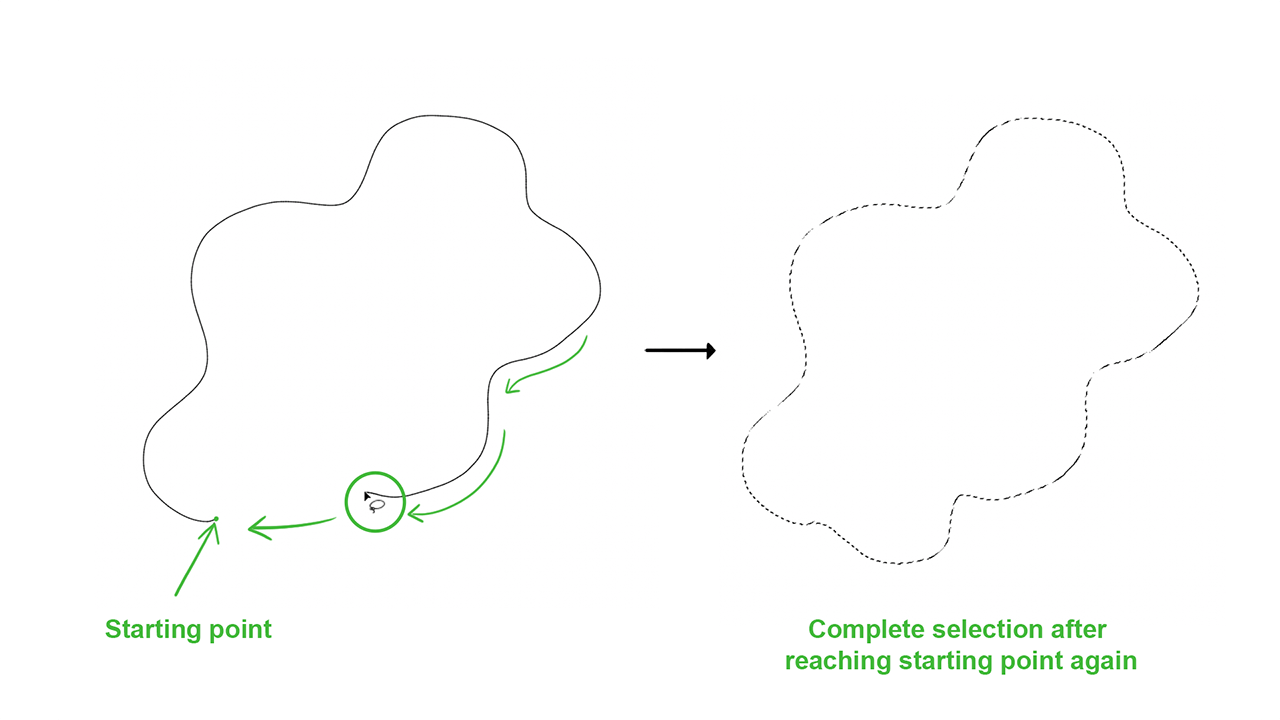
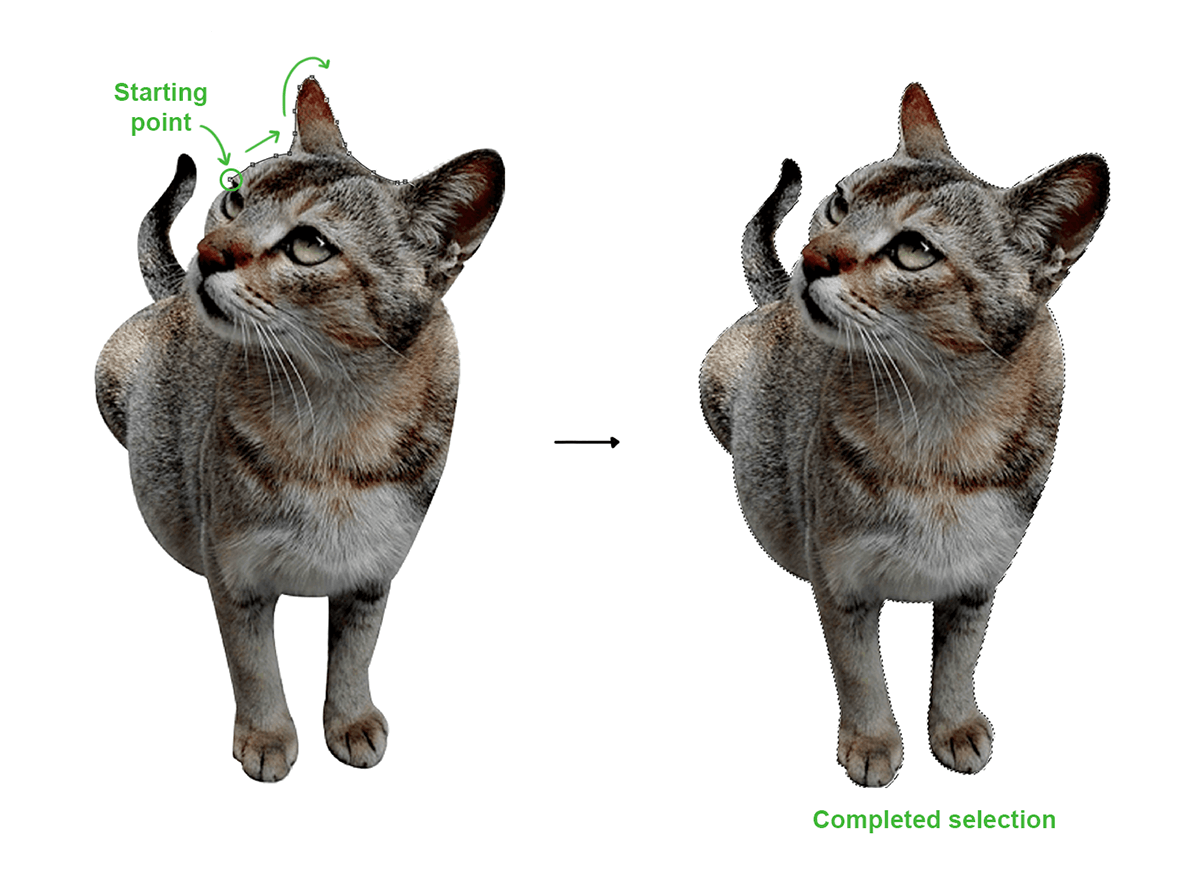
Using the Lasso Tool is very simple. After clicking on the tool, simply drag your mouse to draw your selection manually. To complete your selection, draw the selection back to the same point you had started from and then release your mouse button. You can also let go of the mouse button before reaching the starting point, which will close the selection automatically in a straight line.
Even though the Lasso Tool is inaccurate and requires practice making precise selections, Photoshop provides features to make it easier to correct the errors and select the object with an outline as perfectly as you can.
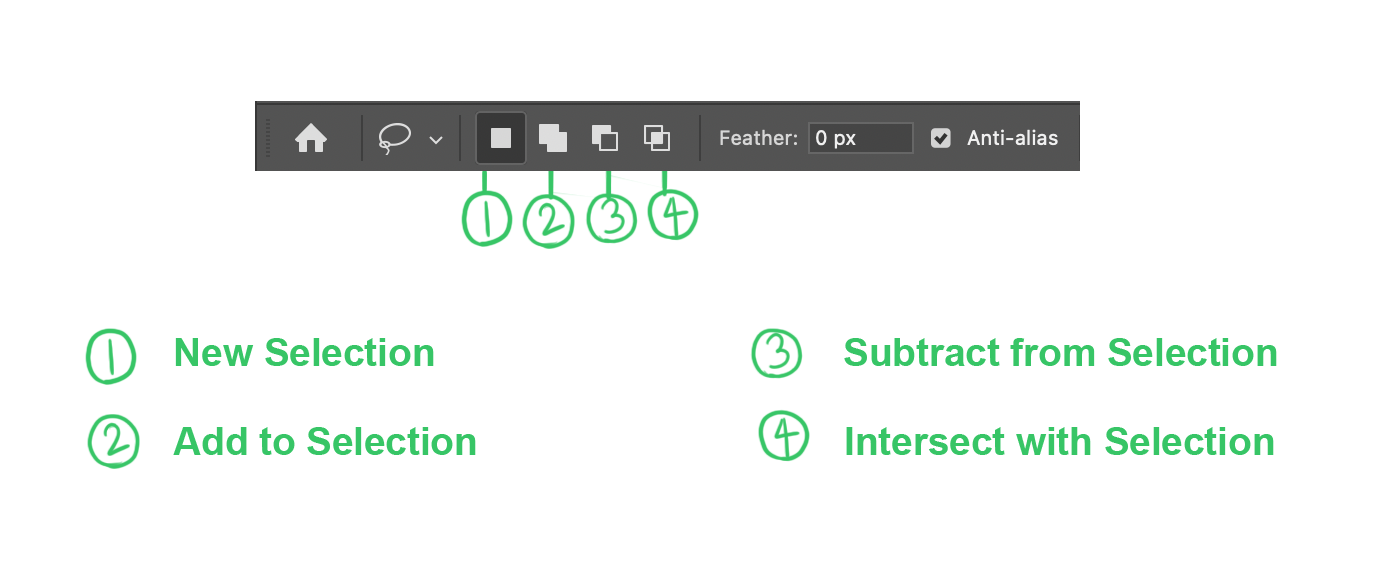
- After completing the selection, you can hold Shift and draw the area you want to add. This will change the Lasso mouse cursor to a Lasso mouse cursor with a plus sign below it. You can also activate this by selecting Add to selection from the options bar.
- Similarly, if you made a mistake and selected an extra area with the lasso tools, you can subtract those areas by drawing over them by holding down option (Mac) or Alt (Win). You can activate this by selecting Subtract from Selection from the options bar.
- You can also zoom in with the Zoom tool (Z) to make it easier to make accurate selections.
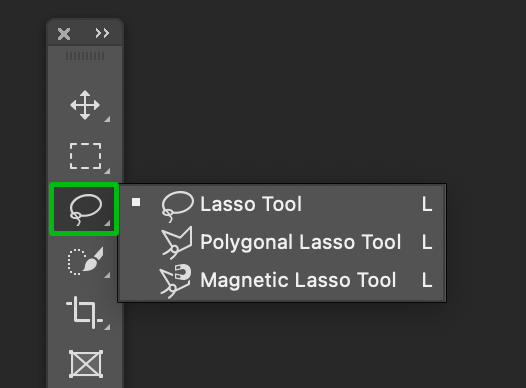
Lasso Tool Types
Photoshop has three types of Lasso Tool. Right-click the Lasso Tool in the toolbar to see the other two tools.
- Lasso Tool: This is the standard tool for freehand selections. Similar to how a cowboy uses a lasso to capture things, this tool can be used to capture any type of irregular shape.
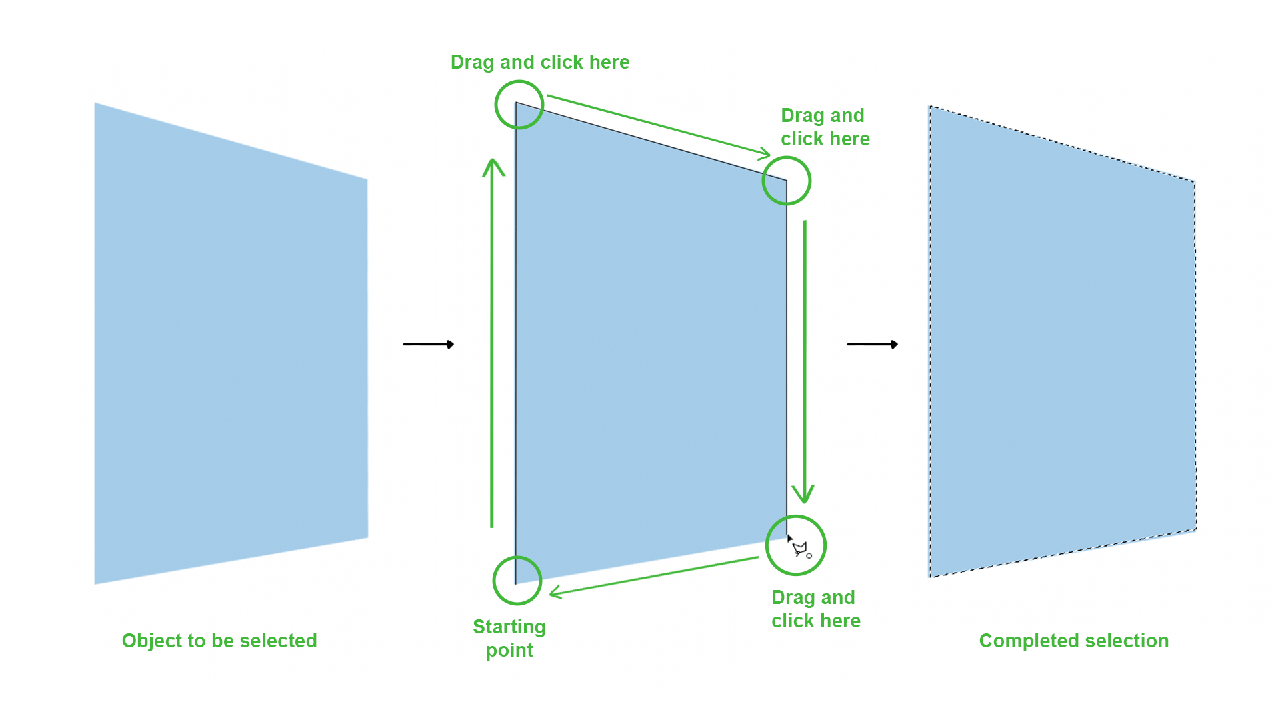
- Polygonal Lasso Tool: This tool will be more useful if you want to select an area with mostly straight lines. After selecting this tool, start the selection process by clicking on the edge of the required object. After releasing the mouse button, you can drag a straight line of selection. Click again at another spot to add a second point. Continue adding points around the object and click on the initial point to finish the selection. You can also double-click on a point to close the selection automatically.
- Magnetic Lasso Tool: This tool will be helpful for selections with many curves. It detects the object's edges and automatically creates a selection outline around it as you move the mouse cursor along its edge. Photoshop detects the pixels of different colour and brightness values, distinguishes them as different objects and snaps a line around the edges. Like the other Lasso Tools, click on the starting point or double-click anywhere to end the selection process.
There are three options while using Magnetic Lasso Tool. If you press Caps Lock, the mouse cursor changes into a circle with a crosshair in the centre. You can change the width of this circle from the Width in the options bar. Photoshop will detect the area inside the circle for edges.
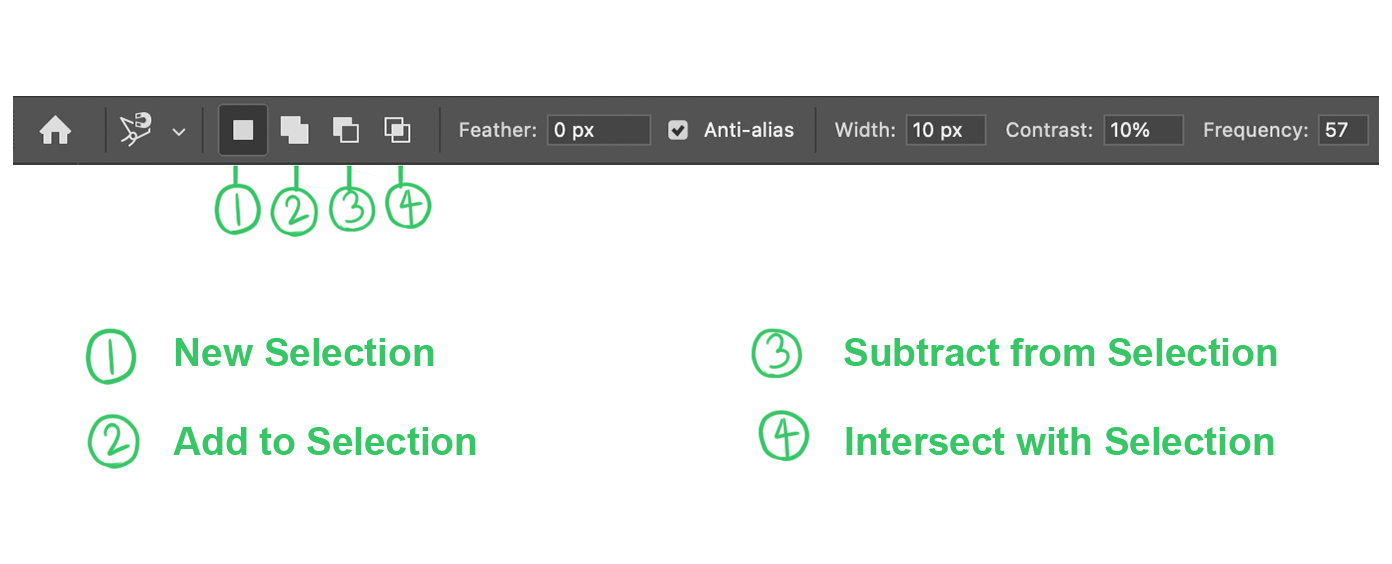
The Contrast value determines the edge by looking at the difference between the colour or brightness of the object and its surroundings. Use a higher value for high contrast between the object and its surroundings and a lower value for low contrast areas. Increasing the Frequency number will increase the number of anchor points added while dragging the mouse cursor.
Thank you so much reading this article. Hope you found these tips to be helpful. I will explain more selection tools soon!