
While doing graphic design work, we may want to edit a certain area of an image instead of the entire image. Selection tools in Photoshop are useful for separating and adjusting only the required areas. This makes photo compositing, separating, deleting objects from the image and photo bashing easier. Photoshop provides multiple tools for making various types of selections.
- Shape Marquee Tools
- Lasso Tool
- Magic Wand Tool
- Colour Range
- Quick Selection Tool
- Pen Tool
- Focus Area Selection
In this part, I will explain the basics of selections using one of the simplest tools available in photoshop: the Shape Marquee Tools. We will go over how to use Shape Marquee Tools, editing selections, and what else you can do with the selections.
Using Shape Marquee
Shape Marquee Tools are the most common and simplest tool to make basic selections. They do not provide many options to deform the selection but are useful to make selections based on the basic geometric shapes like rectangles and circles.
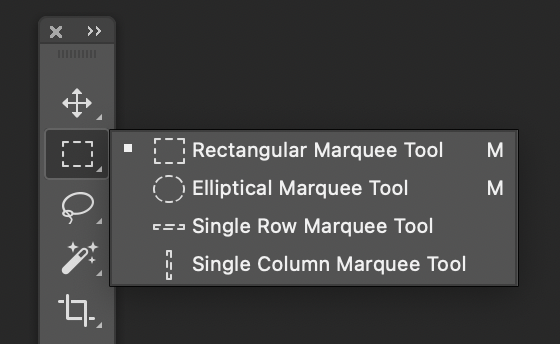
By default, the Rectangular Marquee Tool will be on the top section of the toolbar. Right-click on it to see and select the other shape marque tools.
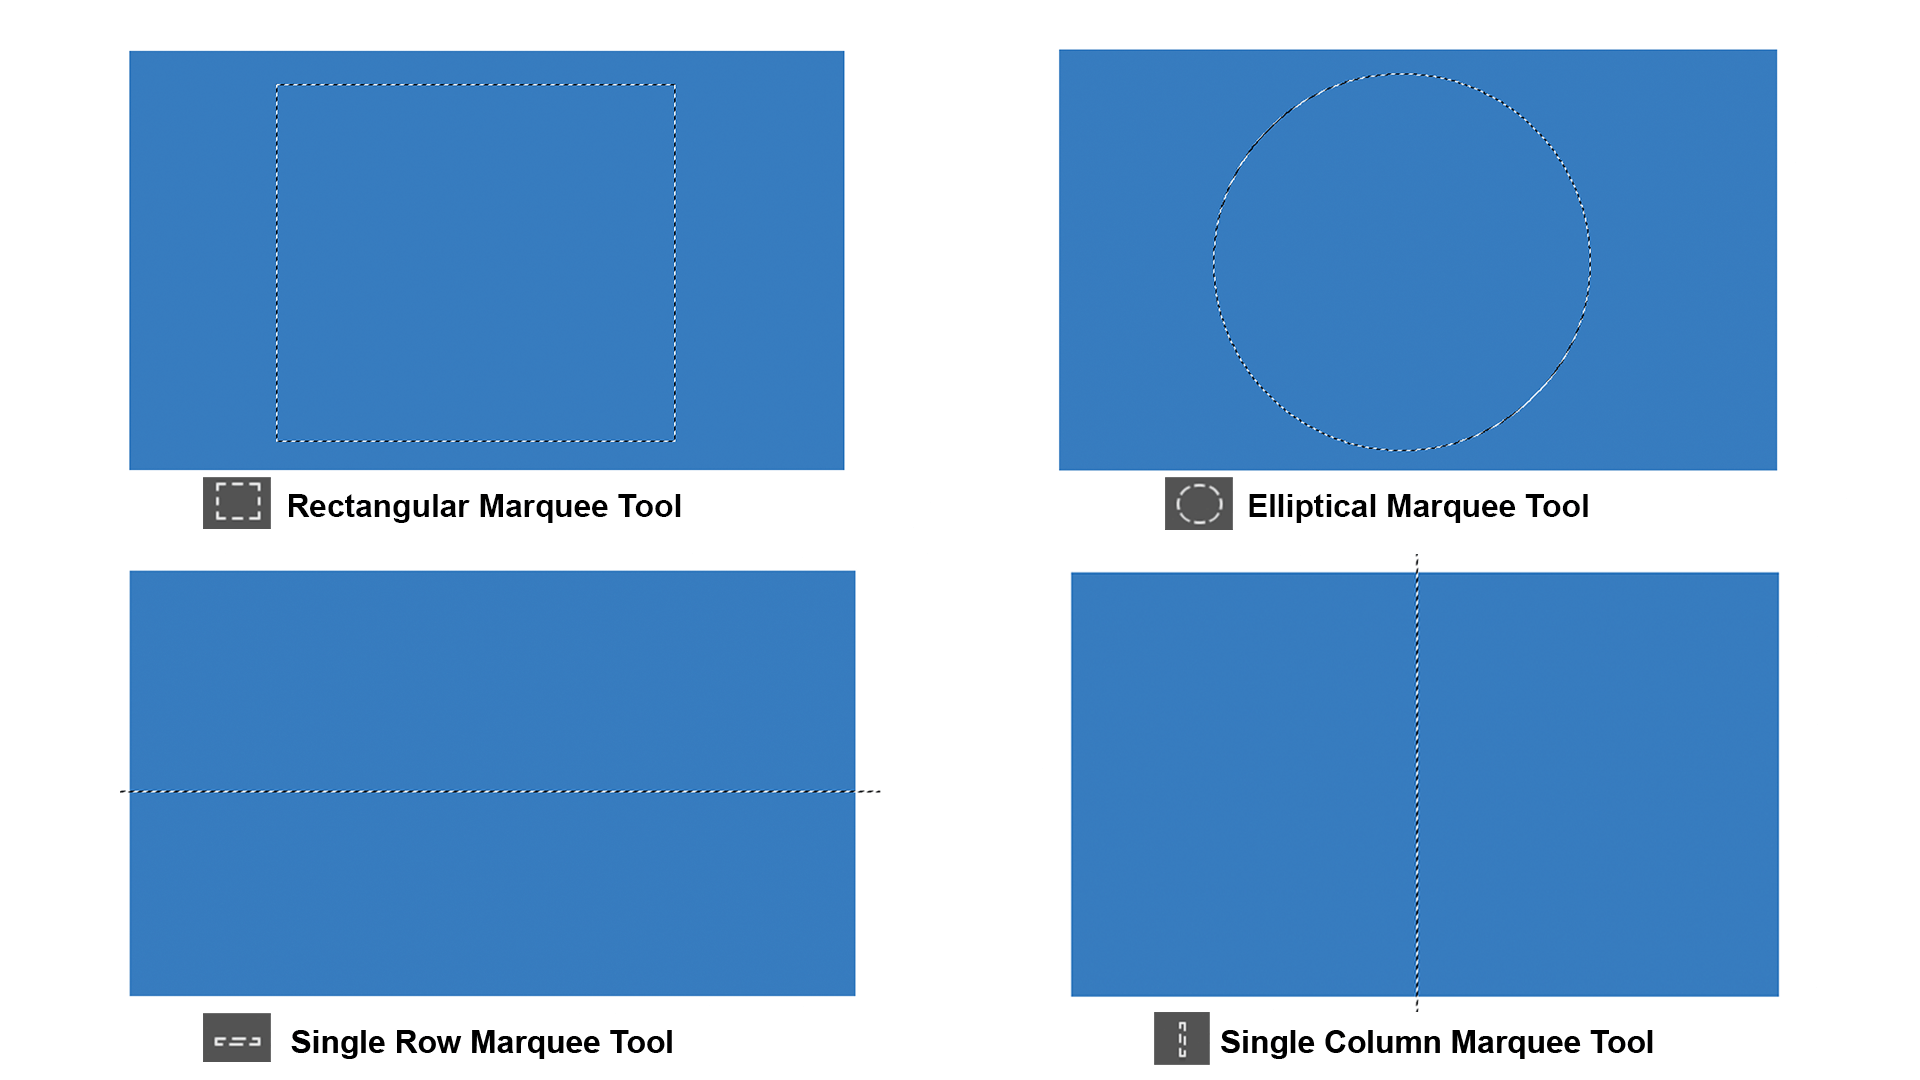
- Rectangular Marquee Tool: With this tool, you can select an area in the shape of a square or rectangle.
- Elliptical Marquee Tool: With this tool, you can select an area in the shape of a circle or oval.
- Single Row Marquee Tool: As the name implies, this tool selects a horizontal line.
- Single Column Marquee Tool: Similar to the previous tool, this tool selects a vertical line.
In order to use the Rectangular Marquee Tool to make selections,
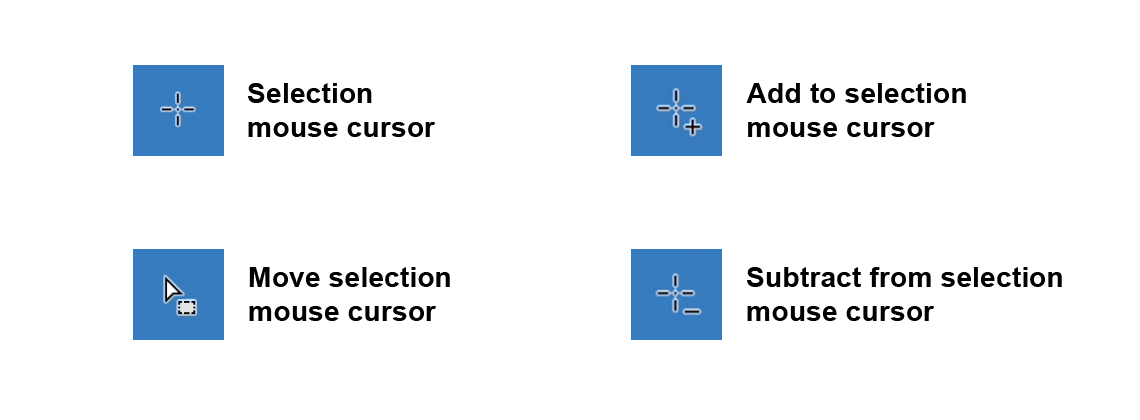
- Click on the tool from the toolbar or press M. Your mouse icon will change to a crosshair icon.
- After selecting the layer, simply click on the point from where you want to start the selection and drag your mouse. It will create a rectangular outline with broken lines which will look like marching ants. This area is your selection.
- Let go of your mouse button to complete the selection.
Editing the Selection
If your selection is slightly away from the desired area or if you want to add/subtract certain areas, you do not need to start over.
- If you did not start the selection from the point you wanted and have not completed the selection yet because you are still holding down the mouse button, you can hold Spacebar and drag your mouse to the desired point.
- If you still have the Rectangular Marquee Tool selected after you had completed the selection, the mouse icon will change from the crosshair icon to an arrow icon with a rectangle below it. You can click on the selection and move it around to the desired area.
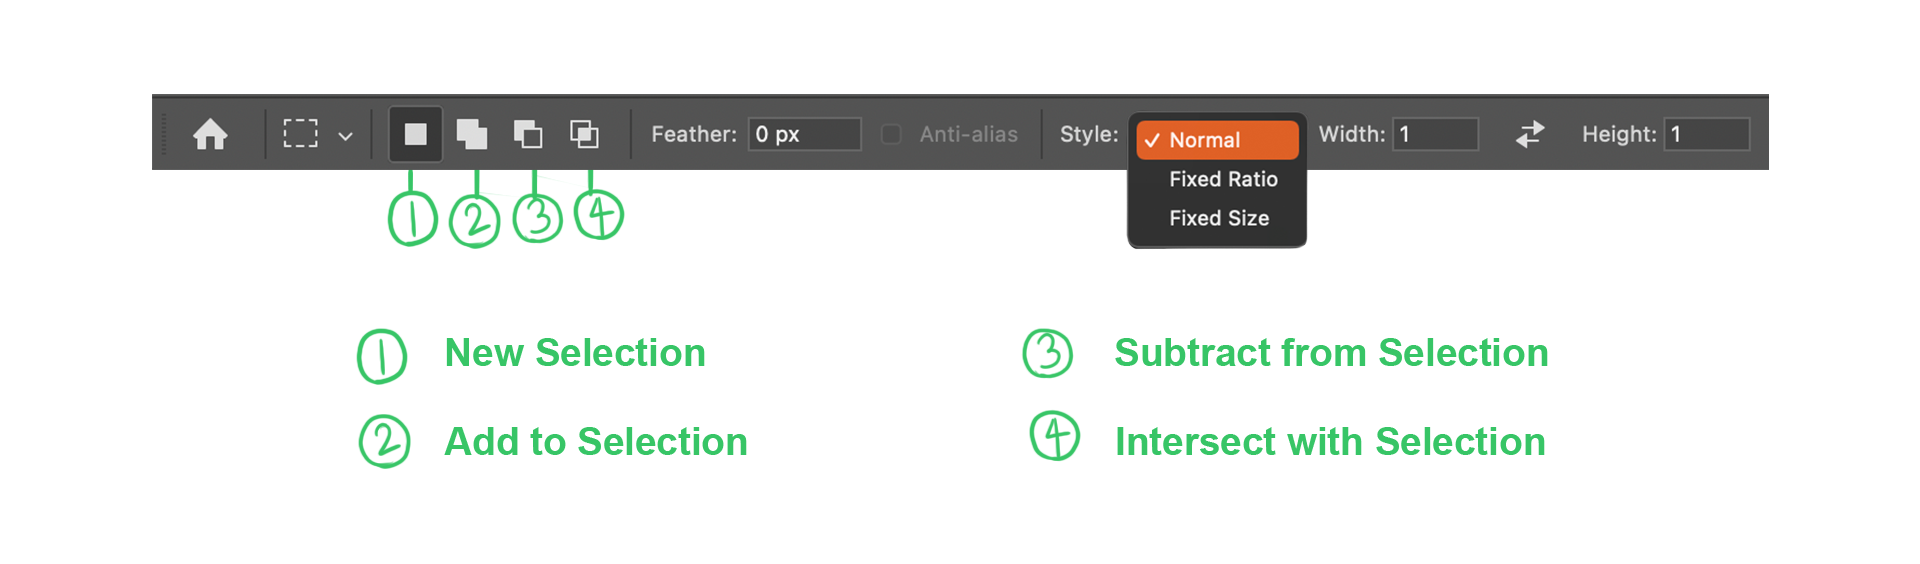
- If you want to add more areas to the initial selection, you can click on Add to Selection in the options bar of the Rectangular Marquee Tool. The cursor will change into a crosshair with a plus sign below it. You can also hold Shift and drag the required area instead.
- If you want to subtract an area from the selection, click on Subtract from selection in the options bar or hold Option (Mac) or Alt (Win) and drag the area. When you release the mouse, the area will be deselected.
- Click on Intersect with selection to select the common area from your existing selection and your new selection.
- Inputting a value in the Feather box softens the edges of the selection. The more number value you put, the edge will be blurred to that amount.
- Clicking on Style will open a new drop-down menu with three options. Normal is the default selection which can be resized to any dimension. A Fixed Ratio will help to create a proportional and uniform selection. This is useful if you want to create a perfect square or circle. After selecting Fixed Size, you will be able to select an exact area by inputting width and height.
This works the same way for Elliptical, Single Row and Single Column Marquee Tool. You can also mix them. For example, you can make a selection with Rectangular Marquee Tool and subtract a circle inside the rectangle selection by using the Elliptical Marquee Tool while holding Option (Mac) or Alt (Win).
Manipulating Selections
So you have selected an area with the selection tool, what can you do to the selection? You can edit that area in many ways according to your need.
- After you have selected the area, press ⌘ + C (Mac) or Ctrl + C (Win) to copy that area and click ⌘ + V (Mac) or Ctrl + V (Win) to paste that area on the same layer or another layer.
- Press ⌘ + X (Mac) or Ctrl + X (Win) to cut that specific selected area.
- Press delete (Mac) or Del (Win) to delete the content inside the selection.
- Press ⌘ + J (Mac) or Ctrl + J (Win) to duplicate the content inside that selection into a new layer.
- Press ⌘ + T (Mac) or Ctrl + T (Win) to transform the content inside that selection.
- Press option + delete (Mac) or Alt + Del (Win) to fill the selection with the selected foreground colour.
- Press ⌘ + delete (Mac) or Ctrl + Del (Win) to fill the selection with the selected background colour.
- To deselect the selection, press ⌘ + D (Mac) or Ctrl + D (Win). You can also press ⌘ + Z (Mac) or Ctrl + Z (Win) to undo the previous action which will deselect the selection too.
- With the area selected, you can perform any editing action from the Image menu bar like Brightness/Contrast, Levels, Hue/Saturation and more.
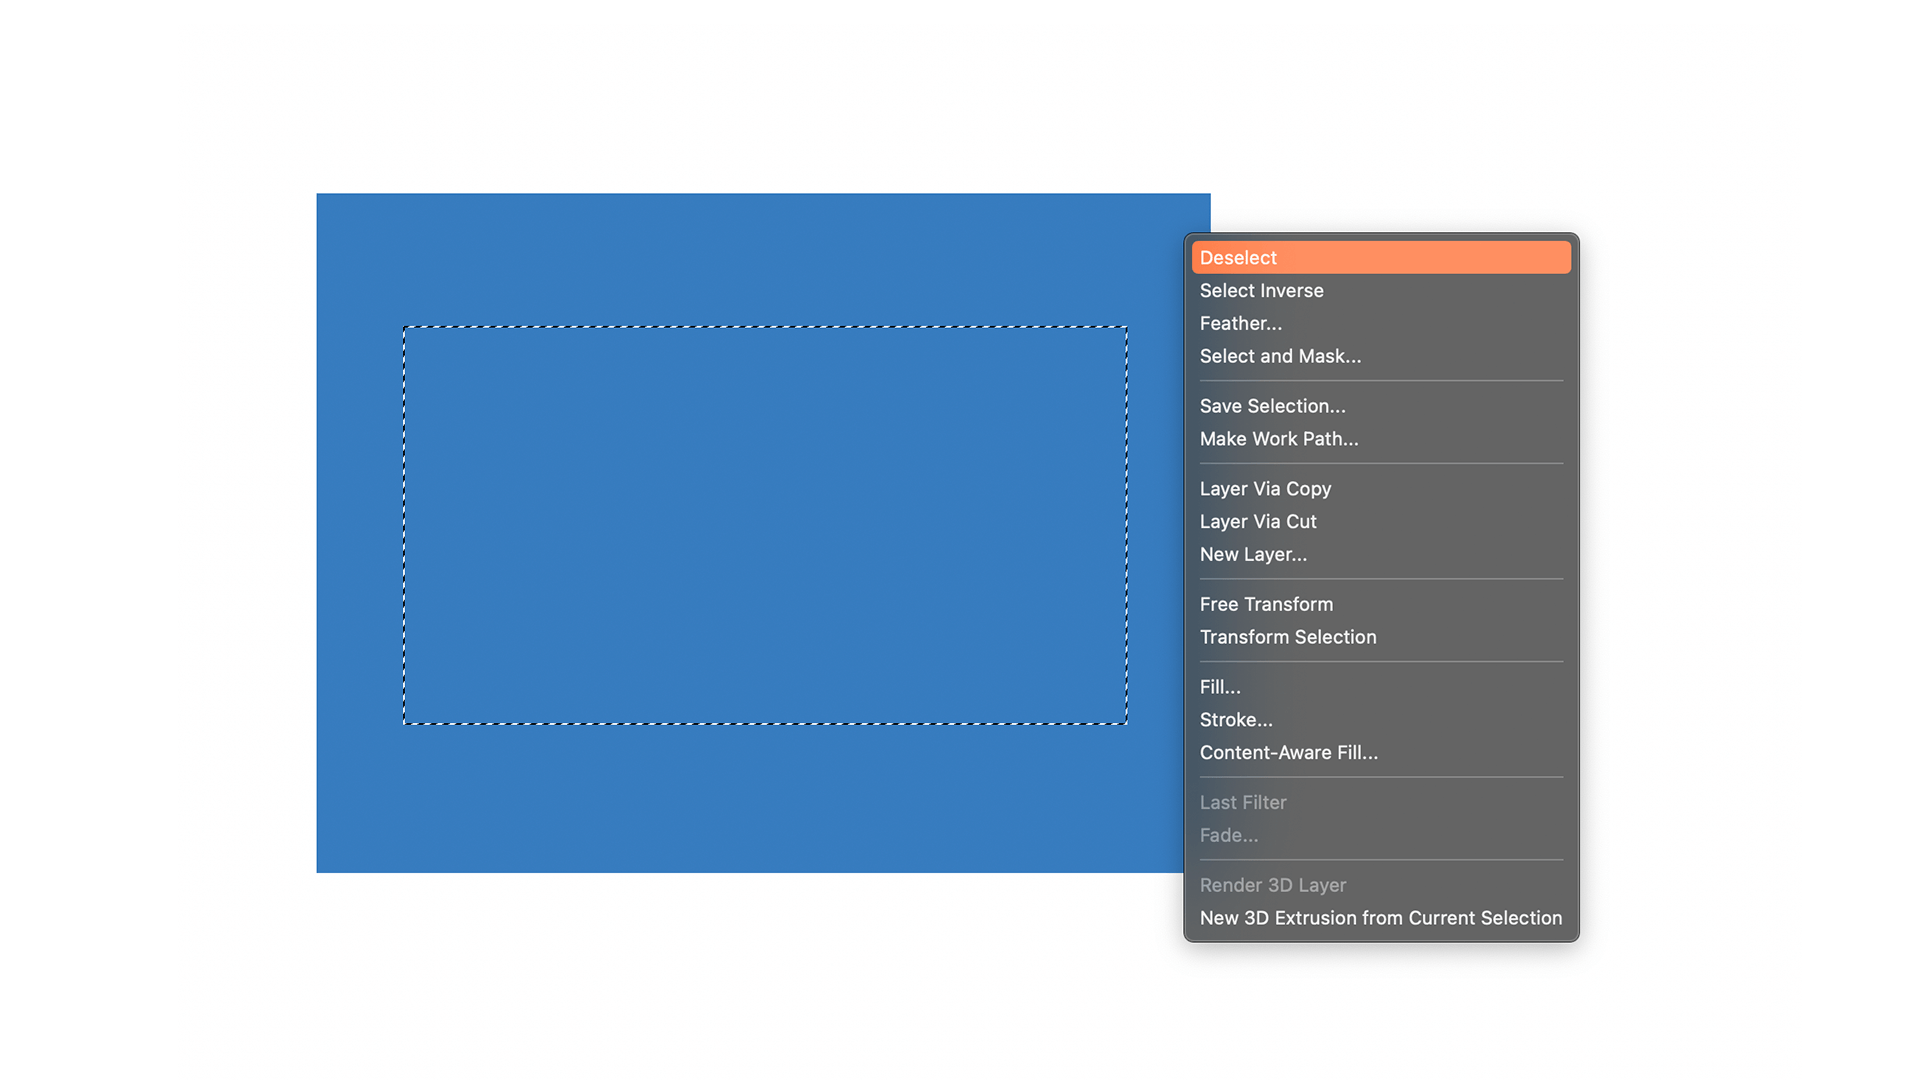
- After you have made the selection, you can right-click to see more options for the selection. These contain most of the options that I have already explained above. You can try them out.
This was the basic shape selection process and the way of editing the selection and contents inside the selection. You can try out these simple steps to learn about the basics of selection before I explain other selection tools in the next article.
Thank you so much reading this article. Hope you found these tips to be helpful.