
In the previous article, we explored some of the basic shortcut keys to make the painting process in Photoshop easier. In this article, I will explain the shortcut keys affecting the layers, colours and how you can customise your shortcuts.
Shortcuts for Basic Tools
14. Ctrl - Toggle Move tool
The shortcut key for the Move tool is V. Switching to the Move tool temporarily will be faster than switching back and forth whenever you want to move something. When you are using another tool, hold Ctrl (Windows) or Command(⌘)(Mac) to toggle the Move Tool. Click on the image and drag your mouse to the desired location.
15. Ctrl + T - Transform tool
When drawing in Photoshop, you might need to change the dimensions of a drawing. After you click Ctrl + T (Windows) and Command(⌘) + T (Mac), a blue outline will appear around the drawing. Pull the corners outwards or inwards to increase or decrease their size. Hold Shift for uniform scaling (This setting might differ based on your preference settings).
16. Ctrl + J - Duplicate layer
You can duplicate a layer by clicking Ctrl + J (Windows) or Command(⌘) + J (Mac). You can also click and drag the layer with the mouse while pressing Alt(Windows) or Option(⌥)(Mac). The layer will be duplicated when you have released the key and mouse click. If you only want to duplicate a part of a picture, select it with the Lasso tool and click Ctrl + J.
17. Ctrl + G - Group layers
When you have many layers, grouping layers together helps in managing them. Hold Ctrl (Windows) or Command(⌘) (Mac) and select multiple layers. After that, click Ctrl+ G (Windows) or Command(⌘) + G (Mac) to group them into a folder. After a group is created, you can also drag new layers inside the group.
18. Ctrl + E - Merge one layer down
Having many layers will make your Photoshop file bigger in size. If you have a layer selected, pressing Ctrl + E (Windows) or Command(⌘) + E (Mac) will merge the current layer with the one directly below it. This will not work if the layer below it is a raster layer, a locked layer or a group. You can also select multiple layers and press the keys to combine them.
19. F - Preview full-screen
If you want your screen to only show the canvas and nothing else, the F key will help you de-clutter your workspace and see your work in full-screen. Pressing F once will remove some menus in Photoshop, and pressing it again will remove all the tools. You can press it again to go back to the default view.
20. R - Rotate canvas
Rotating the angle of the canvas will help to paint brush strokes easily. Press R and move your mouse horizontally to freely rotate your canvas. Holding SHIFT while rotating the canvas will rotate it at 15°. This rotation is only for previewing; the angle you end up with will not be exported.
21. C - Crop tool
Clicking the C key will select the Crop tool. It will help you trim the unwanted portions of the image.
22. SPACE - Pan the canvas
You can move around the canvas with the Hand tool (H key). This tool can be toggled by holding the SPACE bar. While holding this key, click and drag with the mouse to pan the canvas.
23. Ctrl+H - Flip the canvas horizontally
When working on a design or artwork for a long duration, you will get used to how it looks. You can flip the canvas to get a fresh view. This step helps in finding mistakes more easily. Click Ctrl + H (Windows) or Command(⌘) + H (Mac) to flip the canvas horizontally. This will flip all the layers in the document.
24. Ctrl+Y- Change the colour modes
Colour modes affect which colours will be combined based on the channels available in that mode. RGB mode consists of millions of colours and can be used for images on the screen. CMYK mode consists of a small variety of colours available based on inks, which is useful when working with images. Click Ctrl + Y (Windows) or Command(⌘) + Y (Mac) to switch between these colour modes.
Create Your Own Shortcuts Keys
One of the most flexible options in Photoshop is customising the keys in your keyboard to perform short and long functions. Assigning custom shortcut keys can streamline your workflow by changing it according to your ease.
In Photoshop, click the Edit menu in the menu bar and select Keyboard Shortcuts to open the Keyboard Shortcuts and Menu dialogue box. The shortcut keys for this are Shift + Option + Command(⌘) + K (Mac) and Shift + Option + Ctrl + K (Windows).
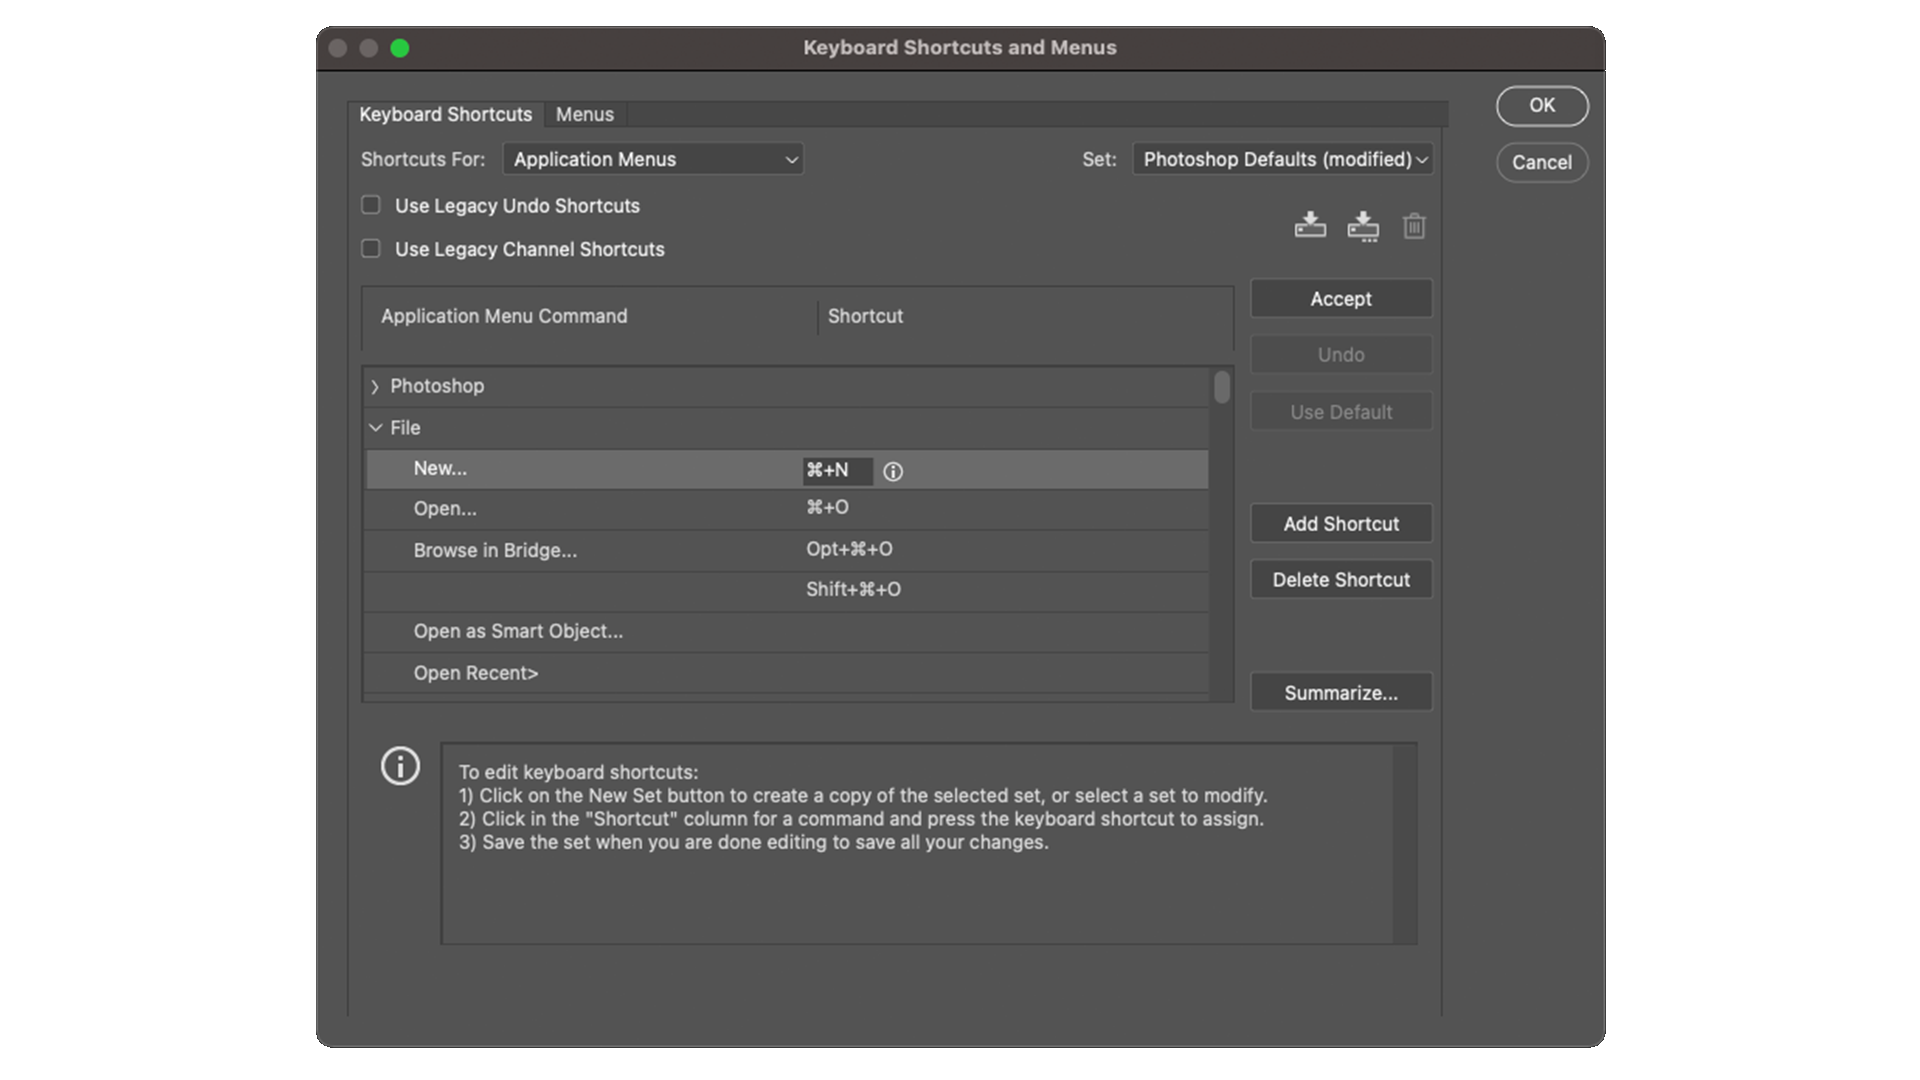
Customise new shortcuts
- Click on the Keyboard Shortcuts tab and scroll through the functions. Click on the arrow symbol next to the names to see the functions inside the menu.
- When you find the desired function, click on the empty field area next to it and press the key combination you want to assign.
- If the key combination already exists, click on it and press a new combination to edit it.
Create your own set
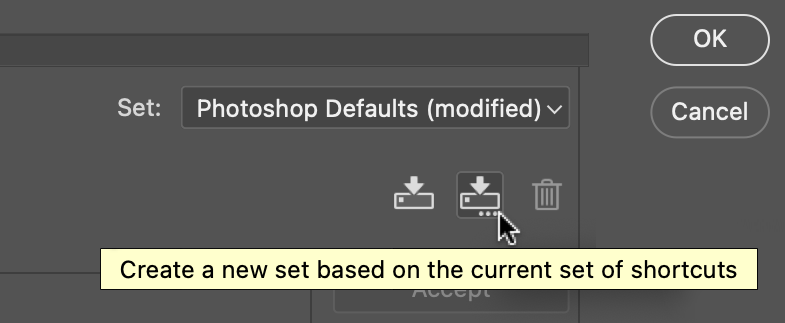
If you do not want to change the default set of keyboard shortcuts, you can create a new set from scratch by clicking on Create a new set based on the current set of shortcuts. This will open a new window to export the shortcut set as a kys file. If you are working in a group or need to switch devices, you will be able to import this kys file through Edit > Export/Import Presets.
Creating custom shortcut keys can optimise your workflow. Any shortcut can save time and enhance productivity by minimising monotonous and repetitive button clicks to perform simple actions. Experiment with different existing and custom shortcut combinations. Enjoy a more pleasing and efficient experience in Photoshop with these simple tricks.
Thank you for reading this blog. Hope you will be able to implement some of these shortcuts to make your workflow easier and faster.