
While working on Photoshop, you will be dealing with many layers. You might only start with a few layers, but the number may increase over time and even reach hundreds or more. If these layers are not arranged during the initial moments of starting the document, you will have trouble finding specific layers when making changes in the future. It may take several minutes to locate the layers, and it will unnecessarily increase your time for that work.
Thus, Layer Management is useful to make your workflow faster and more efficient. It is a minor thing, but improper layer management will drastically affect a document's editability. For example, suppose you are working with the same file with a team of multiple people. In that case, layer management will help other people easily locate specific layers and understand what they are for.
There is no hard and fast rule or right/wrong way to manage layers. However, I will provide a few tips on increasing your layer management skills.
Naming Layers
If you are planning to manage your layers, this is the simplest step that helps to locate the layers easily without much hassle. Imagine if you are working in a team and your team member sends you a Photoshop file with a hundred unnamed layers.
When all your layers are named properly, you only have to run through the layer names on the board to locate the layer you want to work on without checking which layer you're controlling by eye.
To rename a layer, you simply have to double-click on the existing name of the layer in the Layers panel.
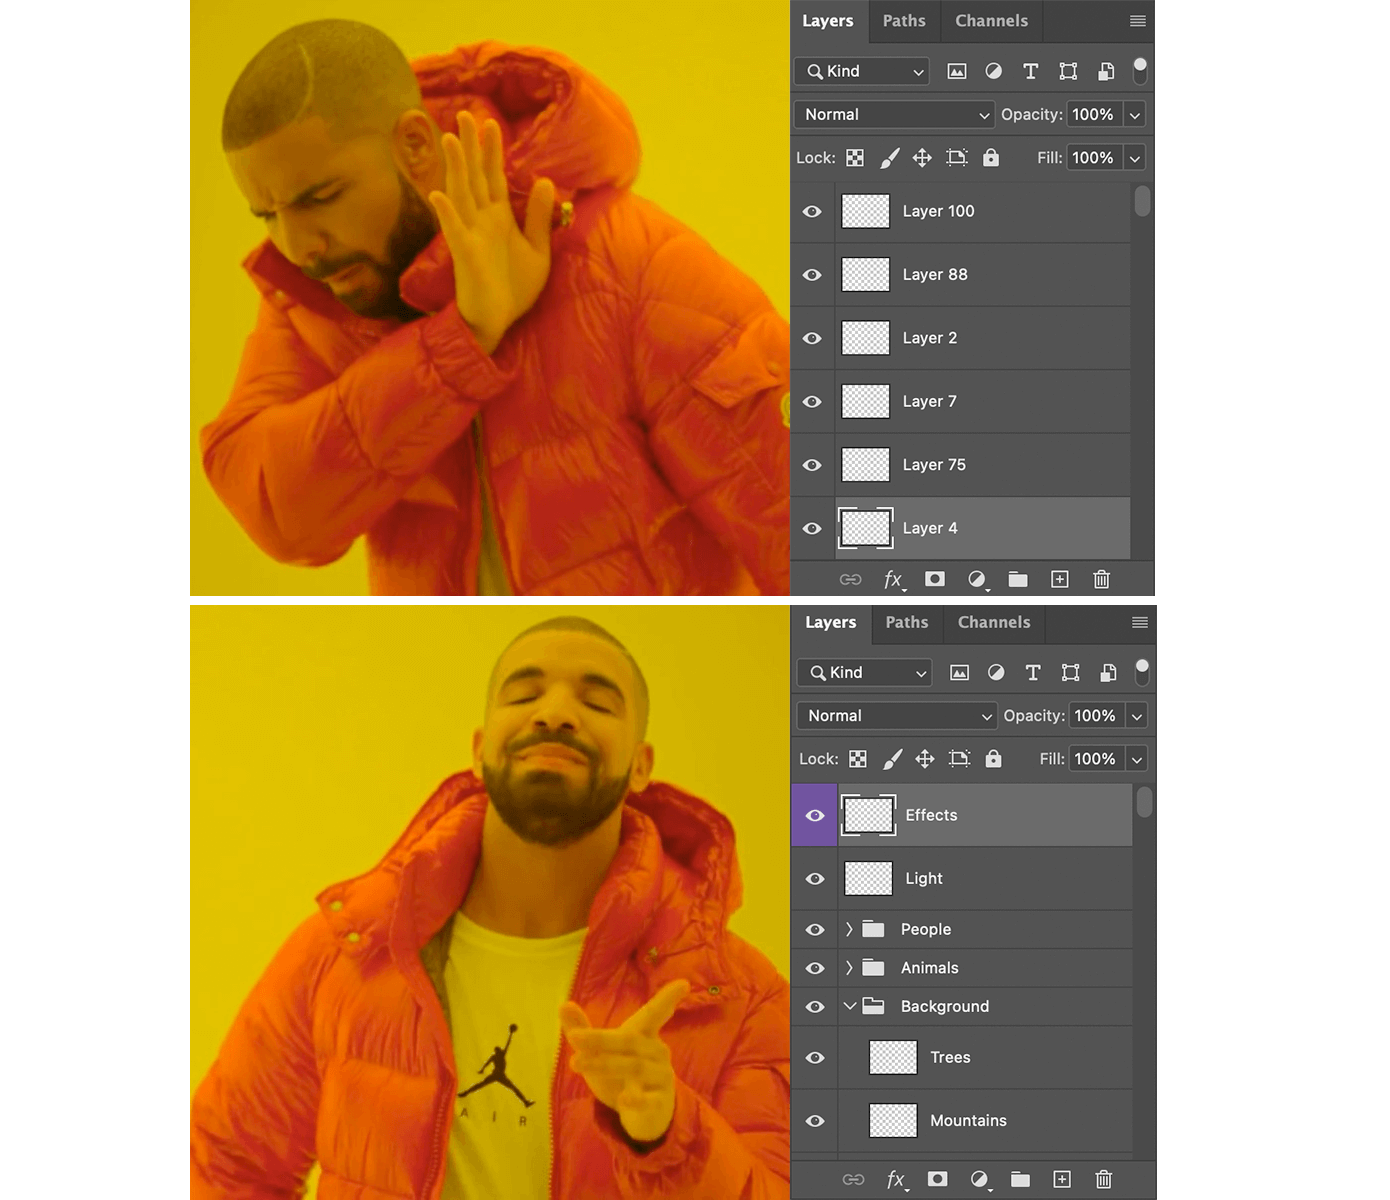
You do not have to think much to find a proper name. For example, name the layer "Box" if you are drawing a box. If you are working with multiple drawings or images, name them "Box 1", "Box 2", and more.
Grouping in Folders
While working with multiple layers, it will be difficult to keep scrolling up and down to find the required layer. There is a high chance that multiple layers might belong in the same category or can be grouped together in terms of the content or the reason they are being used for.
Layers are like papers, and a Group is a book cover. If you keep the layers inside a group, you can close the group and only open it up when you need to work on a specific layer inside. As a bonus, Blending Options or Layer Styles applied to a group affect all the layers inside the group at once.
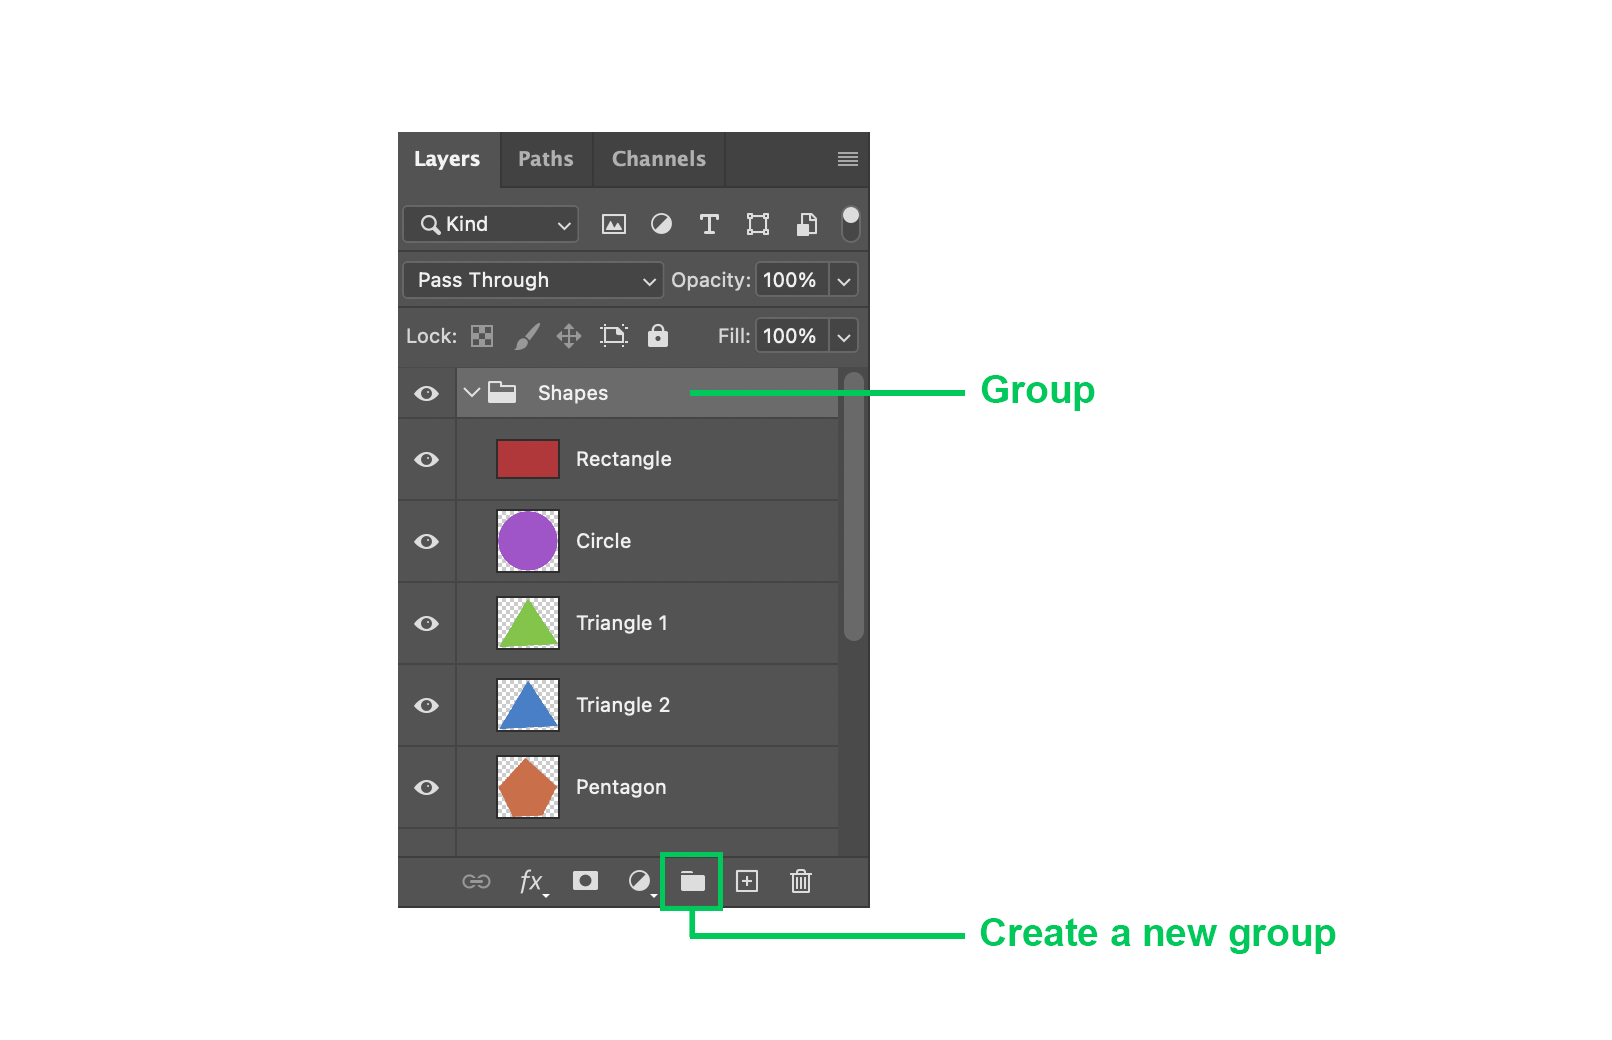
To create a new group, click the folder icon at the bottom of the Layers panel. Shift-click the layers and drag them inside the group. You can rename the group by double-clicking on the name.
Colour Coding Layers
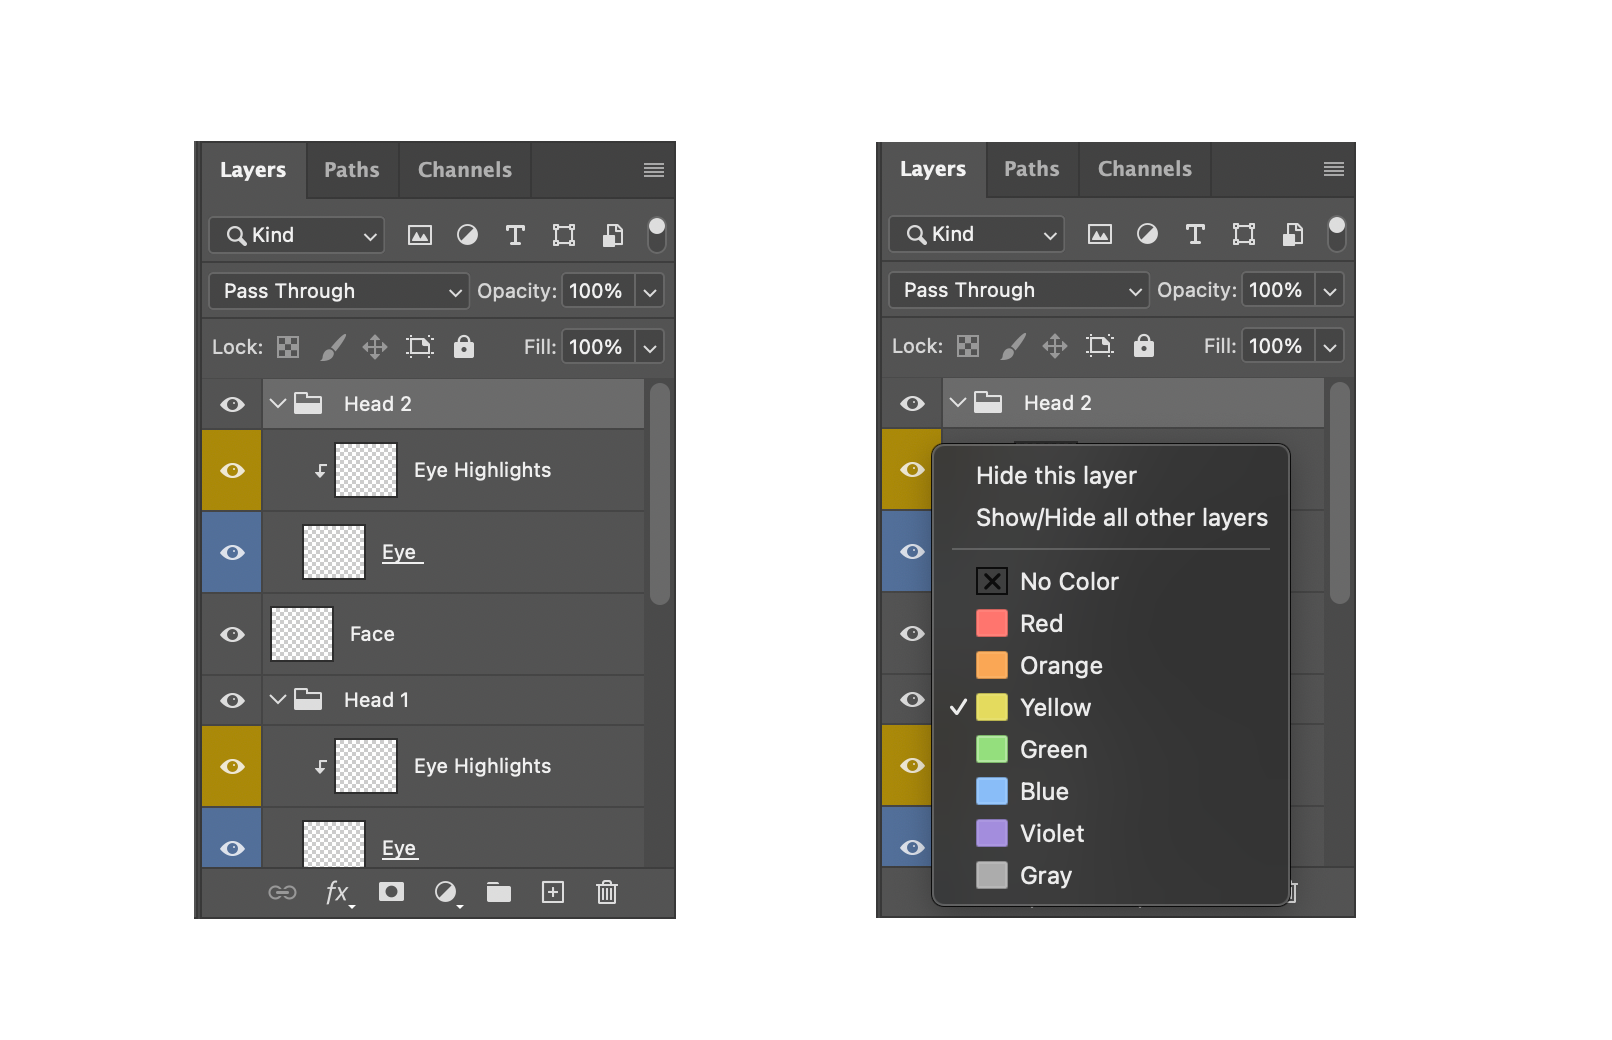
Colouring a layer on the board will help you locate it easily at a glance. If the layer is important and you need to keep looking at it, you can give it a bright colour so other team members can also notice that you are paying importance to that layer.
Colouring multiple layers the same way can be used to show similarity. You can also colour the layer the same colour in the layer's content. Colour coding them will also help locate them within the Layers Filter option by Color.
Below is an example of my method of colour coding layers for drawing and colouring characters:
Deleting, Hiding and Isolating Layers
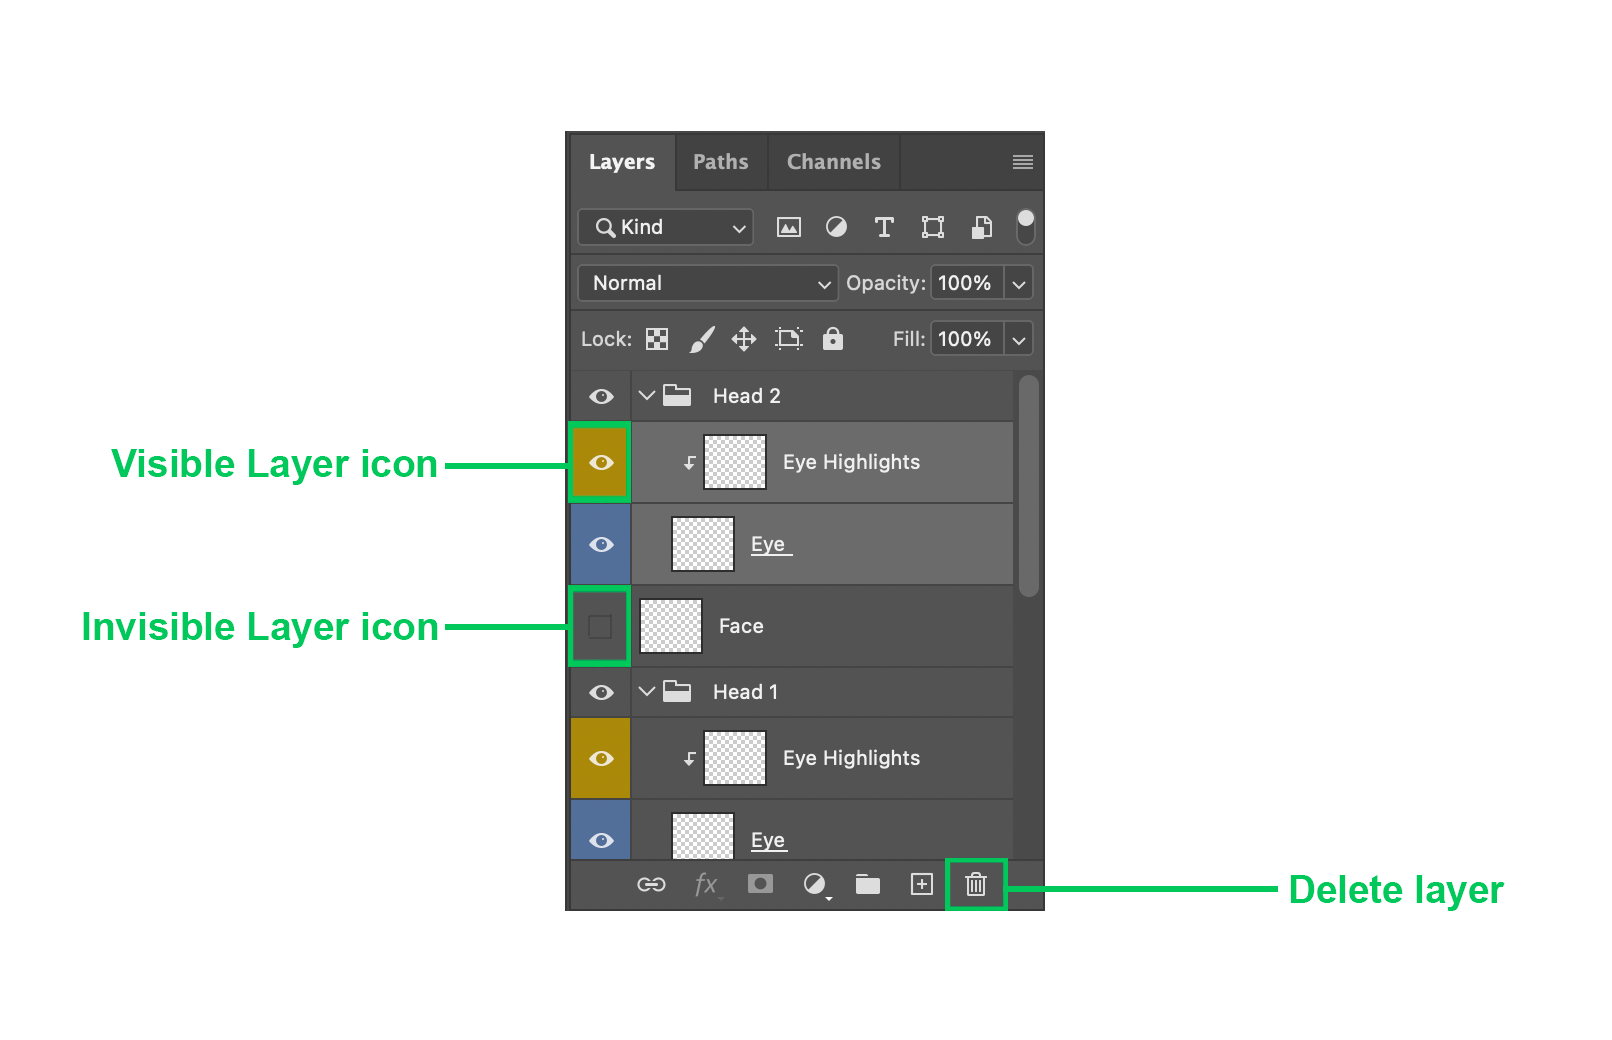
To have a clean and efficient workspace in the Layers panel, you should delete unwanted layers by pressing the Del key or by clicking the trash icon at the bottom of the Layers panel.
Also, you may not need to see certain content inside the document for a while that might overlap with other content. Hiding these obtrusive layers will make it easier for certain workflow steps. You can simply unhide it if you need them in the document again.
If you only need to work on one layer, you can also isolate the visibility of that layer's contents. Hold ⌘ (Mac) or Alt (Win) and click on the eye icon of the layer that you want to isolate and work on. All the other layers except for that one will be hidden. To activate the visibility of all layers, repeat the step for isolating a layer.
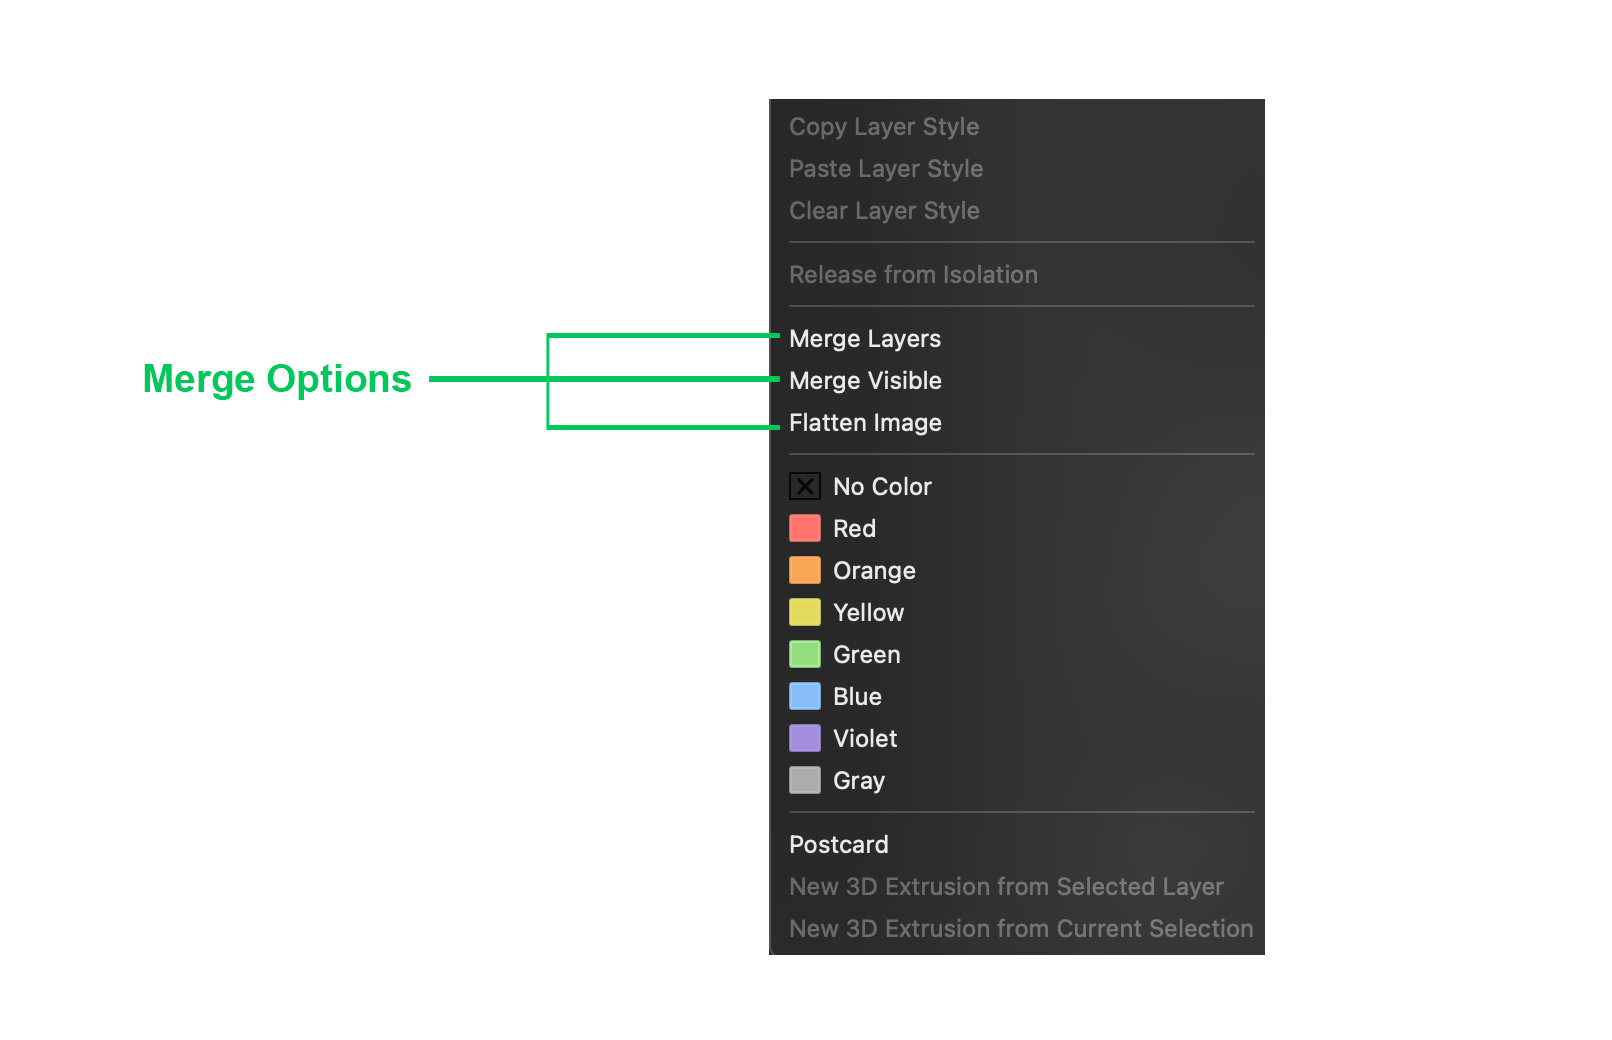
Merging Layers or Groups
While working, you may also have content that does not require its own layer. You can look through your layers and merge multiple layers into one by first Shift-clicking to select the layers and then Right-clicking the layers to select Merge Layers. This also works on Groups.
Merge Visible merges all the visible layers and leaves out the hidden layers. Flatten Image combines all the layers into one.
These steps are useful when you no longer need to work on other layers. It helps reduce the file size but is irreversible, so you should only perform these steps at the end of your editing process.
Conclusion
Organizing layers in these ways help in navigation and increase your workflow. This will make your life easier, and you may also get thanks from your co-workers for making their lives easier as well.
Thank you so much reading this blog. See you in the next one.