
In the first part of this blog, we made the beam part of the magic beam VFX. On this one, we will create the anticipation part and set up the attack part in Unity.
Model your beam as preferred using the methods shown in the previous blog.
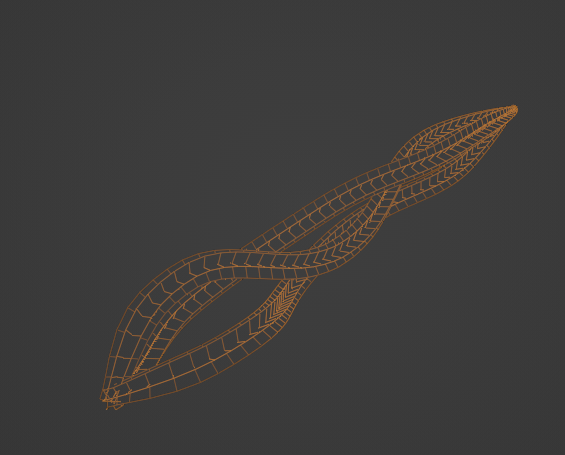
I have decided to go with multiple beams firing at once. Simply use the same method on all the individual mesh and combine them afterwards.
Setup Beam Shader
Once the mesh is finalized, export it to Unity.
We need to create a shader for UV scrolling in Unity similar to the one created in Blender. The Unity Particle System can be used for other parts of the effect.
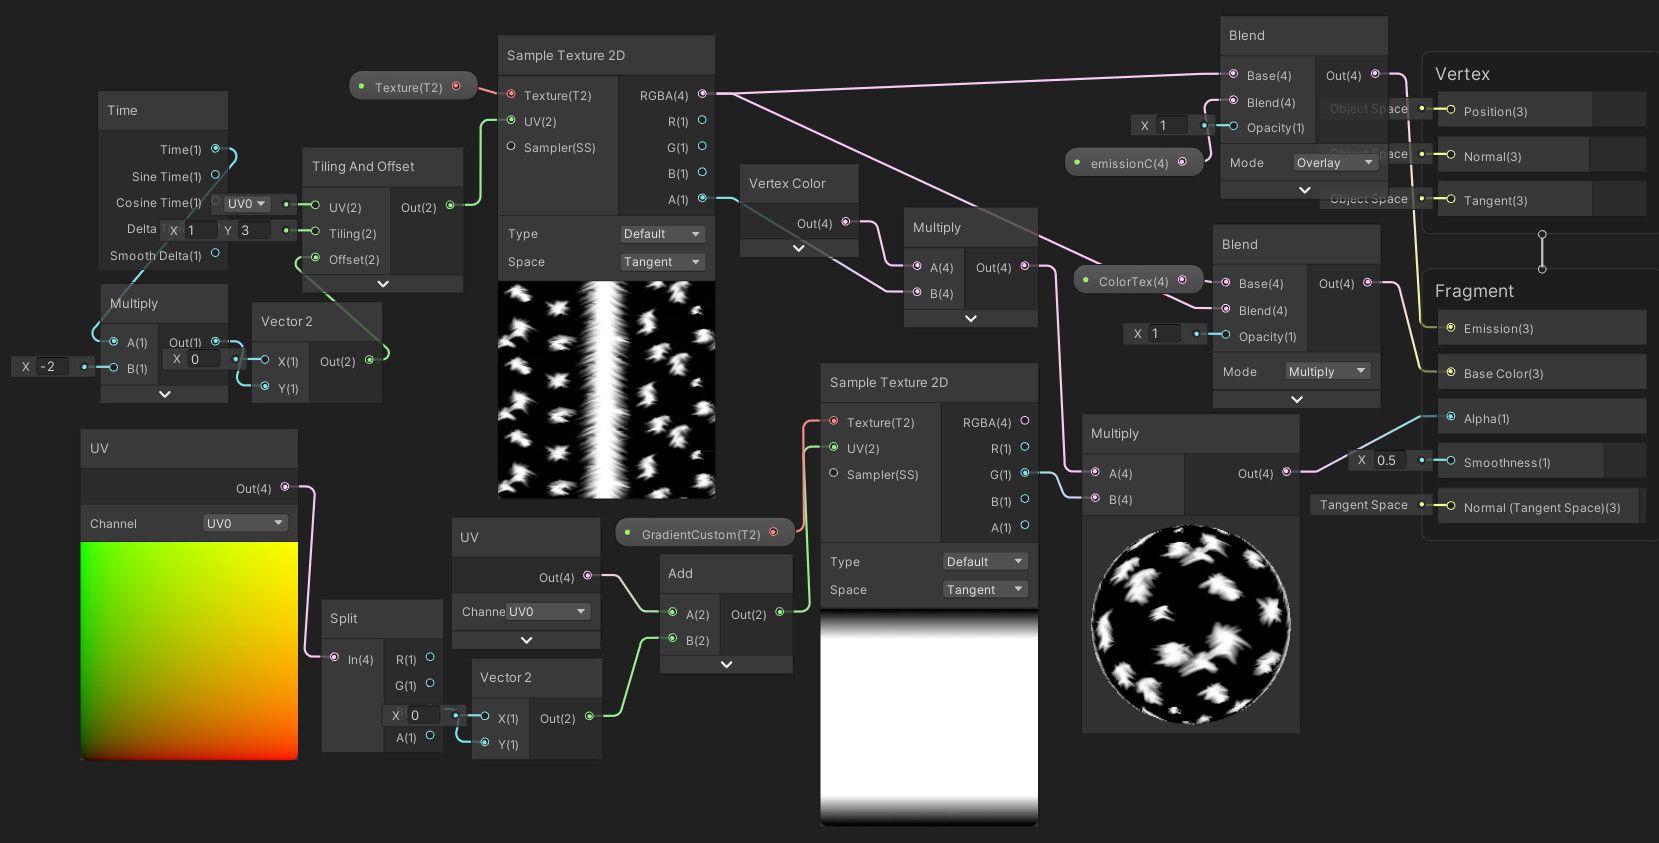
This shader is pretty straightforward for the most part. The UV offset along the y-axis is used on the main texture to constantly scroll along the mesh.
The tricky part is getting the alpha to work as intended. We used a simple clamp node to do this in Blender, but things can be a little tricky in Unity. We must use the vertex colour to blend the texture alpha at the endpoints. We need to use a simple gradient texture to get the effect of the texture scrolling only once through the mesh. To get the desired effect, the gradient texture's UV will be modified using the Custom Vertex Streams module from the Unity Particle System.
First, we need to change the Wrap Mode of the gradient texture to Clamp.
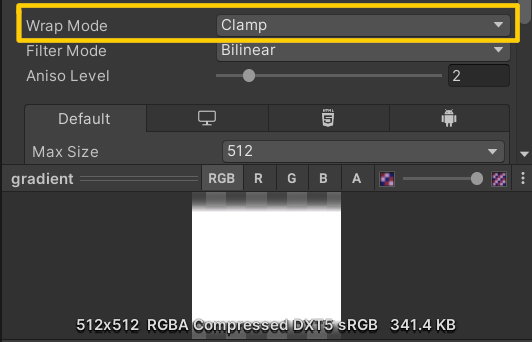
Then, split and use the B channel of the gradient's UV to modify the UV. This is because the R and the G already have a purpose, and the B channel is there for us to use. So, the B channel is used to modify the Y vector of the gradient UV to change the value from -1to 1 or vice versa, depending on the direction of the scroll required.
We cannot see the effects yet while only using the shader. This will make sense when we use it in the Particle System later.
Setup Beam Particle System
The main idea is to spawn a single mesh at a fixed location for a certain time. During this, the shader will scroll the texture automatically. And using the Particle System, we can define the direction and duration of the clipping scroll.
You can refer to the image below for my basic particle settings.
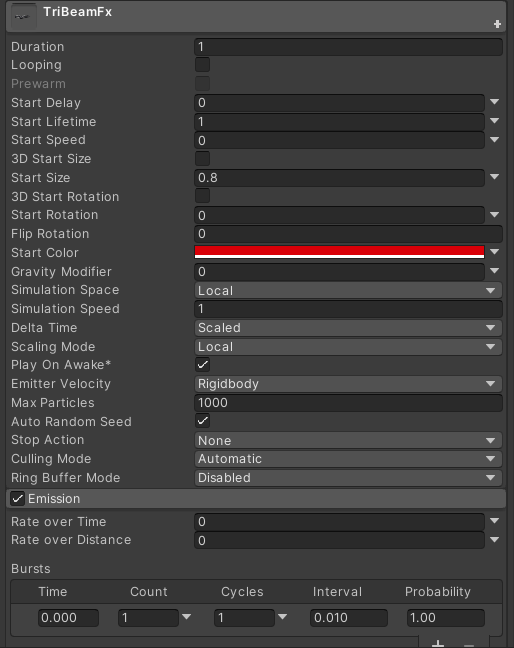
Now for the clipping scroll, enable Custom Vertex Steams, then use the + icon > custom > custom 1.xyzw. Also, enable Custom Data option and modify the X value using a curve that goes from -1 to 1 or vice versa, depending on the direction of the scroll needed.
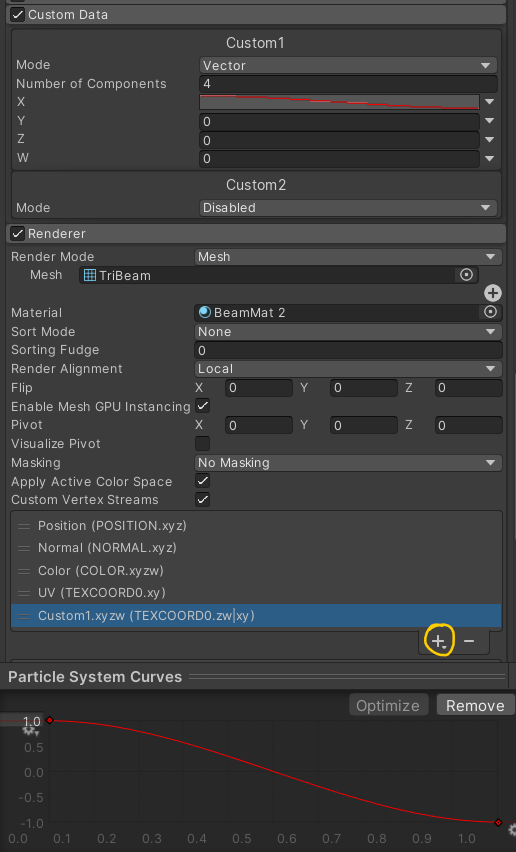
Custom Vertex Stream particle settingsWe will now be able to see the clamping scroll effect. Here is a gif to showcase the difference between before and after using the Custom Vertex Stream.
Anticipation VFX
I will create the anticipation part of the VFX using Unity's Particle System and GIMP (any other image manipulation program of your choice will also work).
For the anticipation portion of the VFX, I plan on doing an initial charge state and then a charge release state. Basically two stages within the anticipation VFX.
Let's start by making the charge part of the effect. For this, let's use a sphere as the particle's emitter shape and a negative value on Radial Velocity over Lifetime so it looks like energy is being collected. The default particle texture of Unity can be used, or just use any simple circle dot texture.
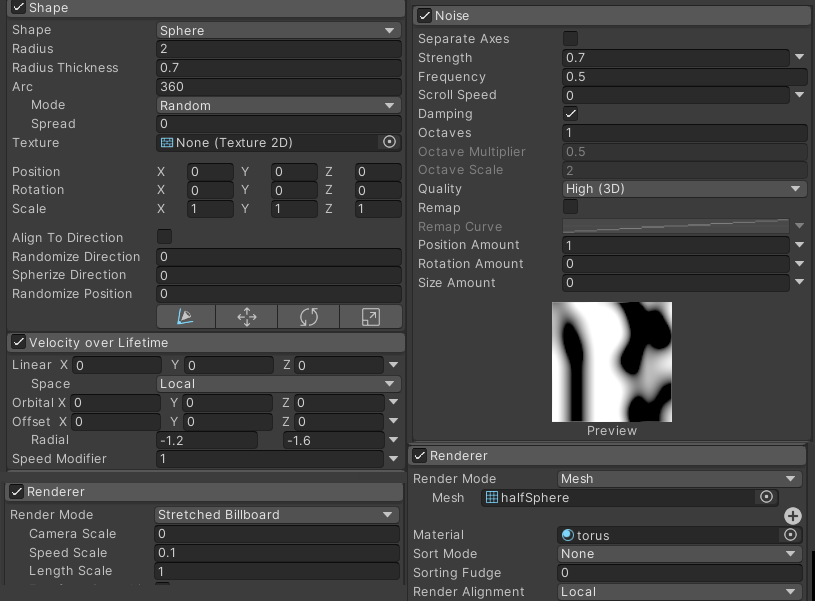
For the release part, just inverse the first effect. A smaller sphere emitter shape and a positive value on Radial Velocity over Lifetime. This time we also modified the renderer to be Stretched Billboard. This makes the shape of the particles look stretched and will resemble embers. Also, add the Noise module for some variation on the ember release.
We must create a simple mesh and texture for the final anticipation effect.
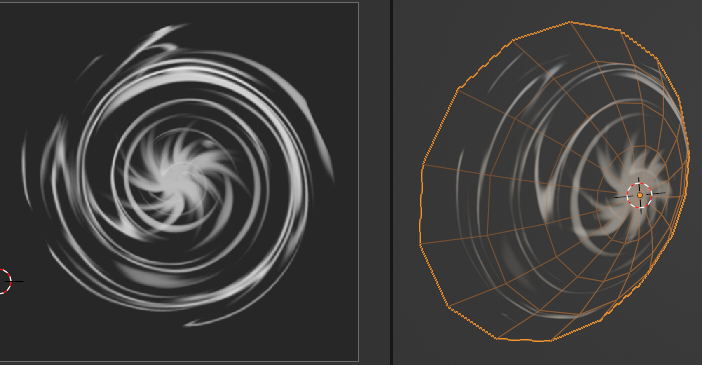
The mesh is just a sphere with all the unnecessary faces deleted and scaled slightly.
As for the texture, start by painting some variations of curved lines in a circular motion. Then in GIMP, go to Filters > Distorts > Whirls and Pinch. This will result in a spiral texture similar to the one shown above. The centre part is made similarly and started as a sun-shaped object but with different values under Whirls and Pinch option.
As for the particle settings, use a mesh renderer with local alignment. The Rotation over Lifetime and Scale over Lifetime options to give it a spinning and scaling effect.
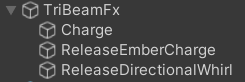
BeamFx hierarchyFinally, we need to adjust the Start Delay option of each individual particle so that they line up properly. You need to experiment and determine the delay value for each of them.
Once done, you should end up with something similar to the VFX below.
With that,
the anticipation and attack part of the effect is done. We still need a separate particle for the impact part. This will be done in the next part of the blog, along with some enhancements to the overall VFX. We will also create some variations of the VFX using similar methods.
Thank you for reading and stay tuned!