
Creating Real-time Visual Effects (VFX) requires both technical and artistic skills. These skills include 3D modeling, texturing, lighting, shader creation, animation, simulation, particle systems, etc.
To follow along with this blog post, you need to be familiar with 3D modeling, texture creation, shader creation, a game engine of your choice, and the particle system of that game engine.
I will explain the steps and techniques to my greatest extent, but if you have the above skills, it will be easier to follow. As for the software used, I will be using Blender, GIMP, and Unity.
Modeling and UV Unwrap
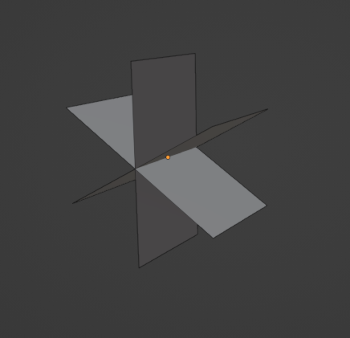
Start by adding a plane, duplicate it twice, and rotate each by 60 degrees.
Create a BezierCurve and adjust its shape as needed. Add an array and curve modifier to the mesh created earlier. The plane's length before the array modifier determines how accurately it will follow the curve.
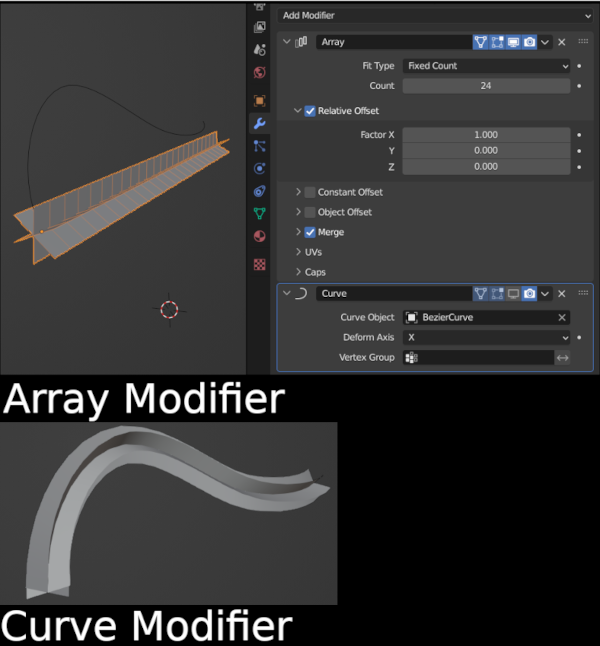
This initial mesh will be used for testing out the effect. Once satisfied with the initial shape, apply the modifiers.
For the UV map, we need to rectify it and constrain the UV within the texture bound. This will make the texture behave more predictably. Also, make sure all the UVs of individual planes are overlapping perfectly.
To rectify the UV, select all looping faces and click UV > Follow Active Quads.
To constrain the UV, under the UV editor window click UV > Constraint to Image Bound.
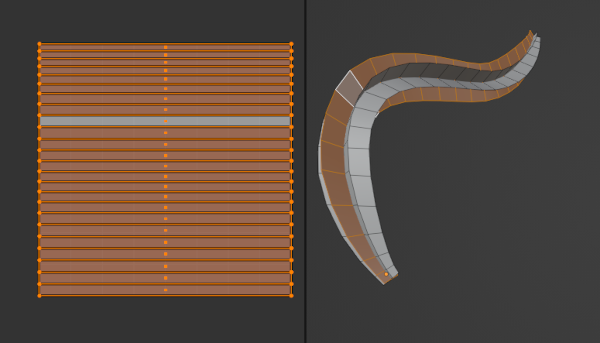
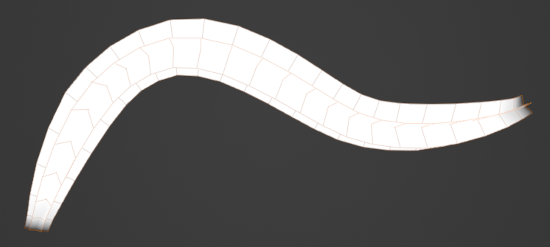
We also need to paint the end vertices of the mesh. This will be useful to fade in and fade out the texture scrolling later on.
Texture Creation
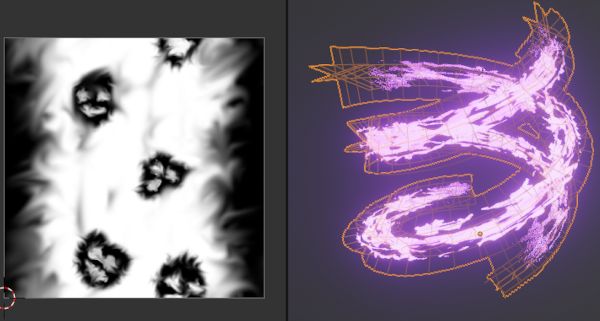
Let's make a simple texture for the magic beam. We will create a grayscale texture. Colour will be given later using either the shader or the particle system. The black part of the texture will act transparent.
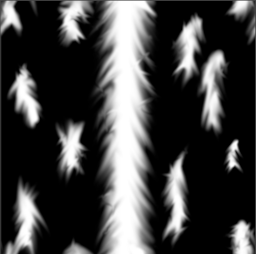
I painted some lines with a smooth brush and used the smudge tool to distort the lines. To remove the seam, use Shift + Ctrl + O in GIMP to offset the image and paint over the seams.
Texture can easily be swapped as the effect desires, even after the effect is done. So, let's just use a simple one for now and tweak it later on as needed.
Shader Creation
The shader will use the image texture created earlier and scroll it along the mesh UV. We will also give some smoothness to the end and beginning of the effect and give it a colour and some glow.
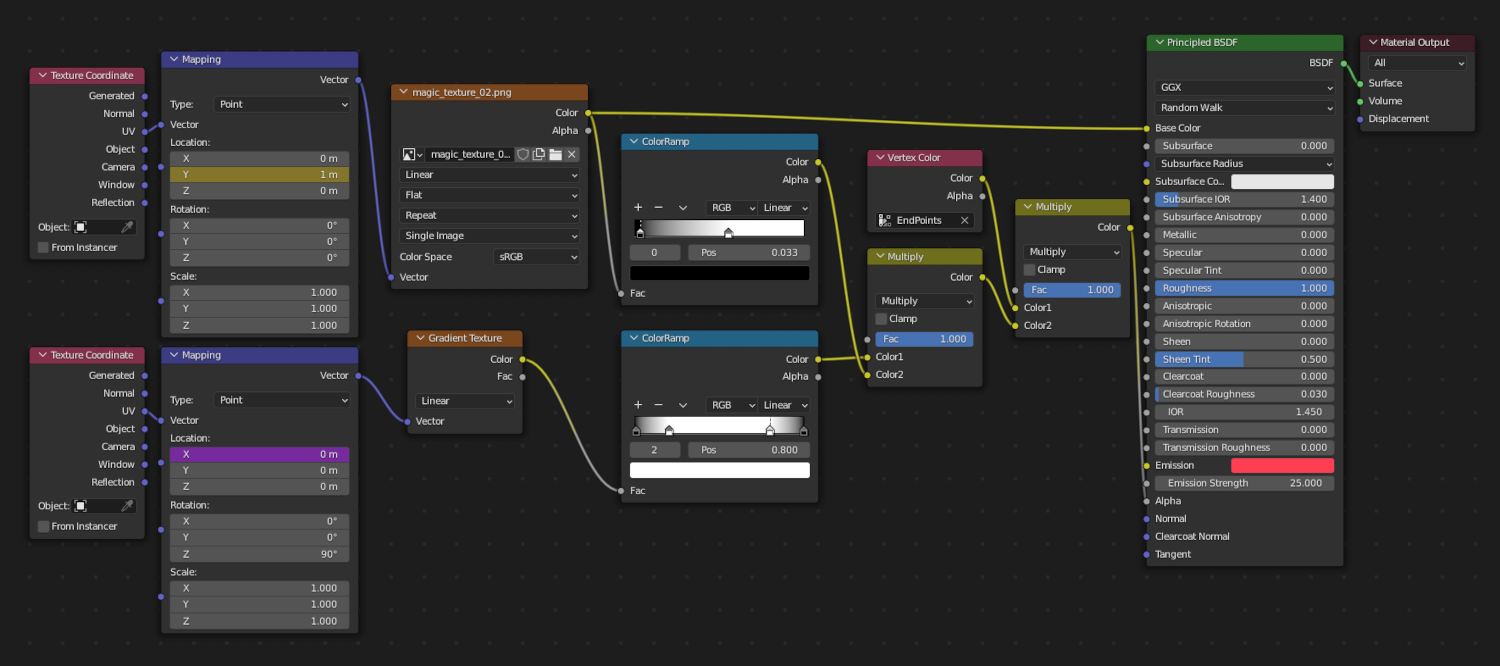
Scrolling is done by animating the y-axis of the magic beam texture. The vertex colour is used to smooth out the effect along the edge of the mesh.
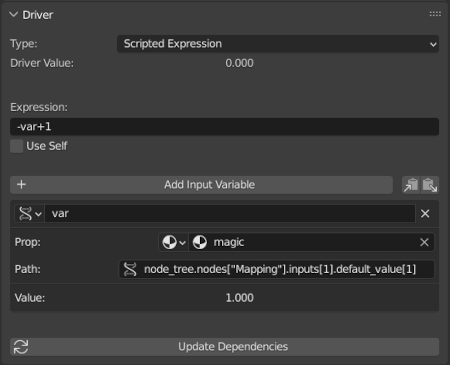
A gradient texture is mapped along the mesh, and the scrolling of this texture is done by using a driver that references the y-axis animation of the magic beam image texture. This will remove harsh lines from both ends of the scrolling texture image.
We can replace the mask made using vertex colour with another gradient texture that won't scroll. However, using vertex colour as a mask gives us more flexibility on parts of the mesh we want to make more or less visible.
Final Effect and its Differences
You can check the differences between different settings.
The version with edge masking:

The version without any masking:

The version with texture mode set to repeat:
The version with emission texture set to gradient:

Feature Modifications
The base effect is now done. We can now easily modify the effect's shape, texture, speed, and colour to get interesting results.
Here is one such effect created using similar steps:

This version was created by changing the effect's curve, texture, and colour.
Conclusion
Real-time VFX usually consists of anticipation, attack, and impact. We have created the attack part of the magic beam VFX.
In the next part, we will create the anticipation and impact effect. We will also export the effect to the Unity engine and set it up there.
Thank you for reading. To keep up with another section of this blog, subscribe using the buttons below.