
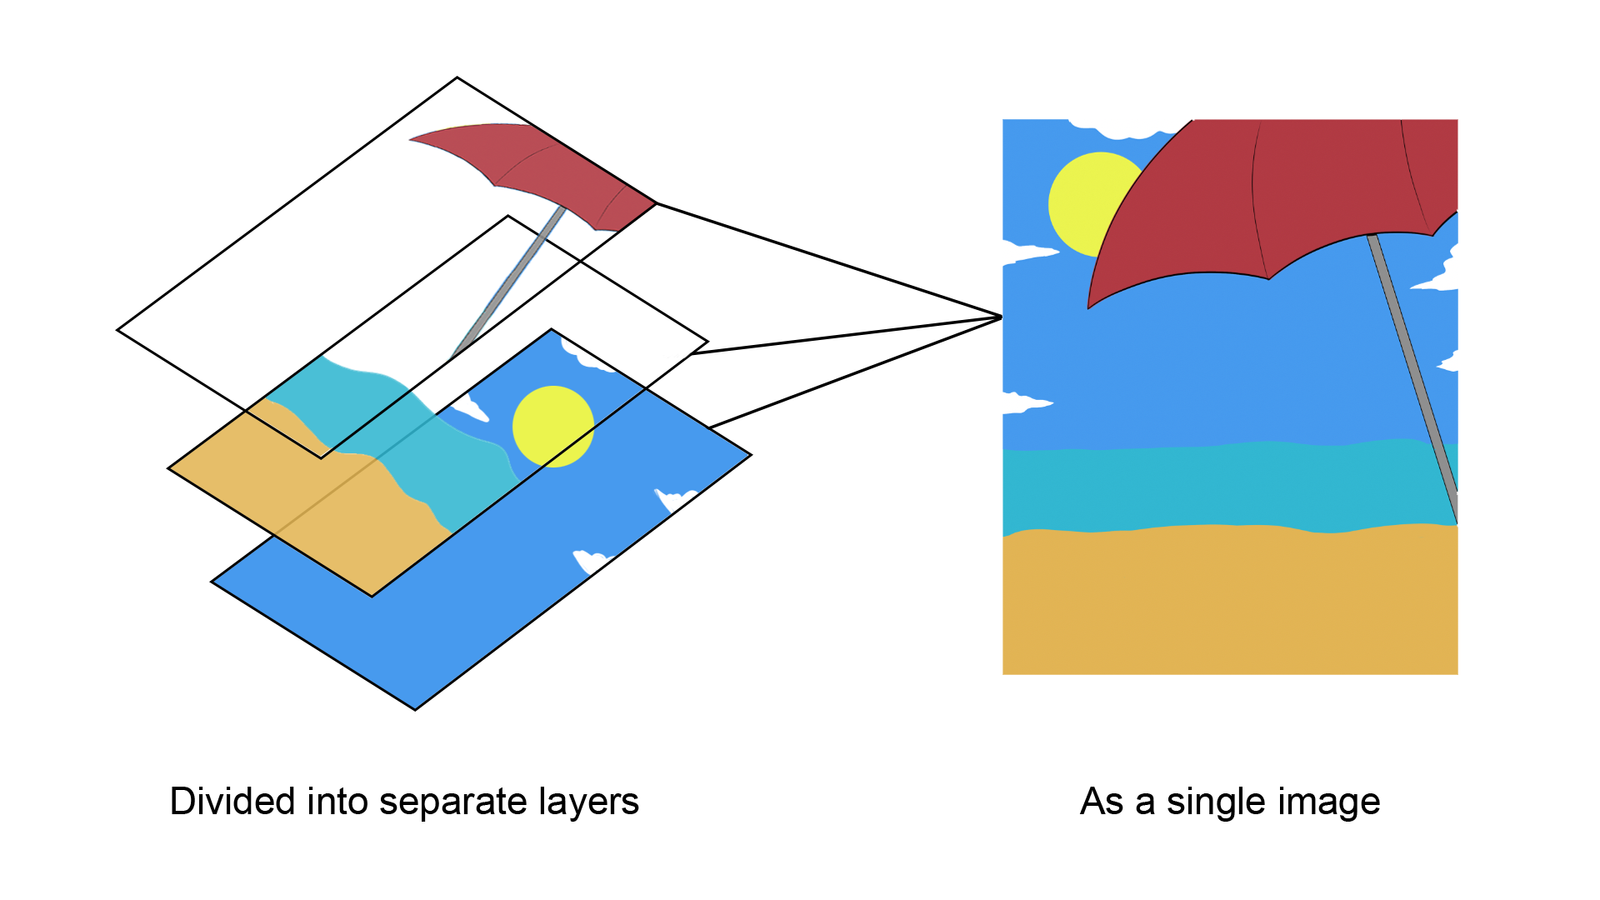
Layers are like pieces of transparent paper stacked on top of each other. The content on the top layer will always appear in front of other layers. You can draw or place images on each one separately and see them combined as a single image. You can see through the transparent areas of the layer to see the content of the lower layers. They help you to composite images by combining different contents like images, text and shapes, and also adjust each of them in various ways.
Creating content in separate layers also helps to create non-destructive and reversible work. If you want to change a part of it, you can just delete the layer. There are many types of layers but they all fall under two categories.
- Content Layers: These layers include objects like text, images and vector shapes.
- Adjustment Layers: These layers do not include any object but instead affect the layers below it. They are non-destructive as they do not change the image’s actual pixels. They are used to change the brightness, contrast, levels or colors of the image. More about this will be explained in future blogs.
This guide about Photoshop is for beginners. Every Photoshop document works with layers and it is important to know what you can do with them to use the software properly. I will explain the buttons and options in the Layers panels so you can work with Layers.
Layers Panel
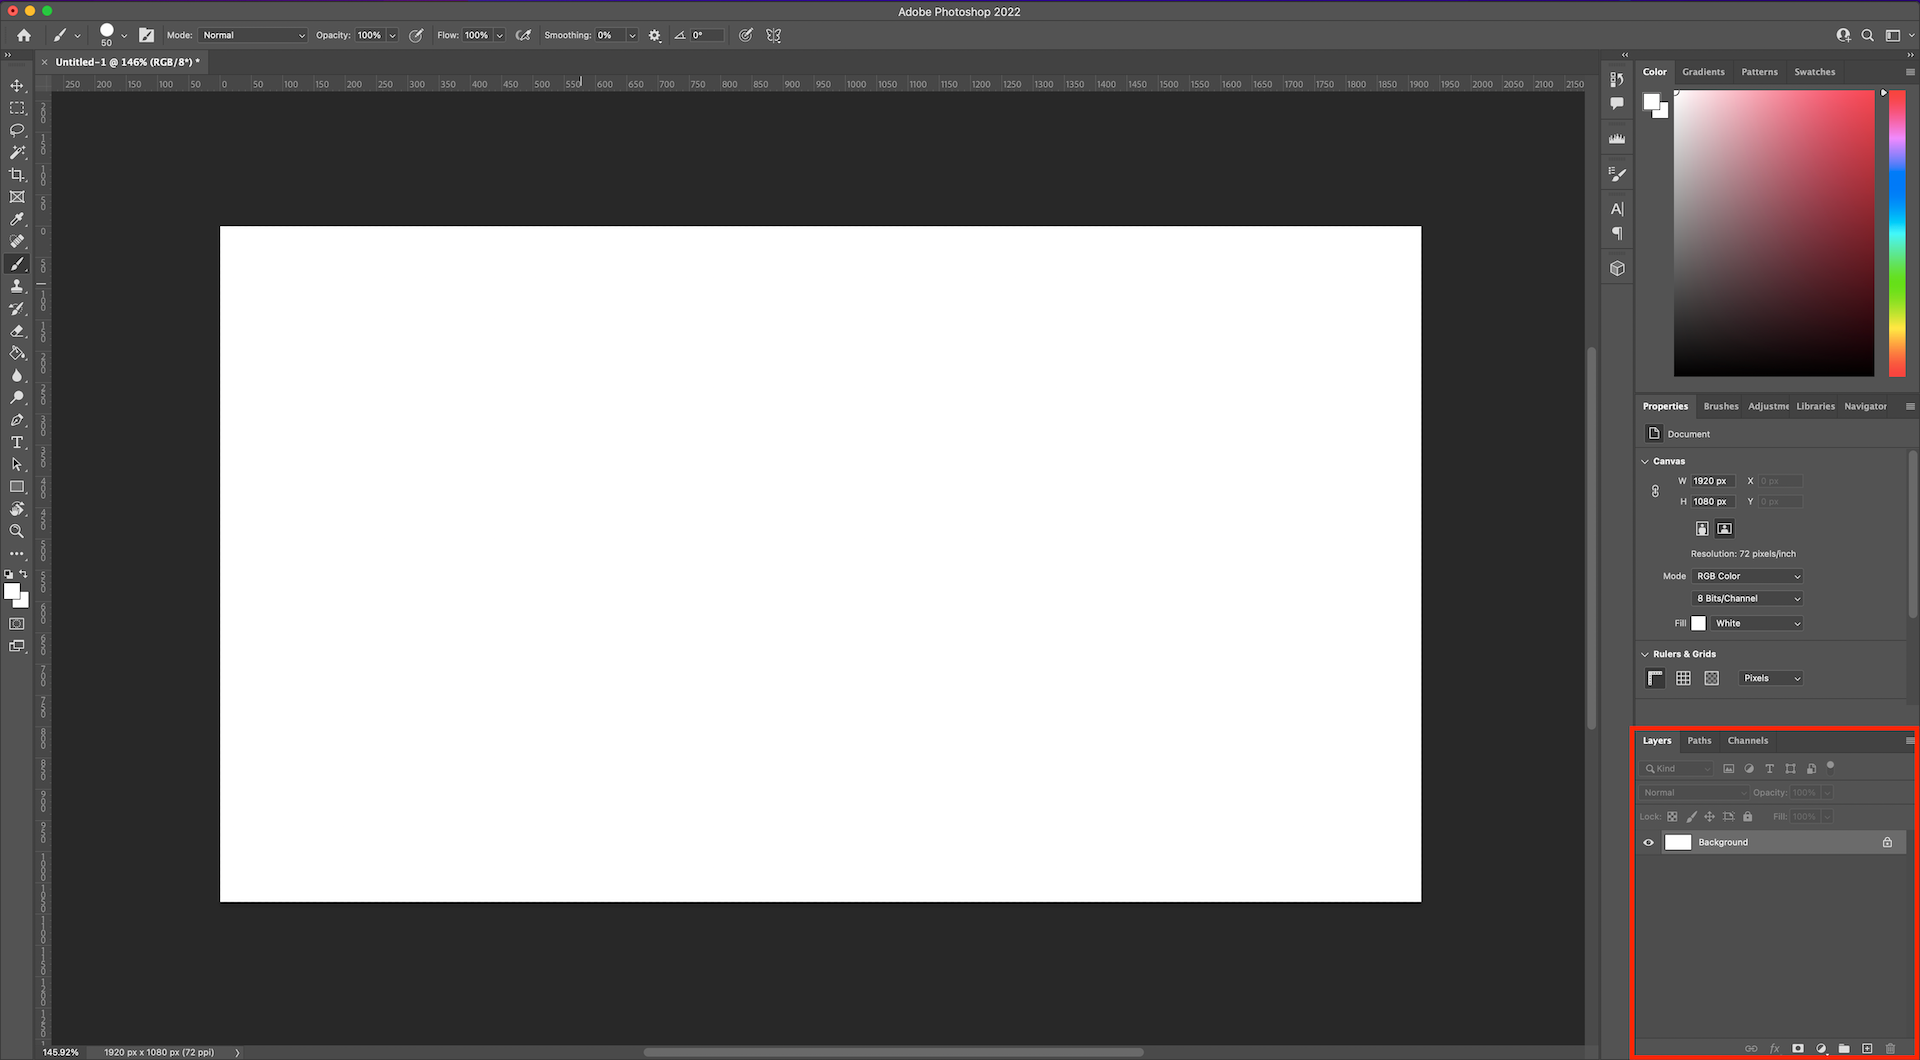
When you create a new document, you are greeted with a Background layer that will be locked. You can see the layer in the Layers Panel on the bottom right area of the screen by default.
You won’t be able to move the Background layer with the Move tool or paint on it without unlocking it.
- Unlock it by simply clicking the lock icon beside the name of the layer.
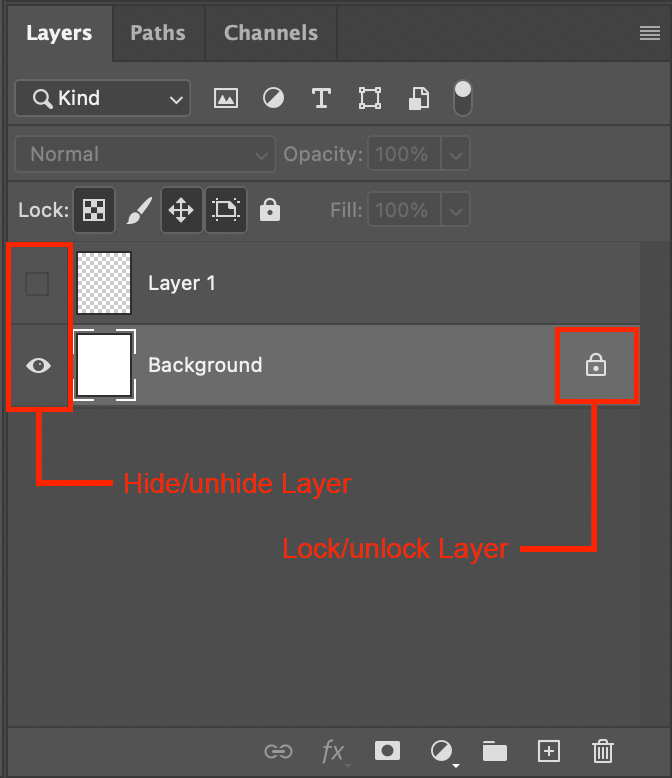
Making layers visible and invisible
If you had created a new layer on top and added content to it but wanted to check what was on the layer below it, you can simply hide the layer. You do not have to delete it.
- Click on the eye icon on the left of the layer name to hide it. If the eye icon is there, the contents on that layer will be visible and if it is not there, the contents will be invisible.
- If you had hidden a layer and want to make it visible again, click on the empty square on the left and the eye symbol will reappear.
If the Layers panel is not visible in your Photoshop document, click on the Window tab and check if Layers is tick marked.
- If it is not marked, click on it to activate it.

Creating and duplicating layers
You can create many layers in a single document but the number of layers is limited by the computer’s memory.
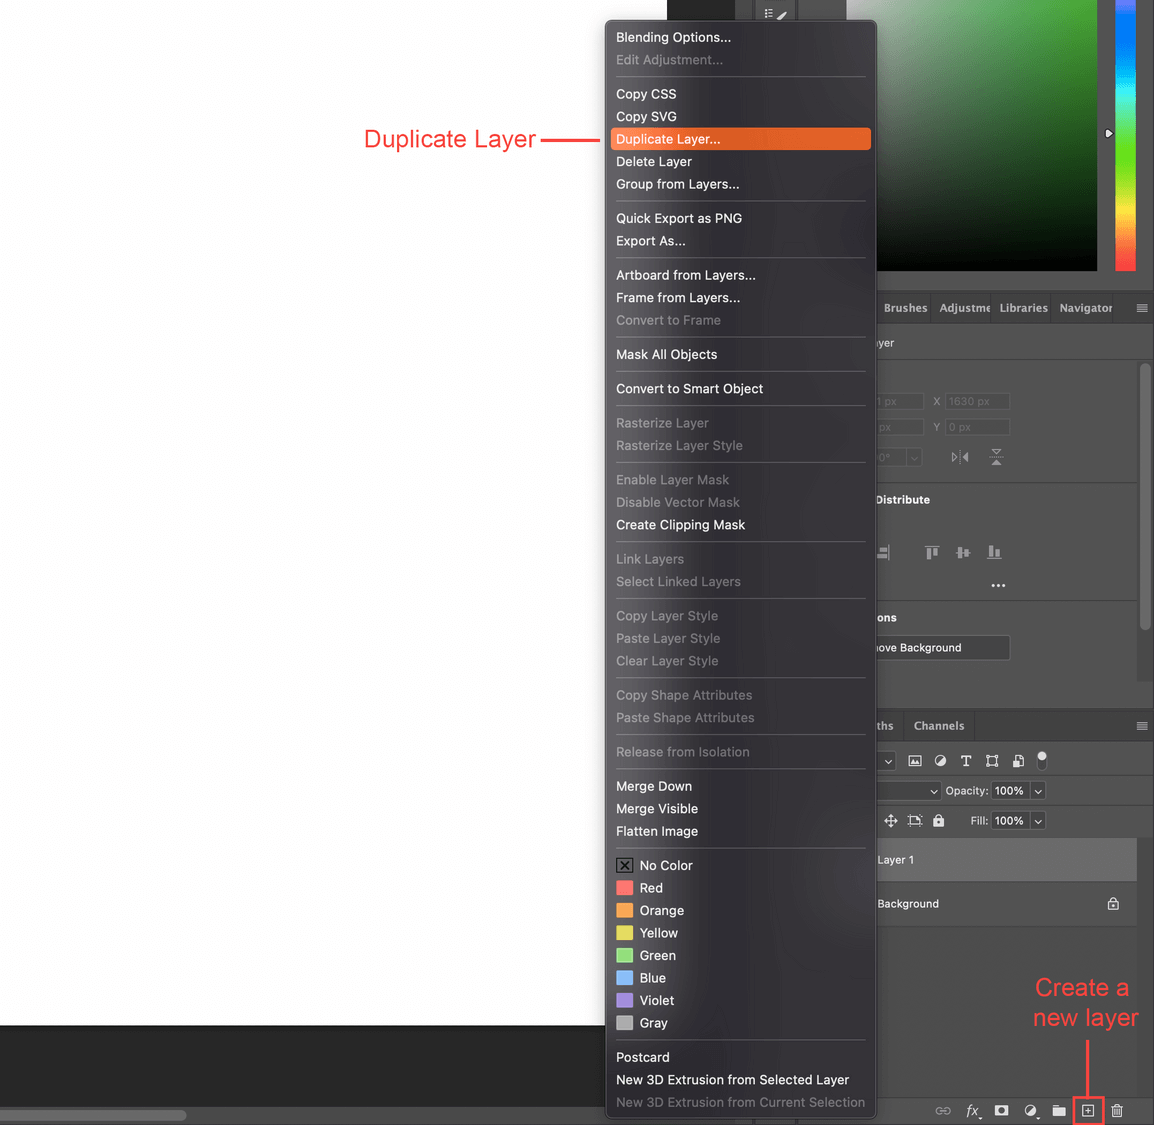
- Click on the Create a New Layer button to add layers to your document. The button is located on the bottom right of the Layers panel.
You can duplicate a layer in two ways.
- Click on the layer you want to duplicate. Hold Alt (PC) or Option (Mac) and drag the layer above it.
- Another way is by right-clicking on the Layer and clicking on Duplicate Layer.
Merging Layers
You can merge multiple layers to create one layer. This change is irreversible so you might want to do it after you are sure that you will not need to edit the separate layers again. This helps to de-clutter the workspace and to make the file size manageable. It is also easier to apply effects to a combined layer instead of giving the same effect of multiple layers.
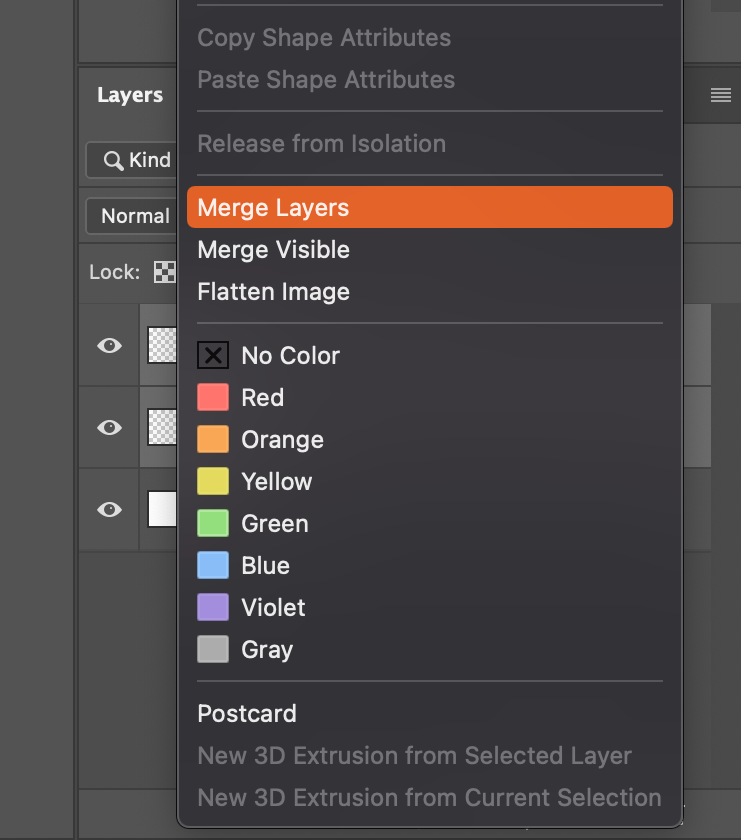
- Select the multiple layers by holding Shift. Then Right-click to open a drop-down menu to select Merge Layers.
Locking layers and Fill slider
As mentioned above, when opening a new black document, the default layer will be locked. You can unlock it by simply clicking the lock icon beside it. Locking a layer makes it impossible to move or make any changes to pixels of that layer.
- To lock a layer, click on the lock icon on the Layers panel which will lock all the content of that layer.
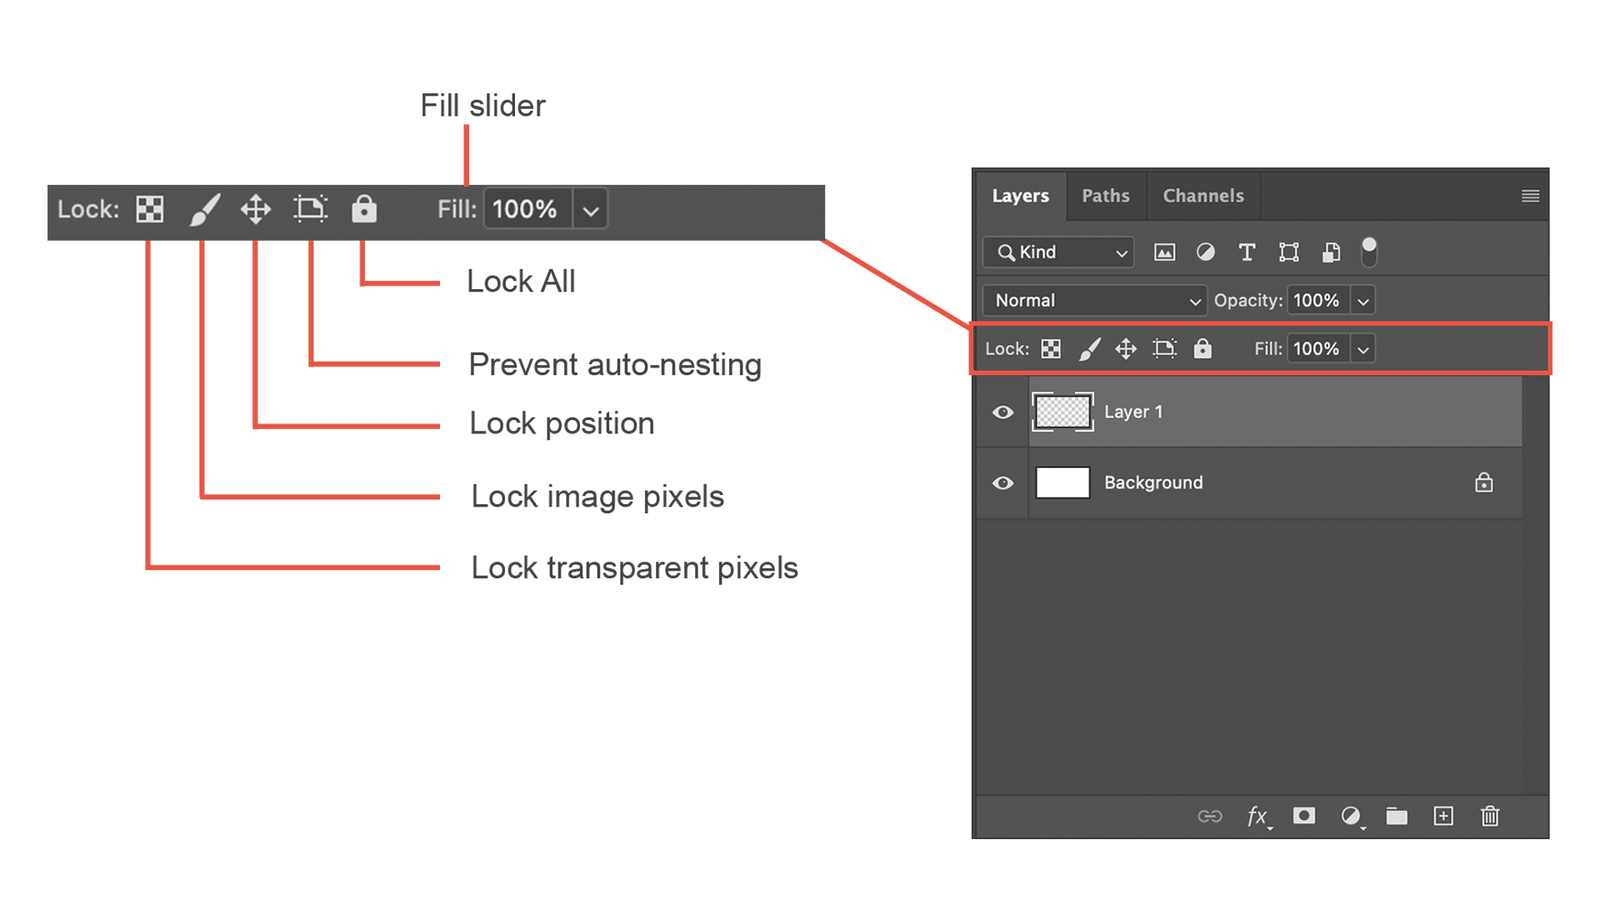
You can also lock certain attributes of a layer from the Layer panel.
- Lock transparent pixels: This will only lock the transparent area of the layer. If you blur the content of the layer, the blurred effect won’t bleed over the transparent area. It ensures that the transparency of the layer is the same no matter what effects are added to that layer. Anything drawn on it will not affect the empty transparent area. It can be used similar to layer masking but this is an irreversible process since it affects the existing pixels of the object even if you cannot draw on the transparent area.
- Lock image pixels: You will not be able to add or subtract the pixels of that layer by using painting or erasing tools. But you will still be able to increase or decrease the size of the content inside it.
- Lock position: This is the opposite of Lock image pixels. You will be able to paint on it but you won’t be able to move it or change its size.
- Prevent auto-nesting into and out of Artboards and Frames: Activating this will lock the layer from automatically nesting to an Artboard when moving the object inside it. Locking a layer inside an Artboard will prevent it from going into other Artboards and make them invisible there.
- Lock all: This has an effect on all the buttons mentioned above. It locks the entire layer and disables you from doing anything to the layer.
- Fill slider: Moving this slider will change the transparency of the objects filling that layer but will ignore all effects applied to it.
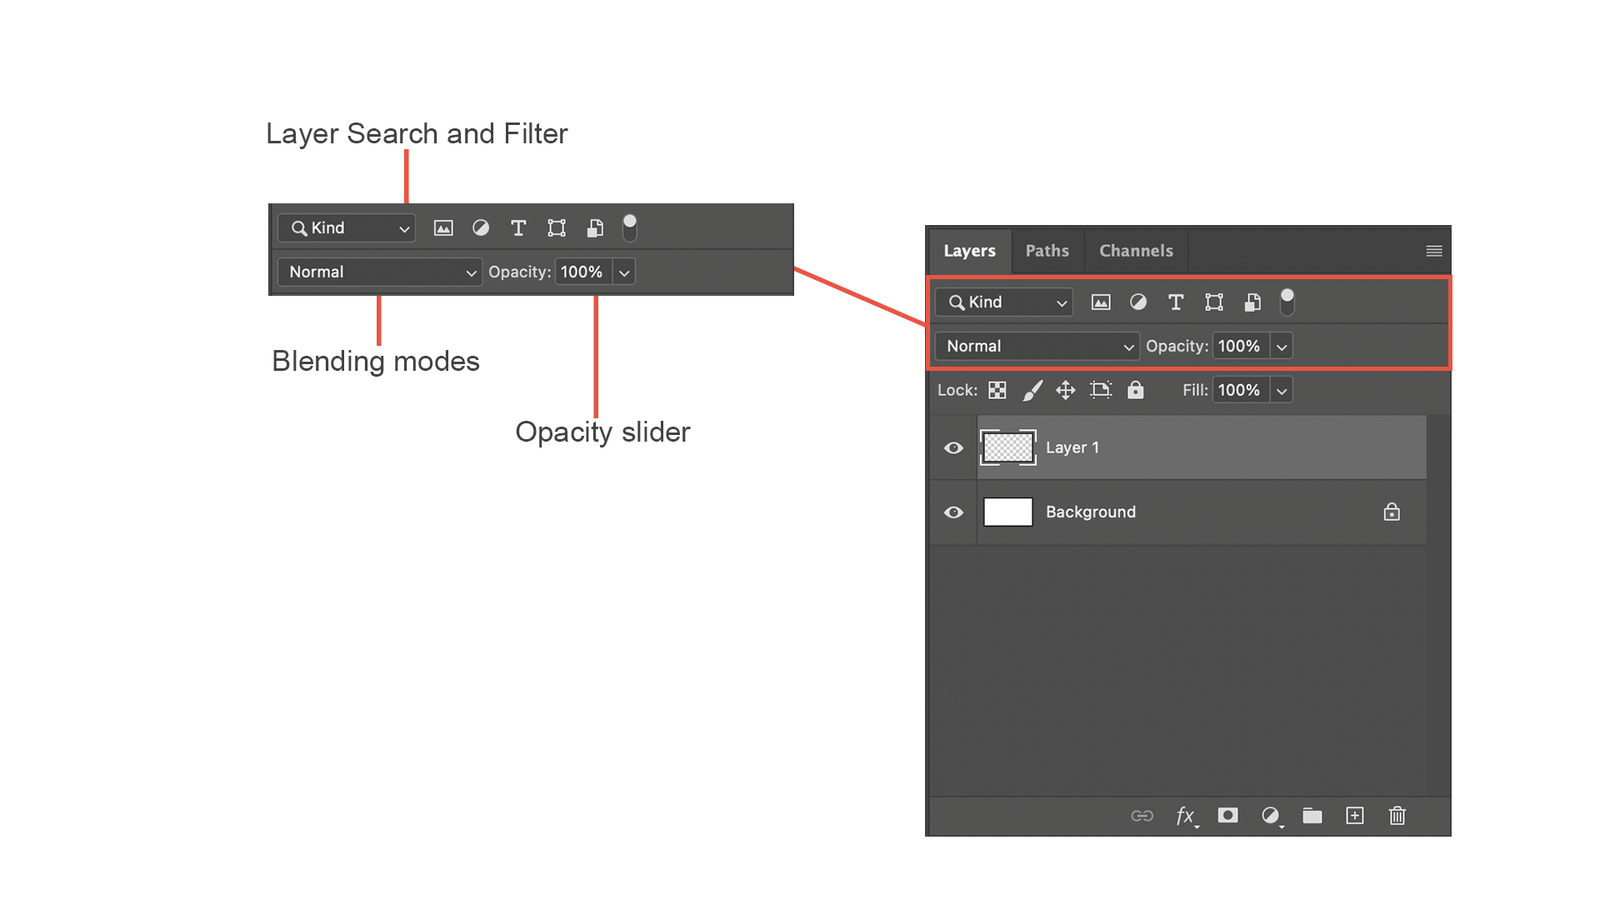
- Layer search and filter: This bar of buttons is used to sort and find specific layers through various filters like name, kind, effect, mode, attribute, color, smart object, selected and Artboard. If you are working with many layers and have renamed them clearly in order, this will be helpful to find and work on those layers.
- Blending modes: You can change the blending mode of a layer to create different effects. You can read my other article on Blending mode for Digital Artists where I explained how to use some of them while painting in Photoshop.
- Opacity Slider: Move the opacity slider to increase or decrease the opacity of the contents of that layer. Unlike the Fill slider, this will change the transparency of everything in the layer including the effects added to it.
Now for the lower section of the Layers Panel:

- Link Layers: Select multiple layers and then click on this button. A chain icon will appear beside the layers and they will be linked together. This helps to move and transform multiple layers at the same time.
- Add a layer style: This button will open a drop-down menu with which you will be able to add effects to your layer like shadow, bevel, glow, gradient, patterns and more.
- Add layer mask: This will help to edit the layer by hiding parts of it. This process is explained in another blog Guide to Layer Masks in Photoshop.
- Create new fill or adjustment layer: This will create a solid, gradient or pattern-filled layer. It will also help to create adjustment layers to change the brightness, hue, color balance and other attributes of the layers below it.
- Create a new group: This will create an empty folder. You can select and drag layers inside it. To create a group of existing layers, select the layers and then click on this button.
- Create a new layer: This will create a new layer above the layer you are currently working on.
- Delete layer: This button will delete the selected layer or group.
Thank you so much reading this blog. See you in the next one.