
A Layer Style is an effect applied to a layer or group of layers. You can add a variety of effects to layers and layer groups in Photoshop like shadows, bevels, a stroke, glow (and more) to make an image appear 3D. These effects are applied in a non-destructive way which can be simply deactivated or deleted without affecting the actual image.
Although they can be drawn in and manually coloured in the layer, to make it appear more realistic, we need knowledge about how light falls on objects and the position of shadows and highlights. The good news is that Photoshop will make the proper calculations for you and apply effects like shadows and glow with just a click of a button. By using several effects at once, you can make do a lot of interesting stuff.
The Layer Style Dialogue Box
We can apply Layer Styles in 3 ways.
- From the Layers tab, click on Layer Style and select any of the effects to open the Layer Style dialogue box.
- Open the dialogue box by right-clicking the layer. Then, click on Blending Options.
- Or, simply double-click the layer on the layers list.
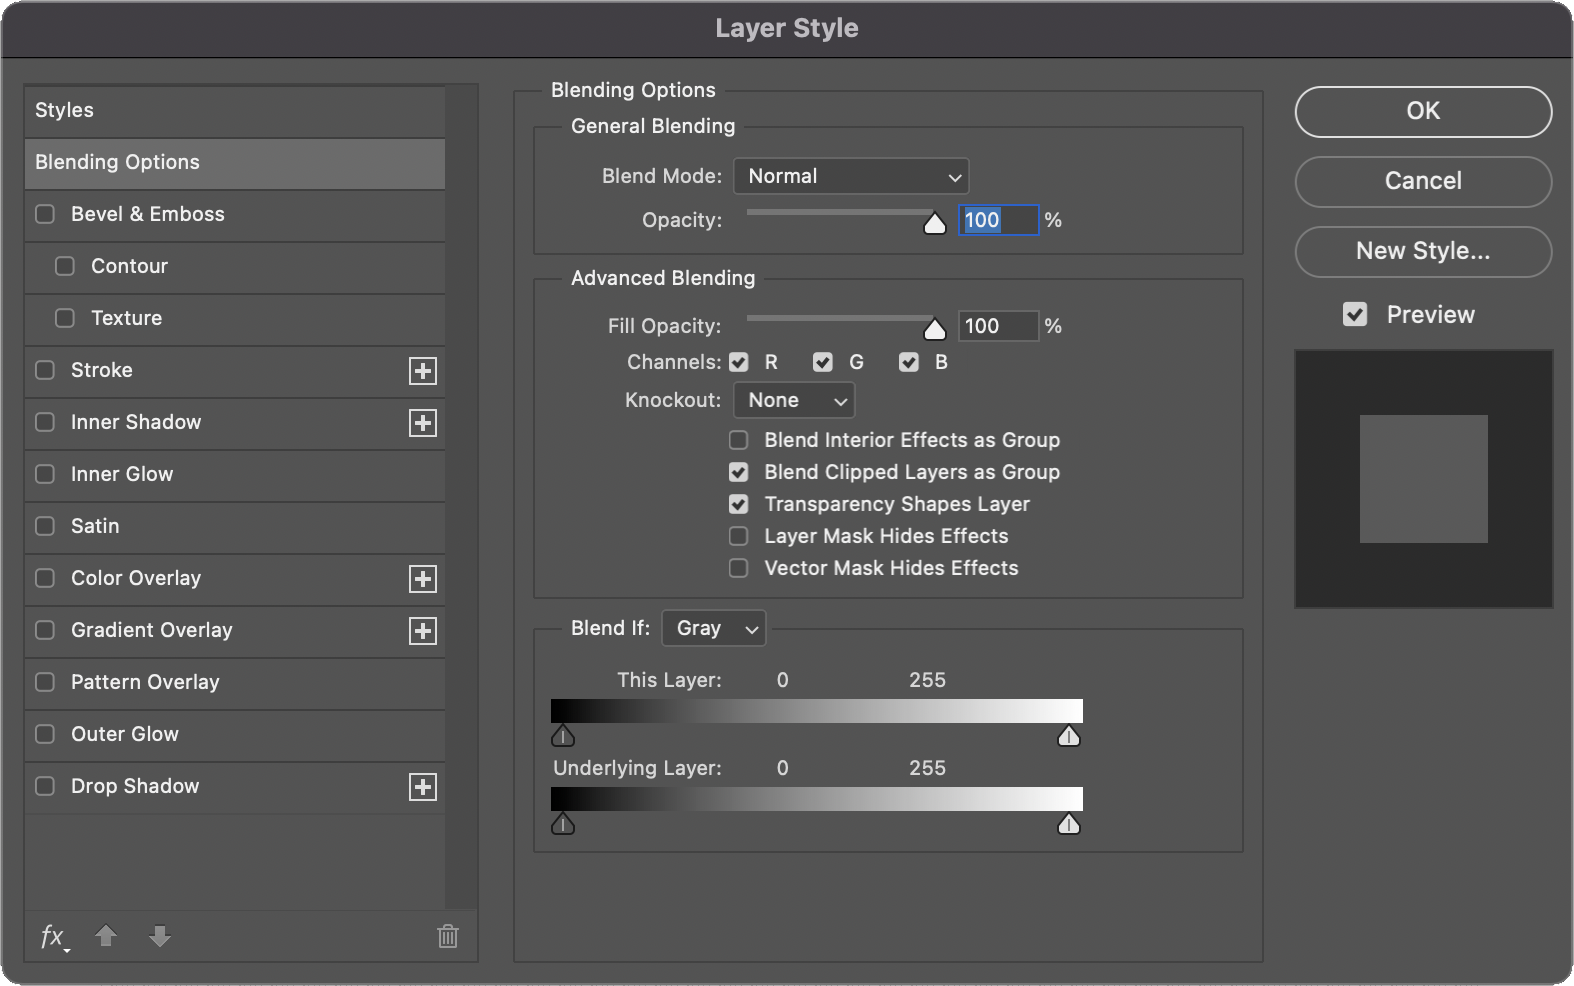
In the dialogue box, you have access to 12 effects. I shall explain in short what you can do with each of these effects.
- Styles has style presets like natural, fur and fabric. You can change the options to get the desired effects.
- Blending Options mixes the selected layer and the layer below them by altering their colour and luminosity. I've explained more in detail in Blending Modes for Digital Artists.
- Bevel & Emboss will add highlights and shadows to give a 3D feel. This effect is very useful for making buttons.
- Stroke outlines the contents of a layer using colour, gradients or patterns. You can add the stroke effect to the inside, outside, or the centre of the layer edge.
- Inner Shadow makes the edges of the layer's contents drop a shadow inside itself, which can make the objects look sunk or pressed inside the image.
- Inner Glow adds a blurred light effect on the inside edges of the layer's contents to make it appear as if it's glowing. You can change its colour, opacity, noise, size, quality and blend mode.
- Satin adds a glossy fabric-like texture to the objects in the layer.
- Colour Overlay completely fills the contents of the layer with the colour of your choice.
- Gradient Overlay works like the colour overlay, but instead, it completely fills the contents of the layer with the gradient colour of your choice. You can pick gradient presets from the default library and change their angles and scale.
- Pattern Overlay works like the colour overlay, but instead, it completely fills the contents of the layer with a pattern. You can pick pattern presets from the default library and change their angles and scale.
- Outer Glow is the same as Inner Glow but it affects the outer edges instead of the inner ones.
- Drop Shadow adds a shadow behind the objects of a layer. You can change the angle, distance, spread, size and quality of the shadow.
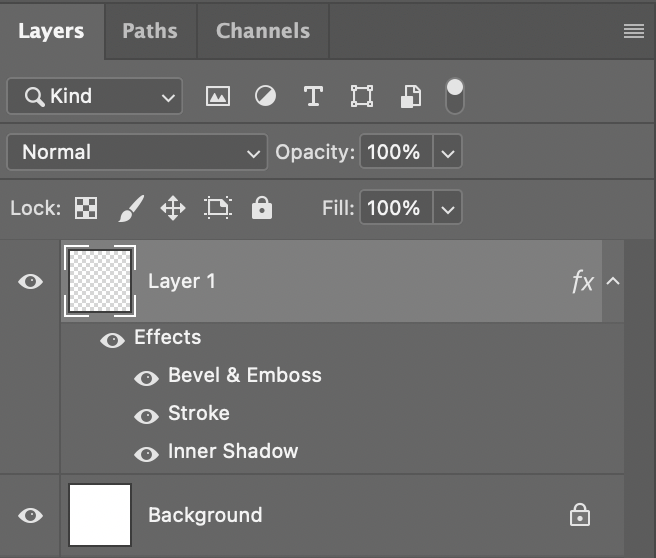
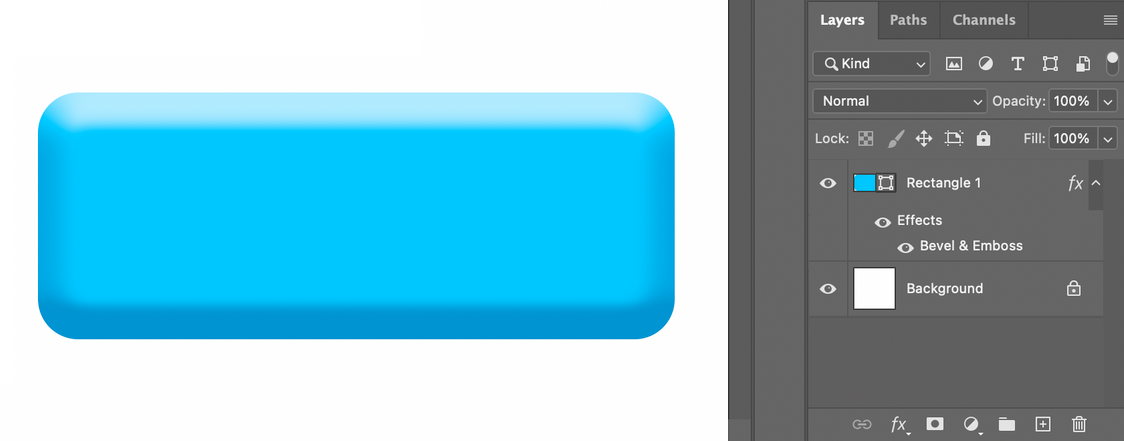
After we have applied the style, the effects will be listed below the Layer name. You can hide/unhide them by clicking on the Eye symbol.
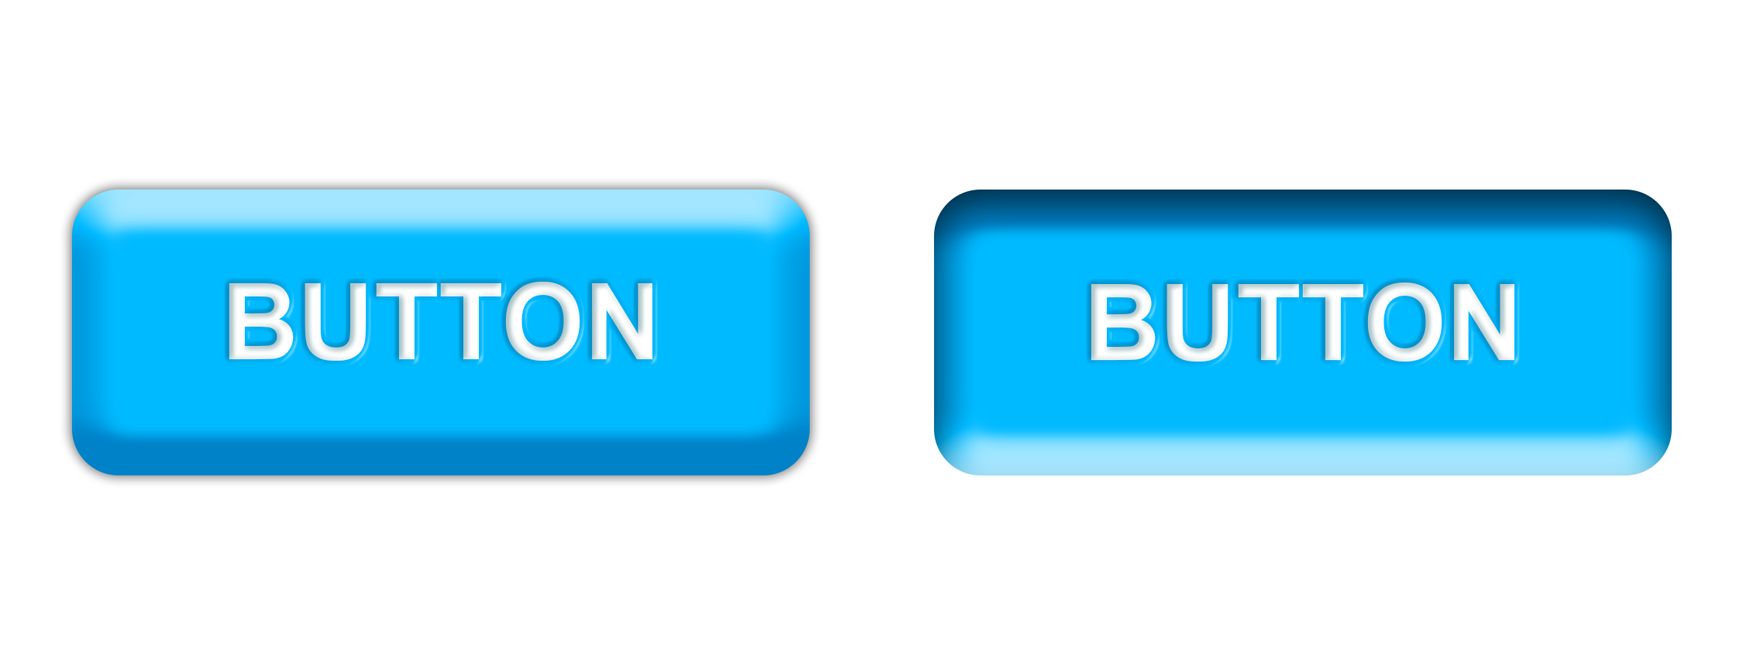
With this knowledge, we can use these Layer Styles to create a button and stylized text.
Creating button with Layer Style
First, create a New Document after opening Photoshop.
Step 1: Setting up the Shape
Use the Rectangle Tool From Toolbar on the left and drag your mouse inside the document to create a rectangle or square. You can also press U to switch to Rectangle Tool.
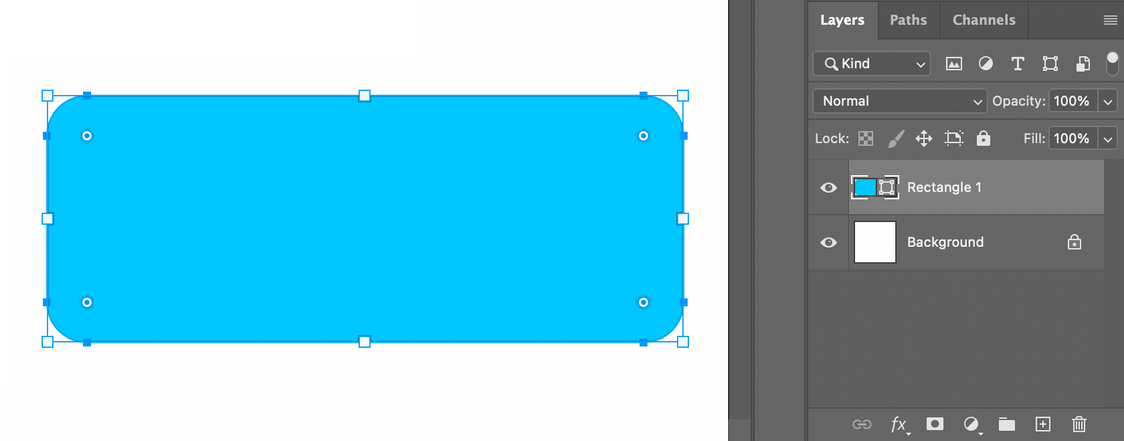
From the top bar, you can fill the rectangle, change stroke thickness, the roundness of its edges and other path options.
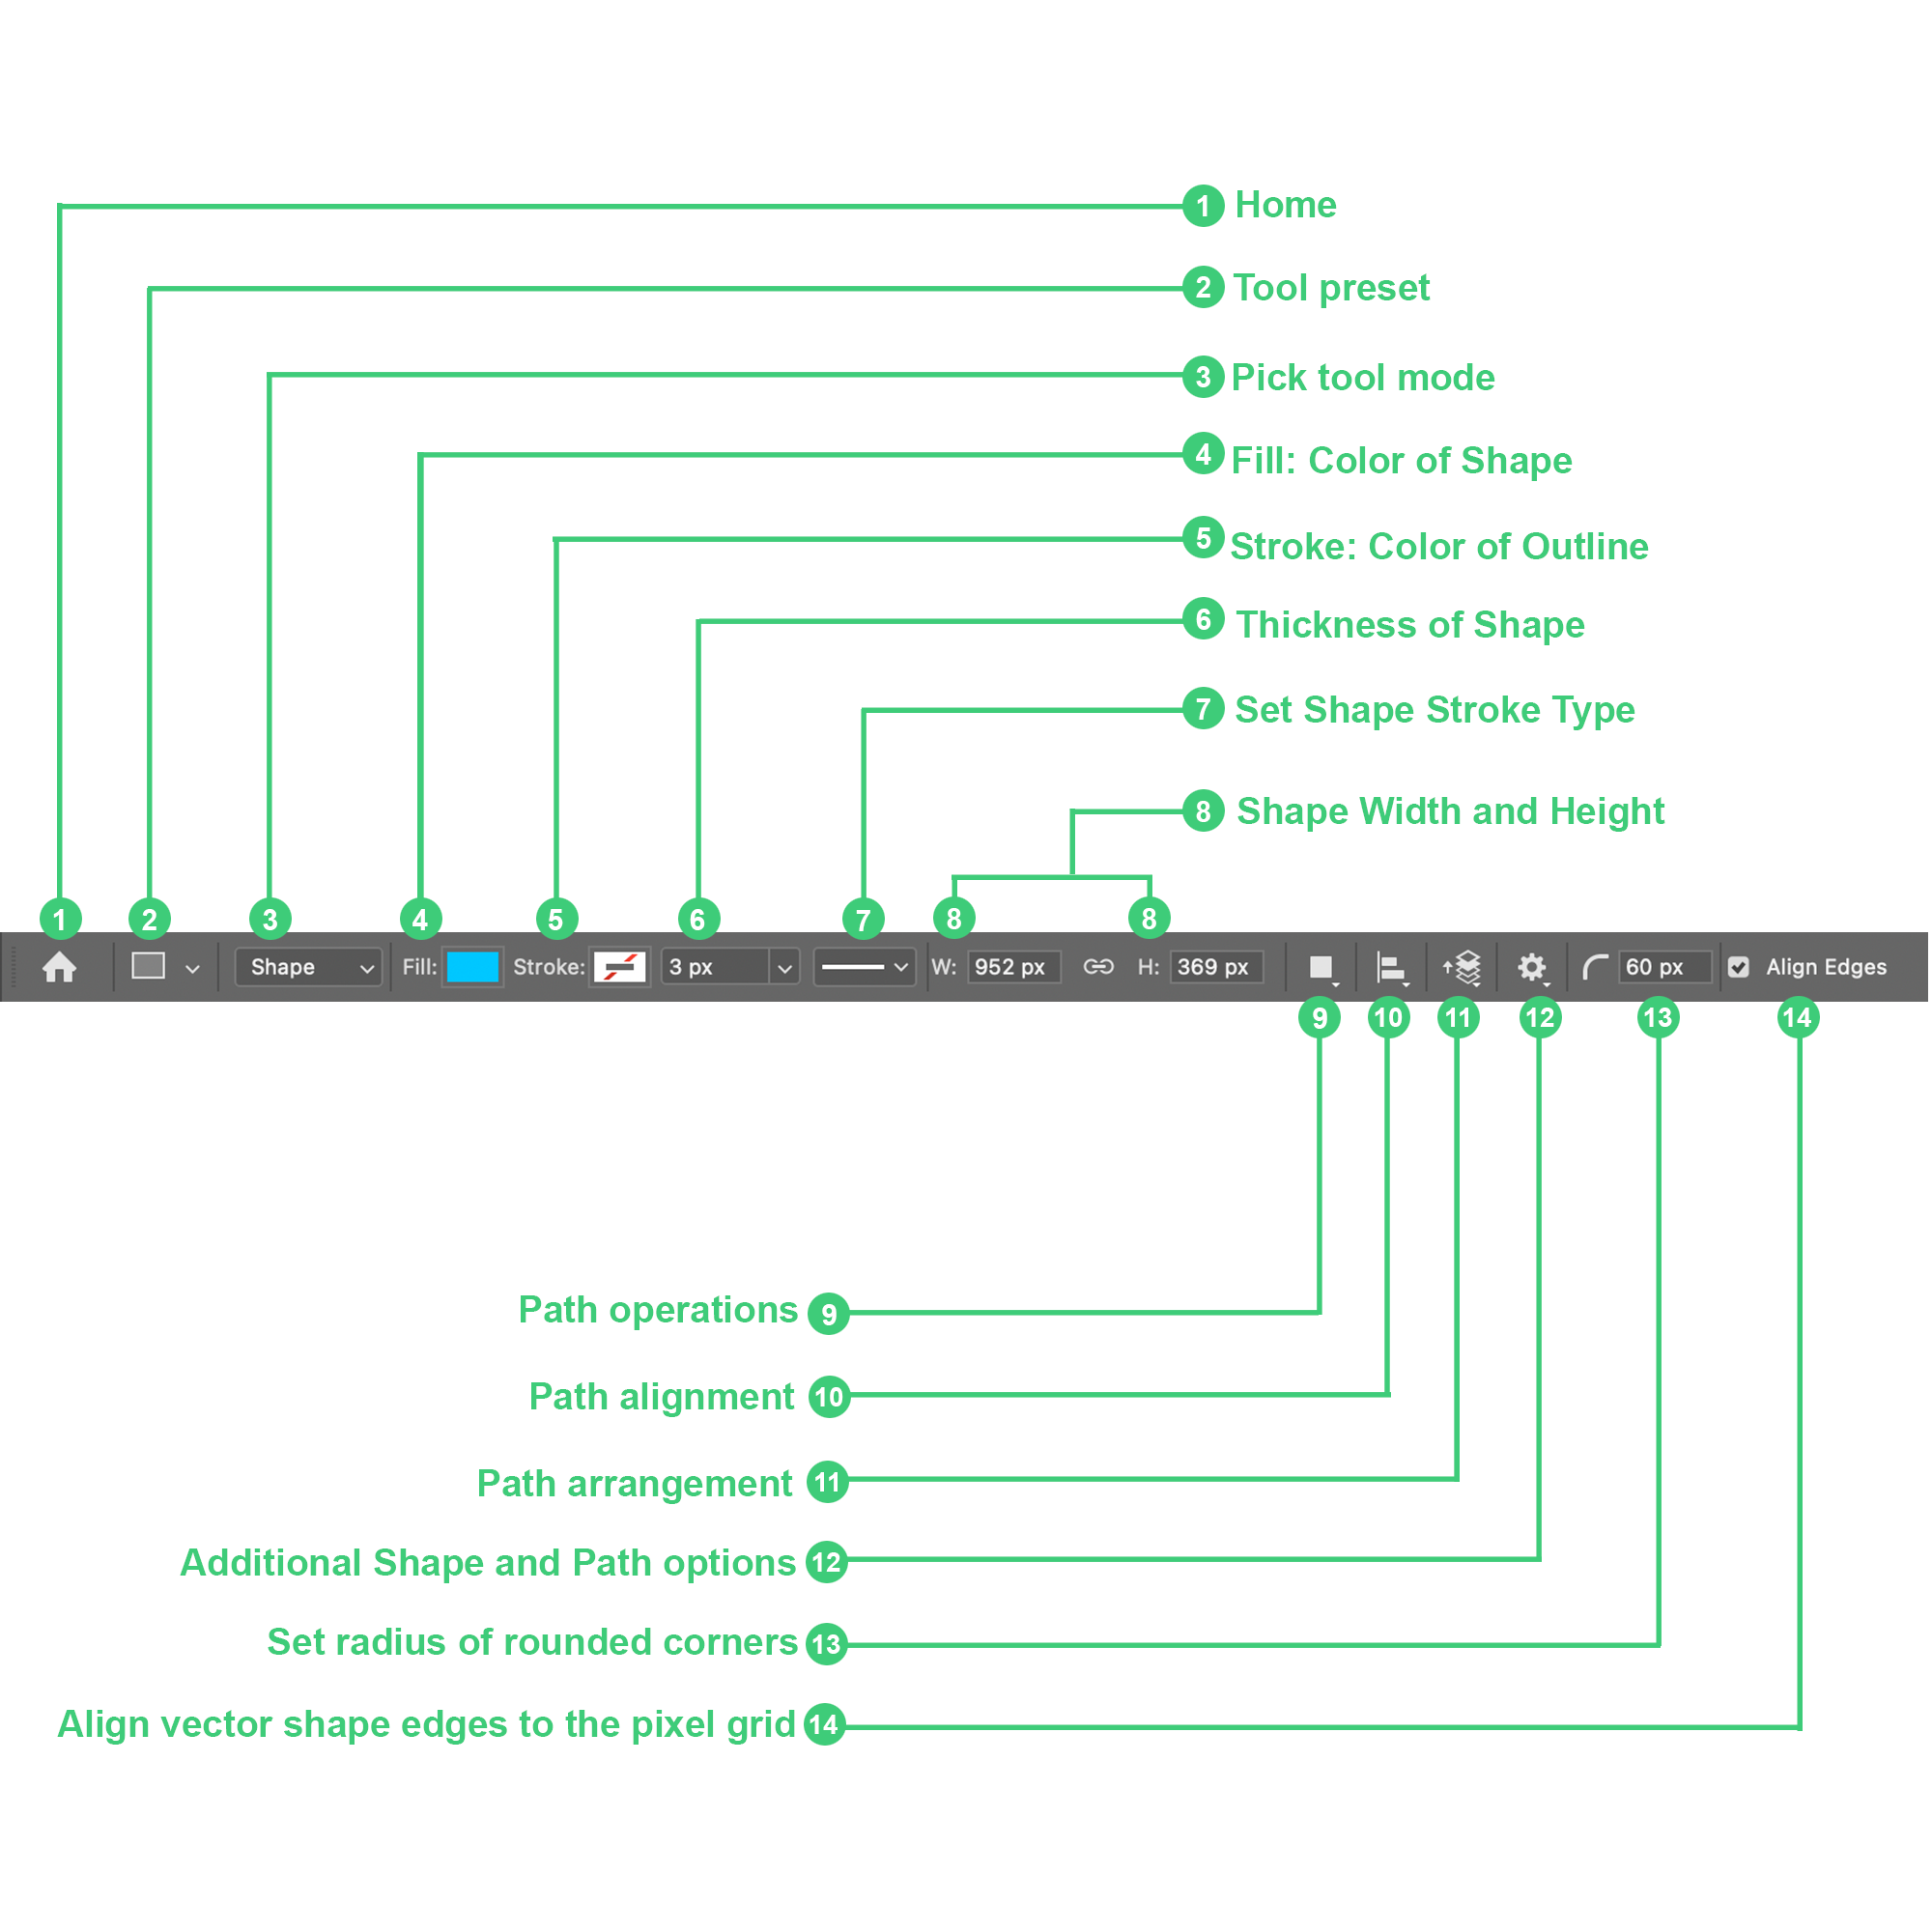
For this button tutorial, change the Fill colour to a colour of your choice and keep the Stroke > No Color.
By default, the rectangle will be a Shape. You can change it in Pick Tool mode Shape and Pixel will work for making a button.
Step 2: Adding Styles
Since we are making it appear like a 3D button, we need highlights and shadows inside the shape.
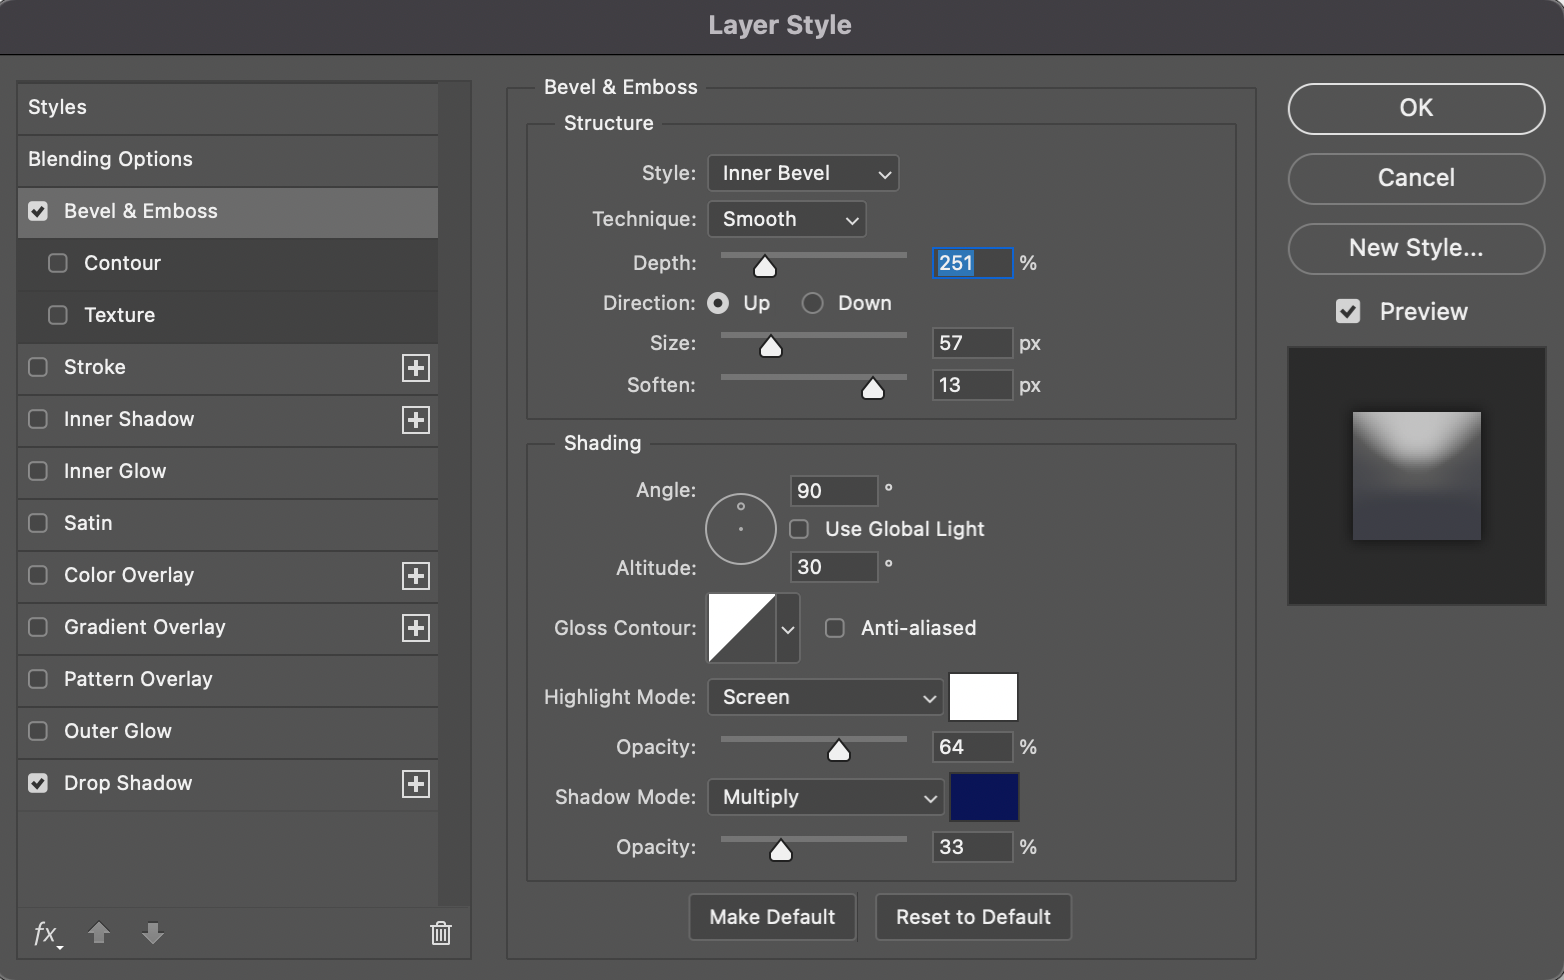
- Click on Bevel & Emboss. A tick-mark beside it means that the style is activated.
- Select Inner Bevel from the Style drop-down menu.
- In the Technique drop-down menu, pick Smooth. You can also pick Chisel Hard or Chisel soft to get desired edge effect.
- Move the Size slider to change the button's highlights and shadows. It will increase the area of the effect to make it appear 3D.
- Move the Soften slider to change the softness of the highlights and shadows.
- Change the Angle and Opacity to your liking.
You can also use Contour and Texture to get different effects for the button. The below image shows the Style options I used to make the button.
This object already appears like a button, but we can add shadows to make it look more realistic.
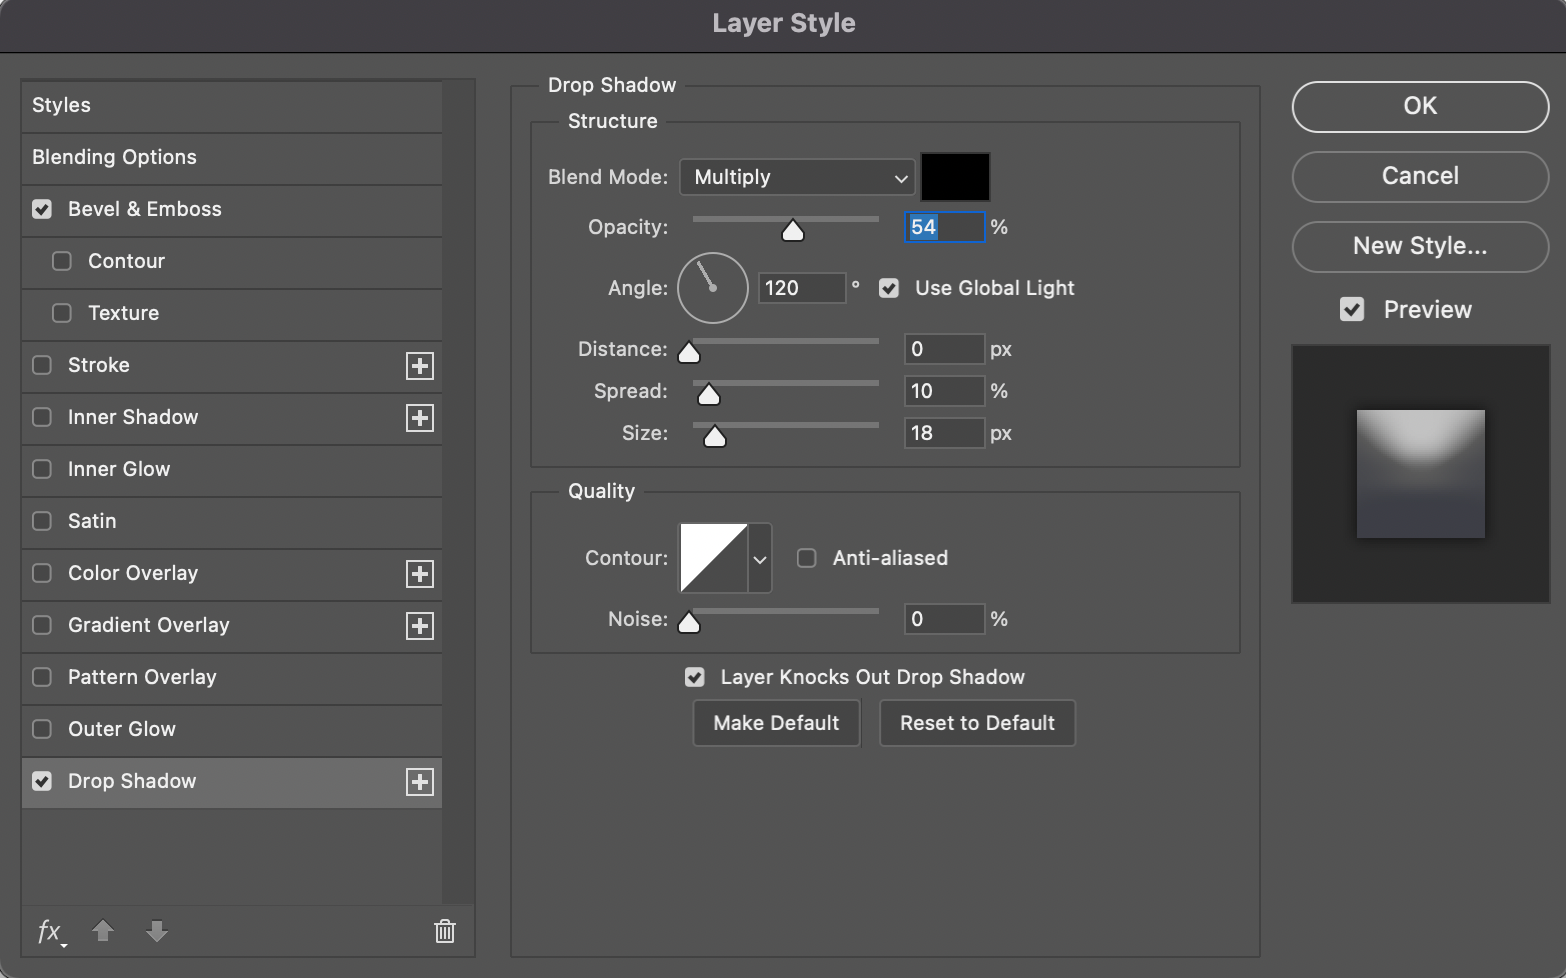
- Click on Drop Shadow to activate shadows behind the selected layers.
- Keep the Blend mode on Multiply as it will mix the colours of the shadows with the background colour.
- Change the Angle to the direction you think the light should be hitting the button.
- Move the Distance, Spread and Size slider. The Distance slider will change the area between the layer and its shadow. The Spread slider will change the surface area of the shadow. The Size slider will change the size of the shadow.
Step 3: Adding Text
The button has been created. Now let's add stylized text on top of it.
- Click on the Horizontal Type Tool from the left toolbar and click inside the empty white area of the document. Type in your desired text, eg. "Button". This will create a new text layer on top.
- Double-click on the layer to open Layer Style.
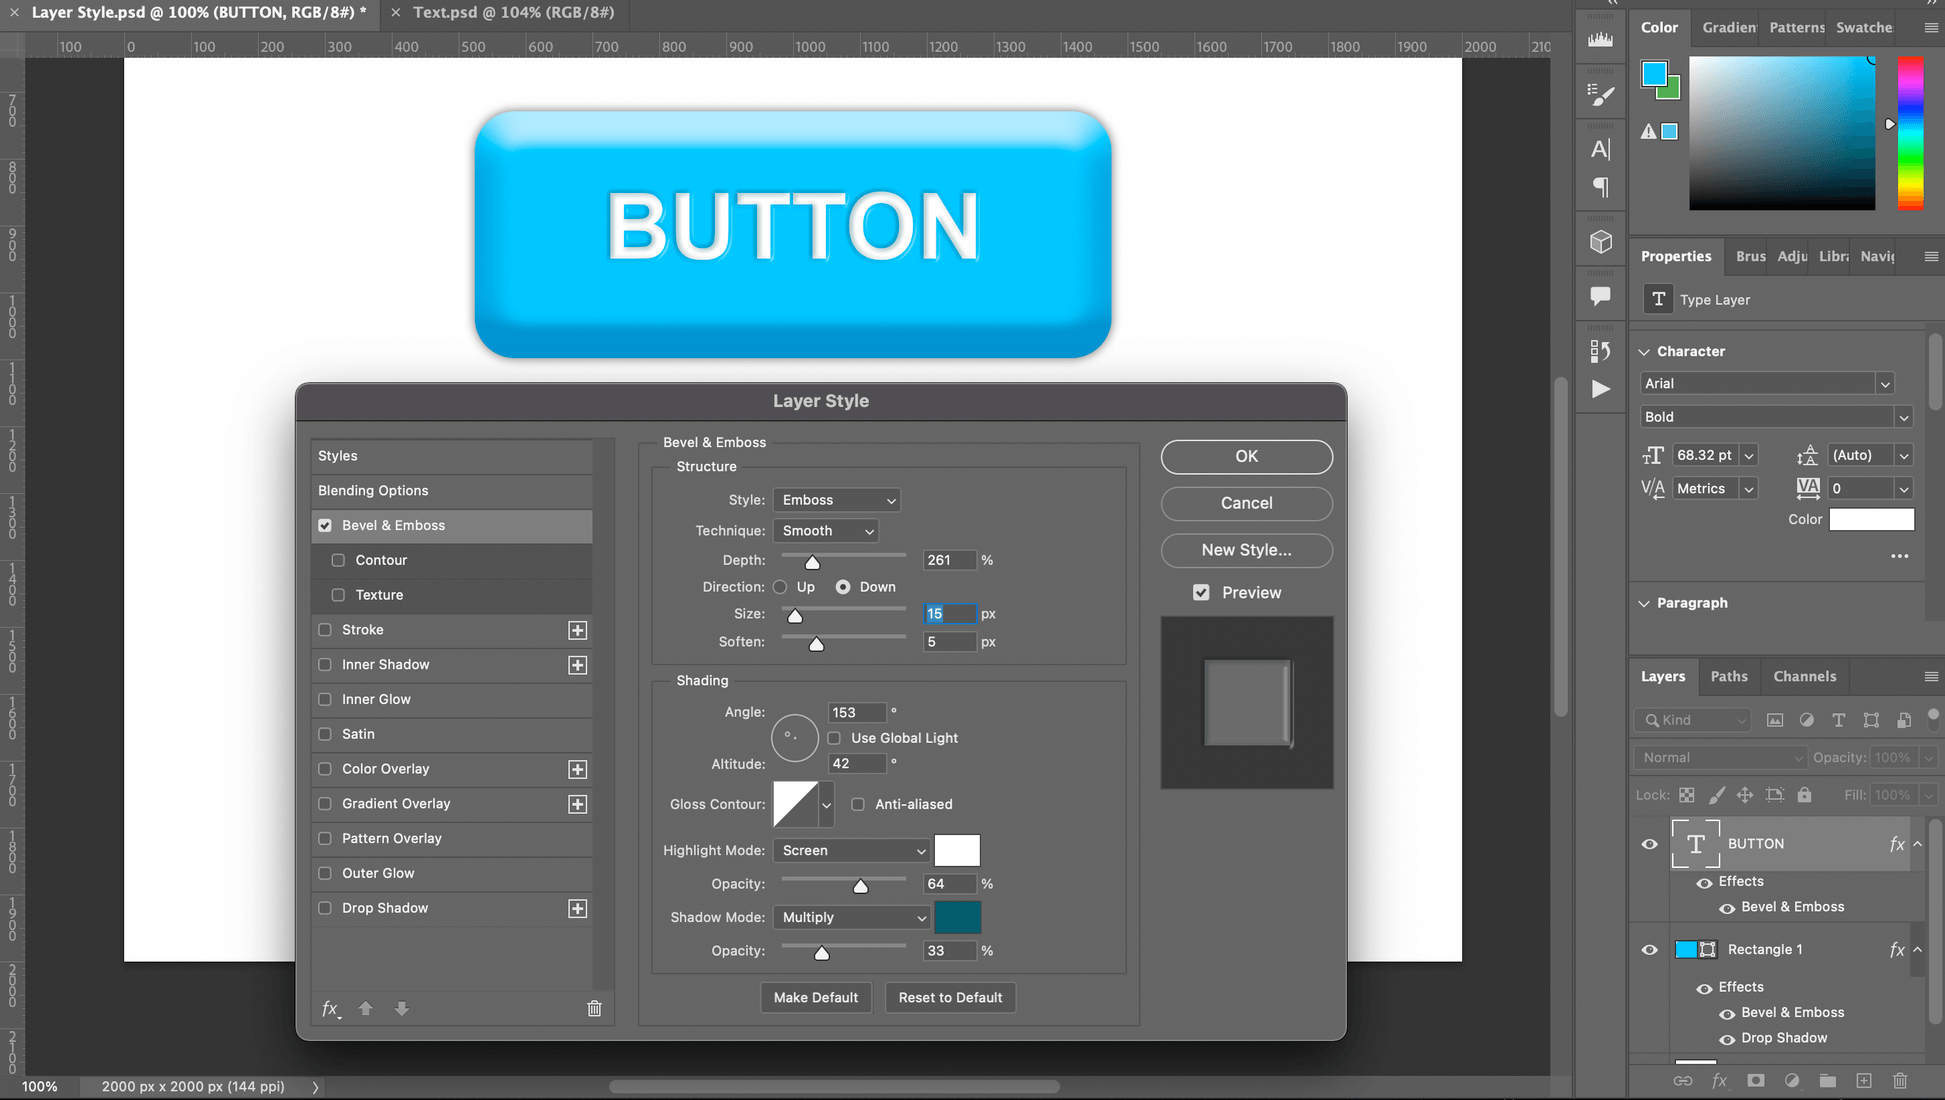
- Activate Bevel & Emboss. Pick Emboss from Style's drop-down menu.
- Set Direction to Down. You can also move the Angle around. This will make the text appear as if it's pressed inside or engraved on the object below it.
- Change the colour by selecting Color Overlay.
Conclusion
This is a simple and fast method to make stylized buttons that appear 3D using Photoshop. You can use the same process for illustrations as well. You can get similar results (and more) by using Layer Styles and experimenting with the effect options.
Hope you found this article useful! Comment below if you have any related questions!