
Blending modes mix the selected layer and the layer below them by altering their color and luminosity. The selected layer will become translucent and the layers below it will be shown. It’s like looking through stained glass and seeing the colors mixed in the view.
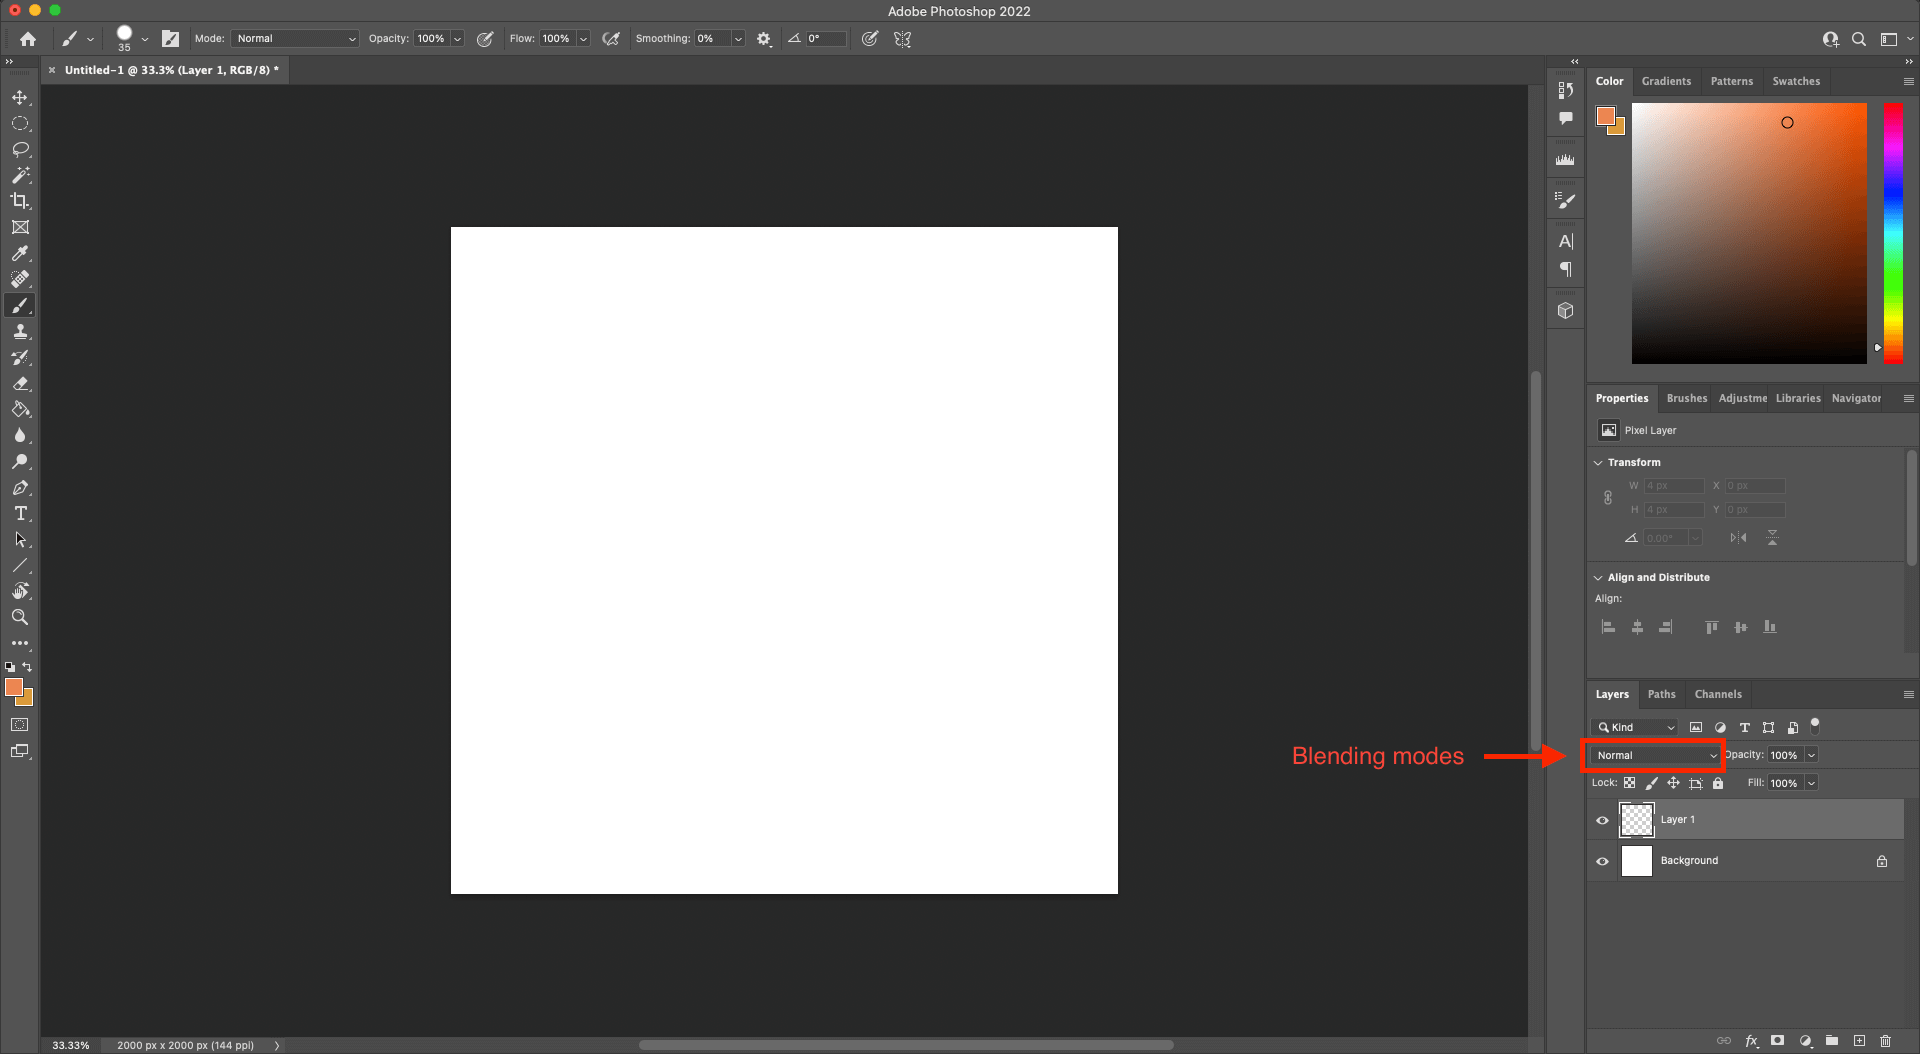
Blending modes are found in many photo editing, drawing and video editing software like Photoshop, Clip Studio Paint, Premiere Pro, After Effects and more. They work the same way so learning to use them in one software will help you use them in any software that has them. Blend modes are located in the Layers tab as shown in the image below. To use them, you simply have to click on them from the list.
The process of blending modes in Photoshop is experimental because they might not give the exact look that you expect but by playing around with the modes and the layer’s opacity, you will be able to get amazing results. The process is non-destructive because you can always go back and change the blending mode if you haven’t flattened the image yet.
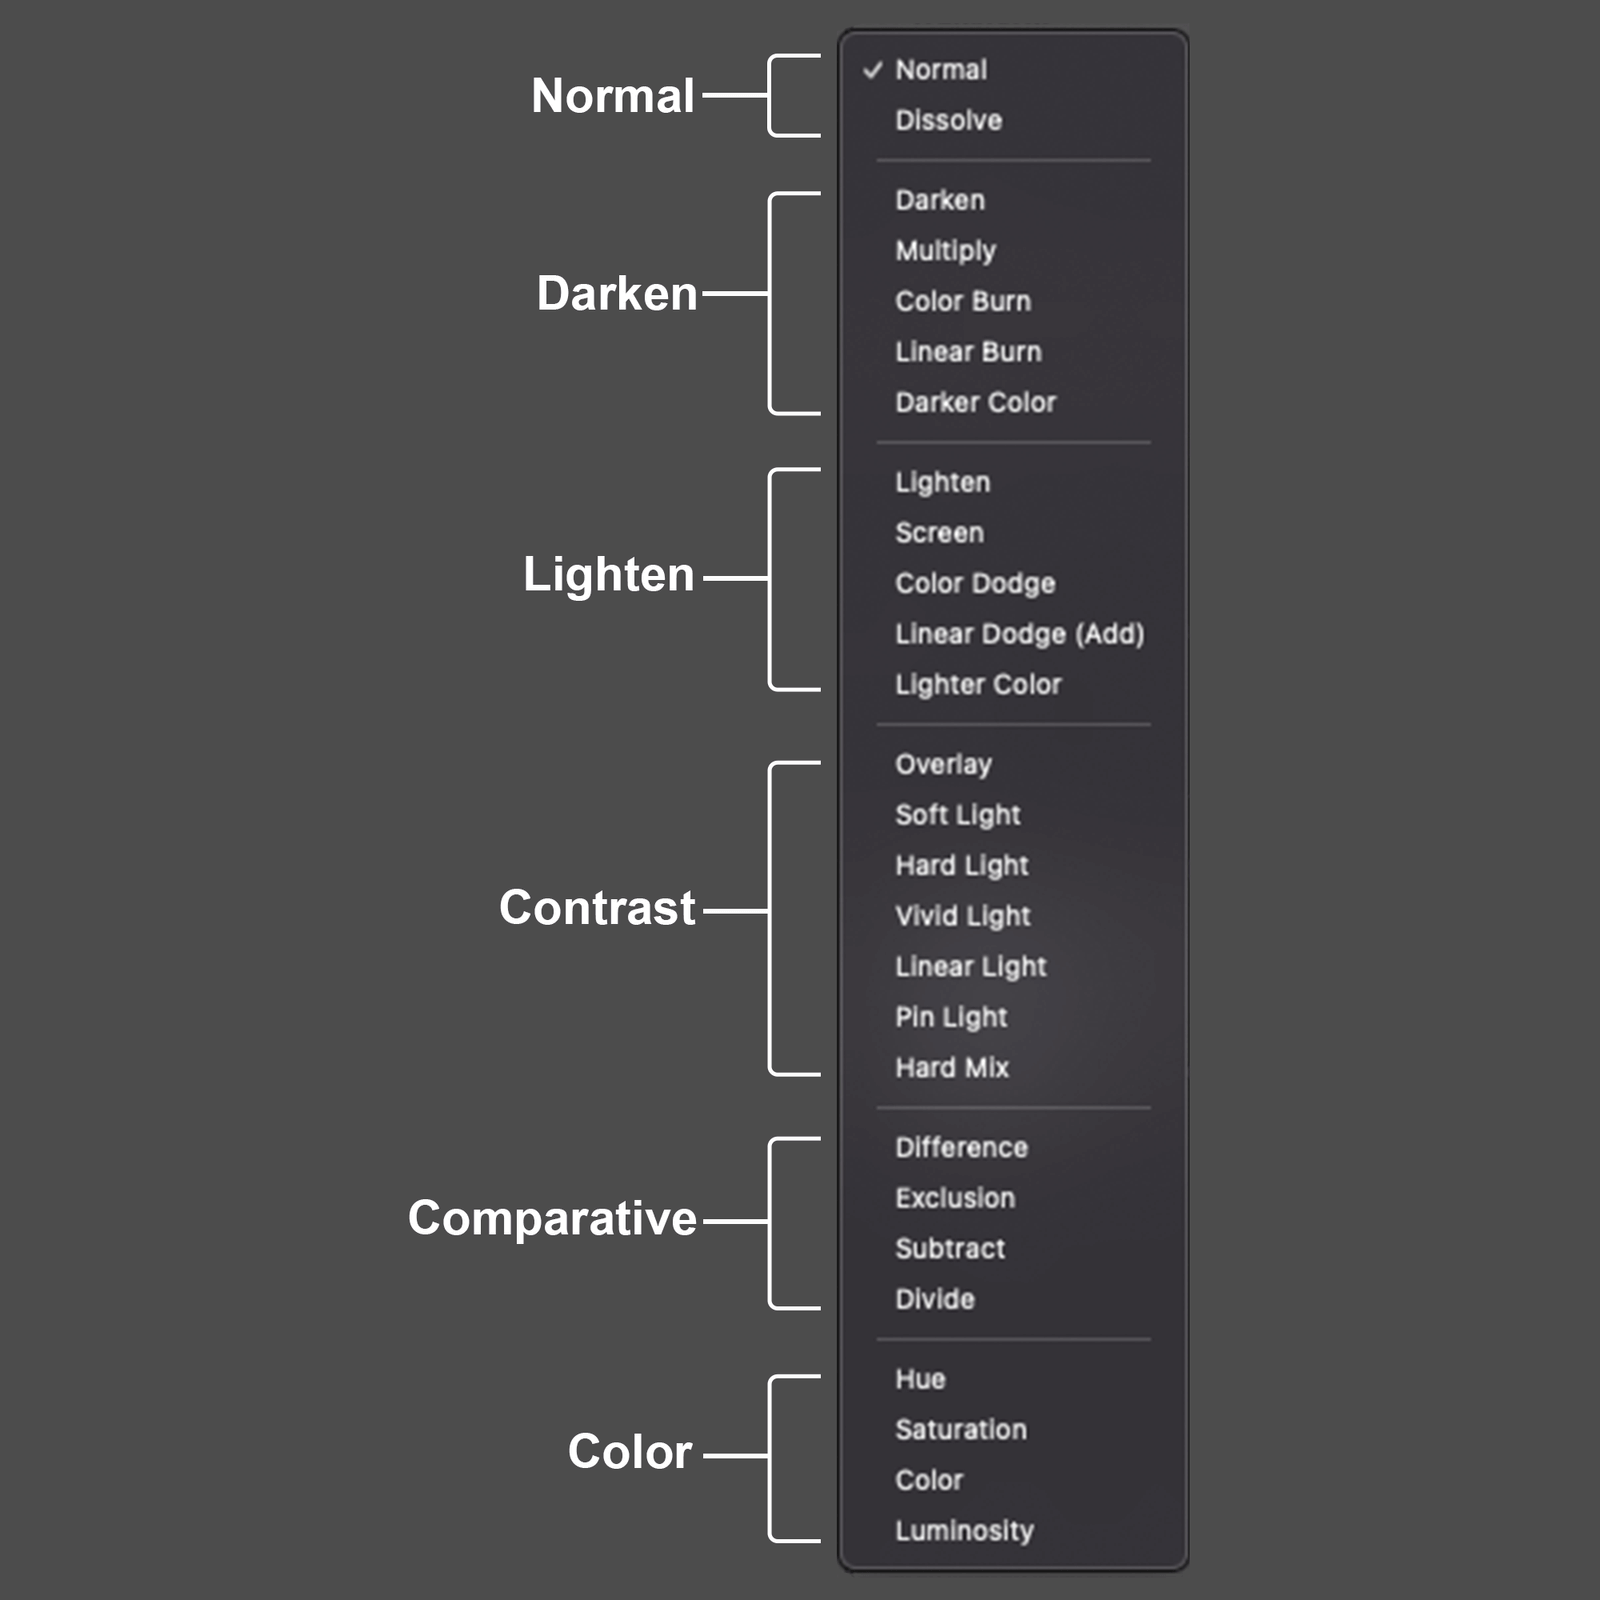
Photoshop has 27 blending modes divided into 6 groups based on similar effects. Even though there are many blend modes, only few will be useful in most cases.
Blending modes use various mathematical calculations to bring the result and understanding those calculations will help during photo editing but today I’ll be simply explaining how few of these blending modes can be used to make coloring in Photoshop faster and easier.
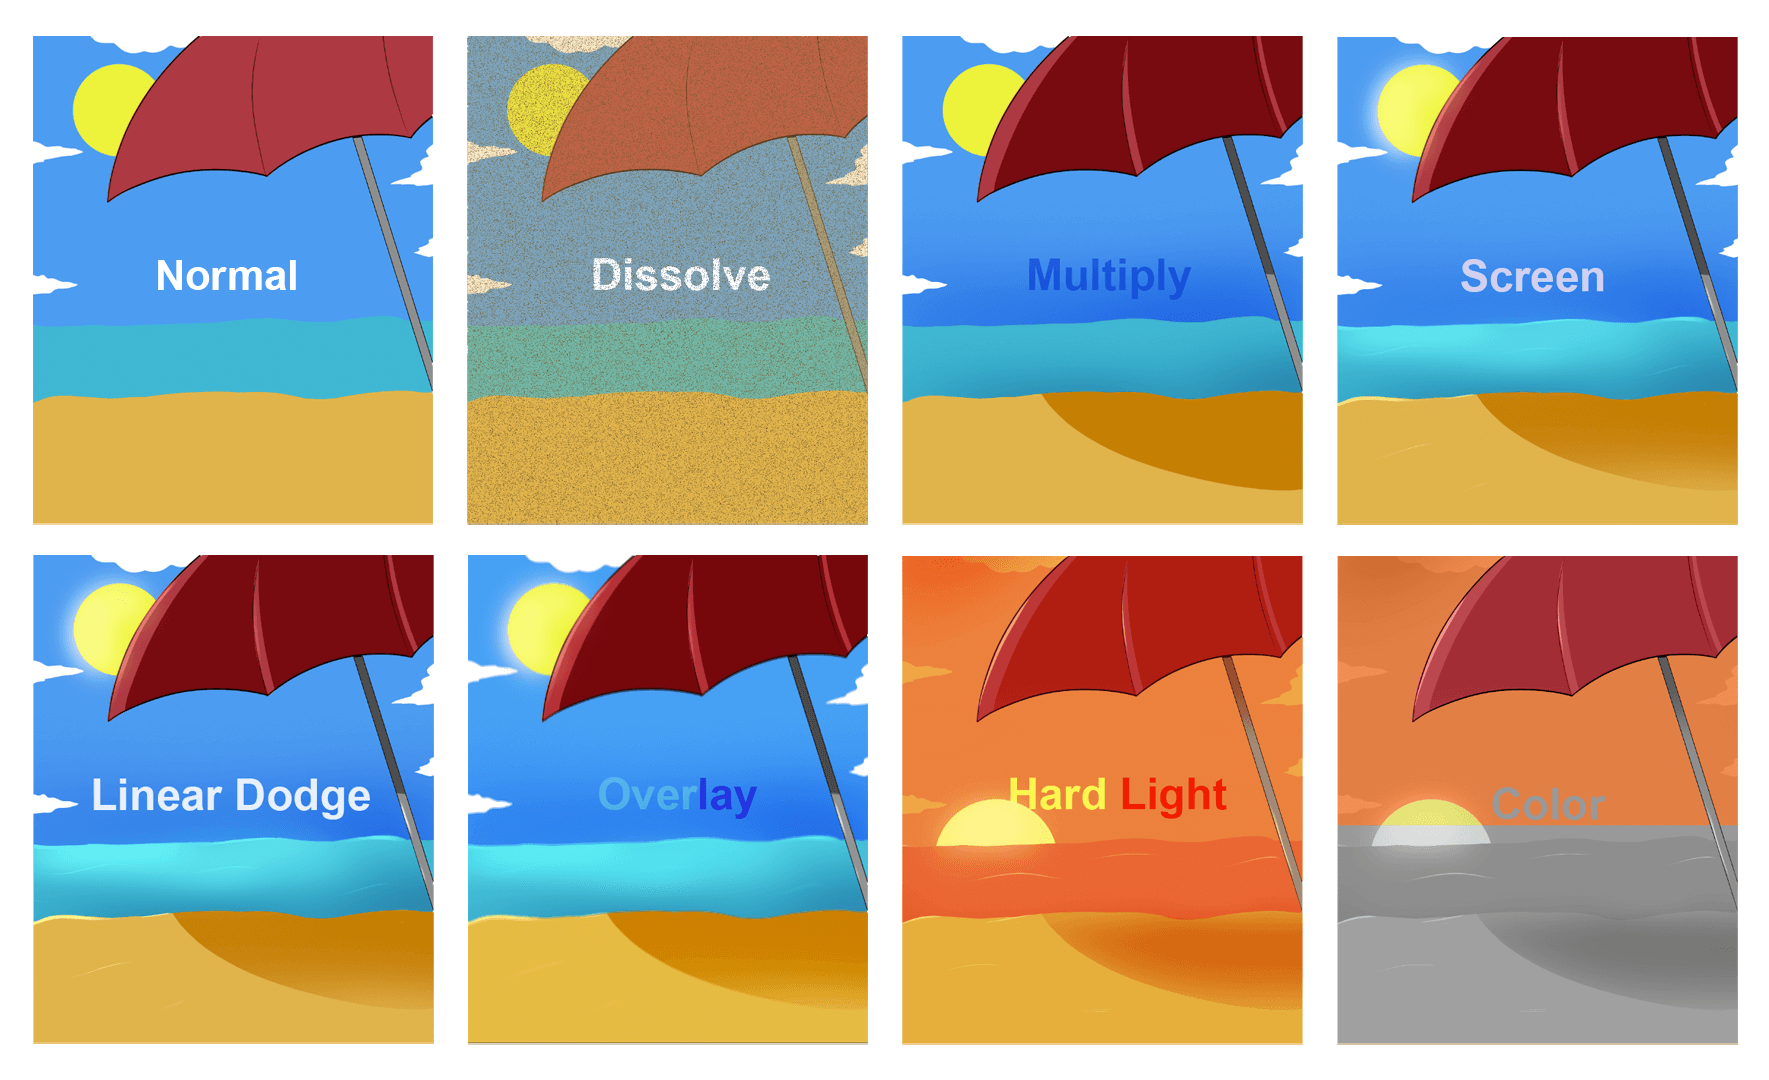
- Normal
- Dissolve
- Multiply
- Screen
- Color Dodge and Linear Dodge
- Overlay
- Hard Light
- Color
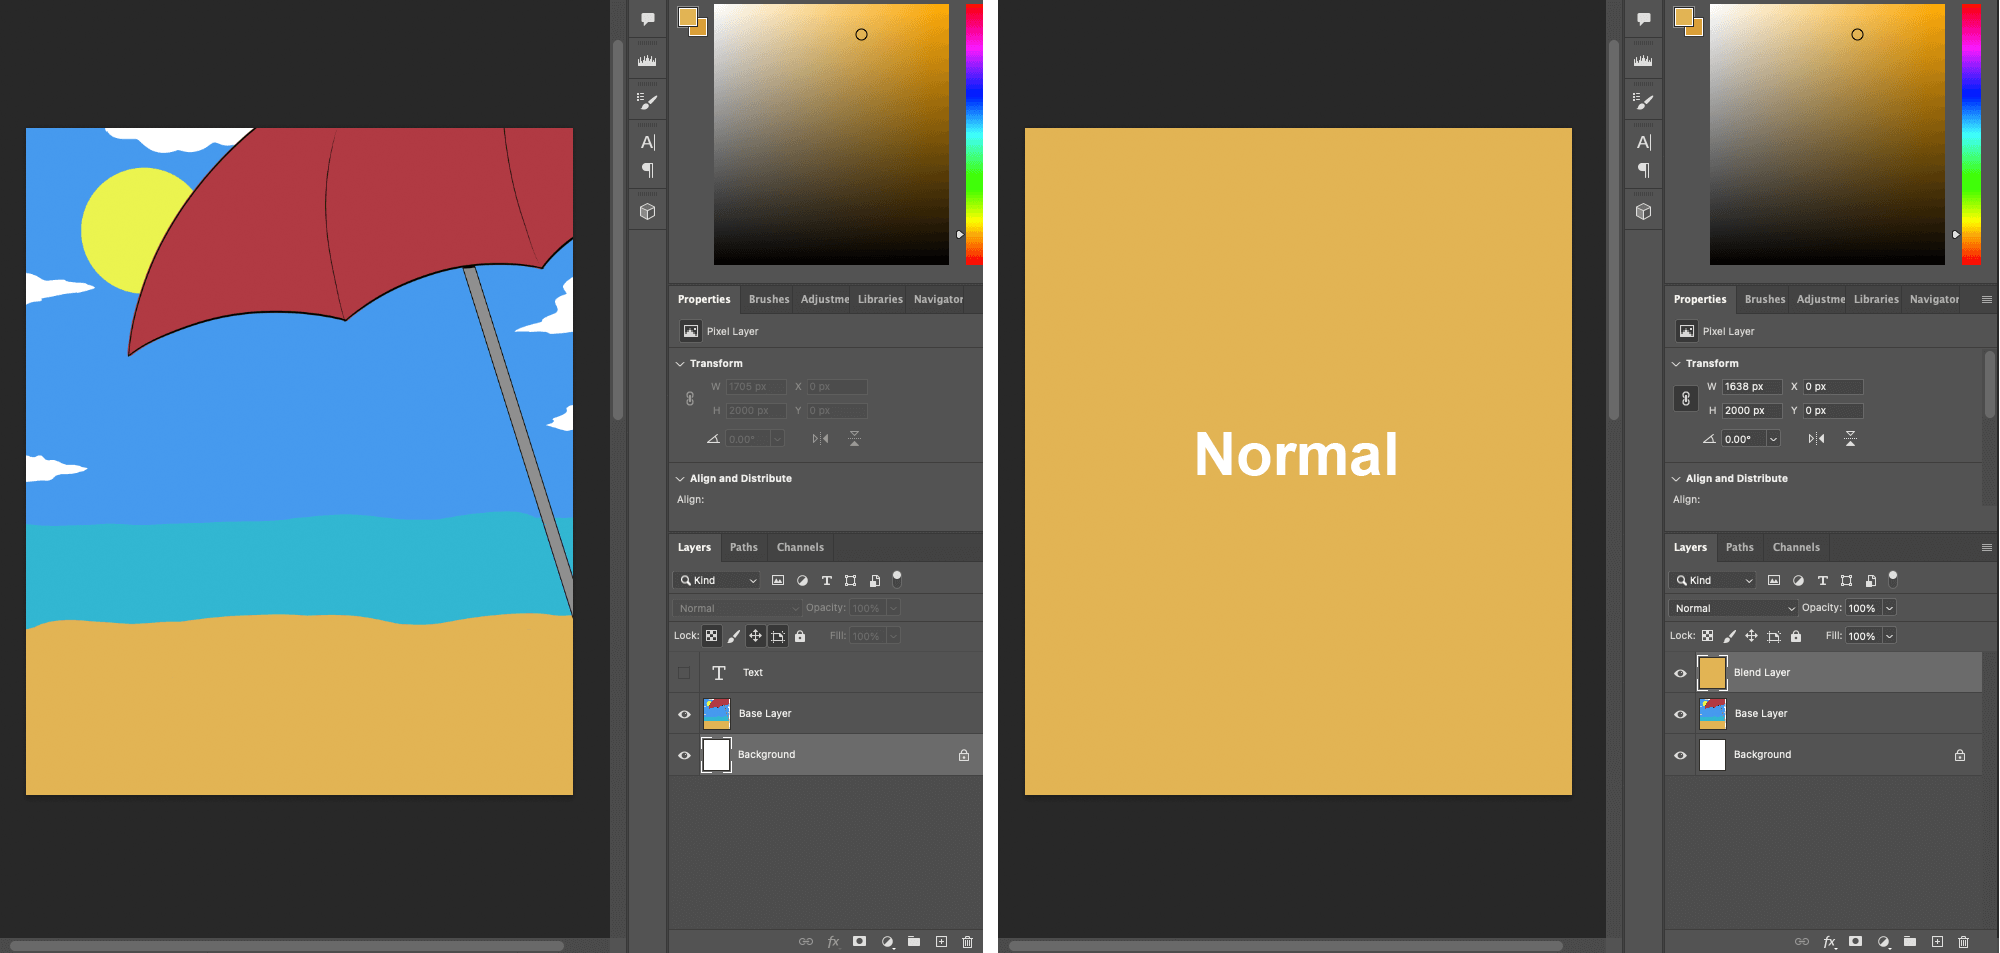
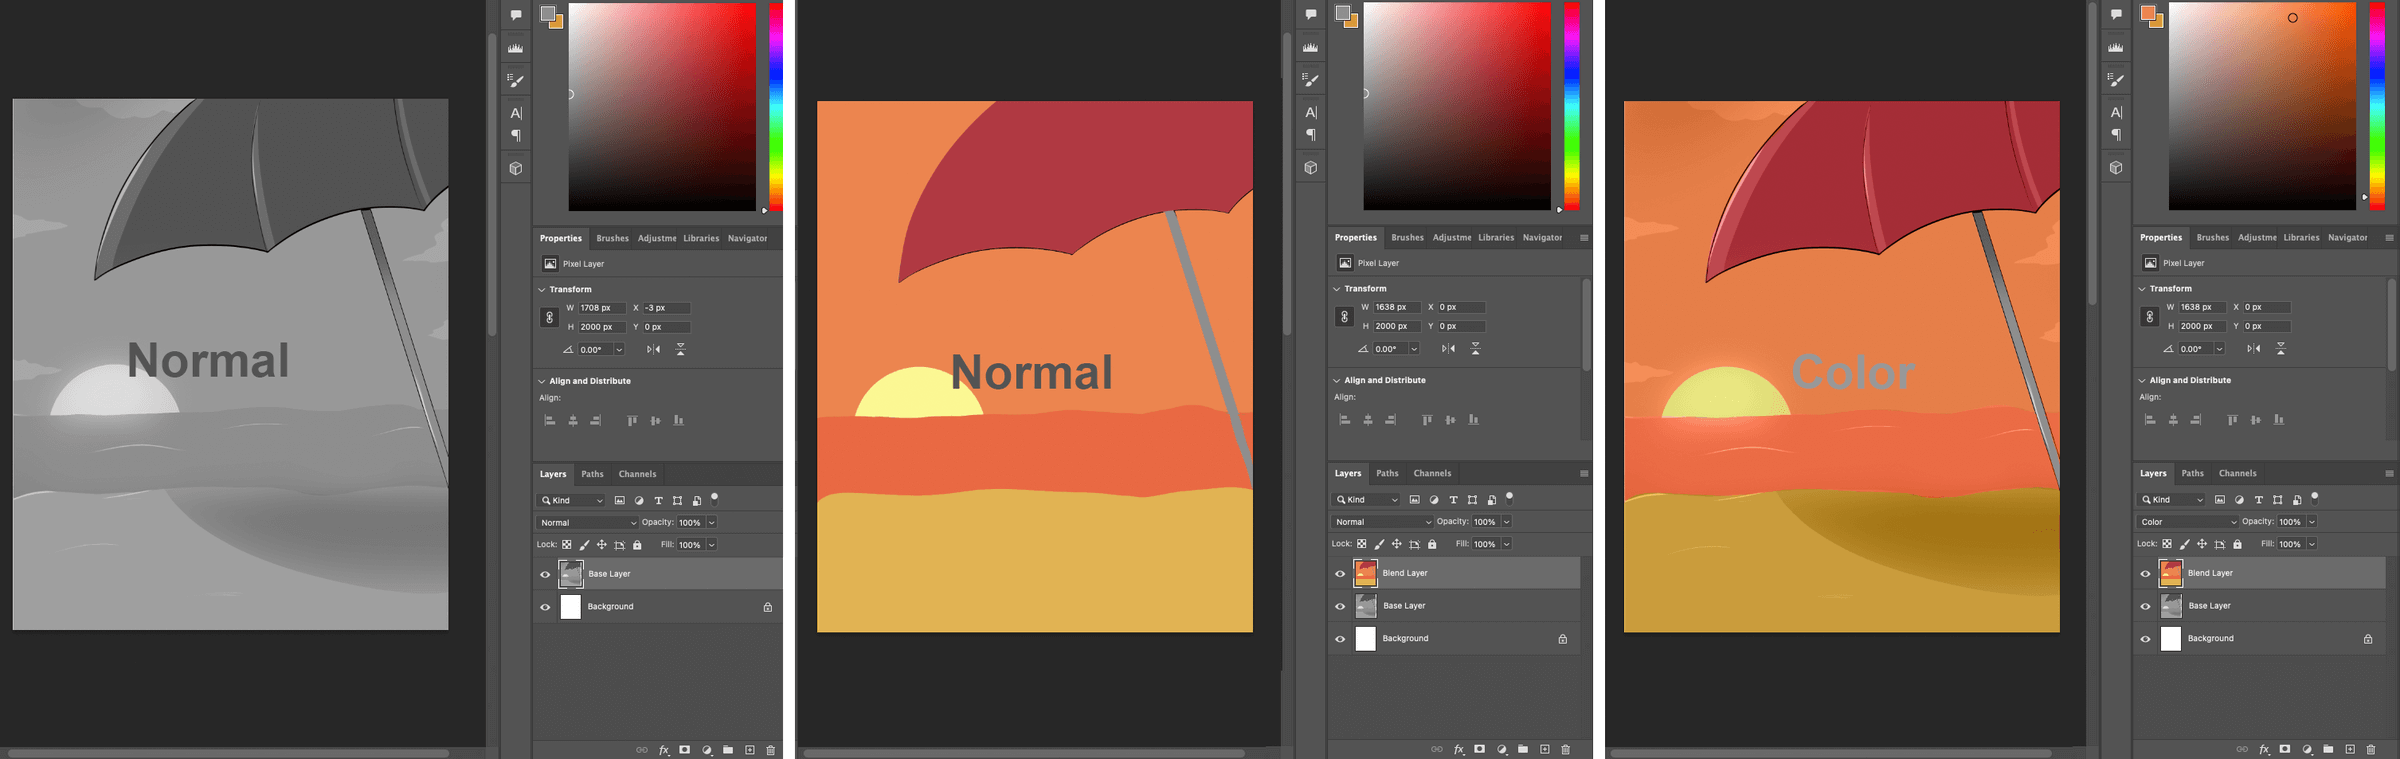
1. Normal Blending mode
When you create a new layer or import an image, the Normal blending mode is the default mode. As the name implies, normal blend mode simply shows the selected layer as it is. We can’t see the layer beneath it. When we lower its opacity from the Opacity slider in the Layers tab, it will become transparent.
- Hit 5 key for 50% opacity
- Hit 0 key for 100% opacity
- Hit keys in sequence to get an exact percentage (Eg: Hit 4 and 5 keys for 45%)
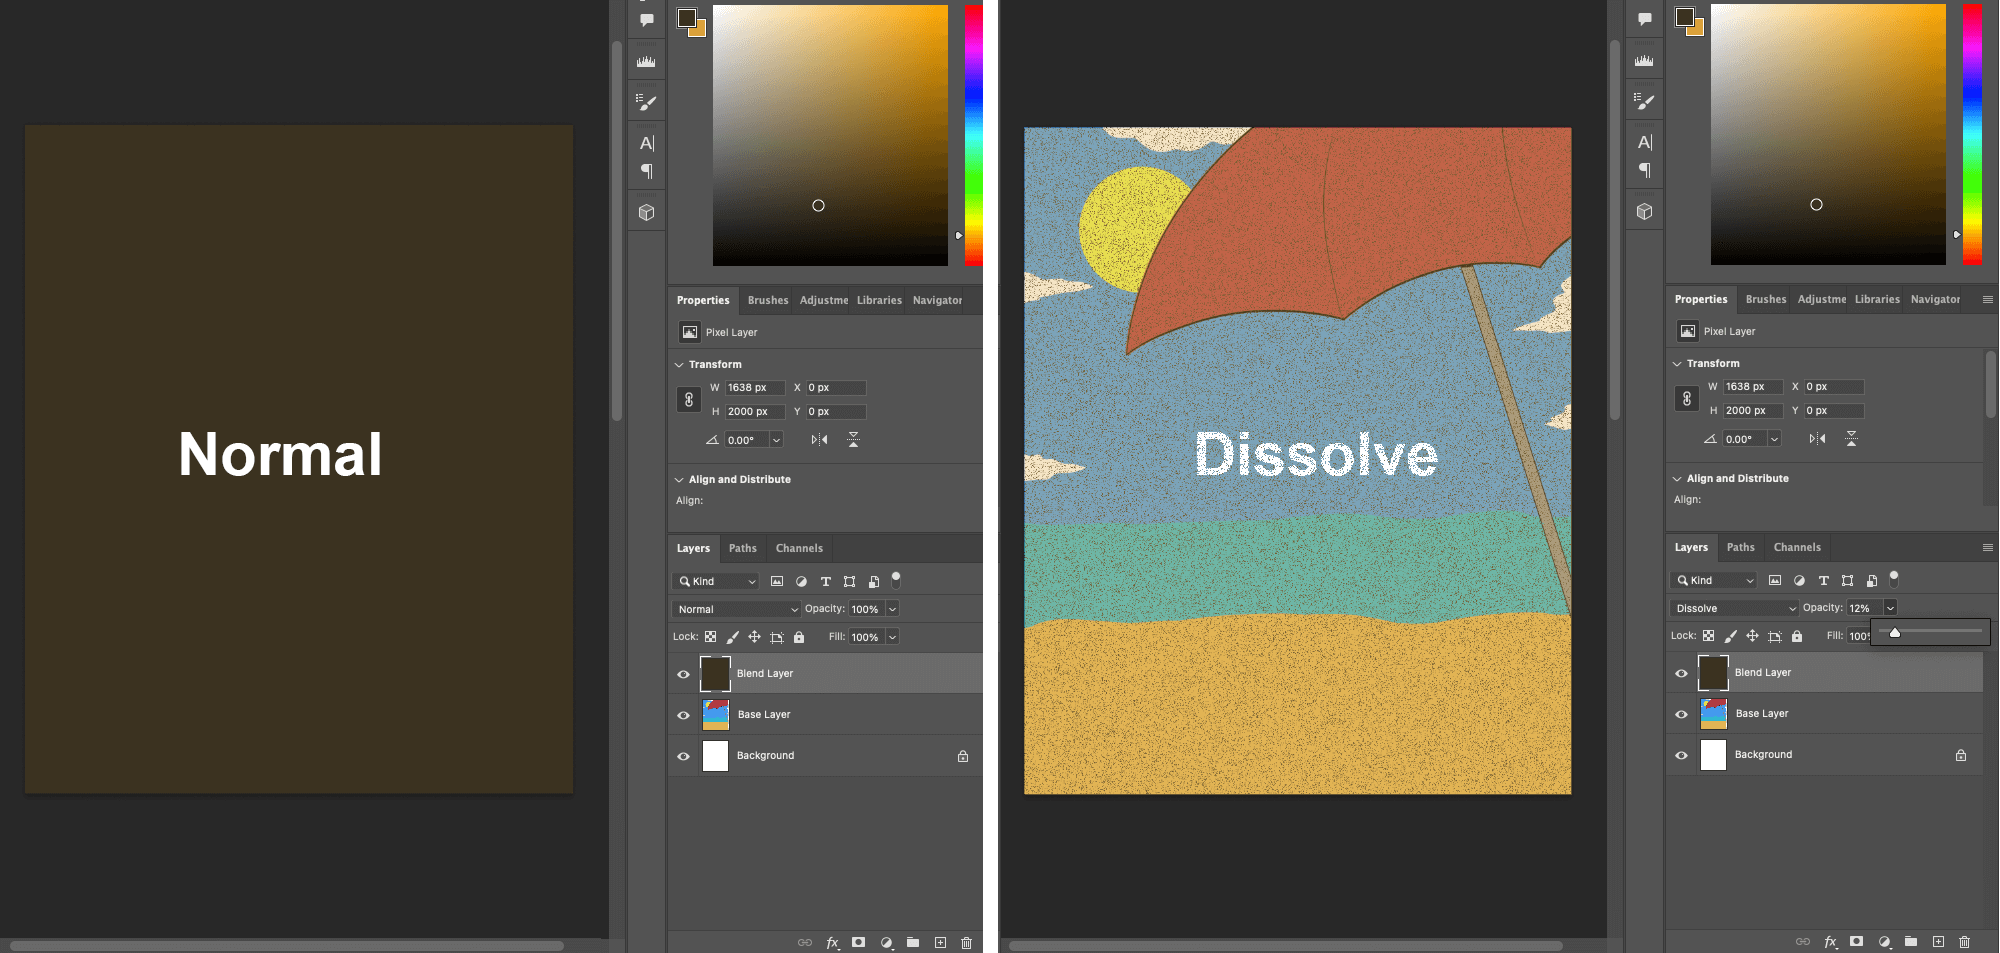
2. Dissolve Blending mode
When you first select this mode, it looks like it did nothing like the normal mode. But when you use the Opacity slider, it will look like some of the selected layer’s pixels are transferred to the layer below it. It shows and hides pixels to create a grainy noise effect. It can also be used to get a paper-like texture.
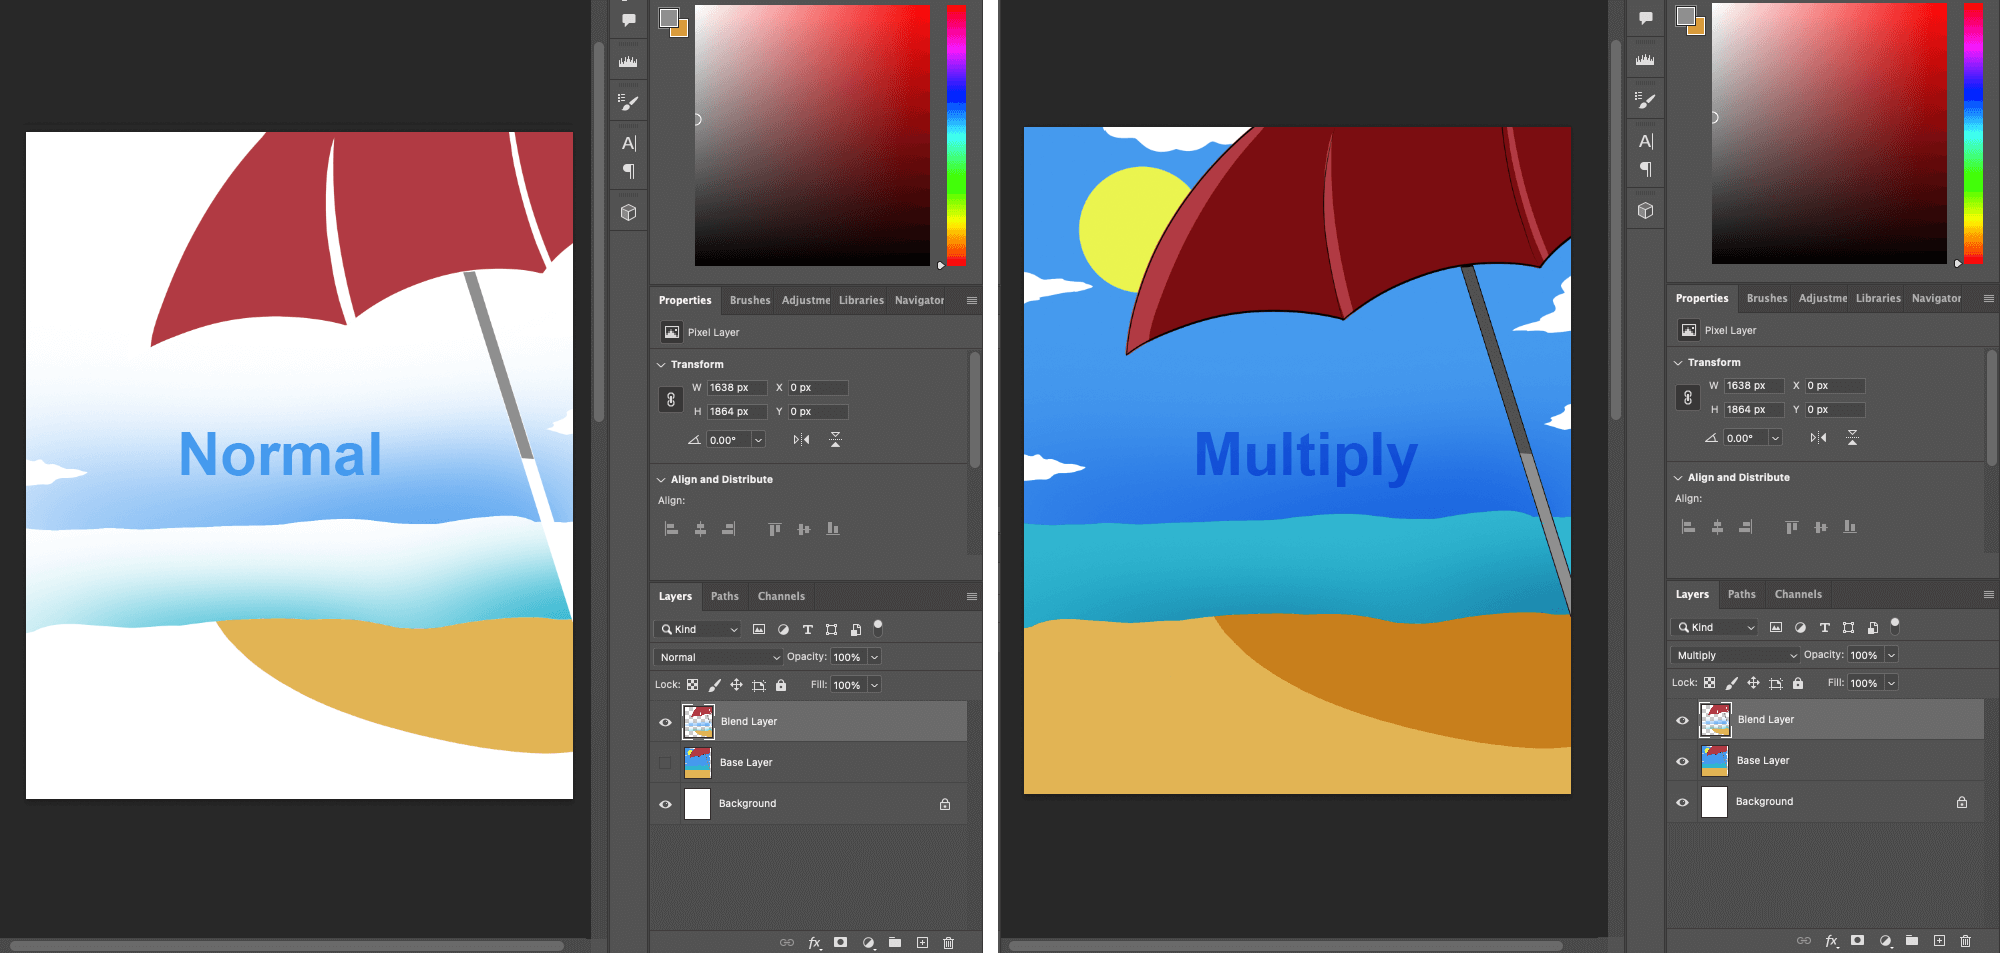
3. Multiply Blending mode
This blending mode darkens the base layer on the basis of the dark colors on the blend layer. This mode multiplies the color of the blend layer with the base layer. It can be used for creating shadows and dark areas in paintings.
For this tutorial, I'll be describing the lower layer as Base layer and the above layer (whose blending modes will be changed) as Blend Layer.
- If you’re painting a night scene, pick a blue or purple color from the background sky and paint the shadows.
- For different scenarios, pick a color from the environment and use that to color the skin and objects.
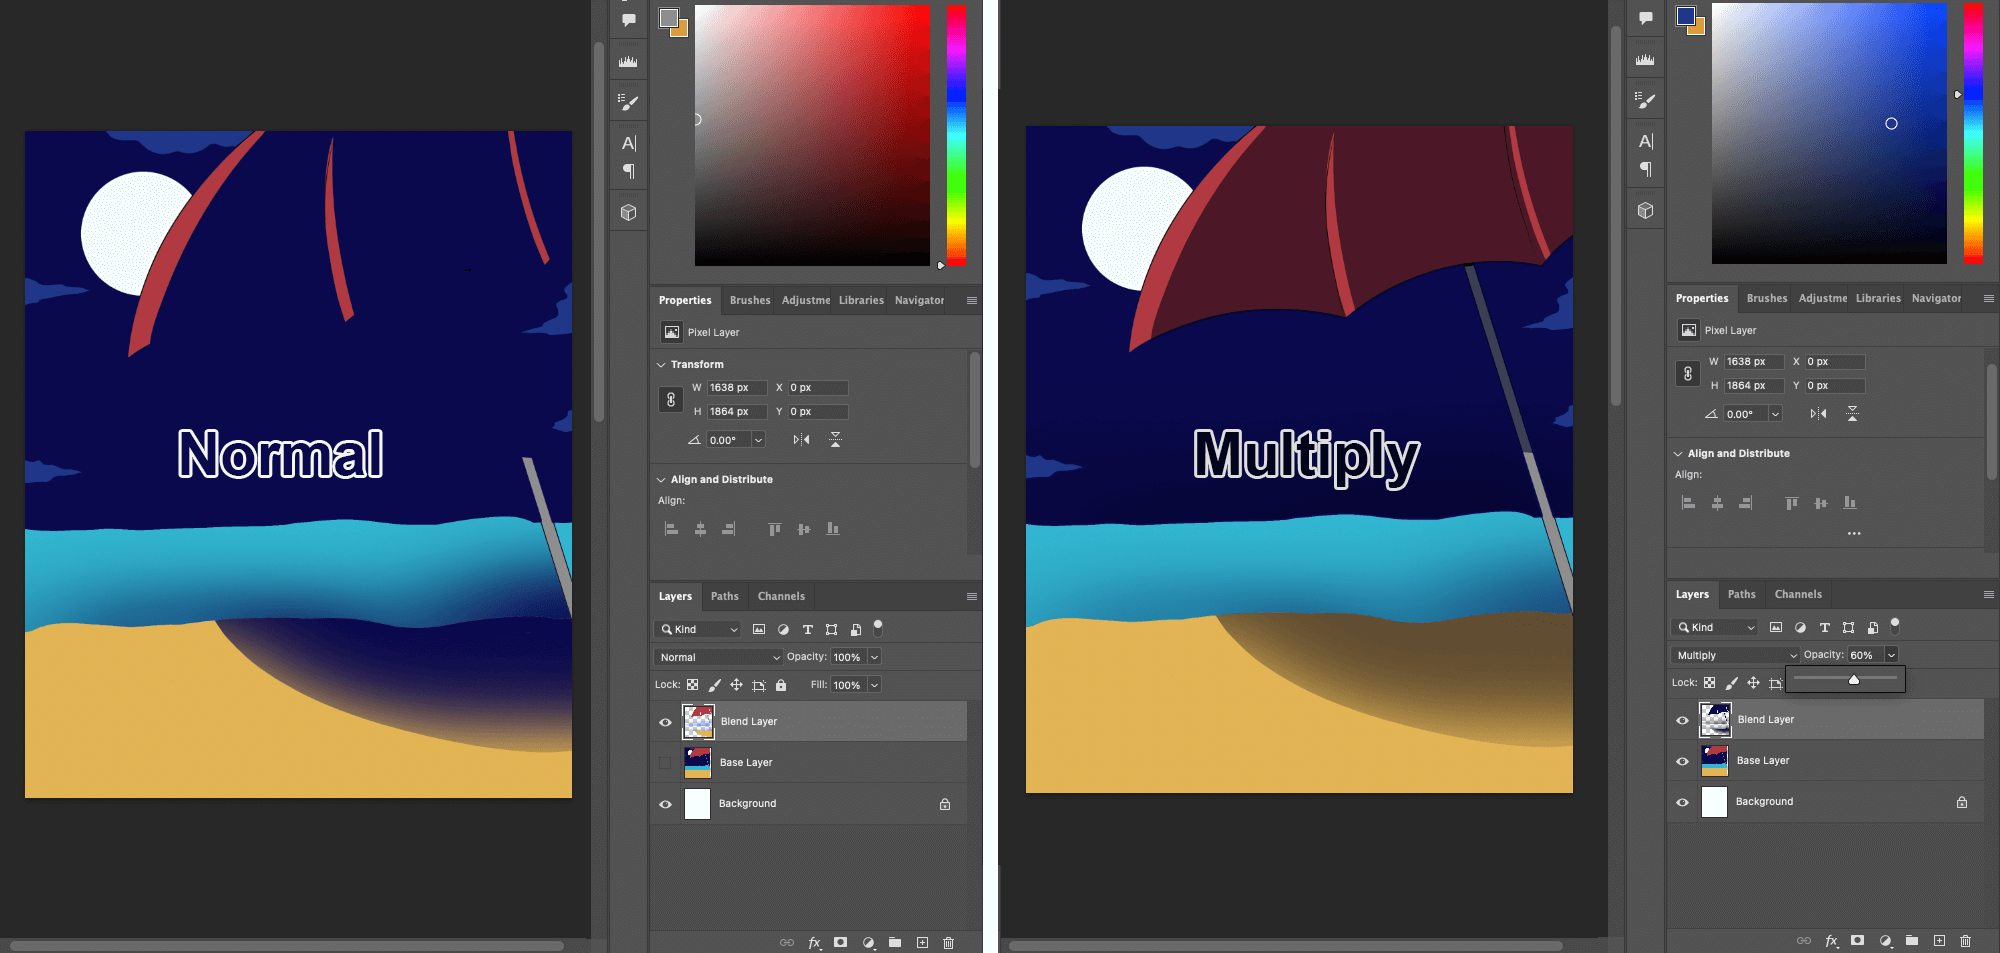
Other blending modes like Color burn and Linear burn give a similar effect but are darker and more intense than the Multiply Blending mode.
4. Screen Blending mode
This blending mode brightens the colors. It can be used for highlights and glow effects. It works like Multiple Blend mode but opposite since it multiplies the light areas and makes them brighter.
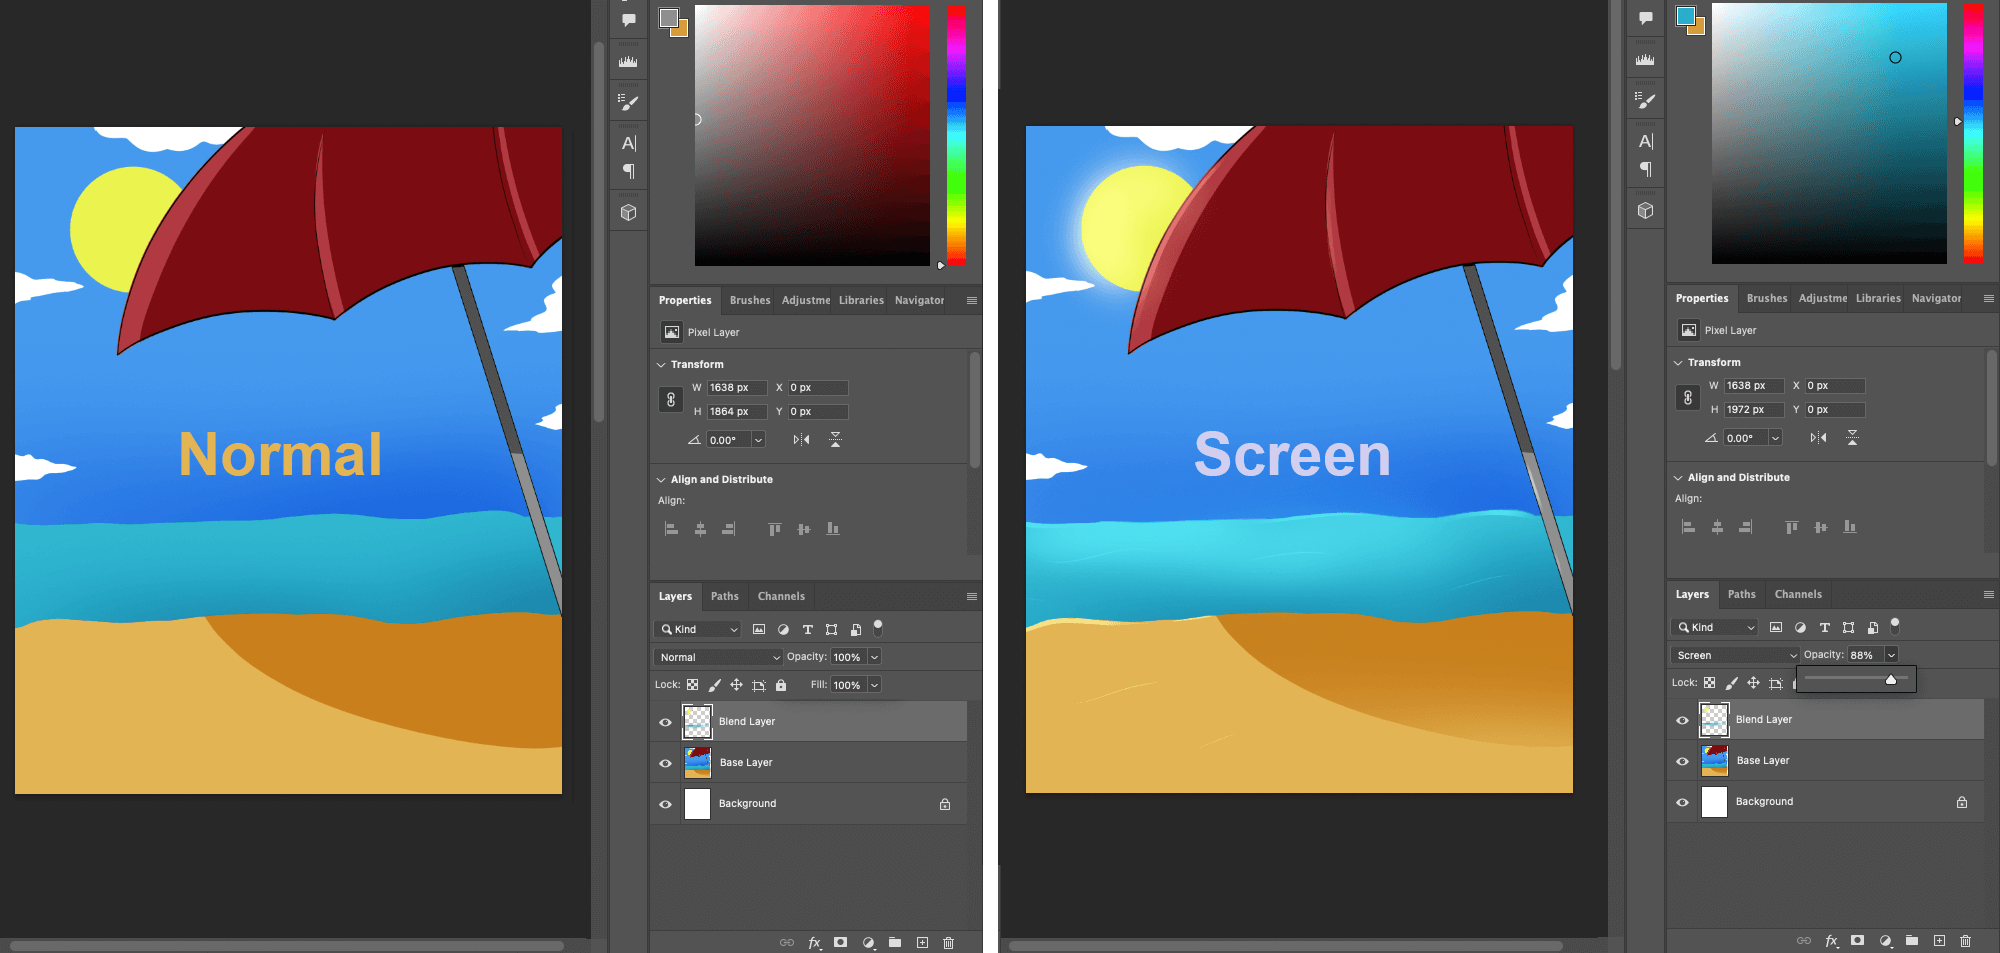
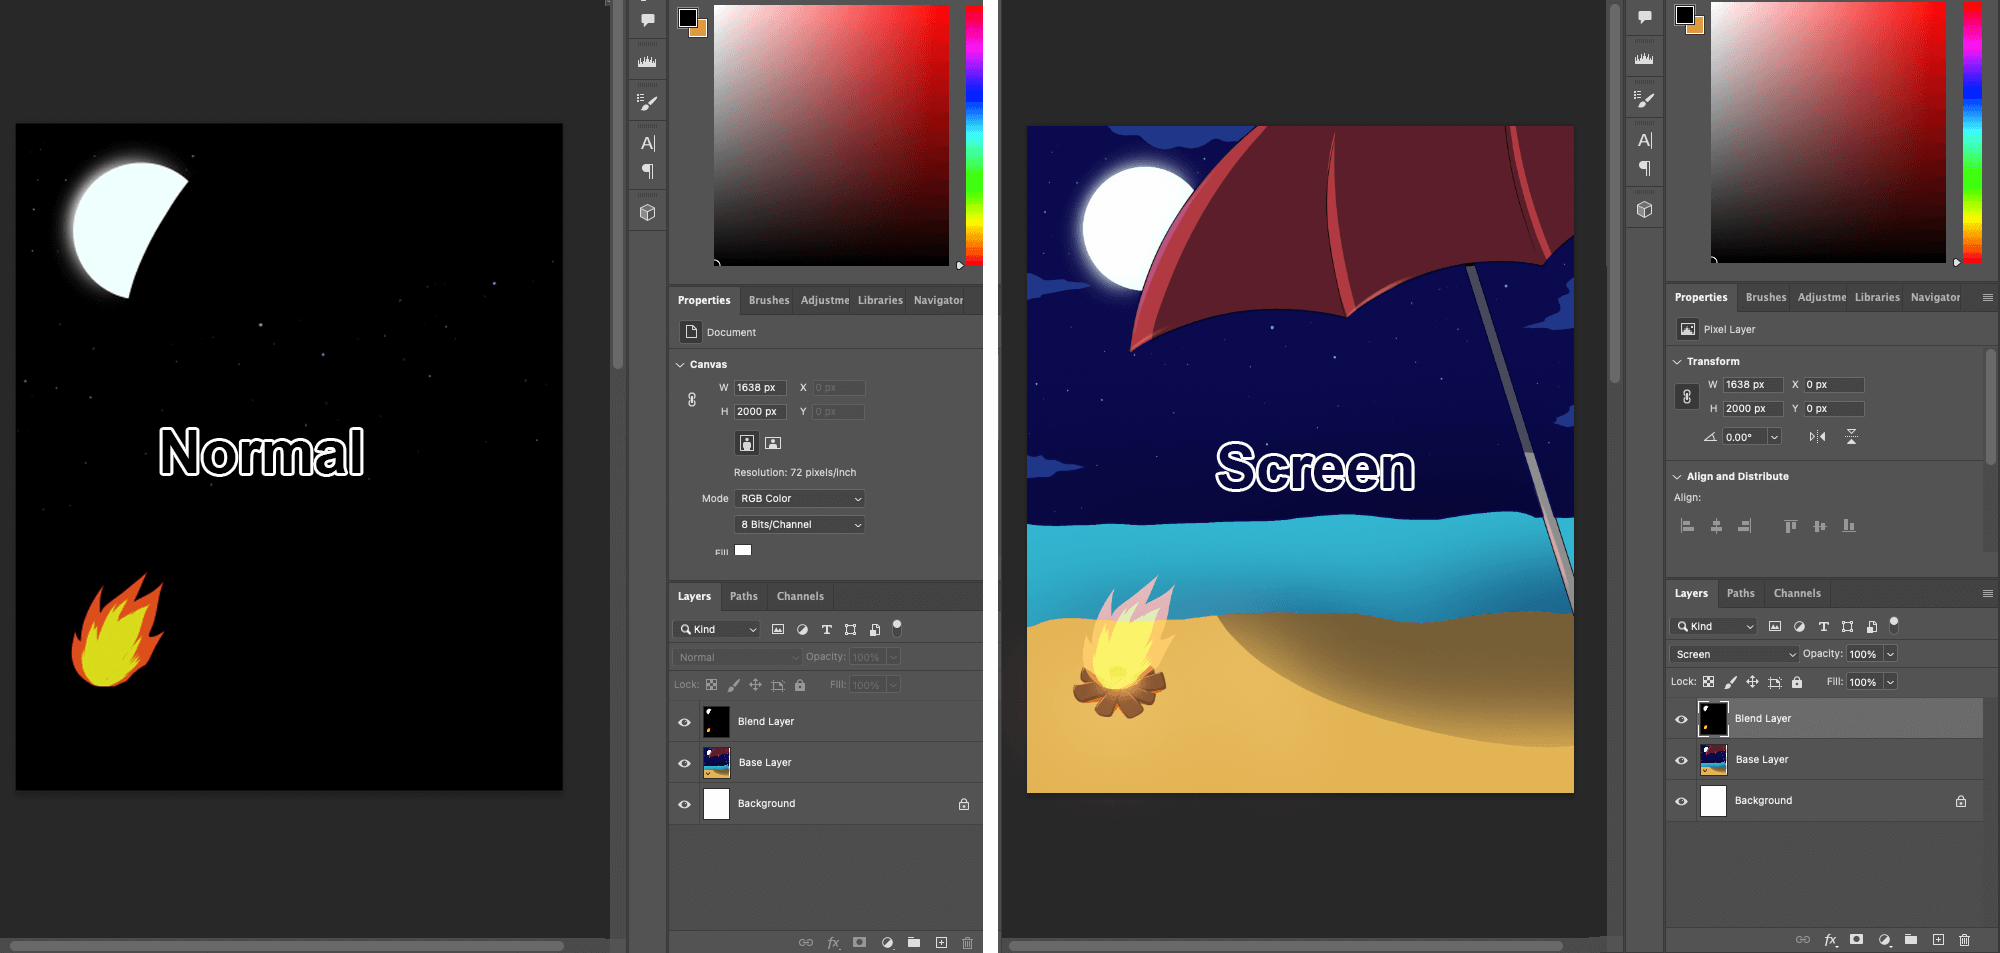
Picking the color of the environment and coloring the edges of shiny and reflective objects will create highlights.
It will also make black color invisible. If you have an image of fire in a dark background or a photo of a starry night, changing its blending mode to Screen mode will hide the dark colors.
5. Color Dodge Blending & Linear Dodge Blending mode
These two blending modes are similar since they both are brighter than Screen. They both give a very intense result by overexposing the image so you will have to lower the layer’s opacity.
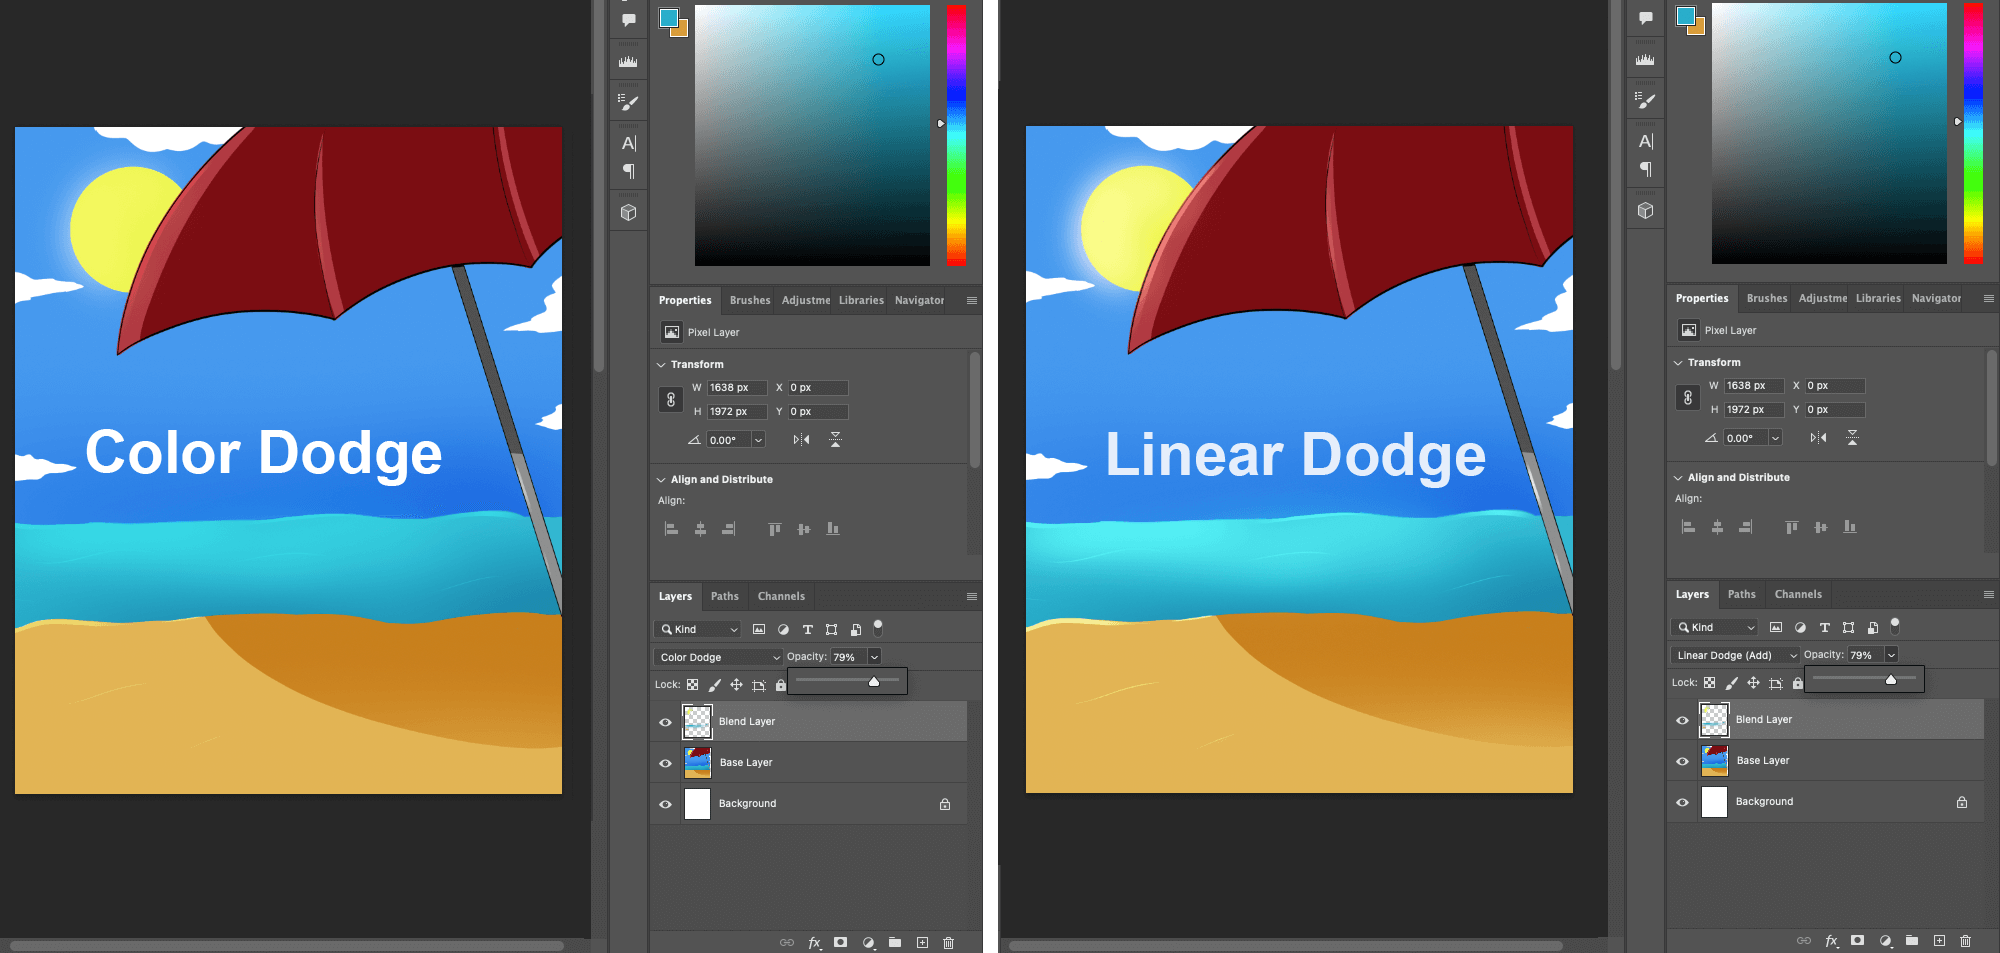
Color dodge will brighten while saturating the bright colors whereas Linear dodge will brighten the image, giving a faded look. You can try both these effects for highlights, glowing objects and light rays and test which one look better for your overall image.
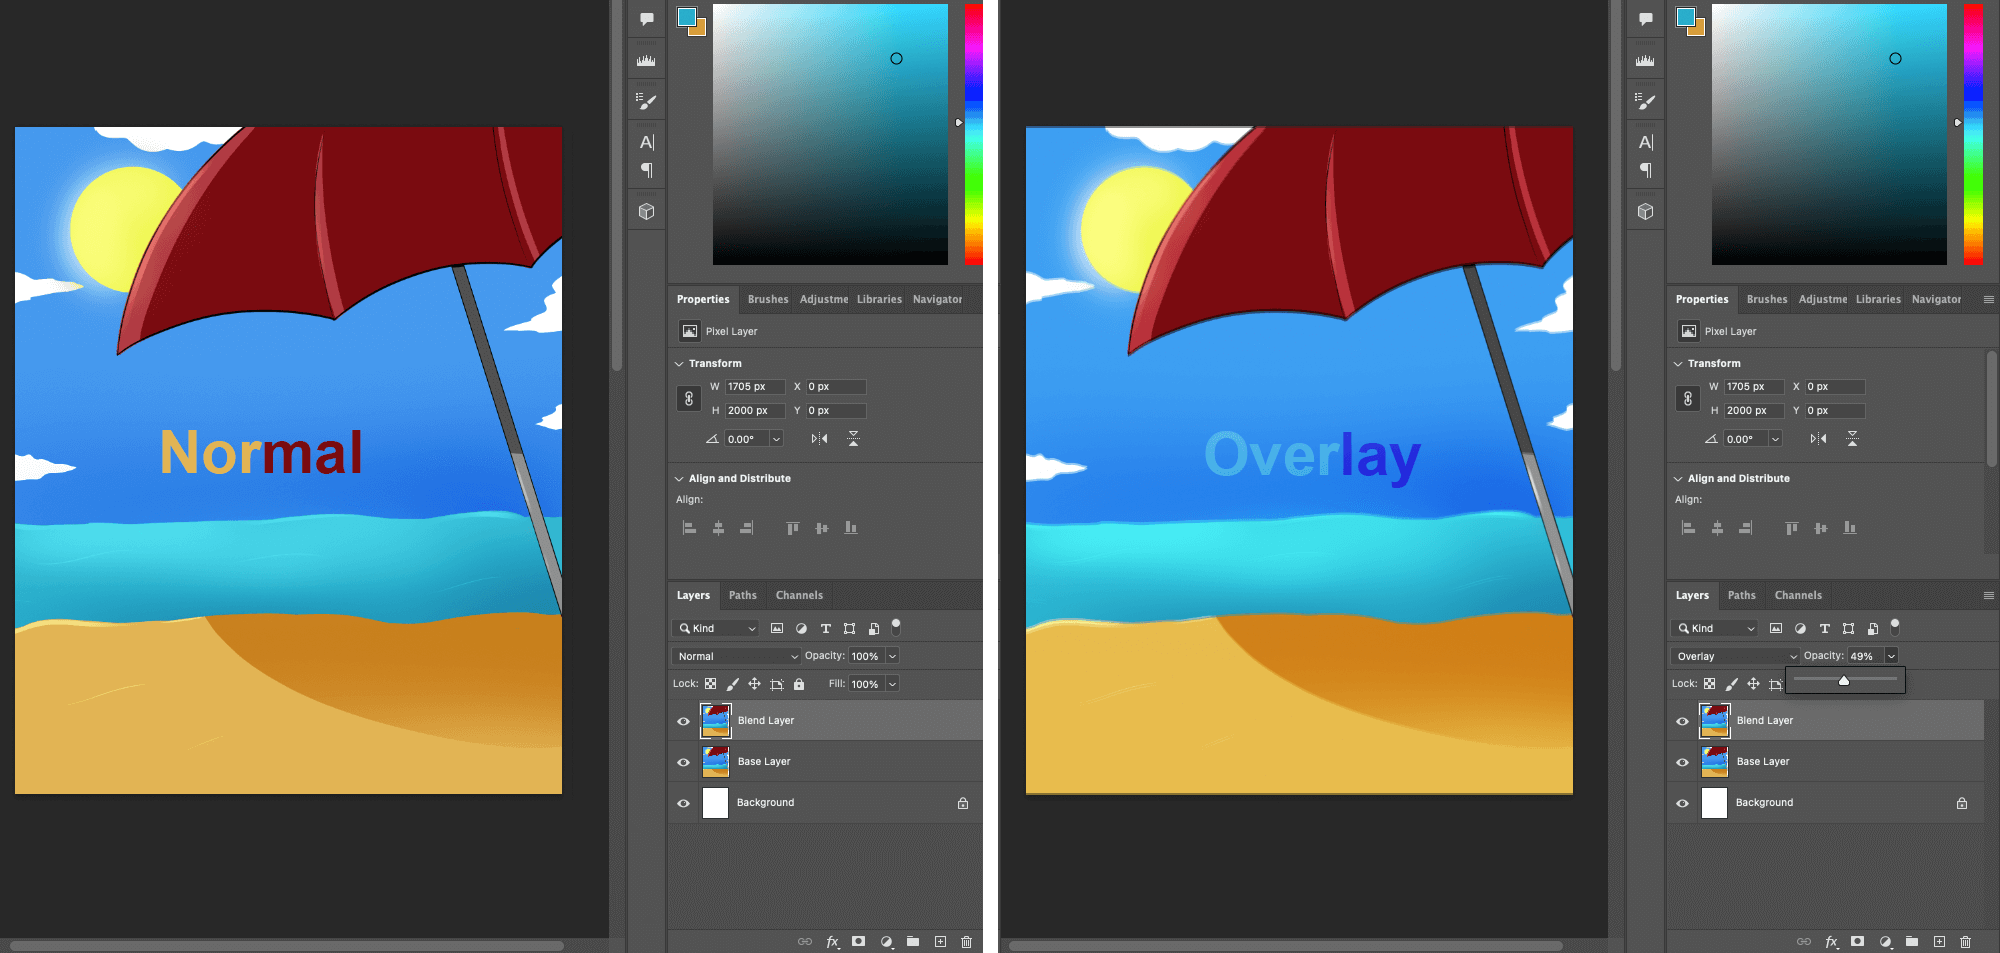
6. Overlay Blending
This blending mode brightens the light areas and darkens the dark areas. It doesn’t affect the middle gray colors. It is also used often in photo editing to get more contrast. You can do this too with your digital paintings.
- Duplicate your painting and change the above layer’s blend mode to Overlay. This will brighten the highlights and darken your shadows.
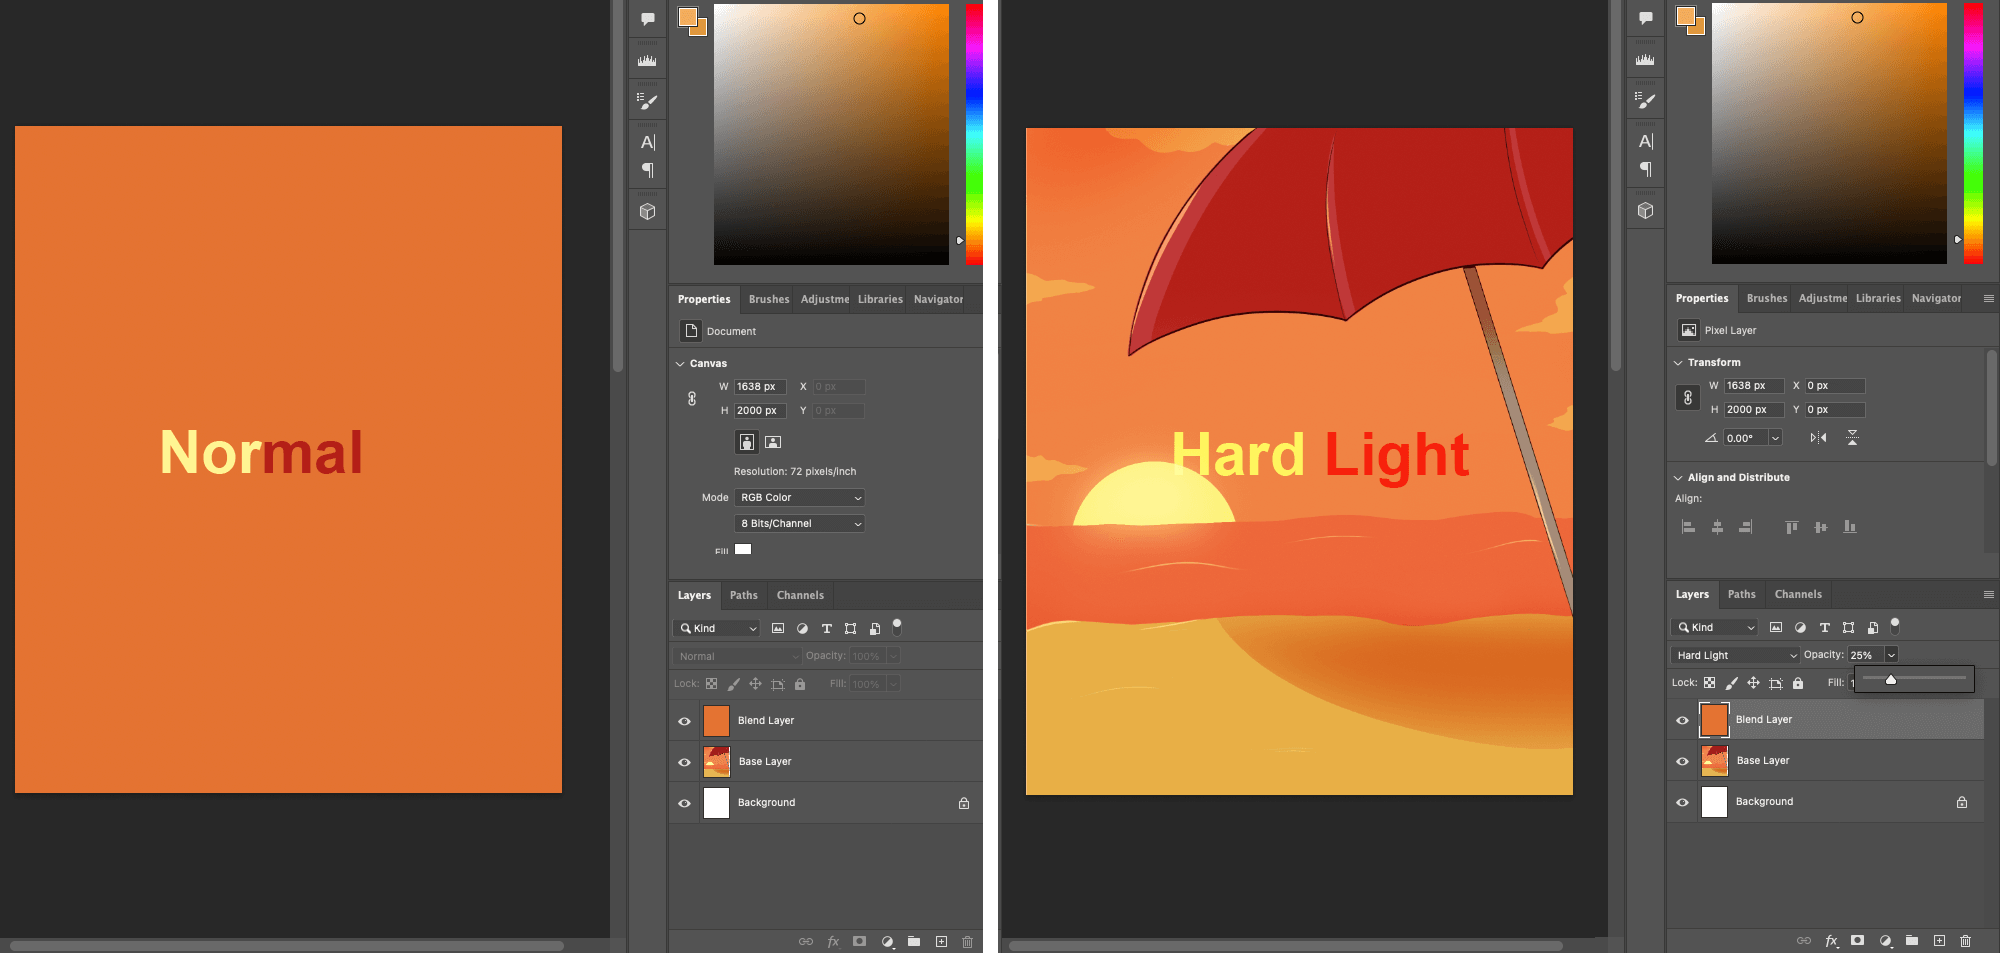
7. Hard Light Blending mode
This blending mode equally affects the bright and dark areas. It is aggressive at full opacity so decrease the opacity to get the desired effect. A way to use it is for mood lighting. If your character is looking at the sunset, the skies and the character will be hit by orange/red light.
- Color bucket fill a layer with orange color and change its blending mode to Hard Light and decrease the opacity.
8. Color Blending mode
This is useful for coloring black & white images. Pick the color you want and start painting. This mode will help to get the colors you want without affecting the light and dark values.
- For eg, paint red color on a bright area, it will be bright red. Use the same red on a dark area, it will become dark red.
I usually use these eight blend modes to quickly paint scenes and edit photos. They make the process faster and more efficient. There are many more ways to use these blend modes according to your needs by mixing them and by playing around with their opacity. Test them out and you might get amazing results by just changing the blending modes.
Thank you so much reading this blog. See you in the next one.