
Recently, I have been experimenting with different typography and text effects on Blender and stumbled upon creating a balloon-style effect with cloth simulation. Although anything related to simulation was pretty scary for me initially, I have been dabbling with it in the past few months. I have covered a similar topic before. You can find it under the blog title 'Beginner's Guide to Cloth Simulation in Blender' or simply click here to read.
Getting Started with Balloon Effect
Let's move on to creating the balloon-style effect. Basically, we will create a mesh for the text, then inflate it with cloth simulation to create a balloon-like text.
First things first, you need a good bubbly basic font, and then we can build the inflation simulation. You can browse free fonts from Google and choose the one you like best. Download the text file so that you can later import it into Blender.
Open up a new general file in Blender and set up your workspace. We can start by adding the text to your file.
Step 1: Adding the text
To add the text, you can press Shift + A > Text.
Then rotate it on the x-axis so that it stands upright by pressing, R > X > 90 > Enter with the text selected.
Go to edit mode to change the text and type the word you want to baloonify!
Step 2: Changing the font
Blender's default font is pretty basic and not what we want for this project. To change the font, you can go to the Object Data Properties and then under Font, click the Folder icon on the Regular style to load the new font from your local directory on your computer.
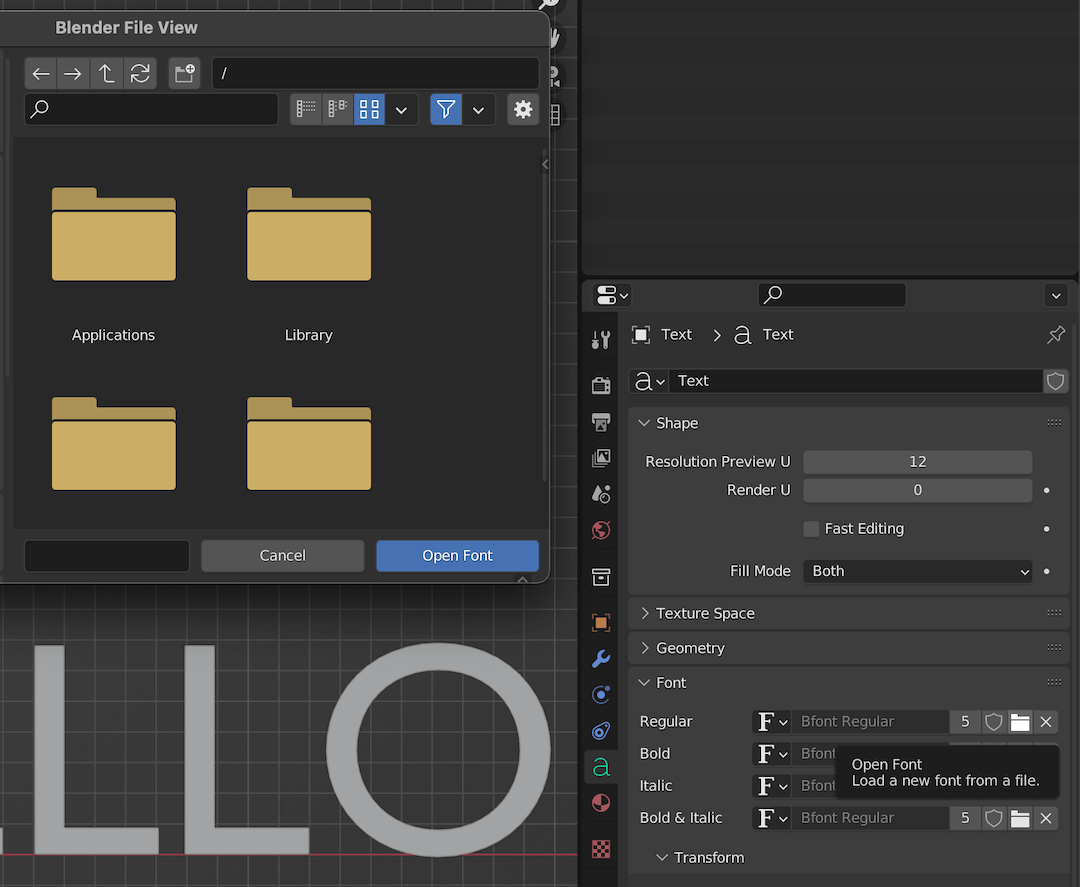
I chose the font Cherry Bomb, which is a free font that you can get from Google Fonts.
Step 3: Preparing the mesh
Usually, you can just right-click on the object and click Convert to > Mesh to create a mesh, but that will create too many extra edges. To avoid those, we need to decimate the text to reduce those extra edges.
Convert to Mesh, then on the Modifier Properties, add a Decimate modifier. Then select Planar, which lets you change the Angle Limit to your preferences. The lesser the value, the smoother the mesh.
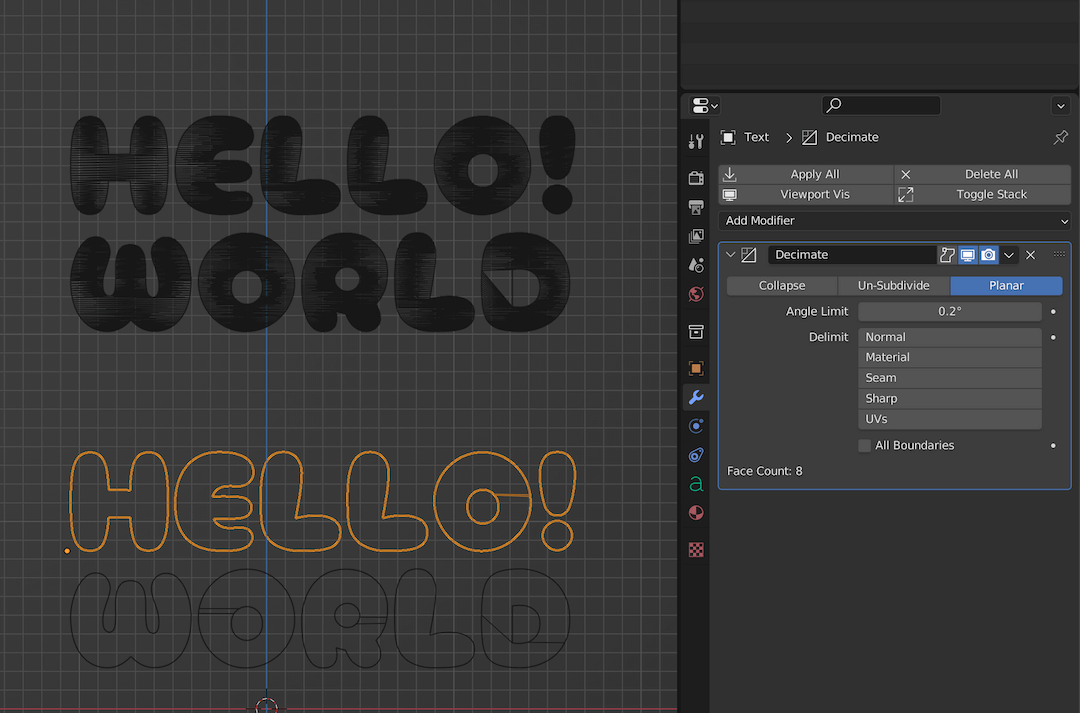
Decimate modifierOnce you are happy with the mesh, apply the Decimate modifier.
Now, we need to build the volume of the text. In edit mode, select all the vertices by pressing 1 to go into vertex select mode and A to select all vertices. Then press E > Y to extrude the vertices in the y-axis.
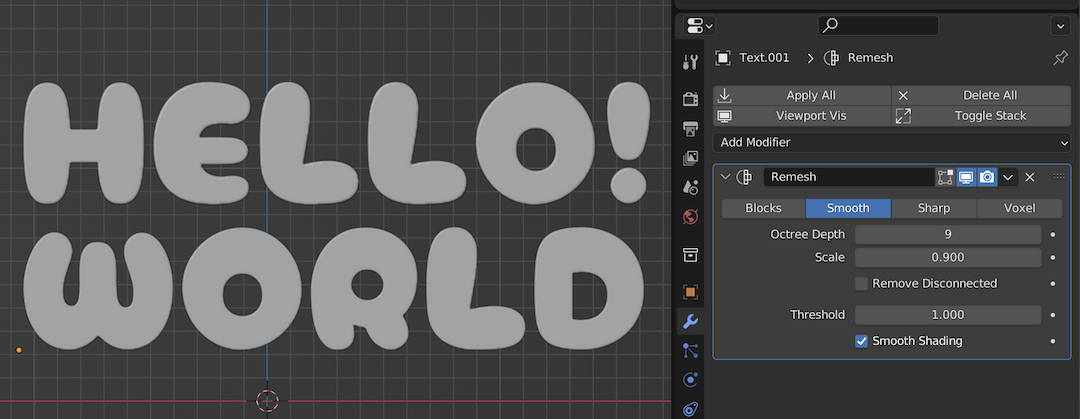
Step 4: Remeshing the text
Now that we have the basic text, we need to re-mesh it to create a new mesh with a uniform topology. Luckily, Blender has a modifier for doing just that.
Select the Remesh modifier, select the Smooth option, and increase the Octree Depth value to create the new mesh.
Also, disable the Remove Disconnected option, or only the first letter will be on your mesh. Enable Smooth Shading for a smoother edge, then apply the modifier.
Remesh modifierStep 5: Adding Cloth simulation
Go to the Physics Properties tab and add in the cloth modifier. We need to add and change some pressure settings in the cloth modifier settings.
First, enable Pressure and Custom Volume. Set the Pressure to 8, Target Volume to 3, and Pressure Scale to 5. You can play around with these values to get different results. Under Cache, set the end keyframe to 10, so that you can see the balloon effect faster instead of waiting for 250 frames. Depending on your device, rendering this simulation might take a long time.
Then press the Spacebar to start your simulation animation. If you are happy with the result, you can Bake the simulation under Cache. It saves the file and will also save your computer a lot of processing power.
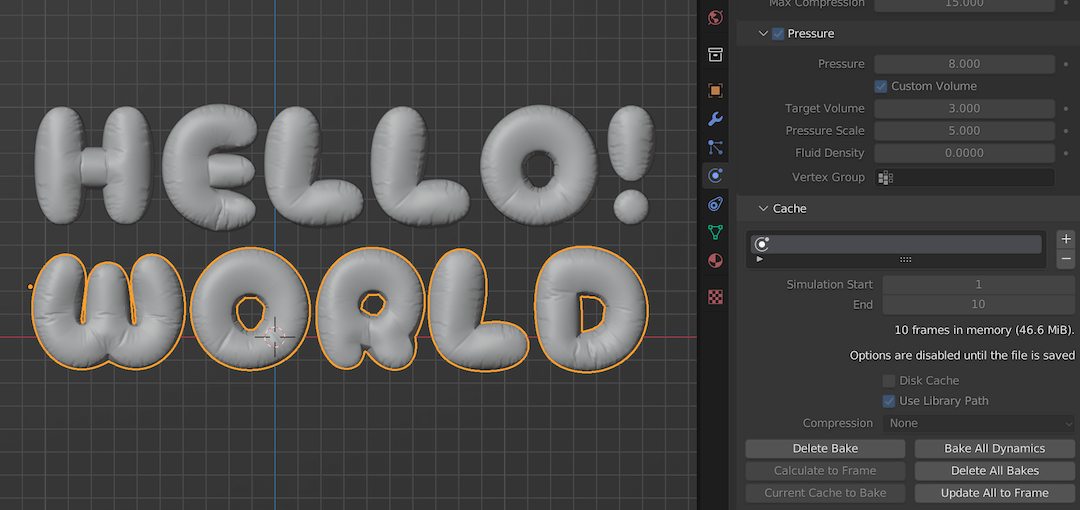
Pressure and Cache SettingsBaked your simulation, you cannot change the existing bake; that is why the options are disabled. To edit the simulation, you need to delete the existing bake by pressing Delete Bake.There we have it! Balloon text ready.
Step 6: Final touches
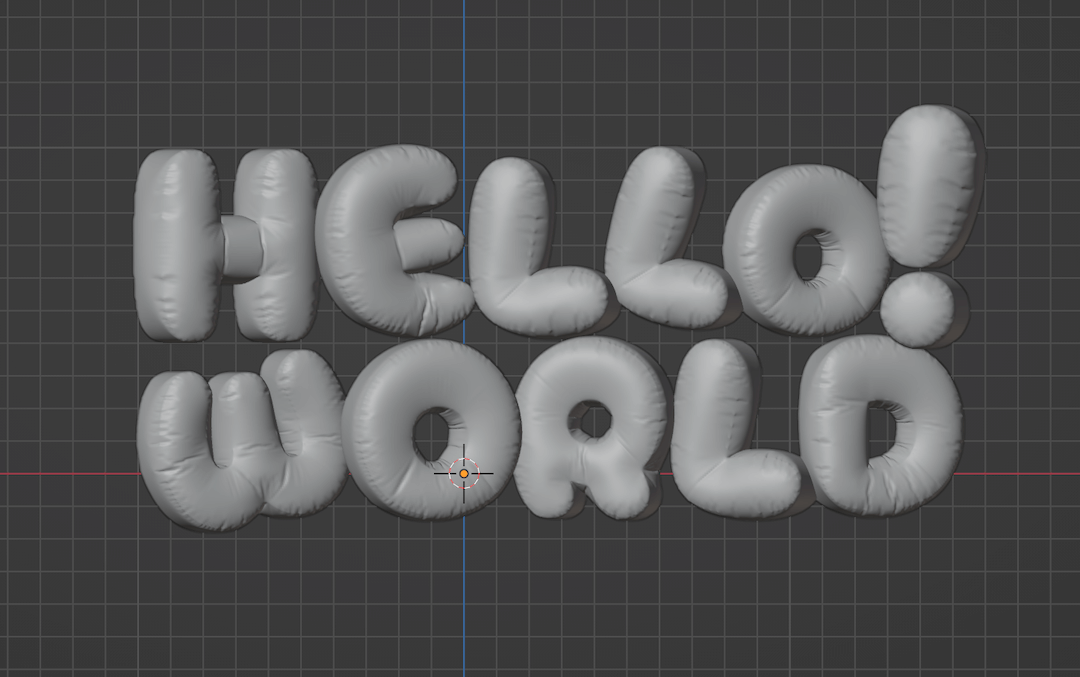
You might still want to make more changes to the mesh, and they're possible in many ways. I usually convert the simulation to mesh to get easily editable objects. Converting it to mesh will remove all the simulation data and only leave the completed result of the simulation, which is our final frame of the animation. After this, you can no longer change the simulation forever.
To do that, right-click on your mouse, then go to Convert To > Mesh.
You can further separate each letter by going into Edit Mode then pressing P > by Loose Parts.
Now, select all the letters and go to Object > Set Origin > Origin to Geometry. This will set the origin of all letters to their respective geometrical origin. You can individually select, move, scale or rotate the letters.
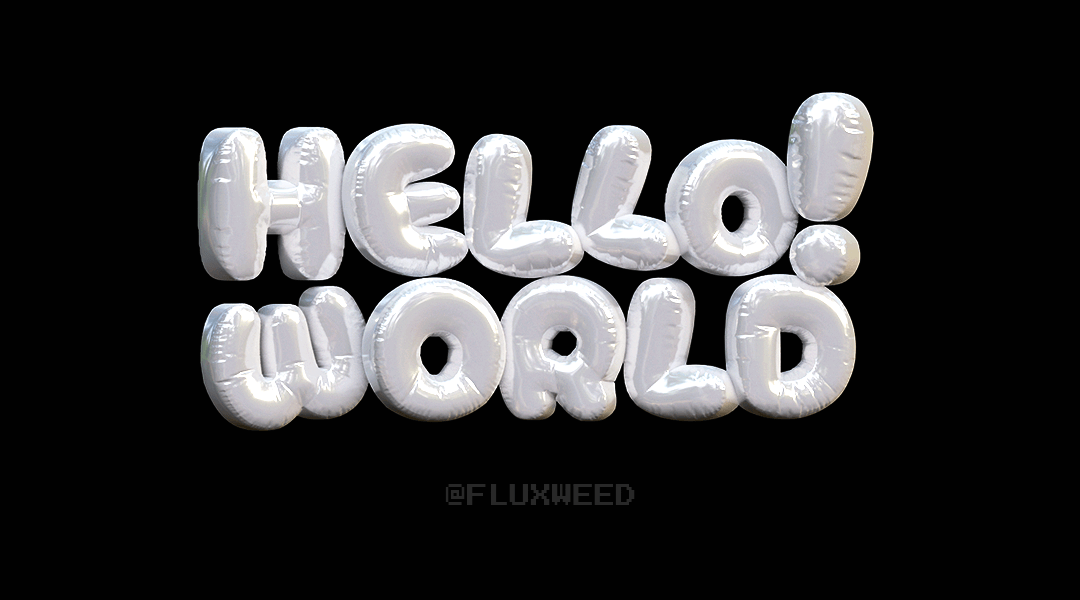
After scaling and moving around a few letters, here is what I came up with. Hope you learned a couple of new things here. There will be a follow-up post, where I will add materials and lighting to render the scene.
This is our final result for this part. Stay tuned to complete this project!
Thanks for reading! Don't forget to subscribe and leave a comment below.