
Blender is such a versatile tool, and since I have only been using it for around two years, I still have yet to explore so many new things. Recently, I discovered a technique for Cloth Simulation in Blender while working on a personal project.
In this article, I will review the basics of cloth simulation and different Blender functionalities.
Arranging The Scene
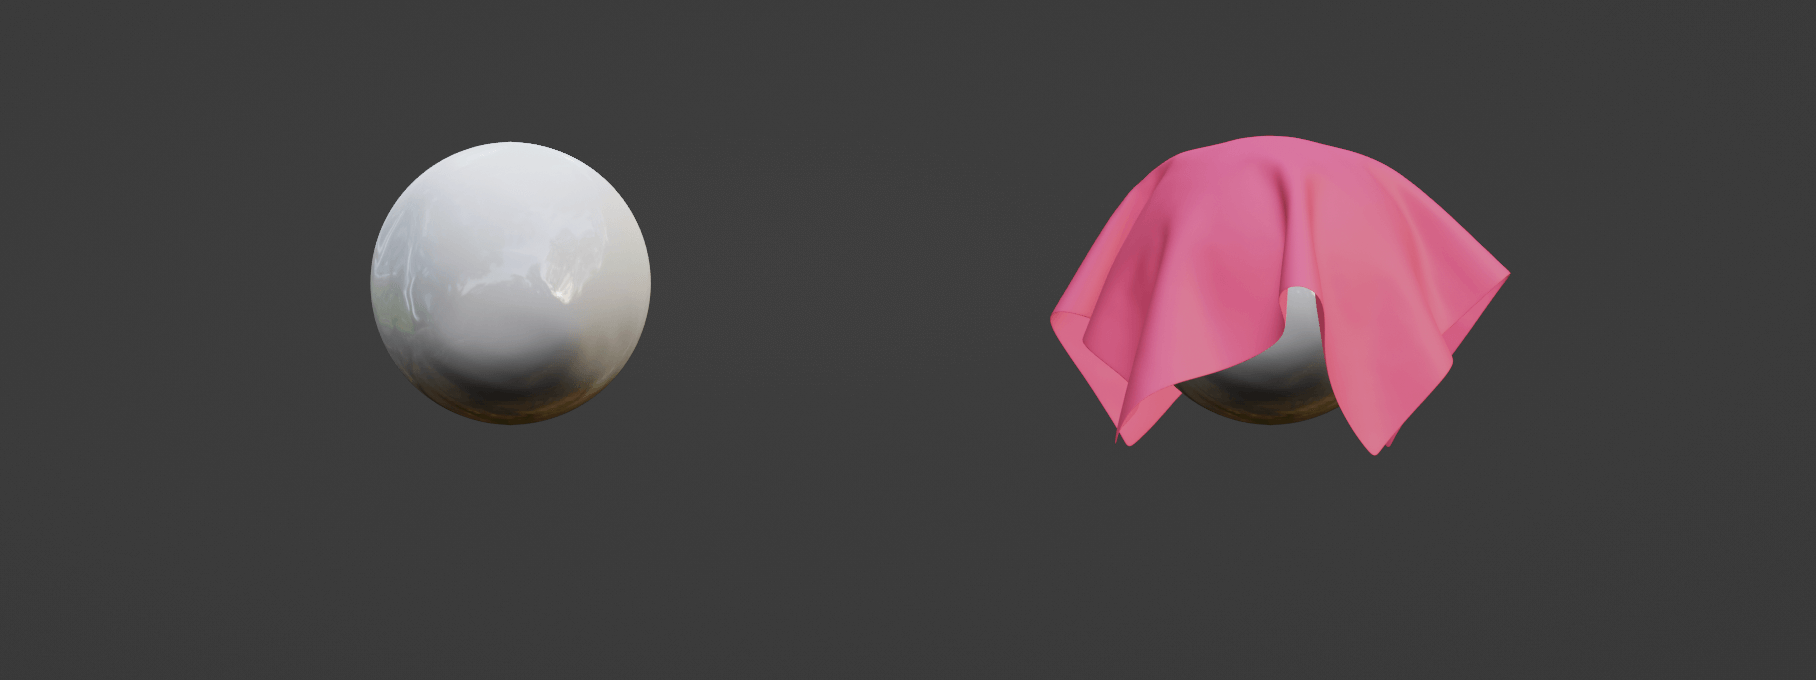
The idea for this article is to land a piece of cloth on top of a sphere.
First, fire up Blender and create a new General File with the basic default cube, and immediately delete the cube by clicking on it and pressing X > Delete.
Related article: Create Pillows using Cloth Simulation in Blender
Step 1: Setting up the sphere
You can use a simple UV sphere by pressing Shift + A and going to Mesh > UV Sphere.
Add a Subdivision Modifier with the Ctrl + 2 shortcut, or add in the Subdivision Modifier from the Modifier Properties tab on the Editor.
Step 2: Setting up the plane
Next, we add the cloth, which is the plane. Add a plane object to the scene by clicking Shift + A and heading to Mesh > Plane.
Go to S > 2 > Enter to scale up the plane to twice its scale. Move it up in the Z axis by pressing G > Z, and with the mouse, move the scale on top of the sphere.
As with the sphere, we need more topology for the plane to interact with the sphere. A subdivision modifier changes the corners of the plane, so I will edit the plane in Edit Mode instead. Select the plane by clicking on it and select Edit Mode from the top left navigation bar.
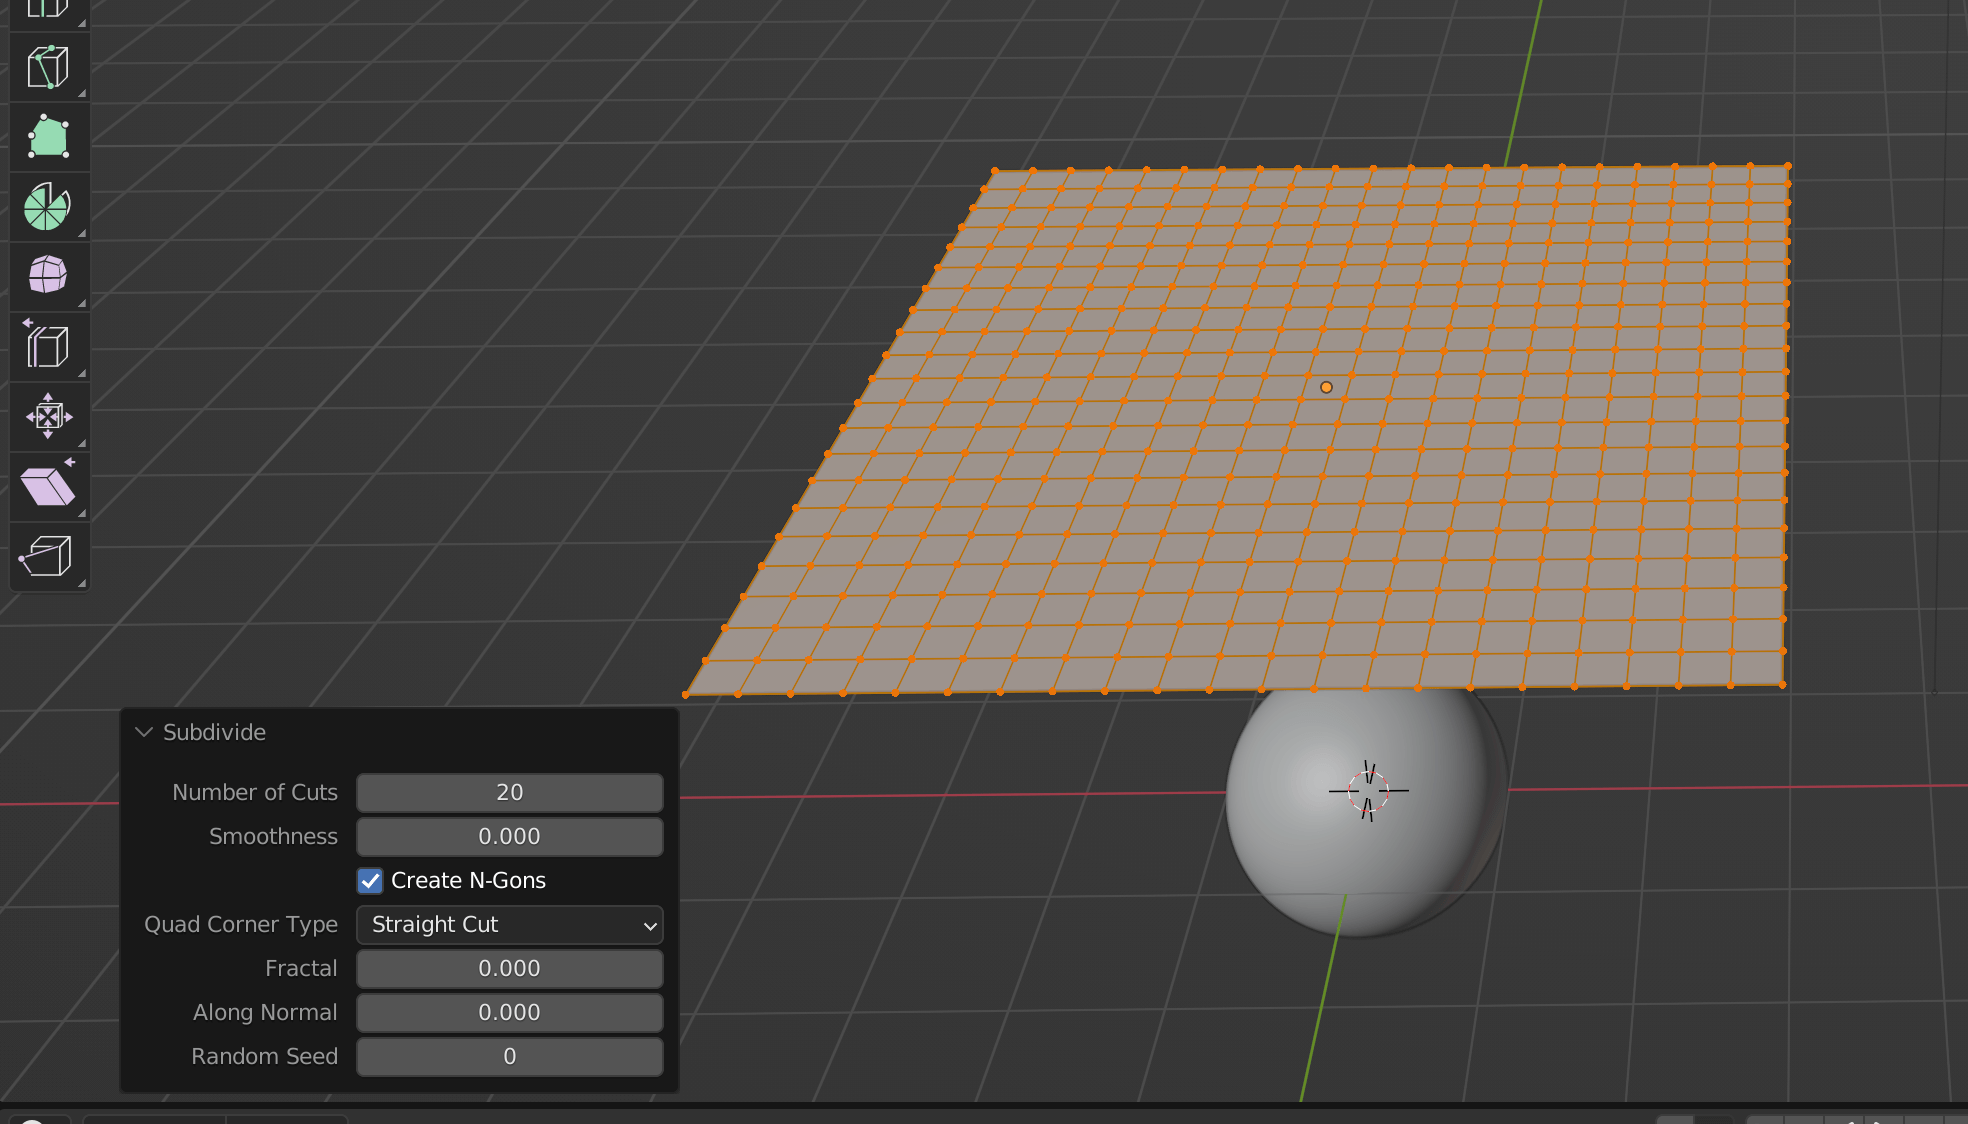
Edit ModeGo into face selection mode by pressing 3, then add subdivisions to the plane with Right Click > Subdivide. This brings up a Subdivide menu on the bottom left of the screen. Click to expand the menu and change the number of subdivisions to 8.
Ctrl + A > Scale.Step 3: Setting up the cloth
Finally, we can add some physics to the scene and create the simulation.
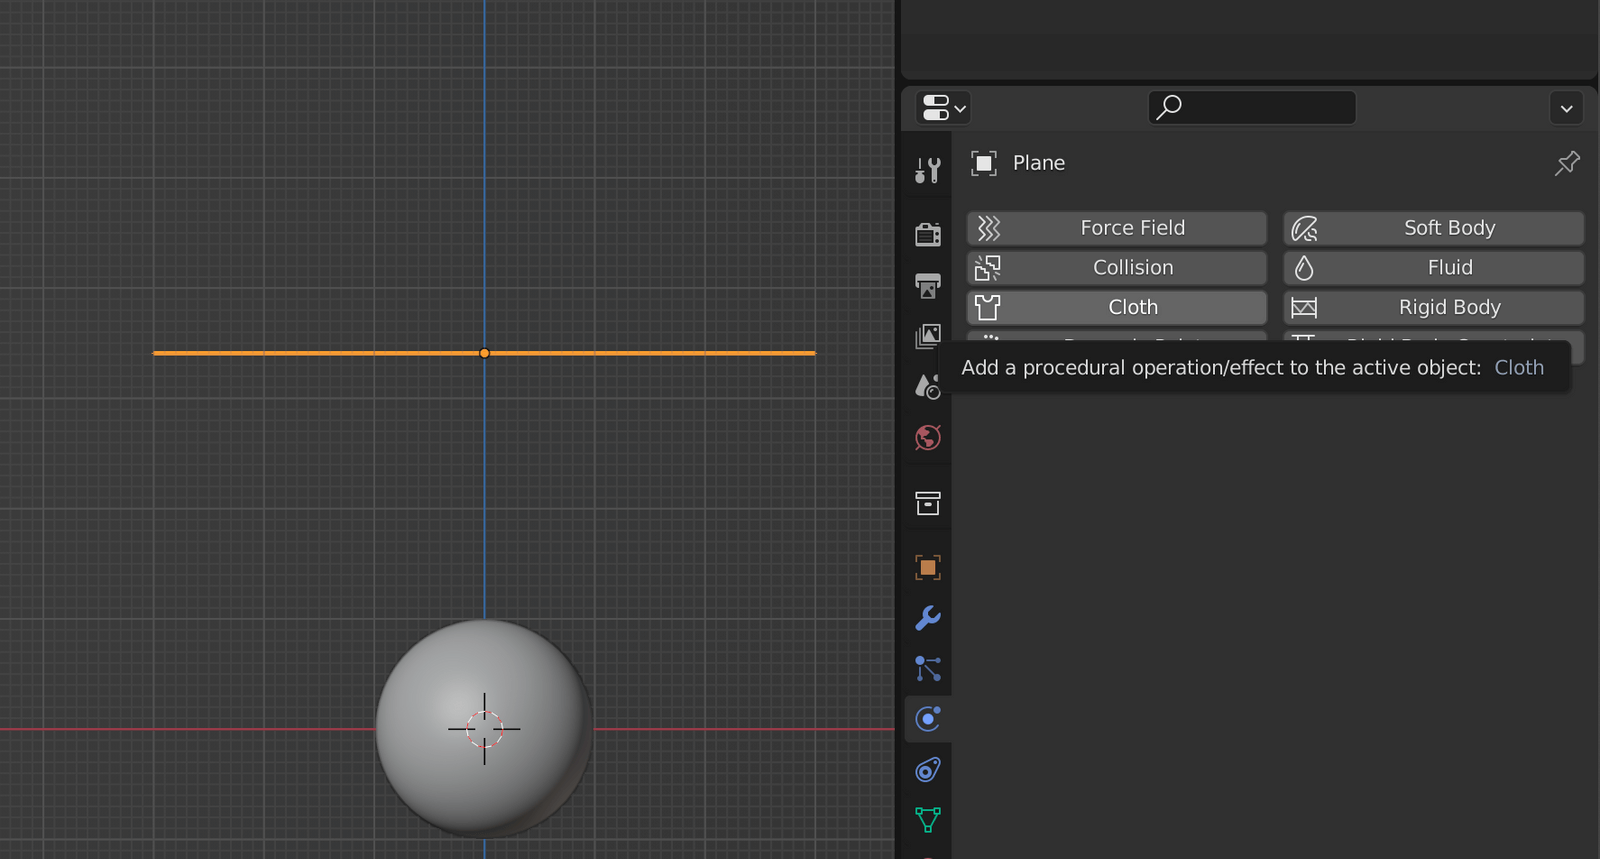
Select the cloth, and on the Properties tab, select Physics Properties and add the Cloth effect. It will bring up a bunch of different cloth properties that you can modify to create the said effect.
Cloth effect on Physics PropertiesStep 4: Adding collision to the sphere
Now, for the cloth to interact with the sphere, we need to add a collision property to the sphere. Like with the plane, in the Physics Properties, select the Collision Property so the sphere will be an object that will create a collision.
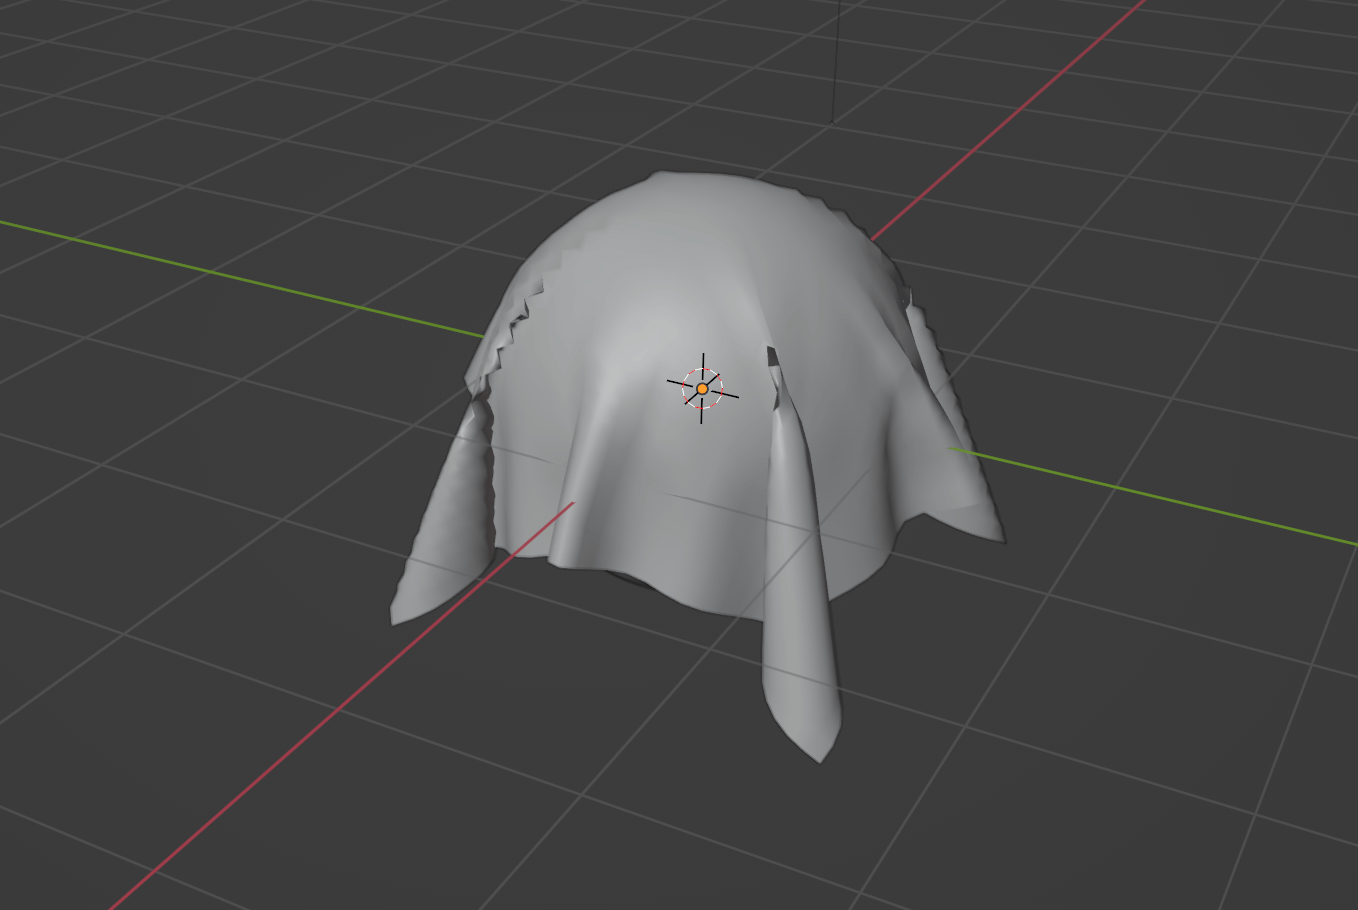
You can now play the animation to see the cloth fall on top of the sphere. If the cloth isn't as smooth as expected, add more subdivisions to the plane for a smoother cloth.
Property Alterations for a Better Look
Various properties can be modified to further change how the cloth falls on top of the sphere and improve the overall simulation. I will go over a few important ones that I find most useful. Going over the general cloth settings first, there are:
Quality steps
Increasing the quality value obviously increases the quality of the simulation but also uses a lot of processing power.
Speed multiplier
The cloth speed is multiplied by this value.
Moving on to the Physical Properties to make the cloth crumple less and feel more like a cloth, I find the following settings most helpful to play around with:
Tension
Increasing the tension value means the material will be more resistant to stretching.
Compression
Increasing the compression value means the material will be more resistant to compression or squeezing.
Shear
Increasing the shear value means the material will be more resistant to breaking off.
Bending
Increasing the bending value means the material will be more resistant to bending or crumpling.
Making the cloth interact with itself
By default, the Self Collision option is turned off to save processing power. Scroll down on the cloth properties and click the check box to turn it on.
Also read: How to Create 3D Balloon Text with Blender
Render Settings
To render the final animation, there are a few finishing touches you can add to create a smoother and faster render.
1. Editing the cloth
To make the cloth a little thicker, you can add a Solidify Modifier from the Modifier Properties, and set the thickness value to 0.01m .
2. Baking the simulation
Once you are happy with the cloth simulation, you can bake the animation to finalize it. On the Cloth Property under Cache, you can find the different properties to edit the animation.
Change the end frame to 60 to end the animation at 60 frames, then hit the Bake button. This will create the animation that you can render in Blender. Finally, you can add a Subdivision Modifier to the cloth.
To make further changes to the cloth simulation property after baking, you must delete the existing bake.
After baking, the animation will play out much smoother because Blender will store the simulation in its cache and play it out from memory.
Here is my final render of the cloth simulation:
There we have it. The basics of cloth simulation! Hope you guys got a basic understanding of cloth simulation in Blender with this blog. There are still lots more to explore, so keep going!
Consider subscribing. Catch you in the next one!