
In the previous part, I covered the basics of cloth simulation to create the balloon effect. In this article, we will be going over lighting and setting up the materials for the final render.
The Final Render
Step 1: Setting up the render scene
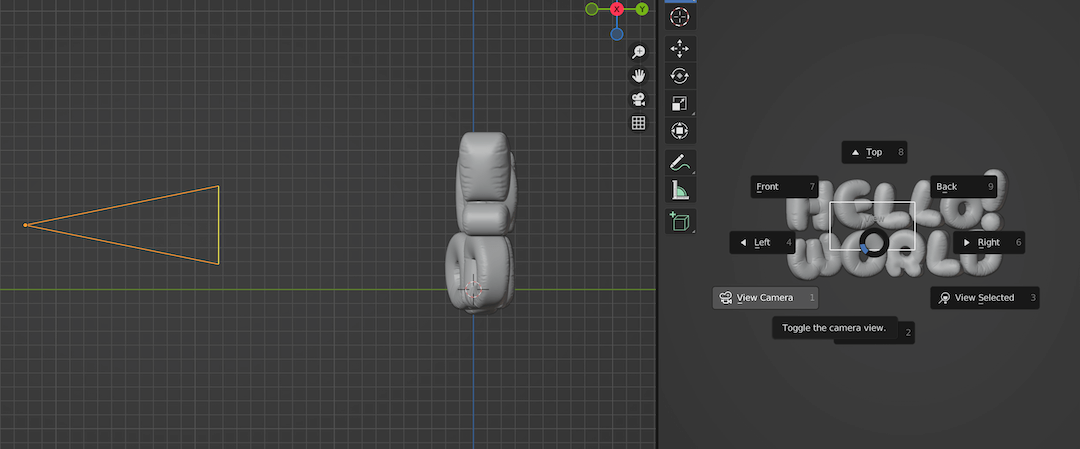
First, you need to add a camera to the scene to capture the render.
I like to add the camera and set up the scene before adding materials. This gives me a foundation to build on my lighting and materials. Note that different camera angles and settings can give you a different render, even with the same materials and lighting.
Adding a camera and setting up the workspace
You can add a camera by pressing Shift + A > Camera. After that, position and set up your camera. I like to divide my workspace into two halves, with one half displaying the camera view at all times. You can click and drag from the corner of the window to create another window in Blender. Then press ~ > 1 (View Camera) to get the camera view.
Render Properties
For the Render Properties, there are only a few settings that I change.
First, turn on Ambient Occlusion, Bloom, and Screen Space Reflections.
Second, turn on Transparent in the Filter Size on the Film settings to get a transparent background.
Third, go to Color Management option. Under that option, choose the Very High Contrast look, and change the Exposure and Gamma values as required to change the contrast level of your render.
Finally, for camera settings, the Orthographic Camera is my preferred choice.
Step 2: Adding the materials
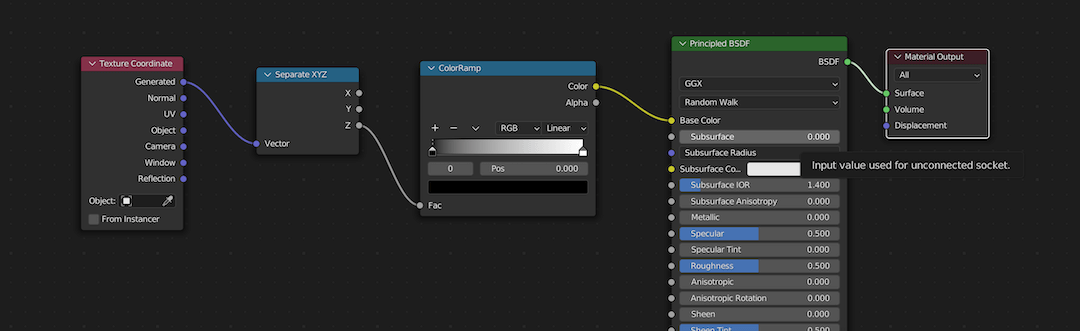
Now, we can finally add some colour to our typography. We will use a couple of nodes to create a simple gradient for the balloon object.
Pull up another window on the bottom to set up your Shader Editor view, then follow the listed directions:
a. Select the text object and add a new material by pressing the New button on the Materials Properties on the bottom right window.
b. On the Shader Editor window, you should have a Principled BSDF plugged into the Material Output node by default. We will be adding a few more nodes to the material.
c. Press Shift + A then select the Texture Cordinate node. Since there are a lot of nodes, you can search for the node you need by clicking on the Search button after pressing Shift + A.
d. Likewise, also add a SeperateXYZ node and a ColorRamp node. Basically, we are going to create a gradient for the text with the nodes added.
e. Connect the nodes as shown. This setup will map the mesh of the object to the ColorRamp in the Z-axis. You can also change the input of the ColorRamp from Z-axis to Y-axis to get another style.
f. Choose any colour you want for the gradient.
g. In the Principled BSDF shader, you can change the roughness value to around 0.1 and increase the metallic value to around 0.3 to get the balloon effect. Play around with the values to get more interesting results.
Step 3: Adding the lights
For rendering, I prefer to use two primary lights. One is the HDRI (environment light), and another is the default simple sunlight. HDRI gives you control over the overall environment light. I find that it really helps to quickly set up the background light.
Adding environment light
On the Shading workspace, or in the Shader Editor window, you can change into the World mode instead of the object mode to add the HDRI.
Press Shift + A > Environment Texture to get the Environment Texture node. Load your HDRI and plug it into the Background node, which is going to the World Output node.
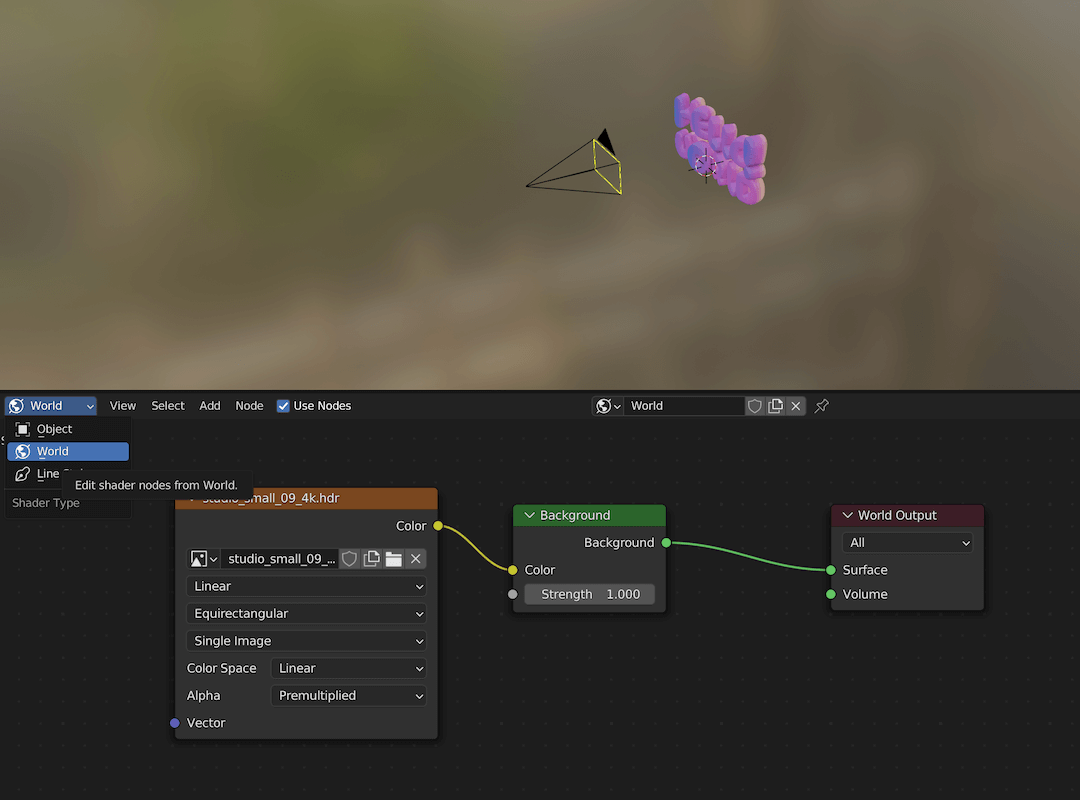
I use the free HDRIs provided by PolyHaven. A simple Google search should give you lots of free resources for HDRI.
Adding sunlight
Now we need to add sunlight.
Press Shift + A > Light > Sunlight.
You can position the sunlight anywhere you want in the scene. The position will not affect the lighting effects; only the rotation value will create the difference.
So, select the sunlight and press R then X to rotate the light in the X-axis and likewise for the Y-axis.
Change the rotation to get the desired lighting effect. Also, remember to enable Contact Shadows of the sunlight to add in that extra shadow to show depth.
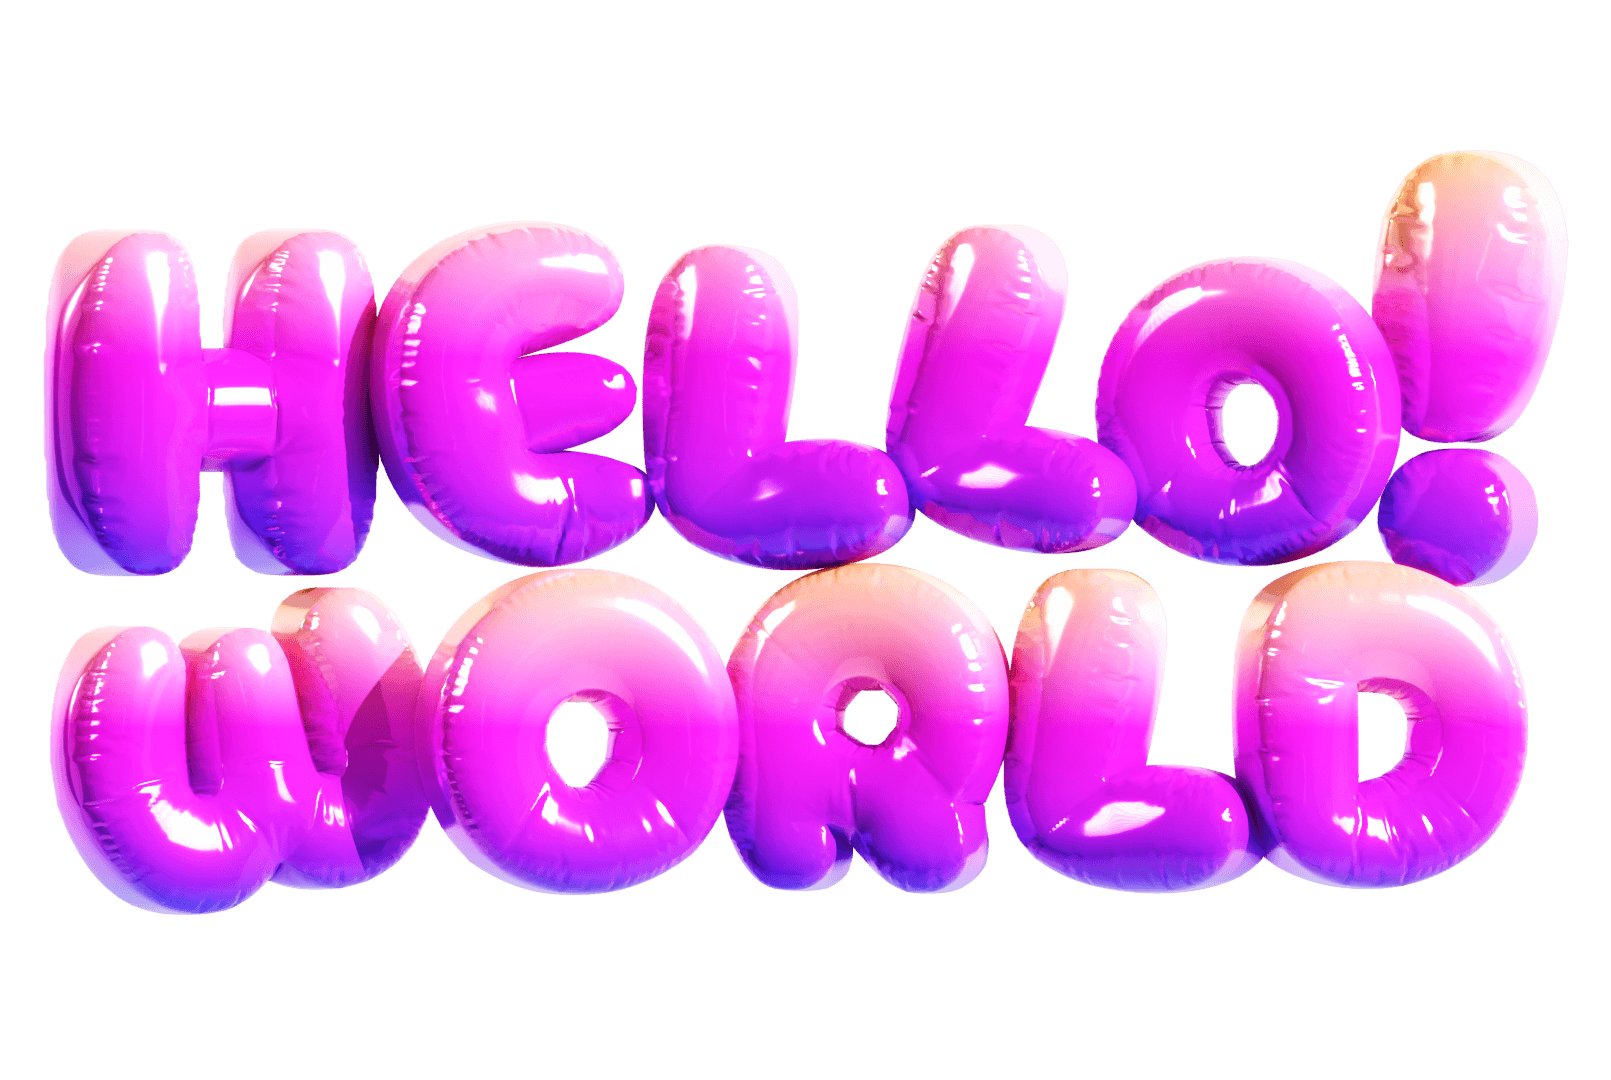
End Result
Here is my final render!
Extra Tips
Here are some extra render tips to further enhance your final render.
- Increasing the metallic value of the material will make the colours appear darker, so, in that case, you can increase the value of the sunlight to balance your render.
- Changing the colour of the sunlight will add more moody lighting to your scene.
- Changing the
Bloomcolour and intensity will give that extra glow to your scene. - Finally, post-processing in Photoshop to bump up the contrast and values is always an option.
Thanks for reading. Catch you in the next one!