
A timer is an essential game feature. Therefore, game developers use it at some point in their careers. We learnt how to create a timer using Invoke() and Coroutine()in the last part. Continuing the series, in this part, we will create a timer with Update() and AsyncAwait.
Timer with Update()
The Update() method is a predefined method given by MonoBehaviour and runs in each game frame automatically. The Update() method will run until the GameObject attached to the script is active.
For the timer with Update() method, we need a float variable, which will be increased with Time.deltaTime in each frame. Its parsed integer value will be used to indicate the increase in the timer.
    //Time value updates every frame
    private float _currentTime;

    //stores the current timer's last integer value
    private int _lastTime;

    //the total time the timer will run
    private int _totalTime;

    //Indicates if the timer is on; By default it is false so the timer doesn't run in Update() method.
    private bool _timerIsOn = false;
Variables Used to Handle the Timer
In the Update() method, _totalTime will hold the total time to which the timer will run and _timerIsOn will handle the starting and ending of the timer update.
Timer increment in update() method
As we mentioned above, Update() runs in each frame change in the game, so the increment of the timer value should be done in each frame.
    private void Update()
    {
        if (!_timerIsOn) return;
        _currentTime += Time.deltaTime;
        _lastTime = (int)_currentTime;//parse the float time to integer
        Debug.Log("timer is : " + _lastTime);
        if (_lastTime == _totalTime)
        {
            _timerIsOn = false;
            Debug.Log("timer is completed");
        }
    }
Increasing the timer in update method
Here, we have created a timer increment. Now, we need to set the value of the timer before starting it. Create a method to start the timer and update the required value.
 /// <summary>
 /// Call when the timer is to be started for the provided total time.
 /// </summary>
 public void StartTimer(int totalTime)
    {
        _totalTime = totalTime;
        _currentTime = 0;
        _lastTime = 0;
        _timerIsOn = true;
    }
Method to start the timer for the given time
After calling this method, the timer will start and end when it reaches the total time you provided in the StartTimer() method above. In this test case, we have called the timer in Start() method, which will be executed once the GameObject the script is attached to is enabled.
Stopping the timer in update() method
Lastly, we need to create a method to stop the running timer.
/// <summary>
/// Call to stop the timer
/// </summary>
public void StopTimer()
{
    _timerIsOn = true;
}
Method to stop the timer
To know when the timer is completed, we can trigger an Action event when the timer is completed and set it to null when it stops. If you don't want to use the Action event, you can directly call the next method that will run when the timer is completed.
 //Action to be triggered when the timer is up.
public event Action OnTimerUp;

private void Update()
{
    --------------
    --------------
    if (_lastTime == _totalTime)
    {
        _timerIsOn = false;
        OnTimerUp?.Invoke();
    }
}

/// <summary>
/// Call to stop the timer
/// </summary>
public void StopTimer()
{
    _timerIsOn = false;
    OnTimerUp = null;
}
Adding action to inform the timerCompletion
This is how you can create a timer with the Update() method in Unity.
Also Read: Moving From Unity To Godot (Placing 3D Object On Mouse Click)
Full code for TimerWithUpdate()
The full code for the TimerWithUpdate() is below:
using System;
using System.Timers;
using UnityEngine;

public class TimerWithUpdate : MonoBehaviour
{
    //Time value updates every frame
    private float _currentTime;

    //stores the current timer's last integer value
    private int _lastTime;

    //the total time the timer will run
    private int _totalTime;

    //Indicates if the timer is on; By default it is false so the timer doesn't run in Update() method.
    private bool _timerIsOn = false;

    //Action to be triggered when the timer is up.
    public Action OnTimerUp;

    private void Start()
    {
        StartTimer(10);
    }

    /// <summary>
    /// Call when the timer is to be started for the provided total time.
    /// </summary>
    public void StartTimer(int totalTime)
    {
        _totalTime = totalTime;
        _currentTime = 0;
        _lastTime = 0;
        _timerIsOn = true;
    }

    private void Update()
    {
        if (!_timerIsOn) return;
        _currentTime += Time.deltaTime;
        _lastTime = (int)_currentTime;
        Debug.Log("timer is : " + _lastTime);
        if (_lastTime == _totalTime)
        {
            _timerIsOn = false;
            OnTimerUp?.Invoke();
        }
    }

    /// <summary>
    /// Call to stop the timer
    /// </summary>
    public void StopTimer()
    {
        _timerIsOn = false;
        OnTimerUp = null;
    }
}
Full code of Simple Timer with Update() method.
Yes, but with float variables, you'll get a timer with decimals which doesn't give a good look on screen. Also, if you need an exact second from the timer, you will need to convert it to an integer. So, using an integer would prevent any hassle beforehand.
Timer with AsyncAwait
Async Await Support is a free plugin in the Unity asset store. This plugin makes your normal method an Async method, so it can run asynchronously in the game. It works similarly to the Coroutine() method but without using the StartCoroutine() to run it. We can apply a timer with this method easily. We can also apply try-catch to the whole code within the method, which we couldn't do in Coroutine().
Importing the plugin from the Unity asset store
First, import the Async Await Support plugin from the Unity asset store. Add the plugin to your Unity asset store account and fetch it to your project using PackageManager from the Window section. Choose My Assets option in Packages and choose the Async Await Support package to install and import it to the project.
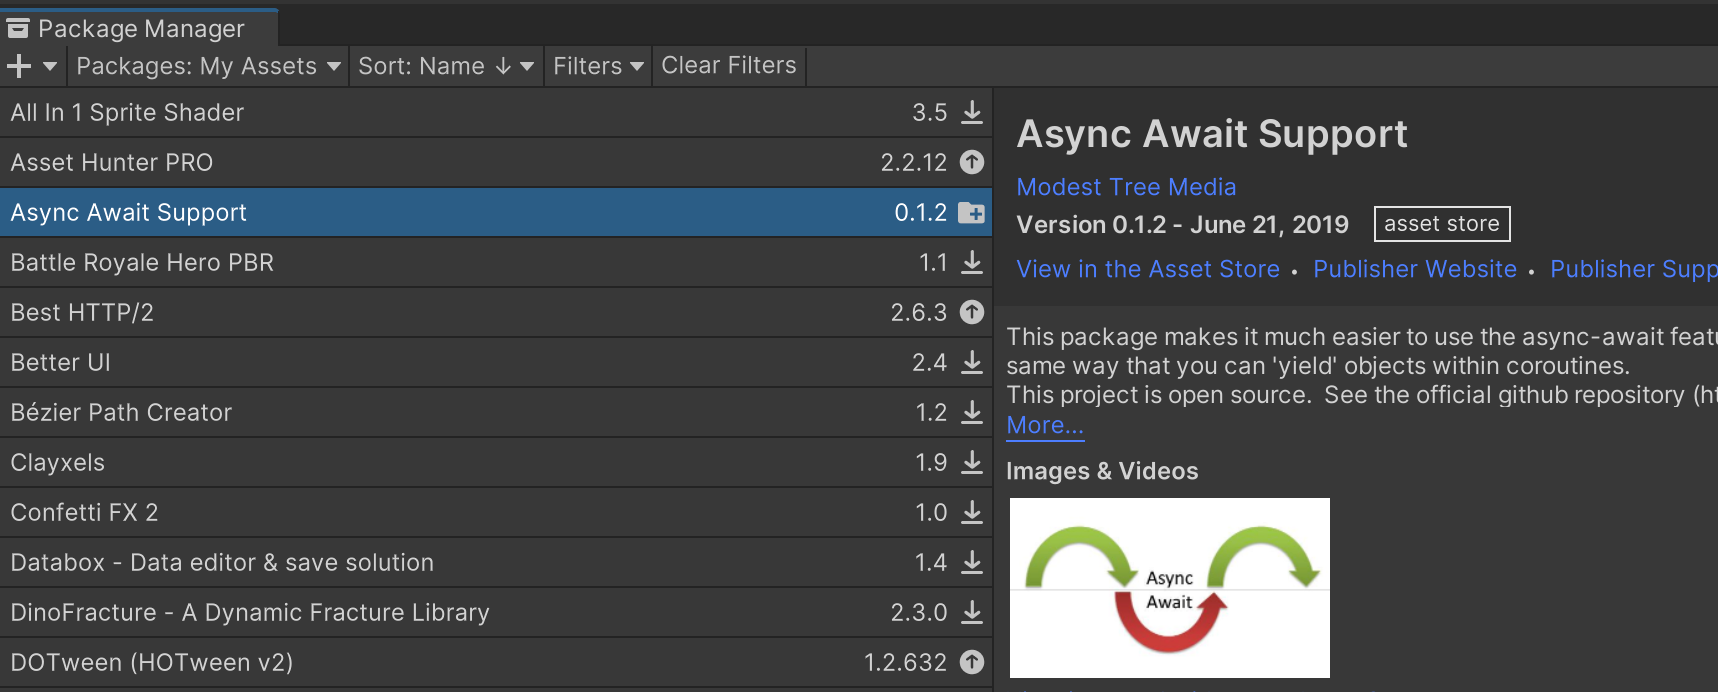
My Assets in Unity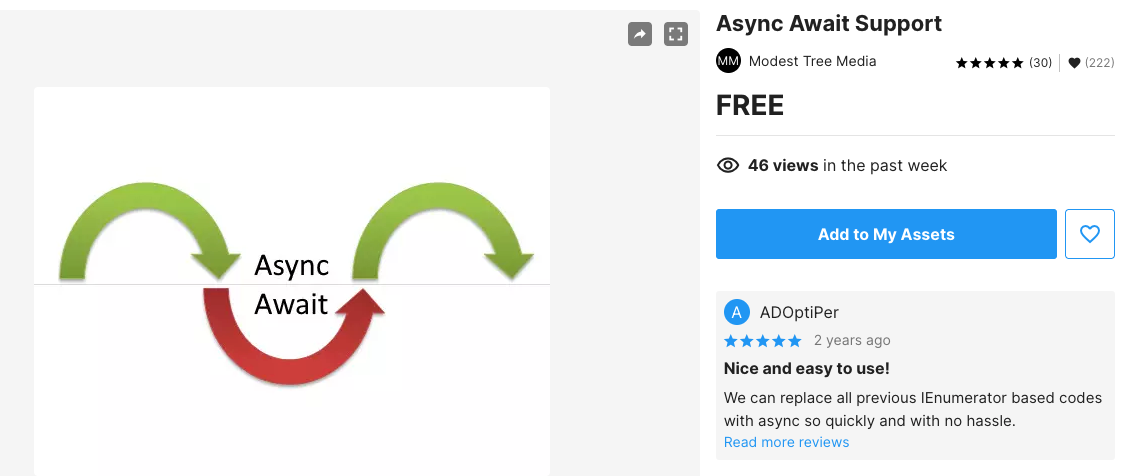
After importing the Async Await Support plugin from the server, you can use it in your project.
Declaring Variables
As we did in the previous part of the blog, we need to declare the variables that will be used for handling the timer. So, let's declare them first.
 /// represents the increasing timer.
 /// </summary>
 private int _timer;

 /// <summary>
 /// represents the total time the timer will run for.
 /// </summary>
 private int _totalTimer;

 /// <summary>
 /// Triggered when timer is completed and timeout is to be called.
 /// </summary>
 public event Action OnTimeOut;
Variables to handle the timer
Timer Increment in AsyncAwait
With AsyncAwait you don't need to increase the timer in each frame like we did in Update() method above. We need to set the timer with a 1-second time interval which will increment the timer by 1-second until it reaches the total time provided in the totalTime.
public async void StartTimer(int totalTime, Action onTimeOut)
    {
        while (_timer < _totalTimer)
        {
            //wait 1 second in real time and increasing the timer value
            await new WaitForSecondsRealtime(1);
            _timer++;
            Debug.Log("Timer is : " + _timer);
        }

        //trigger the timeout action to inform that the time is up.
        OnTimeOut?.Invoke();
    }
Time increment in AsyncAwait
Here, async is added before the return type void. It makes the StartTimer() method an async method, which runs in a different thread than the normal code running thread. You can easily apply await to wait for the given time interval in the method. We will apply a 1-second real-time interval. After the timer is up, OnTimeOut event is triggered to inform that the timer is up.
You might have seen some familiarity in the code above. It is almost similar to the timer increment process usingCoroutine. The only differences areIEnumerator is replaced with async and yield return is replaced with await.
Now, we just need to reset and start the timer for a given time, and it will work fine. In our case, we trigger an Action event once the timer is up. You can assign any reference to it.
public async void StartTimer(int totalTime, Action onTimeOut)
    {
        OnTimeOut = onTimeOut;
        _totalTimer = totalTime;
        //Reset the timer to 0 before starting the timer
        _timer = 0;
        _totalTimer = totalTime;

        while (_timer < _totalTimer)
        {
            .......................
        }

        .........................
    }
Assigning the provided data to the reference variables
Now, call the StartTimer() method and provide the total time and callback method. We will call this in Start() method for this code.
   private void Start()
    {
        StartTimer(10, TimeOut);
    }

    private void TimeOut()
    {
        Debug.Log("Your timer is up.");
    }
Calling the timer to start and providing a callback method
We have provided a total of 10 seconds to be run in the timer, and when it's up, the TimeOut method will be called. You can invoke any action whenever the timer is up in the TimeOut() function.
Stopping the Timer in AsyncAwait
For stopping any loop or method which uses AsyncAwait, we need to use CancellationToken . By assigning the CancellationToken created by CancellationSourceToken object, we can easily manage the cancellation of the running timer with AsyncAwait.
CancellationToken is a token created by the CancellationSourceToken object assigned to a task. It helps in cancelling the corresponding tasks running in multiple threads.Create a global CancellationSourceToken reference. We will need it to cancel its thread from a different method.
private CancellationTokenSource _cancellationTokenSource;CancellationSourceToken reference
Create a method to cancel the _cancellationTokenSource if it has been initiated. Apply try-catch the method to handle the case where the CancellationSourceToken object might have already been disposed, so the full cancellation process can't be executed.
    public void StopTimer()
    {
        try
        {
            if (_cancellationTokenSource == null) return;
            _cancellationTokenSource?.Cancel();
            _cancellationTokenSource?.Dispose();
        }
        catch (ObjectDisposedException e)
        {
            Debug.LogWarning("The object is already disposed." + e);
        }
    }
Method to stop the cancellation and dispose the CancellationSourceToken
AsyncAwait applied method doesn't stop by itself when its attached GameObject is disabled or destroyed. So, call for the StopTime() method when the timer is needed to be stopped. You can always decide when to stop the timer.Now, initialize the CancellationSourceToken and assign its token to a local CancellationToken for its easy use. Before initializing the CancellationSourceToken, don't forget to cancel it if it has already been initialized.
   public async void StartTimer(int totalTime, Action onTimeOut)
    {
    	//stop the already initialized cancellation token
        StopTimer();
        //initialize a new token
        _cancellationTokenSource = new CancellationTokenSource();
        var token = _cancellationTokenSource.Token;

        OnTimeOut = onTimeOut;
        .....................

        while (_timer < _totalTimer)
        {
            //wait 1 second in real time and increasing the timer value
            await new WaitForSecondsRealtime(1);
            //stop the loop if the cancellation has be requested
            if (token.IsCancellationRequested) return;
            _timer++;
            Debug.Log("Timer is : " + _timer);
        }

       .........................
    }
Cancelling the timer using the CancellationSourceToken
This is how you can create a simple timer using the Async Await plugin.
Also Read: Unity for Beginners - Part 1: Set Up
Full code for TimerWithAsyncAwait
The full code for the TimerWithAsyncAwait is below:
using System;
using System.Threading;
using UnityEngine;

public class TimerWithAsyncAwait : MonoBehaviour
{
    /// <summary>
    /// represents the increasing timer.
    /// </summary>
    private int _timer;

    /// <summary>
    /// represents the total time the timer will run for.
    /// </summary>
    private int _totalTimer;

    /// <summary>
    /// Triggered when timer is completed and timeout is to be called.
    /// </summary>
    public event Action OnTimeOut;

    /// <summary>
    /// Reference of the cancellation token source applied when timer is running.
    /// </summary>
    private CancellationTokenSource _cancellationTokenSource;

    private void Start()
    {
        StartTimer(10, TimeOut);
    }

    private void TimeOut()
    {
        Debug.Log("Your timer is up.");
    }

    /// <summary>
    /// Start the timer for the given time
    /// </summary>
    /// <param name="totalTime">total time for the timer to run</param>
    /// <param name="onTimeOut">The action to called when timer is up</param>
    public async void StartTimer(int totalTime, Action onTimeOut)
    {
        StopTimer();
        _cancellationTokenSource = new CancellationTokenSource();
        var token = _cancellationTokenSource.Token;
        OnTimeOut = onTimeOut;
        _totalTimer = totalTime;
        //Reset the timer to 0 before starting the timer
        _timer = 0;
        _totalTimer = totalTime;

        while (_timer < _totalTimer)
        {
            //wait 1 second in real time and increasing the timer value
            await new WaitForSecondsRealtime(1);
            if (token.IsCancellationRequested) return;
            _timer++;
            Debug.Log("Timer is : " + _timer);
        }

        //trigger the timeout action to inform that the time is up.
        OnTimeOut?.Invoke();
    }


    /// <summary>
    /// Call to stop the timer.
    /// </summary>
    public void StopTimer()
    {
        try
        {
            if (_cancellationTokenSource == null) return;
            _cancellationTokenSource?.Cancel();
            _cancellationTokenSource?.Dispose();
        }
        catch (ObjectDisposedException e)
        {
            Debug.LogWarning("The object is already disposed." + e);
        }
    }
}
Full code for TimerWithAsyncAwait
To Summarise,
we have finished creating a simple timer in two ways; update() and AsyncAwait in this article. Now you know how to make a simple timer in Unity in four ways: Invoke, Coroutine, Update and AsyncAwait.
Hope you found this blog series helpful. Comment below if you have any queries.