
Hi game developers! Just getting started with Unity and having no idea where to begin? No worries. This blog series will guide you from the very beginning, step by step.
So come on, grab your mouse and let's learn Unity: A Real-Time Development Platform.
Knowing Unity
Unity is a user-friendly, multi-cross-platform game engine. It's been a famous game engine in the game industry due to its vast learning resources and simple-to-grasp concepts. Unity's user-friendly interface and intuitive features provide easiness to beginner game developers, enabling them to create their own games in no time with no effort.
A developer can easily create a game without coding using the provided tools and resources. The attention-grabbing element for beginner game developers with a low budget is that they can use Unity free of cost.
Pro features can be accessed by subscription, which gives more benefit to the developer. But that's no bummer for the non-pro developers. Unity provides most of the features required to make a game for free. There are certainly more benefits in having access to the pro features and functionalities, but don't underestimate what you can accomplish as a beginner developer using the free features alone!
The Setup Process
Step 1: Download Unity Hub
Downloading and installation are a must before getting started with using the software. Unity has provided us with Unity Hub for easy download and setup process. It allows us to download and use multiple versions of Unity along with management functionalities on a single PC easily.
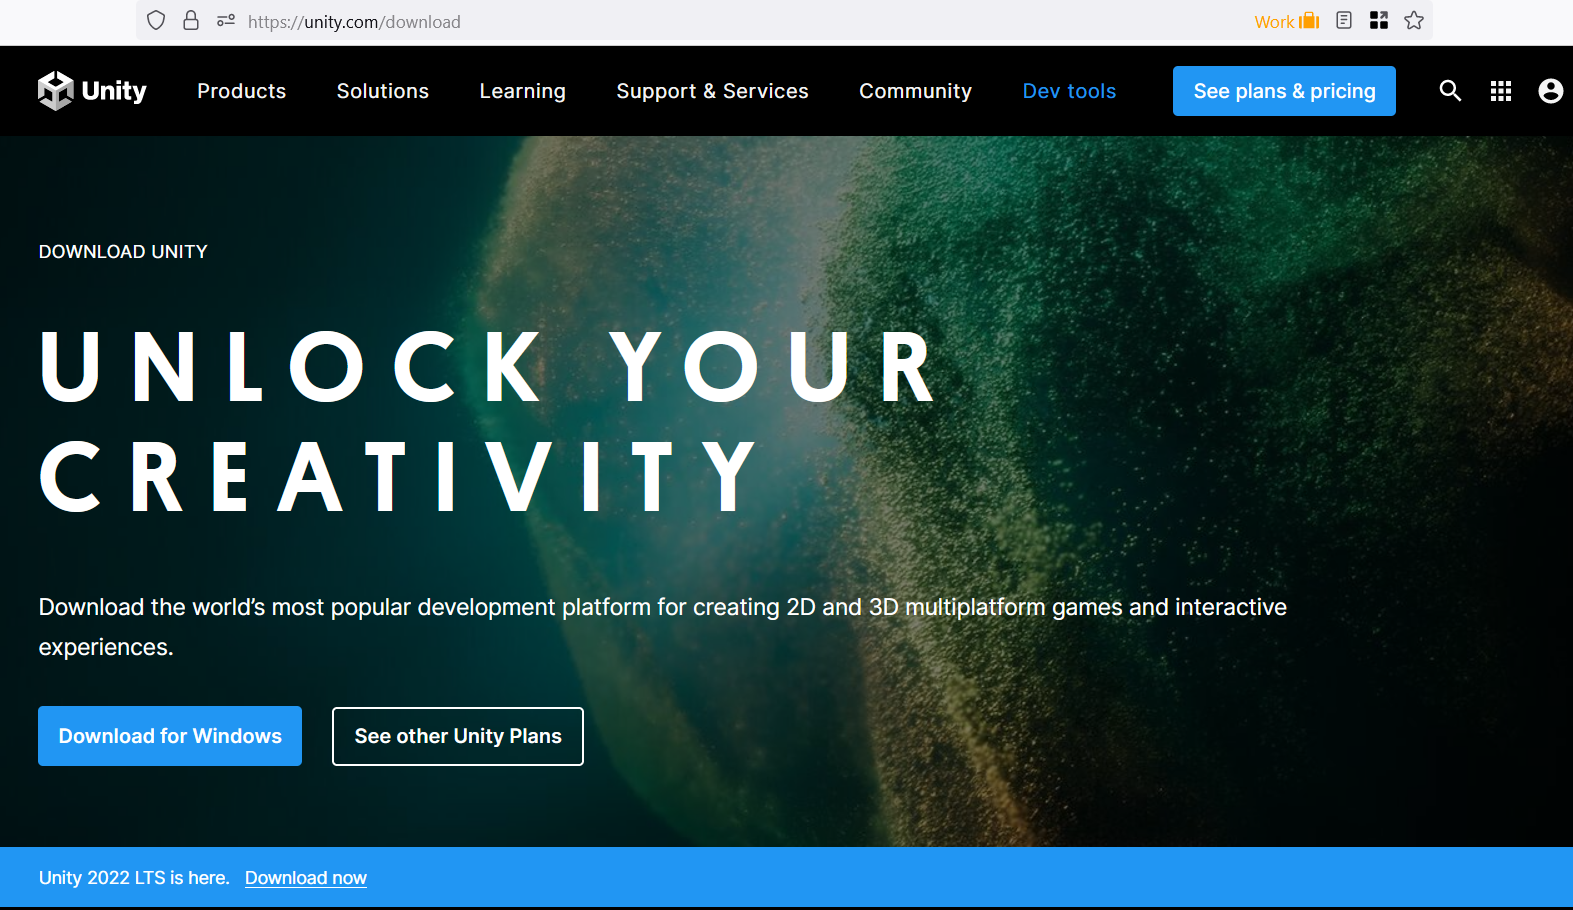
Download Unity Hub and start your game dev journey.
After installing Unity Hub, open it, and you will get a window panel like the image below. The interface may differ depending on the version of Unity Hub.

The sections available in the initial interface are:
Under (1), find all the available tab options in the left panel.
Under (2), find all created projects listed in the centre.
Under (3), create a new project or open already created ones at the top-right panel.
Step 2: Install Unity Editor
Select the Installs tab in the Unity Hub panel. All Unity editors you downloaded using Unity Hub are listed here.
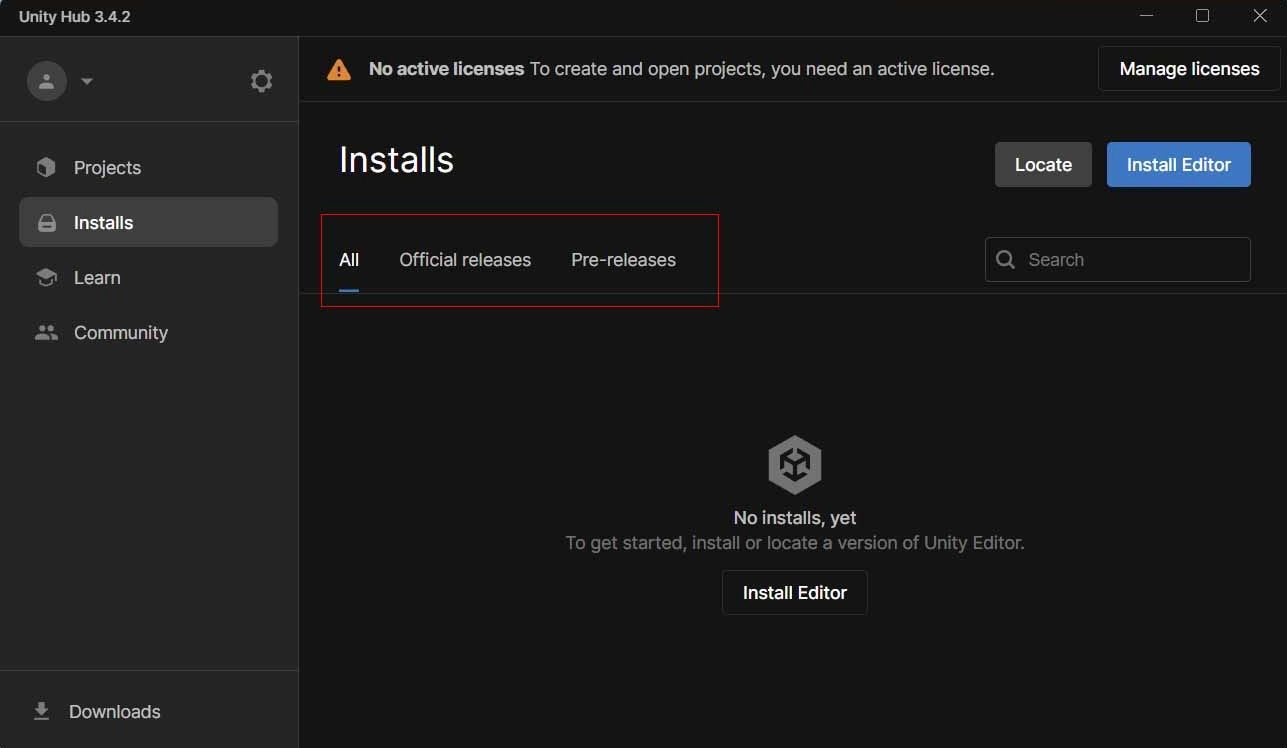
Three tabs are categorised:
- All: Shows all versions of Unity editor installed in Unity Hub.
- Official releases: Shows the
LTSversion of Unity editor installed. They are stable versions which provide stable support. - Pre-releases: Shows the Unity versions, which are released as
AlphaandBeta. These Unity editors are in the testing phase and are unstable.
At the top-right corner of the screen, there are two more options to install Unity versions.
- One is to locate the standalone downloaded Unity editor, which will be available on your PC if installed beforehand. For this, choose the
Locatebutton and show the folder in which the Unity editor was installed. - Another button
Install Editorinstalls a new Unity editor.
We will be using the second option and installing a new editor. For that, follow the listed steps:
- Click on
Install Editorbutton and a panel like in the image below will be shown.
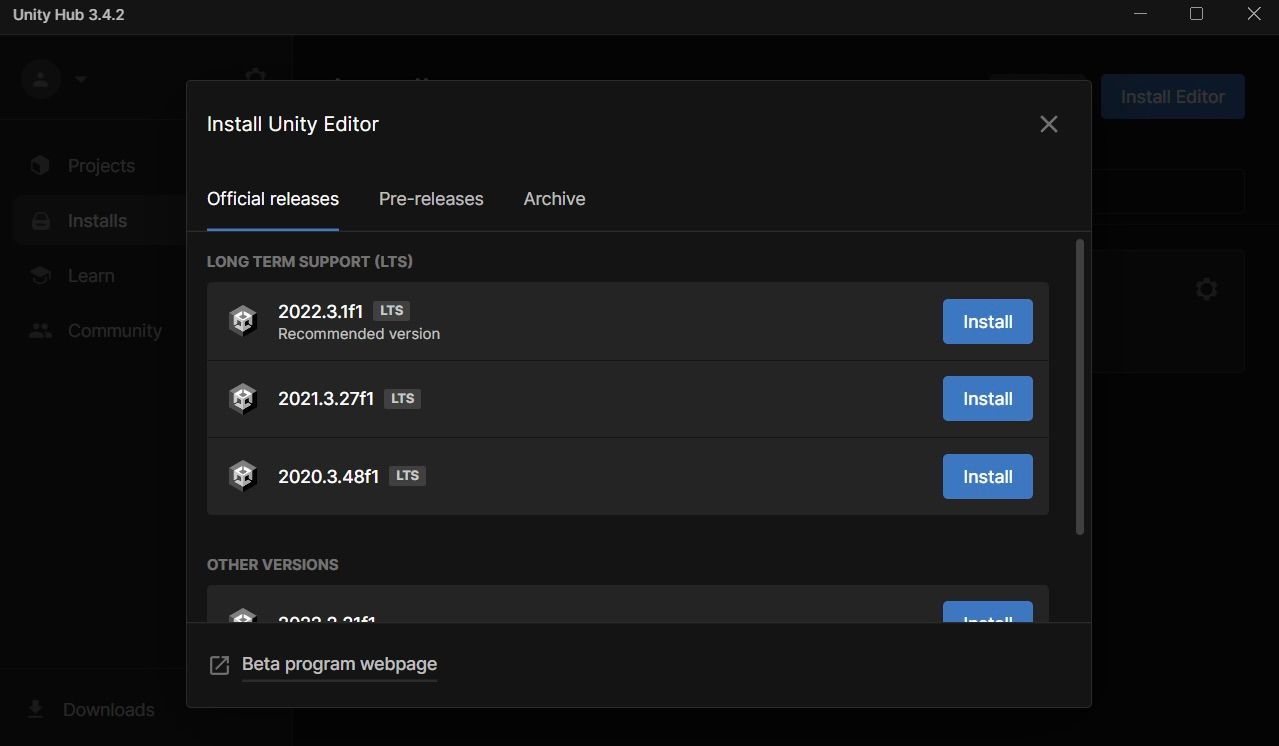
2. Click on the Install button of one of the listed Unity versions.
LONG TERM SUPPORT (LTS).3. Choose the modules you want the Unity editor to support.
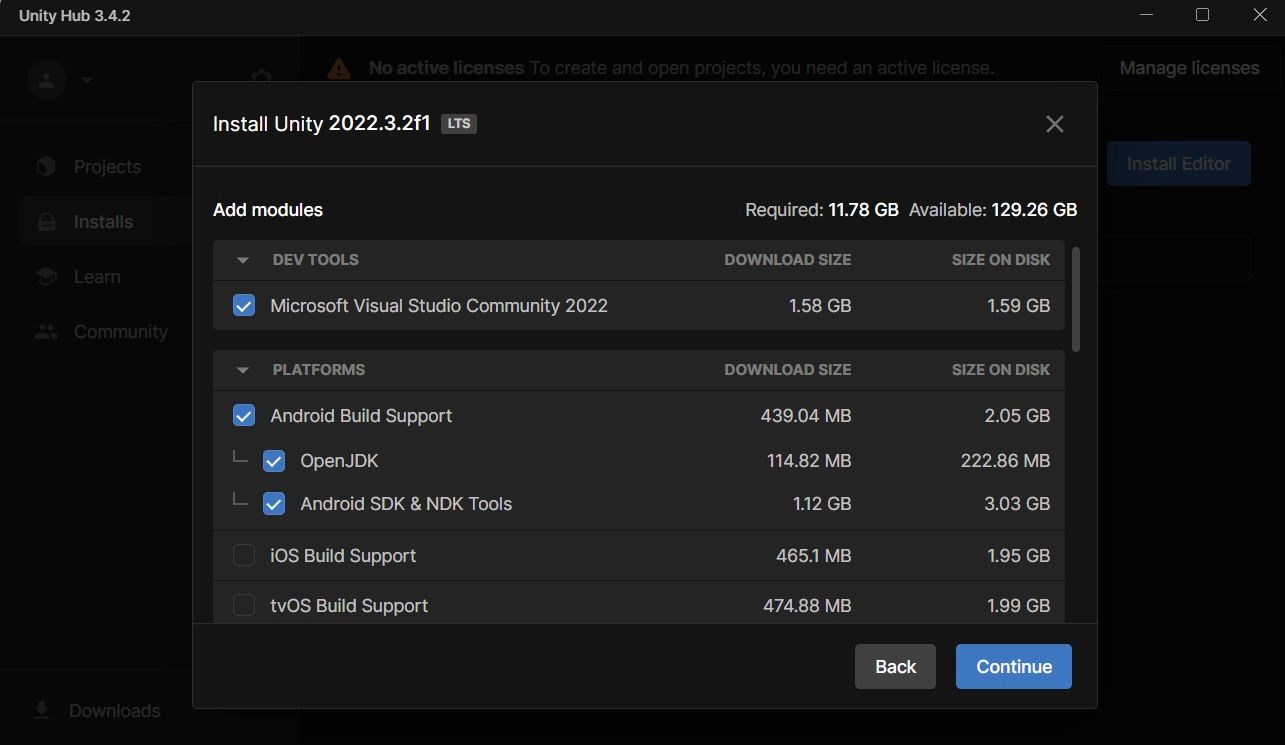
You can add the platforms before or after the installation as you prefer. However, installing the required platform modules before the Unity editor is recommended. Because, as a Windows user, installing the platforms after the Unity editor could potentially prolong the overall installation time.
Microsoft Visual Studio.4. Click Continue and your editor will be downloaded and installed in the Unity Hub.
After the installation is complete, you can find the editor under the All section of Installs panel.
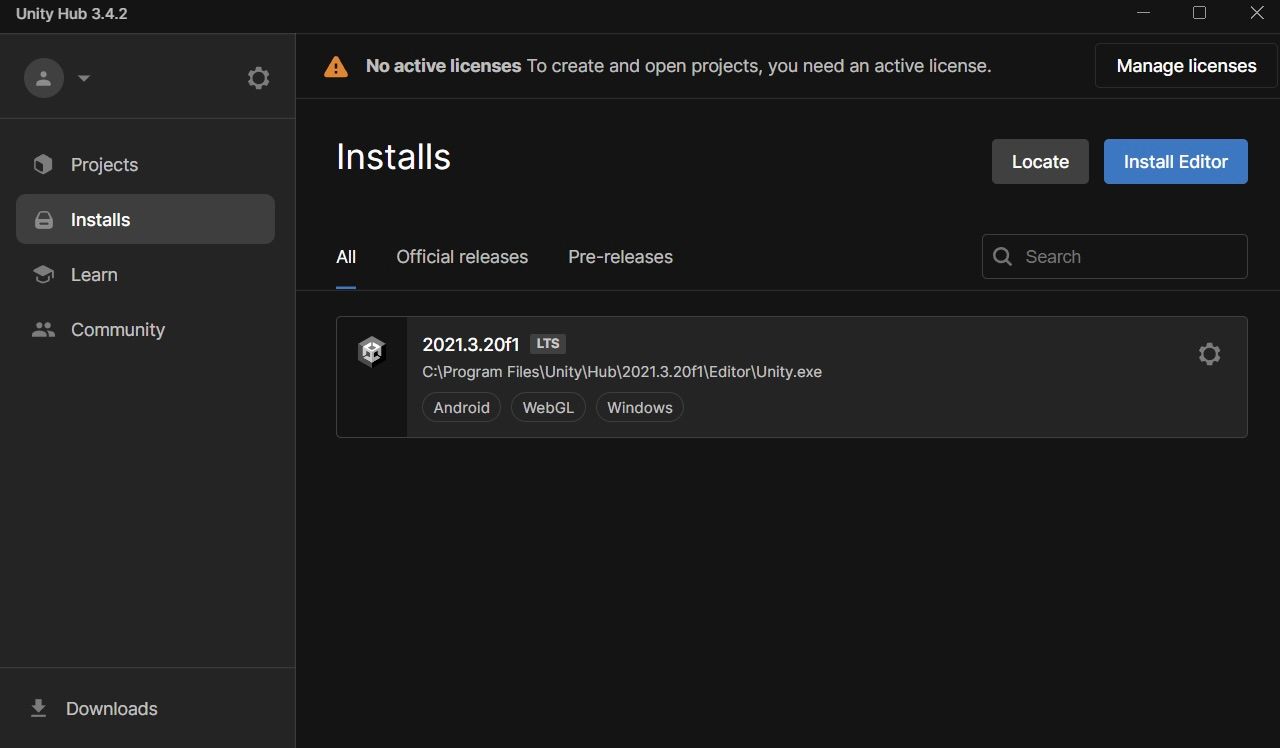
Installs panelDid you notice the warning at the top of the Unity Hub panel?
This warning implies that you won't be able to create or open projects with Unity unless you have an active license in Unity Hub. So, let's make ourselves an active license.
Click on Manage Licenses at the top-right corner of the warning, and a license management panel will open.
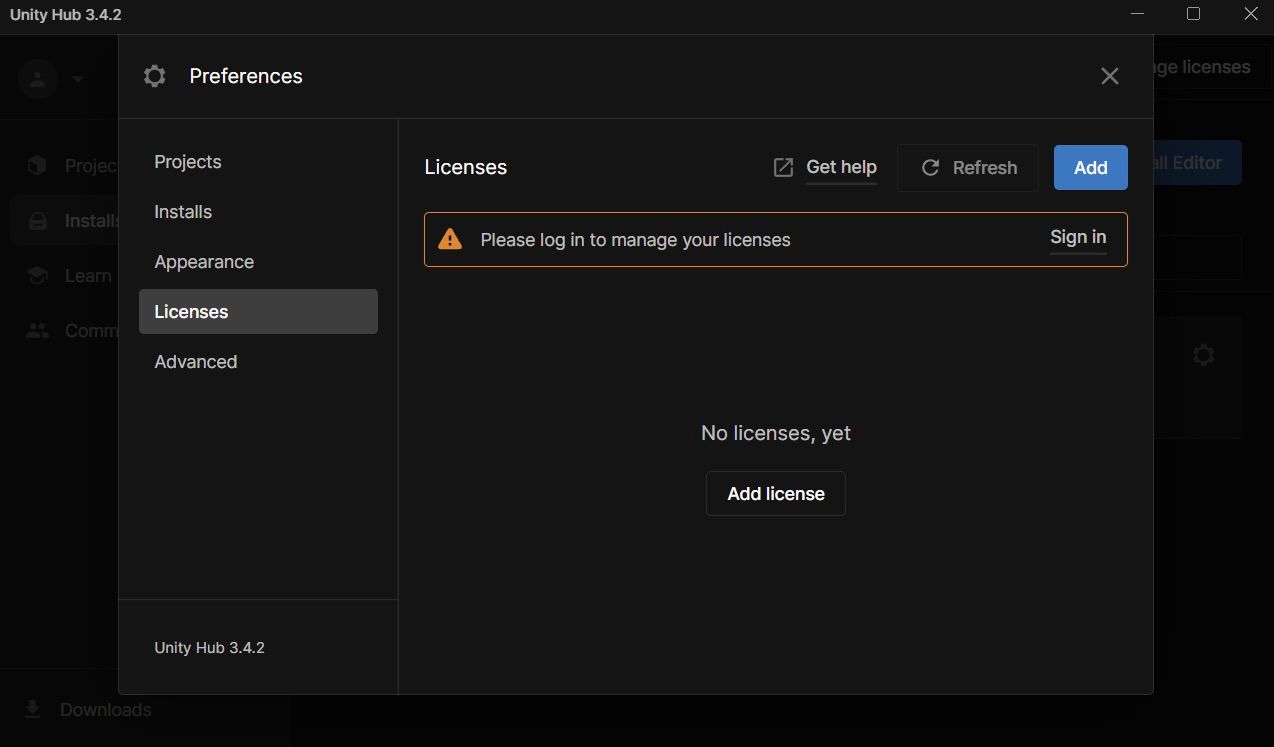
This panel showcases any licenses you own. Let's add one since we don't have any licenses currently available.
Click on Sign in from the warning section to create a new Unity account. You can easily create a new account if you don't have one.
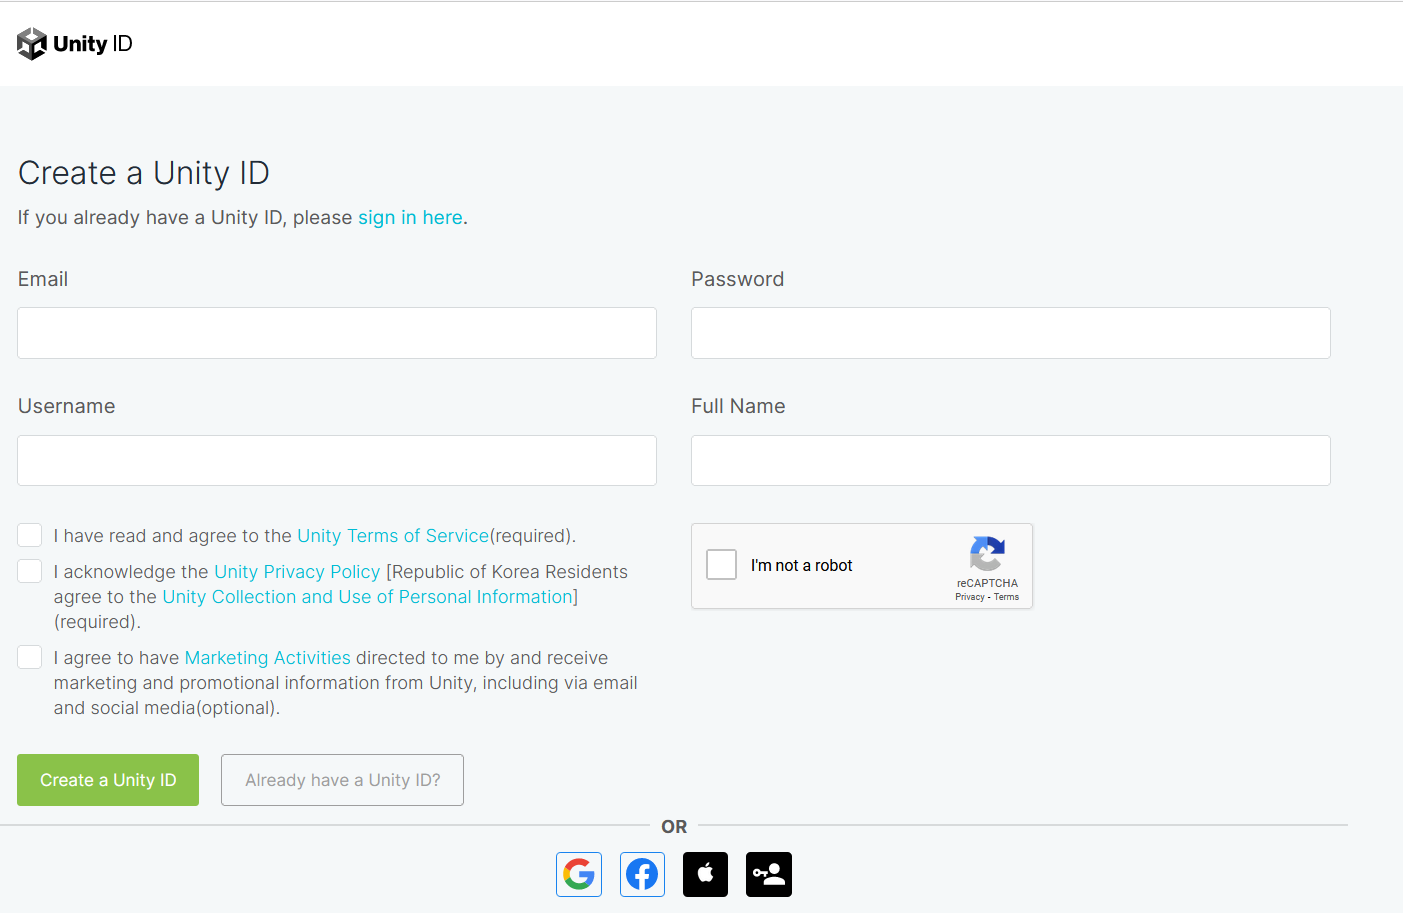
Step 3: Create a Unity Account
Let's create a Unity ID. Enter the details in the empty field shown in the image below and click on Create a Unity ID. Your Unity account will be created if all the details entered are correct.
Step 4: Sign in with the Unity account in Unity Hub
After creating the account, sign in to your Unity account on your browser. Re-open your Unity Hub and re-click on the Sign in button in the license panel.
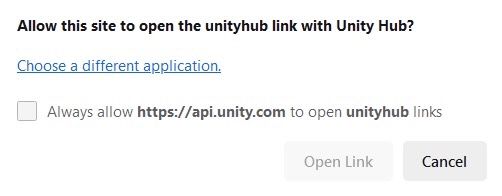
You will be automatically redirected to the browser, and your Unity account sign-in will be verified. The warning sign will also be removed from the Unity Hub.
You may be asked to give permission to the browser to open the link in the Unity Hub. Tick the Always allow option and click on Open Link when it is enabled.
This will complete your sign-in process for your Unity account in Unity Hub.
Step 5: Add license
An active license is required to create and open a Unity Project. So if you don't have an active license, you will still be warned about the license in your Hub opening panel.
Open your license panel and follow the steps below:
- Click on
Addbutton at the top-right of the license panel or click onAdd licensein the middle of the panel. A panel with options to add new licenses will appear.
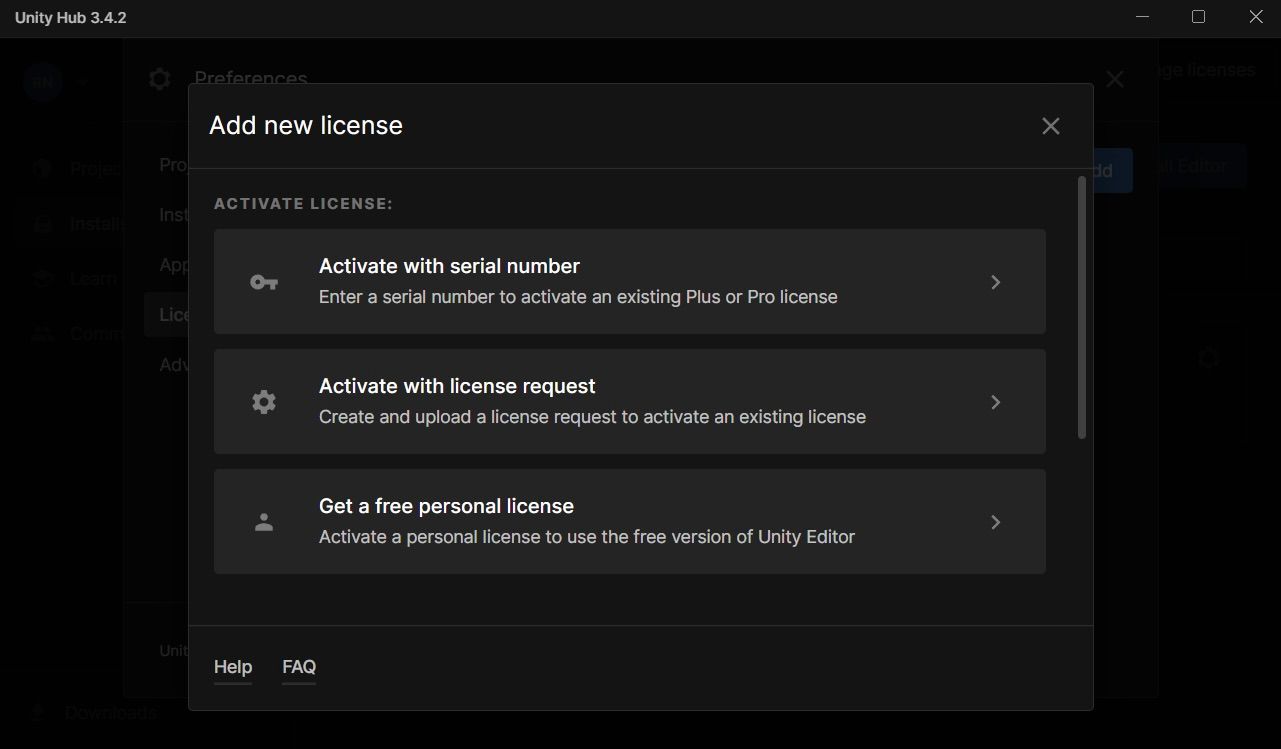
- If you already have a pro license, choose
Activate with serial numberto enter the serial number and activate the license. - If you already have a license on your PC but need to activate it, choose
Activate with license request. - If you want a free license to use Unity without any payment, choose
Get a free personal license. This will create a personal license in your Unity account and will be added to the Unity Hub. You can use the Unity editor to create and open Unity projects.
Step 6: Get a personal license
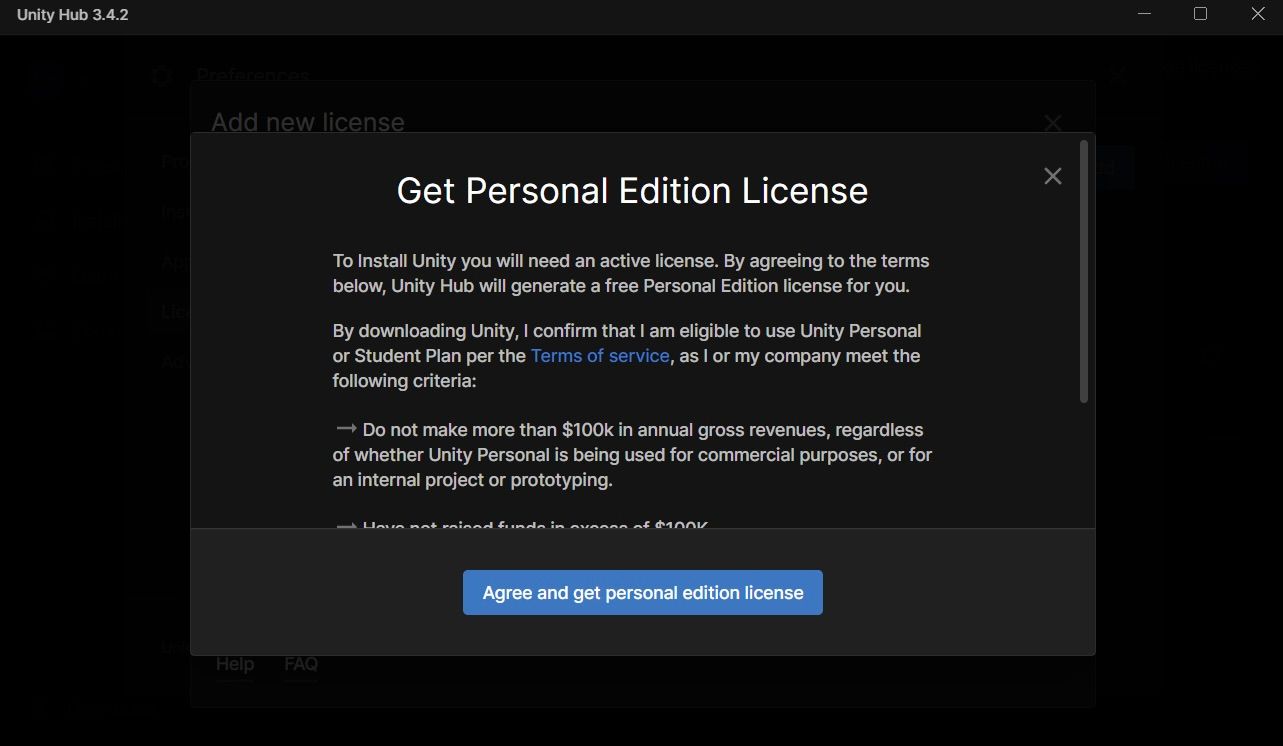
You'll be redirected to an agreement panel if you choose to get a free personal license. Click on Agree and get personal edition license and an active license will be added to the license panel.
Personal Edition License.You are ready to create your first Unity project with the Unity editor.
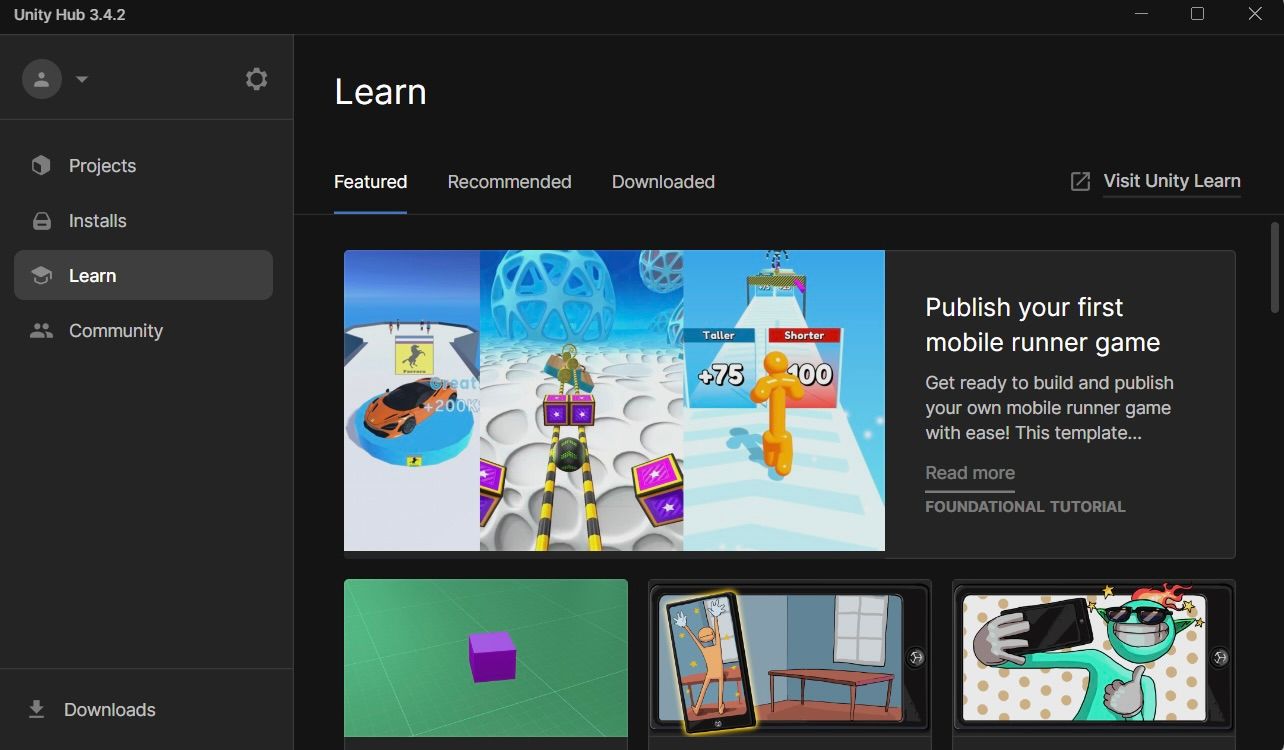
Learning Options
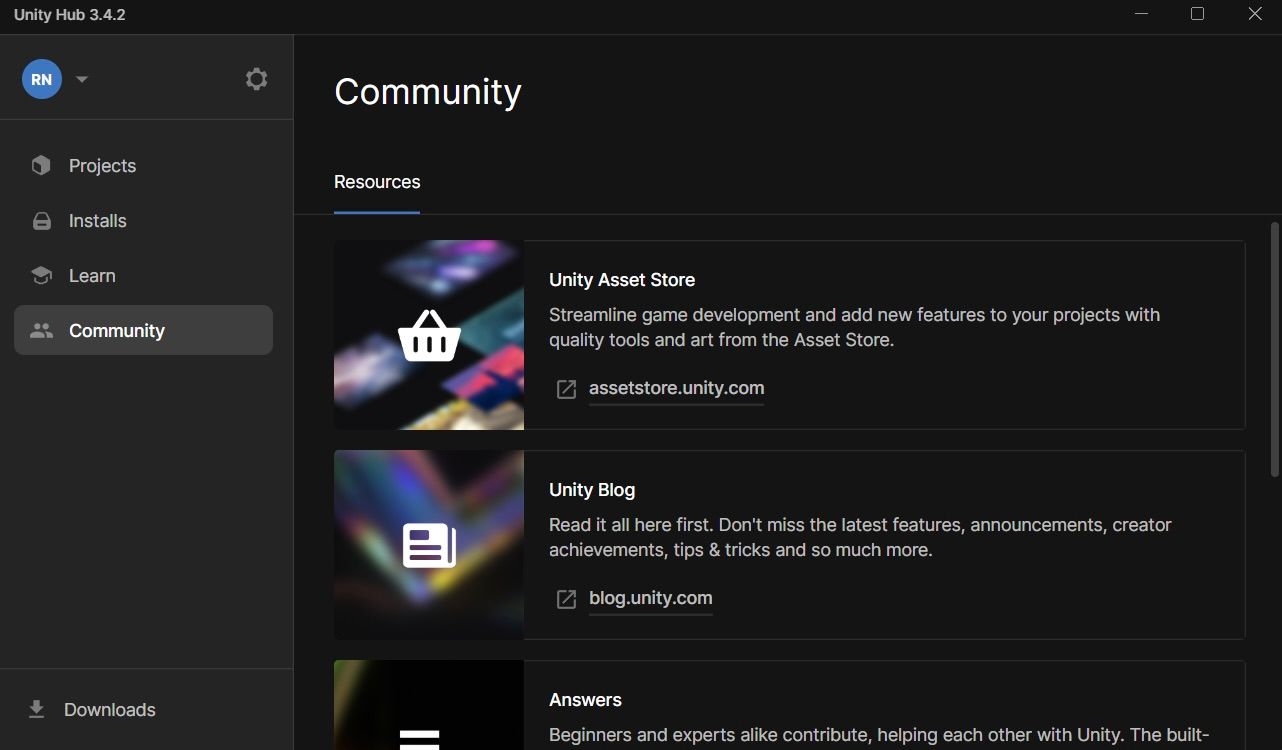
You can find Learn and Community tabs in Unity Hub.
Before diving into your first project, take the time to explore these sections. Uncover multiple start-up tutorials, providing the necessary resources to get started. Begin your exploration on the Learn page from Unity Hub.
Discover Community section and get links for the plethora of resources available for using and learning about Unity editor for creating games.
So what are you waiting for? Unleash your creativity in Unity and create the best beginner game you can. With all the resources and guides available, there's no limit to what you can create.
Thanks for reading! Stay tuned for the next part, and leave a comment below if you need any assistance with the setup process.