
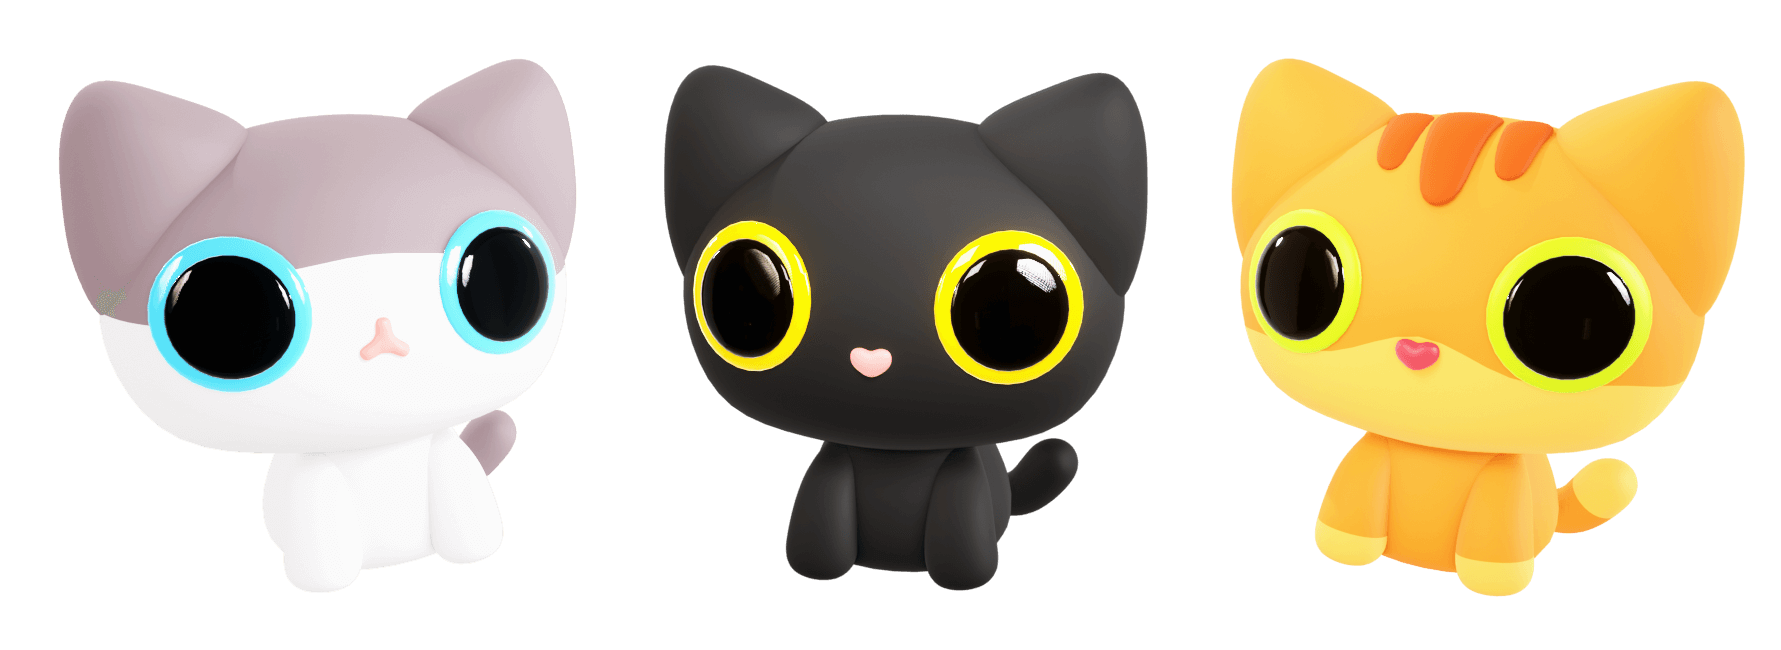
Blender is a powerful and versatile software when it comes to 3D art and models. The possibilities are endless when it comes to designing in Blender. One of the most popular choices of artists is animals, and cats are often a cherished option. In this blogtorial, learn how to create the shown cat models from scratch. So grab your mouse, and let's get started!
First things first, gather your references. Researching and collecting pictures of what you want your end product to look like is always a good thing. Especially if you are a beginner. Remember, it's okay to take inspiration. If you are comfortable sketching, you can start with a sketch and move on to 3D modelling. We can begin the process of modelling now.
Step-by-Step Model Creation Process
1. The Round Cube and Mirror Modifier supremacy
The round cube and the mirror modifier are always what I start with. Press Shift + A and go to Mesh > Round Cube.
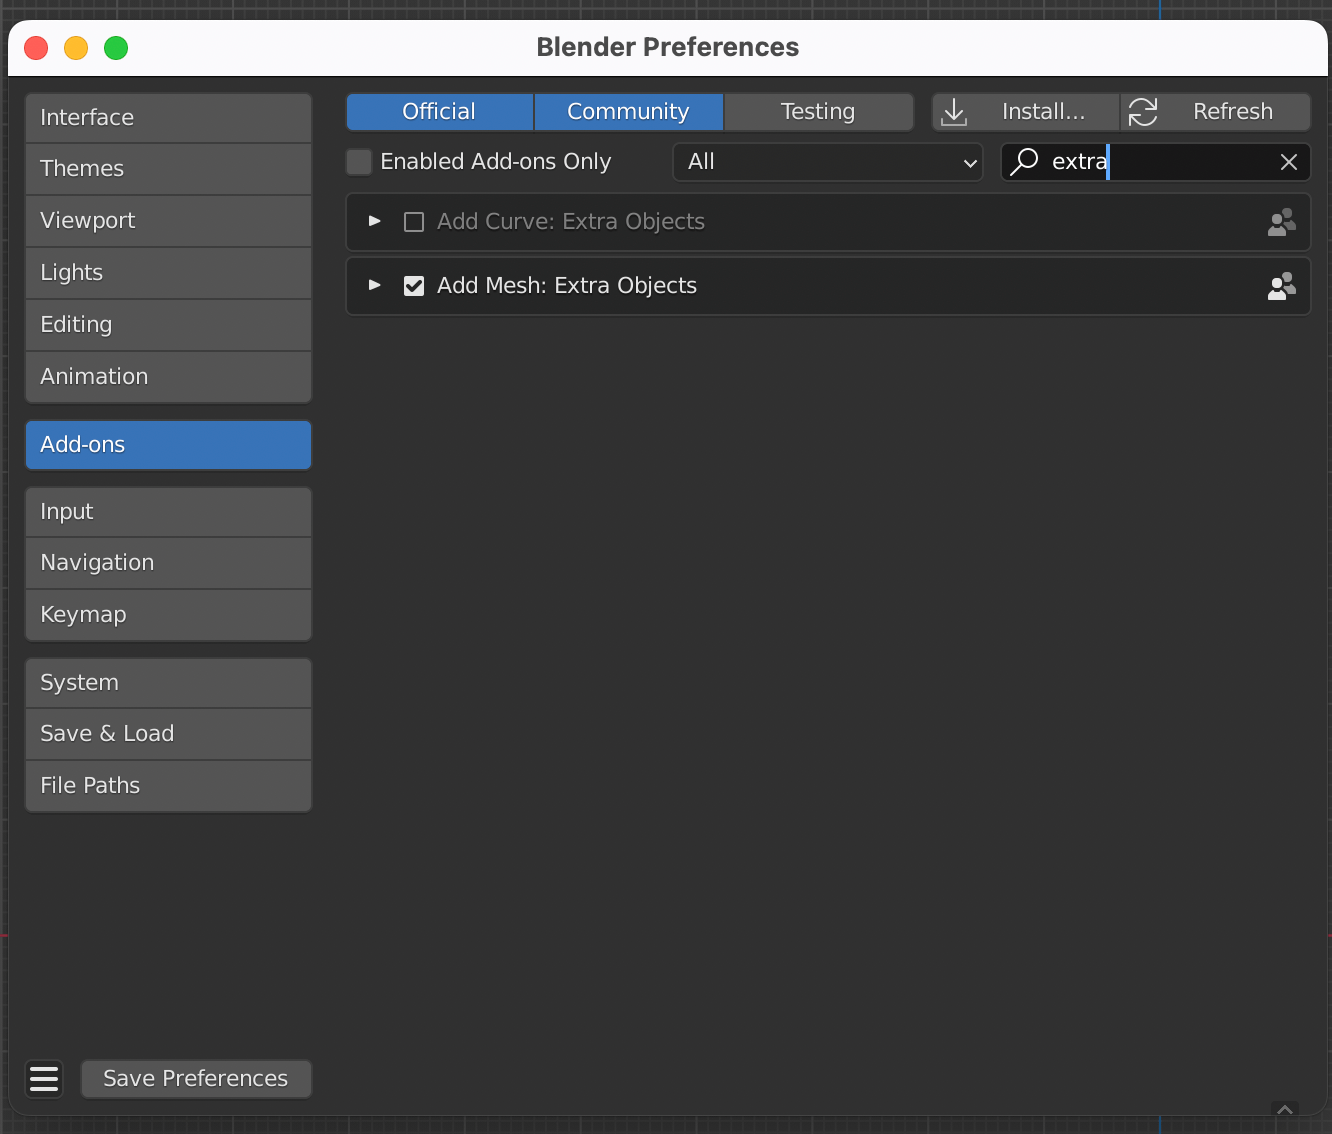
If you don't have Round Cube in your mesh options, you can enable them from Blender Preferences by going to Edit > Preferences > Add-ons. Then search for Extra Objects and enable it. Next, enable Add Mesh: Extra Objects. Don't forget to hit the Save Preferences button.
Creating a sphere
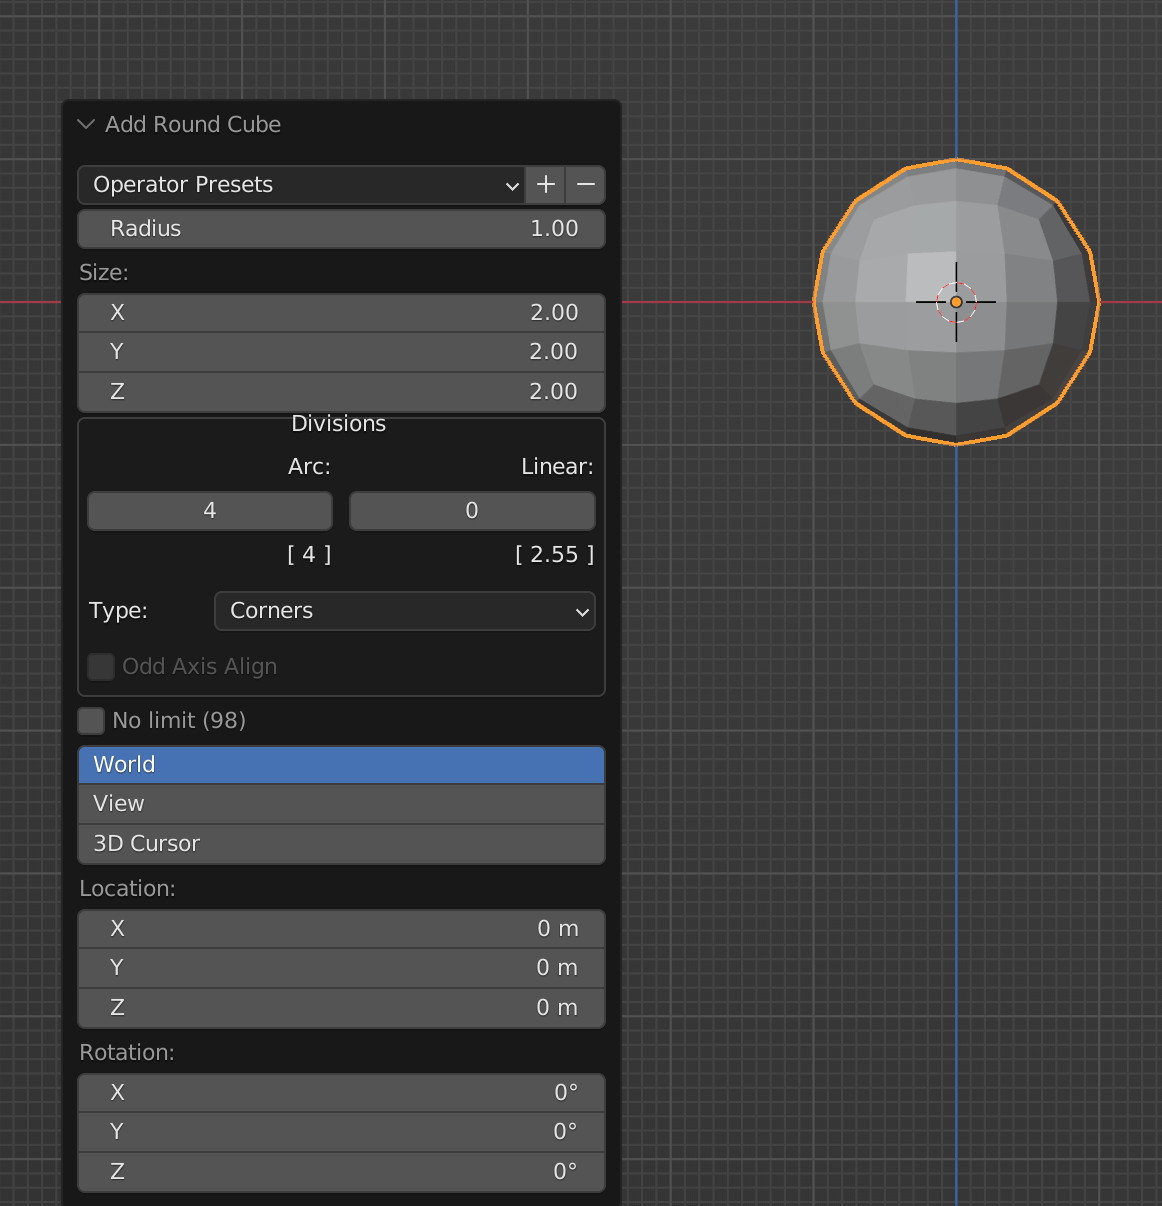
Starting with the Round Cube, change the radius of the Round Cube to 1 from the Add Round Cube menu. The menu can only be accessed once you've added the cube before performing any other action. You will now have a sphere.
1Adding the mirror modifier
The mirror modifier halves our workflow, creating a perfectly symmetrical face.
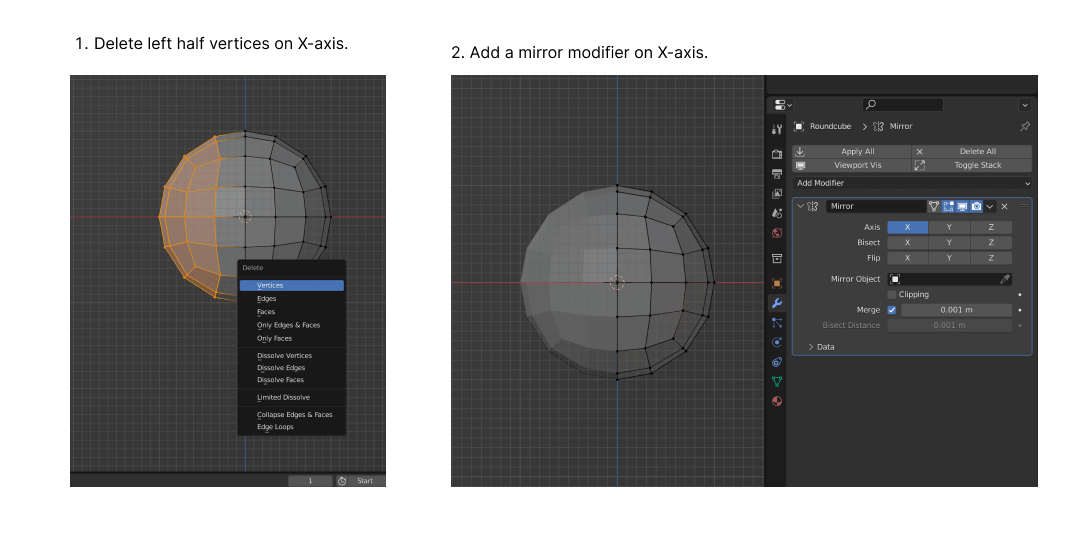
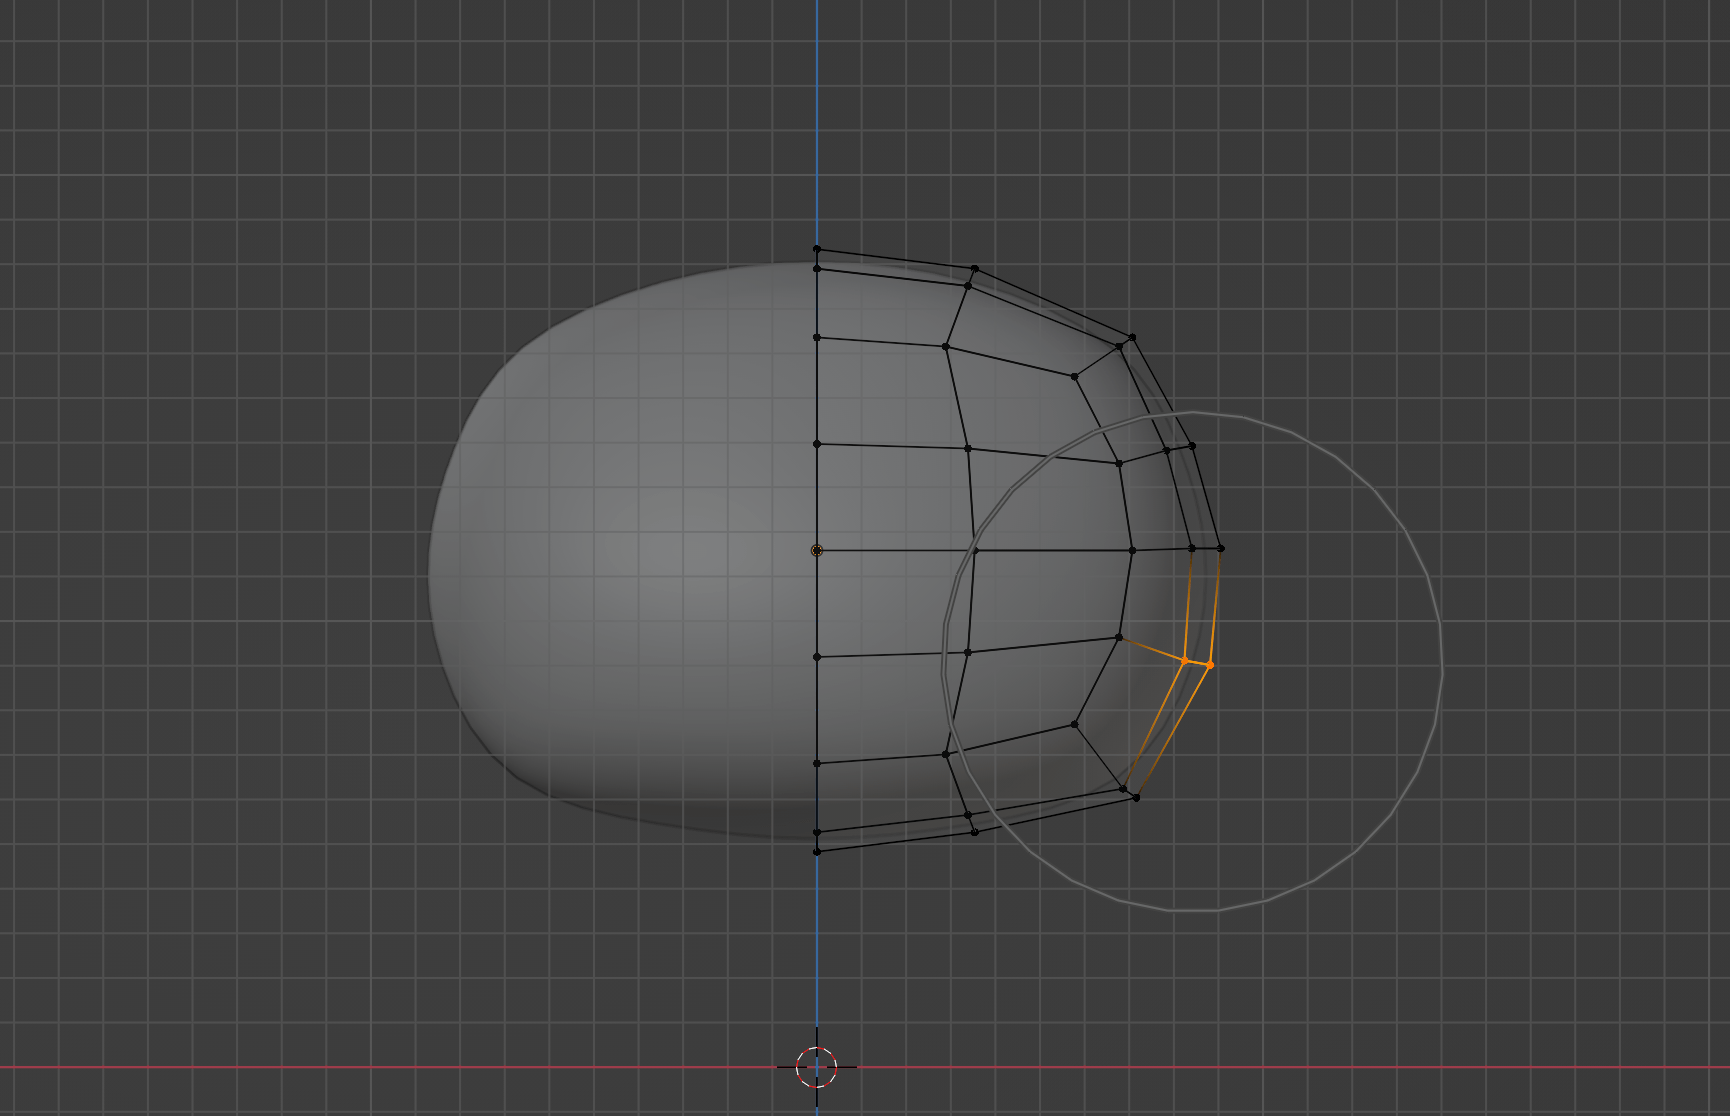
Enable x-ray mode with Alt + Z keys, and tab into edit mode with the Round Cube selected. Make sure you are in vertex select mode by pressing 1.
Then, select one-half of the vertices on the x-axis of the sphere, delete them and add a mirror modifier on the x-axis.
We only need to worry about creating one half of the face, and the other half will be perfectly symmetrical.
2. Proportional editing
Let's move on to building the model.
The proportional editing tool comes in handy during this process. Note that the change to the selected vertices will also affect its neighbouring vertices proportionally.
You can enable and disable the proportional editing with the O key.
With the proportional editing turned on, you can scroll to change the affecting radius. The circle outline shows the affecting radius.
3. Building the model
Adding the ears
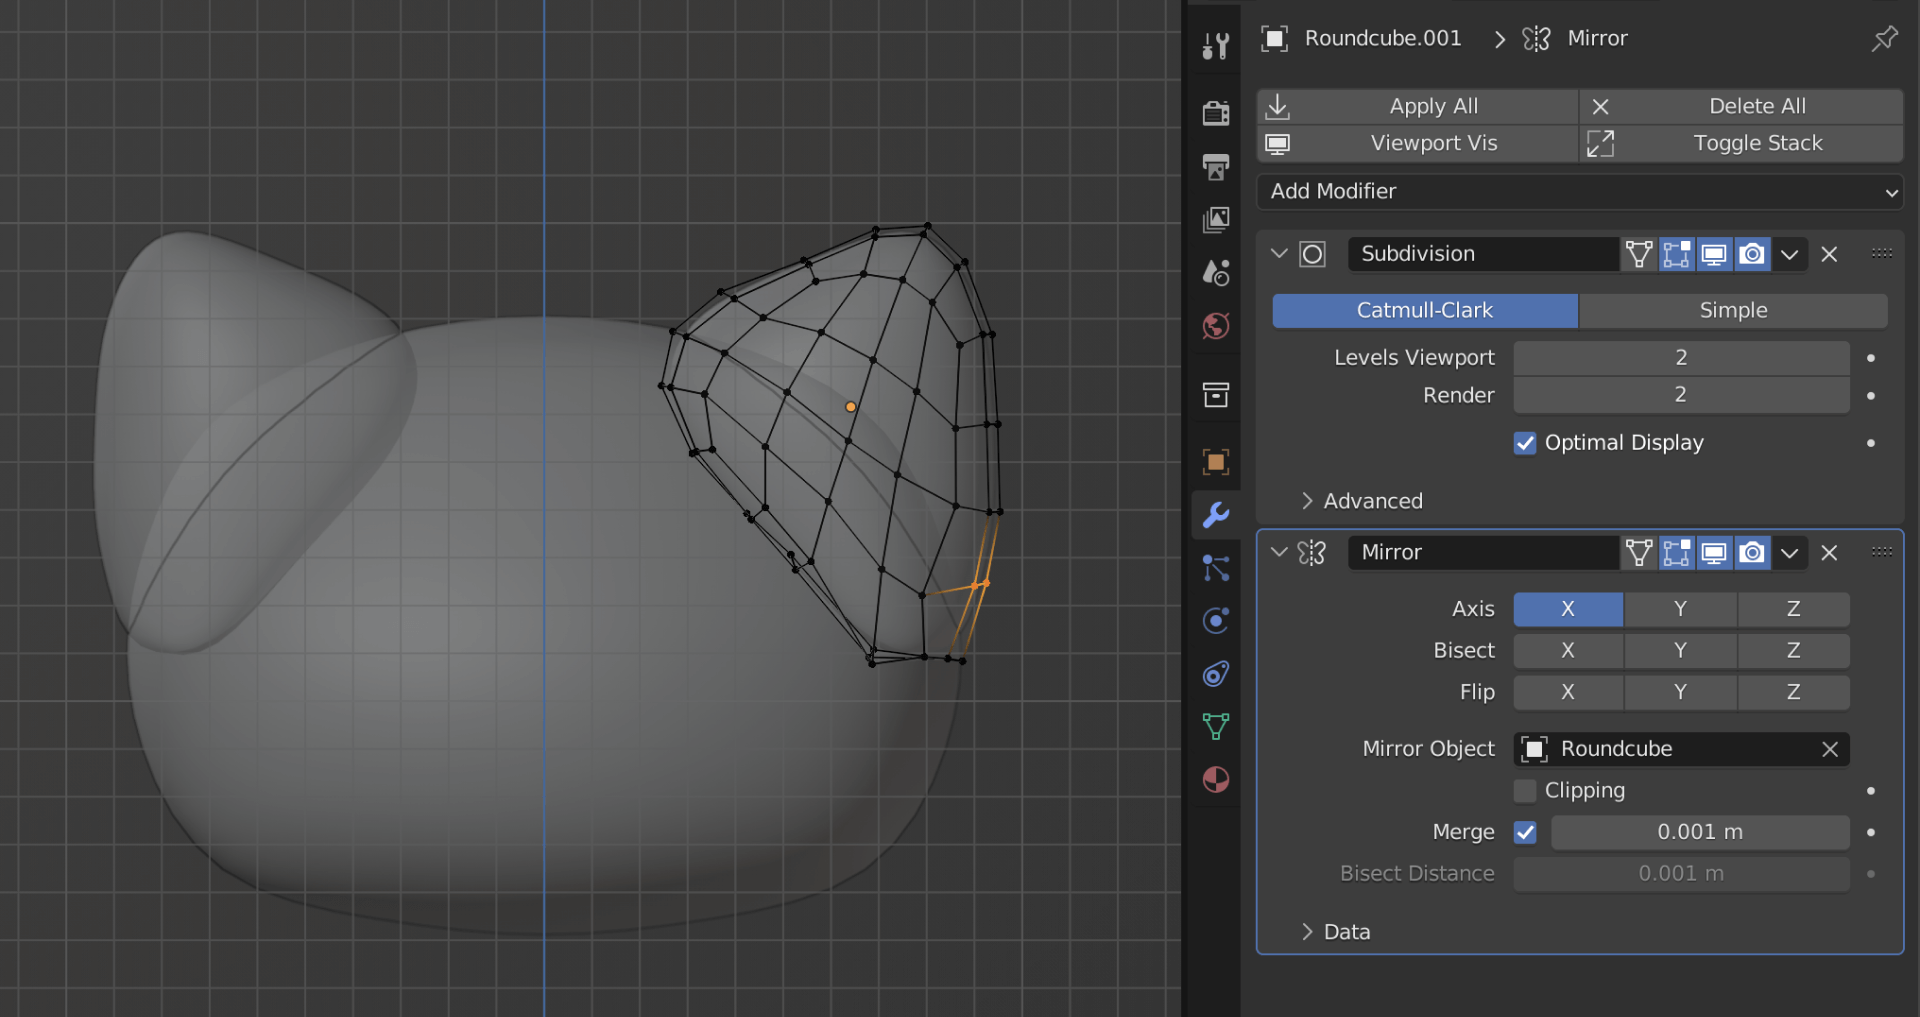
To add the ears, you can follow steps 1 and 2. Add a new cube and a mirror modifier, and set the Mirror Object to the head.
Then with proportional editing, modify the vertices to resemble an ear.
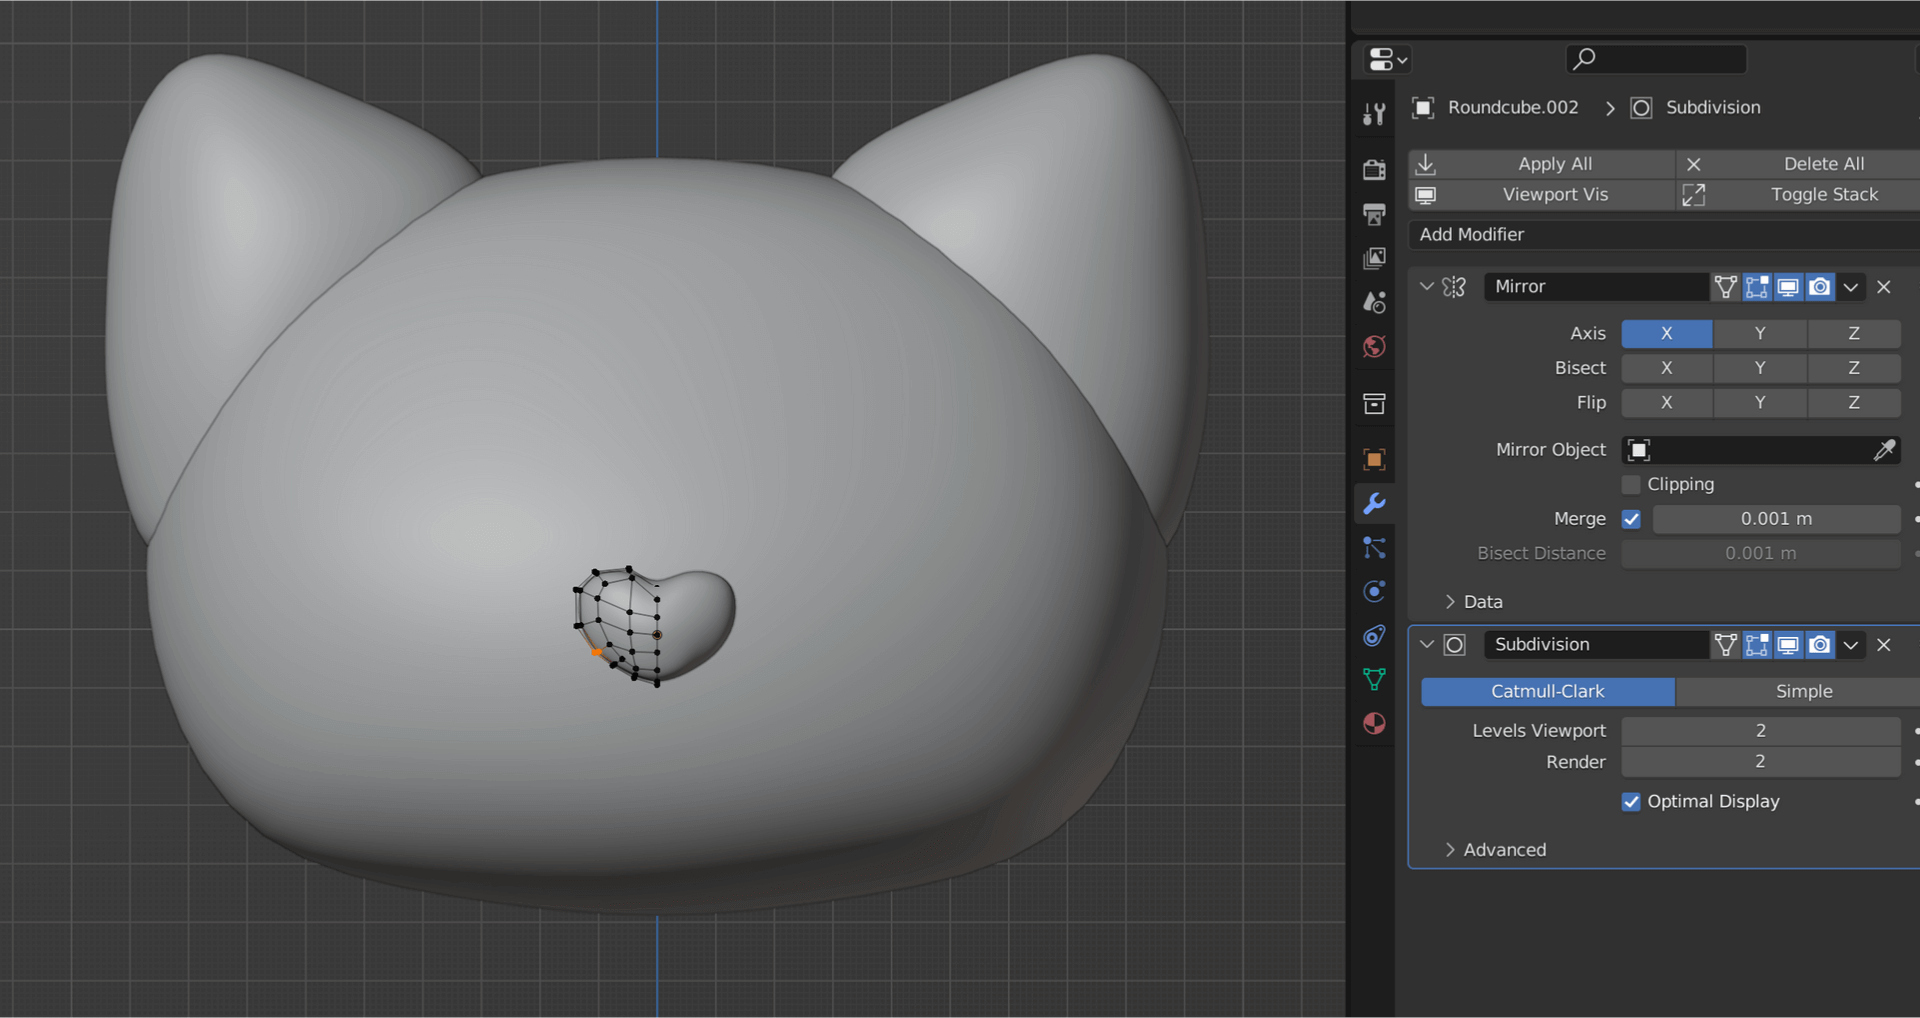
Adding the nose
Adding the nose follows the same process as well. Since it is also another Roundcube but without any mirror modifiers.
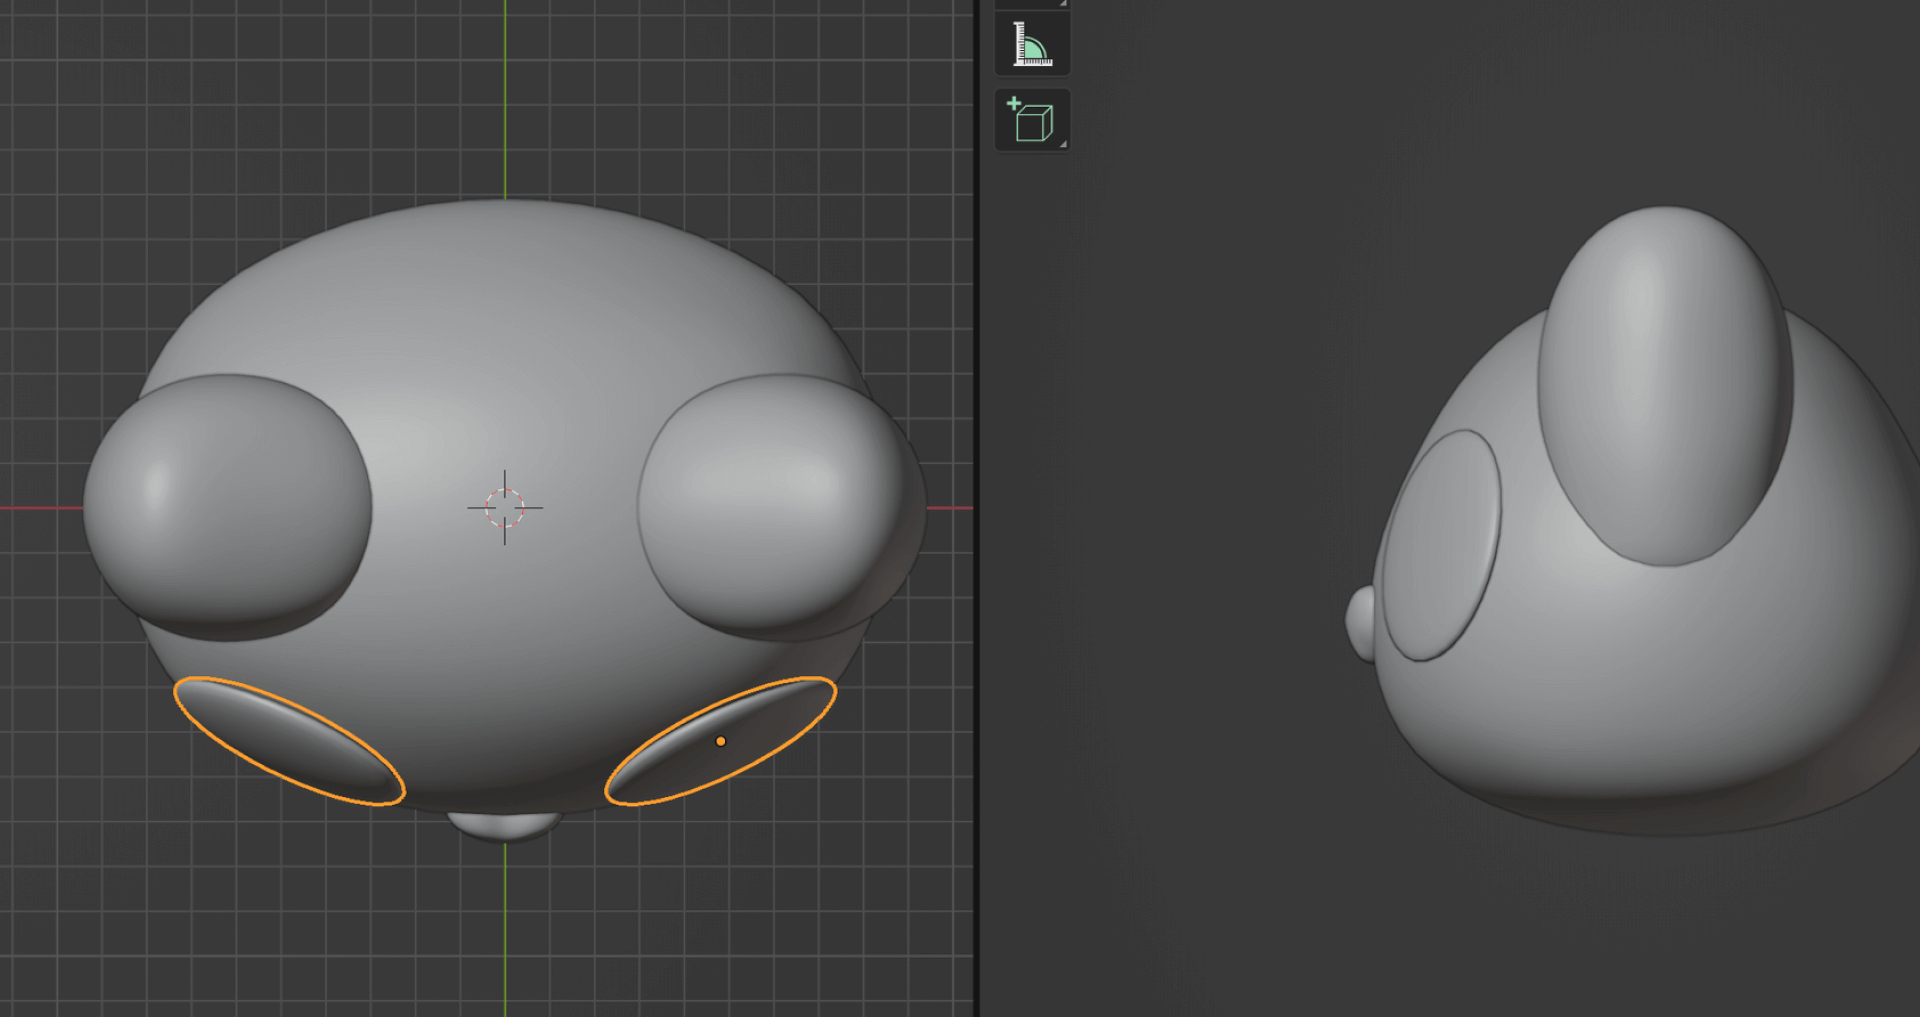
Adding the eyes
For the eyes, I prefer using UV spheres. Simply add in a sphere, flatten it by scaling it in the y-axis, and then add in a mirror modifier. You can also copy the modifier from the ears instead of manually adding modifiers every time.
Make sure to change the view frequently to check for the correct position of the eyes on the head.
Shift and select the ears. Then use the shortcut keys Ctrl + L to bring up the Link/Transfer Data menu. Select Copy Modifiers to copy the same modifier as of the ears. The object you select last will be the active object, i.e. whose modifiers will be copied. You can also use this to link materials, object data and other properties listed in the menu.4. Single Vertex and Skin Modifier combo
After the Round Cube and Mirror Modifier combo, I often use the Single Vertex with the Skin Modifier combo.
Adding a Skin Modifier to a Single Vertex builds a cube-like mesh around the vertex. You can then extrude the vertex to build out the shape. This method can be used to build out the cat's body.
Adding the body
Add in a single vertex with Shift + A > Mesh > Single Vert >Add Single Vert. Then, add in a Mirror Modifier(with mirror active in X-axis), a Skin Modifier, and a Subdivision Modifier.
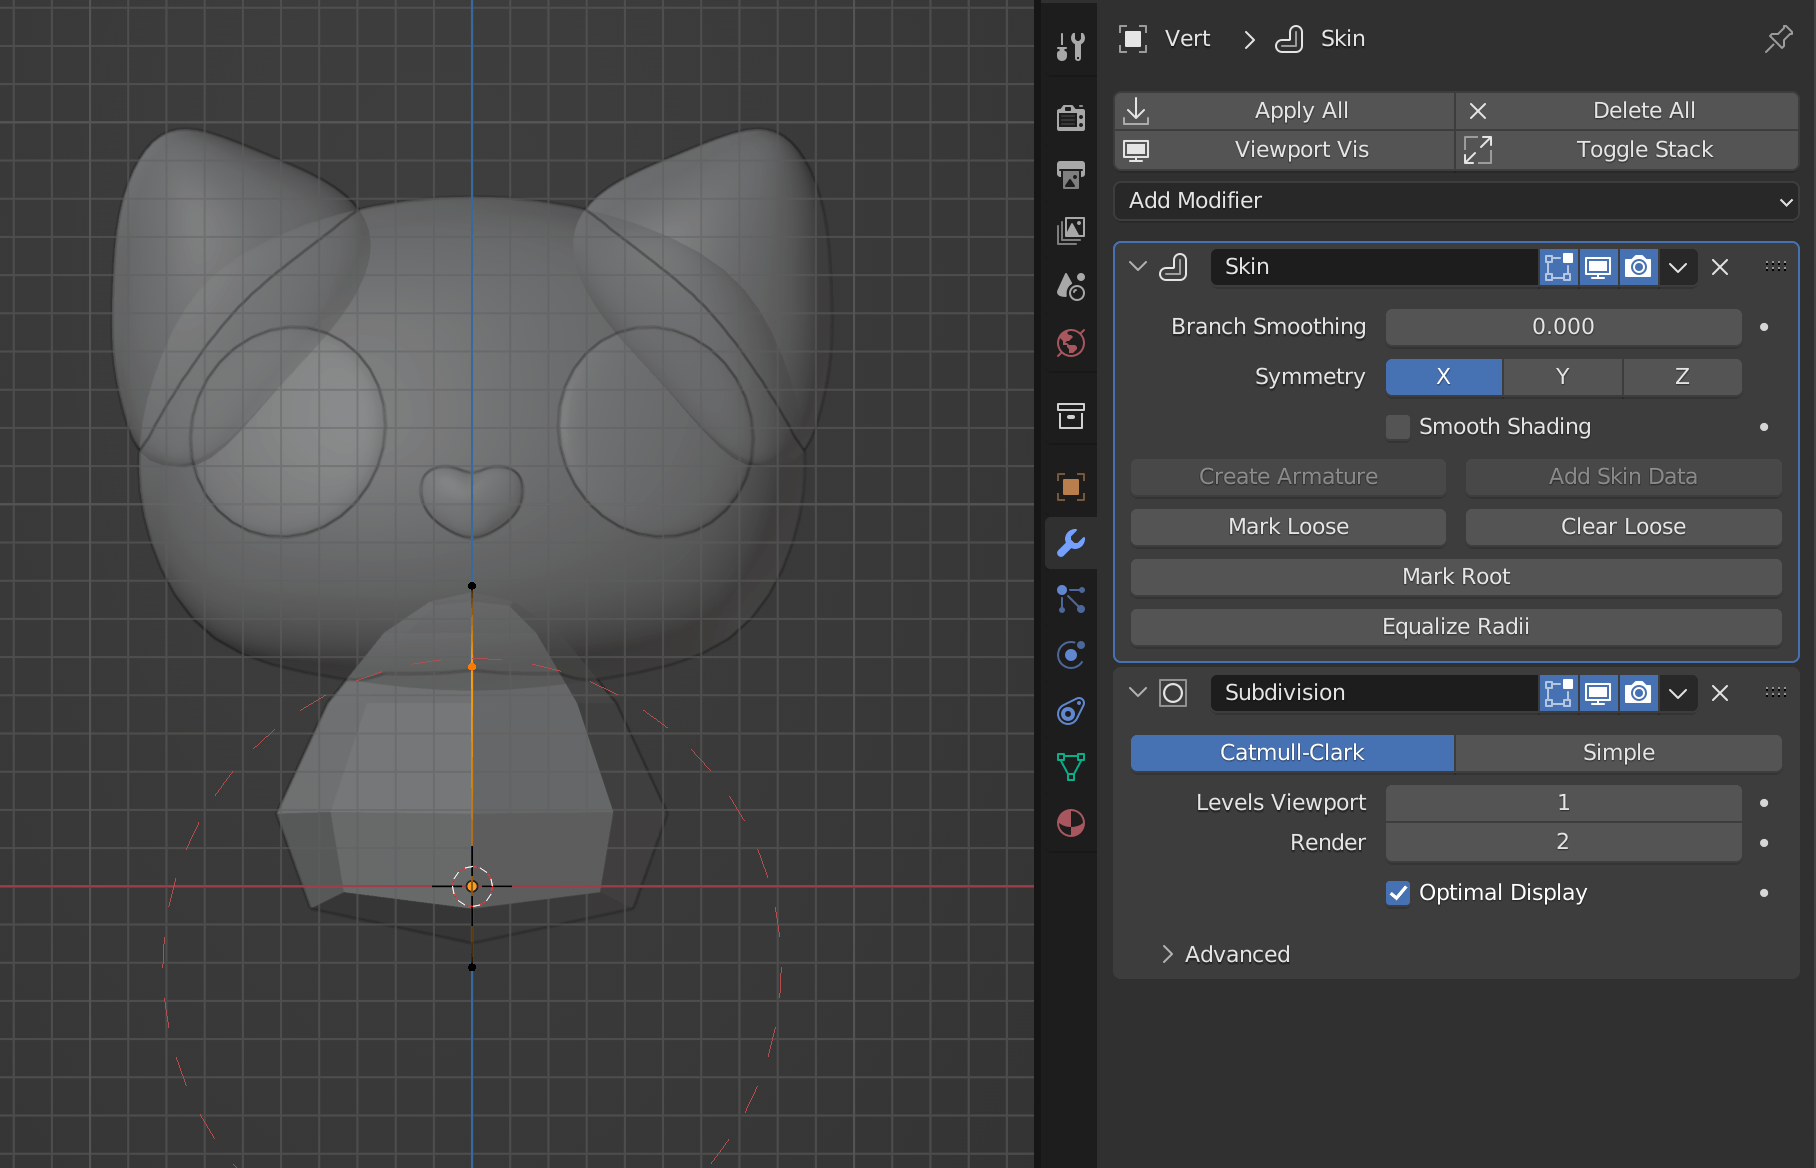
You can select each individual vertex and scale them using Ctrl + A to build the body in Edit mode. To scale the whole thing, you need to be in Object Mode.
After you are satisfied with the shape, you can apply the skin and subdivision modifiers to get a mesh from the vertices. Then, you can add a subdivision modifier to the resulting mesh.
Adding the tail and legs
Using the same Single Vertex and Skin Modifier combo, I also built a tail and legs for the cat.
Here is the resulting model.
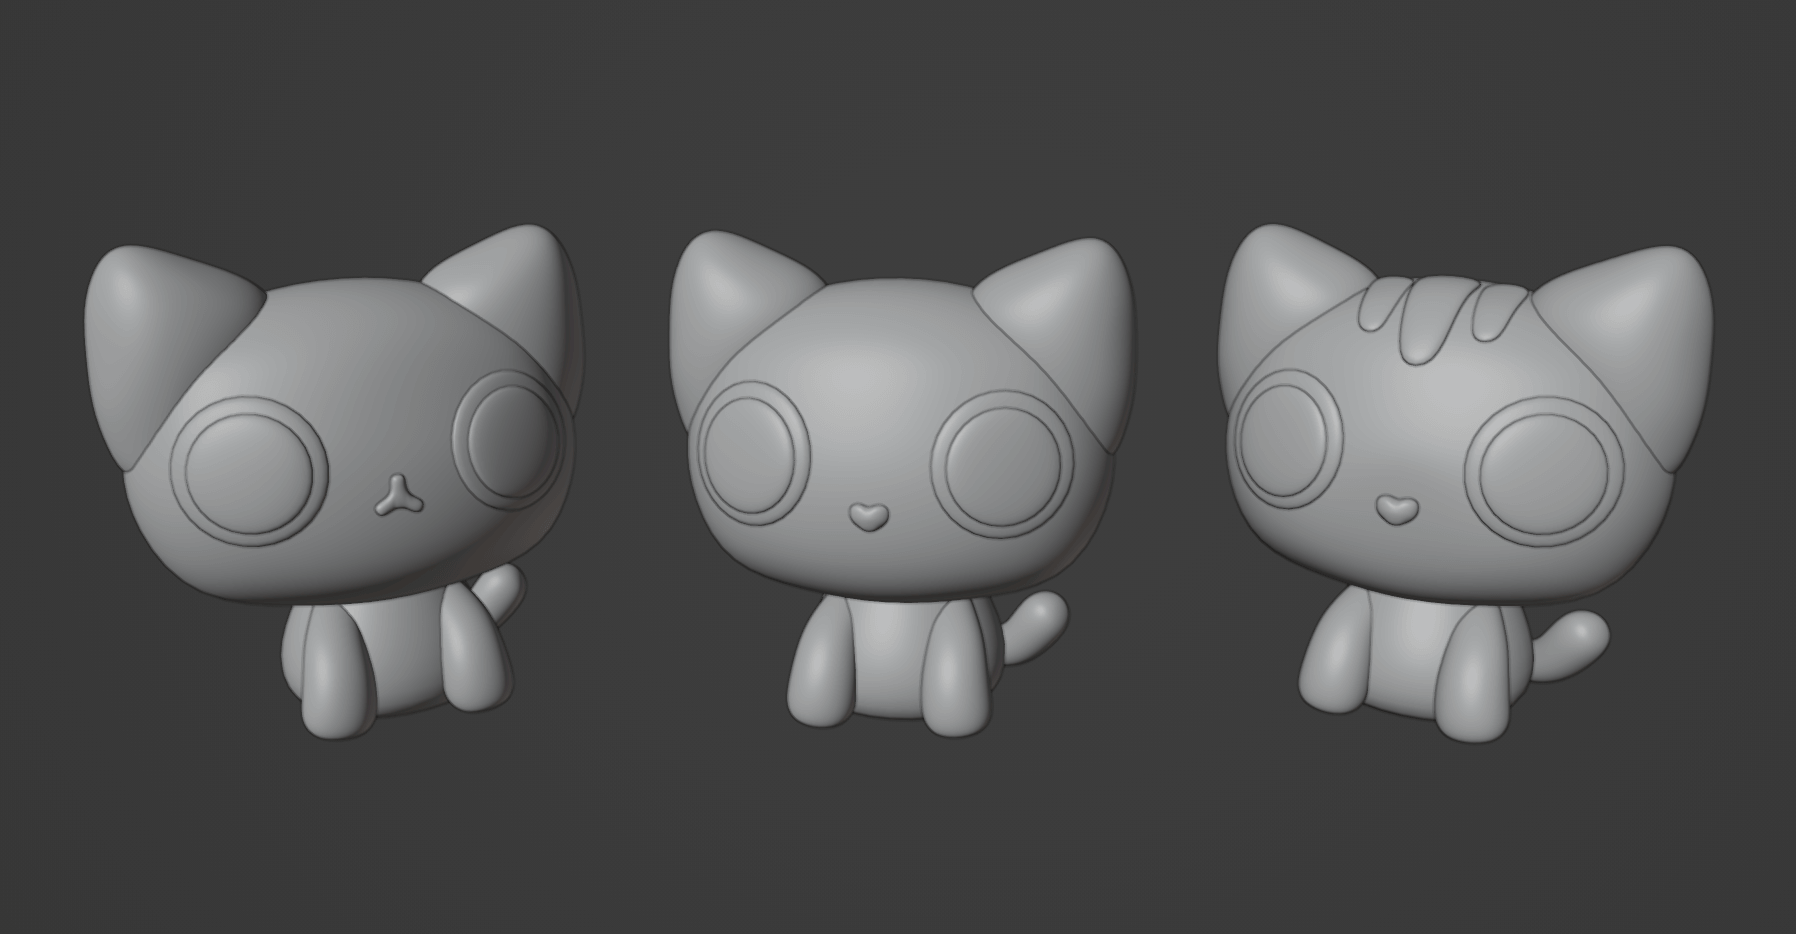
This is the end result of modelling 3D cats in Blender. Hope this was a smooth and easy-to-follow guide. Let me know if you have any tutorial you want to see next from me.
Thanks for reading! Consider subscribing.