
In this tutorial, we will be making a script that will handle the simple animation of the opening and closing of a panel using DOTWeen.
We will make the main variables required in the script public variables so we can easily update them from the inspector as we require them. Attaching the script to any panel will work easily, and you won't even need to call for the opening or closing method from the other script in most cases.
You don't need to know about the DOTween beforehand if you want to follow this tutorial. It is easy to understand by viewing the current code and testing them out yourself with different values for better understanding. However, if you want to learn more about DOTween, you can refer to Using DOTween in Unity - Part 2.
Setting Up Panel
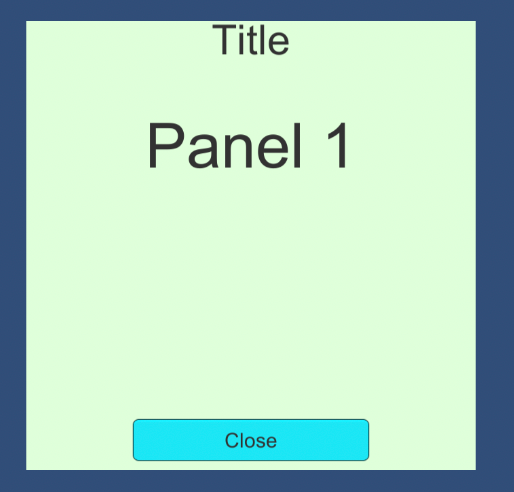
First, create a panel in your scene for applying panel animations.
Now, create a script called PanelWithDOTween.cs and attach the script to the panel gameObject. Add the following RequireComponent at the top of the script.
[RequireComponent(typeof(CanvasGroup))]
public class PanelWithDOTween : MonoBehaviour
{

}The RequireComponent(typeof(CanvasGroup)) will add the CanvasGroup element to the gameObject to which this PanelWithDOTween script will be attached. If you need any compulsory elements, then just use RequireComponent() at the top of the script. It will reduce the mistake of not adding the required component to the gameObject.
Now let's create the required variables for handling our dynamic panel animation.
//Enum option for opening and closing panel
public AnimationAction OpenAnimation, CloseAnimation;

//Animation Effect adding to the animation of the panel.
public Ease OpeningEase, ClosingEase;

//CanvasGroup attached to the gameObject
public CanvasGroup thisPanelCanvasGroup;

//total time for the animation duration.
public float animationTime = 0.25f; These public variables are the variables required for a dynamic panel animation. By using these public variables, you can change the animation of the panel, its effect, and the duration as you want with ease.
Here, AnimationAction is an enum containing all the options to which the panel animation will be animated in our script. So let's create an enum AnimationAction and add the options you would like to give for the panel animation. For our example, let's add the following enum options.
[Serializable]
public enum AnimationAction
{
    slideToRight,
    slideToLeft,
    slideUp,
    slideDown,
    noAction
}Add a reference for the close button to close the panel and a boolean to control what to do when the panel is closed.
[Tooltip("Provide close button reference if the panel has to be closed by a button click.")]
public Button _closeButton;

[Tooltip("Make this true if the panel has to be destroyed after it has been closed.")]
public bool NeedToBeDestroyed;
Now let's create the private variables we will use internally to handle the animation of the panel.
///<summary>
/// Positions of all four side of the screen. It is calculated using the screen camera .
///</summary>
    private Vector3
    leftScreenPosition,
    rightScreenPosition,
    topScreenPosition,
    bottomScreenPosition;

///<summary>
///screen positions updated status. It must be set to true when 		all side of the screen positions are set.
///</summary>
    private bool positionSet;

///<summary>
/// Positions of all four side of the screen. It is calculated using the screen camera .
///</summary>
    private Vector3
    leftOffSetScreenPosition,
    rightOffSetScreenPosition,
    topOffSetScreenPosition,
    bottomSOffSetcreenPosition;
Now that we have all the required variables let's start creating the animation.
Initiate/Update the Required Process and Elements
The first thing to do is set the references of the required components and variables of this script so it won't give any null reference error when running this code.
Set the reference for the CanvasGroup thisPanelCanvasGroup
We can set this reference in the Start() or OnEnable() methods. I have done this in the Awake method. You can do it wherever you want. You just have to keep in mind that a component's references are set and that the reference is not null before using any component.
private void Awake()
{
    if (thisPanelCanvasGroup == null)
    thisPanelCanvasGroup = GetComponent<CanvasGroup>();
}
Setup Button Clicks
The button clicks need to be set only once when the script is run. So it is good practice to add the onClick() listener to the button on Start() method.
private void Start()
{
    if (_closeButton != null)
    {
        _closeButton.onClick.AddListener(()=>PlayAnimation(false));
    }
}
As shown in the code above, we have directly added the method to close the panel in the onClick method. But you can create a new method and use that to call the method assigned to the close button when you want to play the close animation of the panel.
Initiating Panel Animation
We will be playing the opening animation of the panel when it is enabled. So we will add the code to open and play the opening animation on OnEnable() method.
private void OnEnable()
{

    if (!positionSet)
    {
        //Set the positions of all sides of the screen
        UpdateAllSideScreenPositions();

        //update the offset position of the scree as per the size of the panel
        SetOffScreenPositionForPanel();
    }

    //set the alpha value of the canvas group to 0 for its initial value
    if (thisPanelCanvasGroup != null)
        thisPanelCanvasGroup.alpha = 0;

    //play the animation
    PlayAnimation(true);
}
We are doing the following things with the code above when the panel is enabled.
- Update the variables representing the positions of all the sides of the screen.
- Update the variables representing the offset positions of all the screen sides as per the panel's size.
- Set the initial values for the CanvasGroup if it is not null.
- Play the opening animation.
If you don't want to play the animation when the panel is enabled, then just replace the code of the OnEnabled() method with your customised method and call it when you want the panel opening animation to play.
Update Screen Offset Positions of the Screen
Before doing anything else, we need to find the position of all the screen sides. We will use those screen offset positions to move the panel. You can set the screen's positions manually, but it may not work for all screen sizes. So we will find the offset screen positions of all sides using the scene's main camera.
 private Camera _mainCamera;//Main camera of the scene.

 //Get the all position of all the screen side positions.
 private void UpdateOffsetScreenPositions()
    {
        if (_mainCamera == null)
            _mainCamera = Camera.main;
        Vector3 screenDimen = _mainCamera.ScreenToWorldPoint(new Vector3(Screen.width, Screen.height, 0f)) * 2;
        if (screenDimen.x < screenDimen.y)
        {
            screenDimen = new Vector3(screenDimen.y, screenDimen.x, screenDimen.z);
        }

        topScreenPosition = new Vector3(0, screenDimen.y / 2, 0);
        bottomScreenPosition = new Vector3(0, -screenDimen.y / 2, 0);
        leftScreenPosition = new Vector3(-screenDimen.x / 2, 0, 0);
        rightScreenPosition = new Vector3(screenDimen.x / 2, 0, 0);


    }
Now we need to find the offset position as per the size of the panel.
    //Get the offset position of the screen for the panel.
          private void SetOffScreenPositionForPanel()
    {
        RectTransform myRect = transform.GetComponent<RectTransform>();
        float sizeToAdd = myRect.rect.width / 100;
        leftOffScreenPosition = leftScreenPosition - new Vector3(sizeToAdd, 0, 0);
        rightOffScreenPosition = rightScreenPosition + new Vector3(sizeToAdd, 0, 0);
        sizeToAdd = myRect.rect.height / 100;
        topOffScreenPosition = topScreenPosition + new Vector3(0, sizeToAdd, 0);
        bottomOffScreenPosition = bottomScreenPosition - new Vector3(0, sizeToAdd, 0);
        positionSet = true;
    }
Now that we have got the offset positions of all the screen sides. We will use them as the starting or ending positions for the panel animation and write a method for playing the animation using these offset screen positions.
Animation Bounds
Now we set the initial and ending position of the panel for the selected animation.
We will be creating a single method that will handle the opening and closing of the panel animation using a single boolean value provided as a parameter. The animation that you want the panel to play will be used as per the selection you do for OpenAnimation and CloseAnimation in the public variable from the Inspector in the Unity Editor.
/// <summary>
/// Start playing the selected animation for the panel
/// </summary>
/// <param name="playOpenAnimation"></param>
private void PlayAnimation(bool playOpenAnimation)
{
    try
    {
        Vector3 posToGive = Vector3.zero;
        Vector3 initPos = Vector3.zero;
        float scale = 1;
        AnimationAction playAnimationType = playOpenAnimation ? OpenAnimation : CloseAnimation;
        switch (playAnimationType)
        {
            case AnimationAction.slideToLeft:
                initPos = playOpenAnimation ? rightOffSetScreenPosition : transform.position;
                transform.position = initPos;
                posToGive = playOpenAnimation ? new Vector3(0, transform.position.y, 0) : leftOffSetScreenPosition;
                StartSlideAnimation(playOpenAnimation, posToGive);
                break;
            case AnimationAction.slideToRight:
                initPos = playOpenAnimation ? leftOffSetScreenPosition : transform.position;
                transform.position = initPos;
                posToGive = playOpenAnimation
                    ? new Vector3(0, transform.position.y, 0)
                    : rightOffSetScreenPosition;
                StartSlideAnimation(playOpenAnimation, posToGive);
                break;
            case AnimationAction.slideUp:
                initPos = playOpenAnimation ? bottomOffSetScreenPosition : transform.position;
                transform.position = initPos;
                posToGive = playOpenAnimation ? new Vector3(transform.position.x, 0, 0) : topOffSetScreenPosition;
                StartSlideAnimation(playOpenAnimation, posToGive);
                break;
            case AnimationAction.slideDown:
                initPos = playOpenAnimation ? topOffSetScreenPosition : transform.position;
                transform.position = initPos;
                posToGive = playOpenAnimation
                    ? new Vector3(transform.position.x, 0, 0)
                    : bottomOffSetScreenPosition;
                StartSlideAnimation(playOpenAnimation, posToGive);
                break;
            default:
                HideOrDestroy();
                break;
        }
    }
    catch (Exception e)
    {
        HideOrDestroy();
        Debug.LogWarning($"Exception while running dotWeen animation " + e);
    }
}
Here, the initial and final position of the panel has been set. If required, the panel's position has also been updated to the required initial position before playing the animation.
Playing the Animation
Now that the positions have been selected as per the opening and closing animation that will be selected let's code the part where we use those positions and create animation with DOTween.
/// <summary>
/// Start playing the slide animation as per the opening or closing animation selected from the unityEditor
/// </summary>
/// <param name="openingAnimation">Open status of the panel. True for opening panel: False for closing panel</param>
/// <param name="position">Position to which the panel should slide.</param>
private void StartSlideAnimation(bool openingAnimation, Vector3 position)
{
    try
    {
        if (openingAnimation)
        {
            transform.DOMove(position, animationTime).SetEase(openingEase)
                .OnComplete(() => transform.localPosition = position);
            if (thisPanelCanvasGroup != null)
                thisPanelCanvasGroup.DOFade(1, animationTime);
        }
        else
        {
            if (thisPanelCanvasGroup != null)
                thisPanelCanvasGroup.DOFade(0, animationTime);
            transform.DOMove(position, animationTime).SetEase(closingEase).OnComplete(HideOrDestroy);
        }
    }
    catch (Exception e)
    {
        Debug.Log("Exception throw on panel sliding animation. " + e);
    }
}
We are just doing three things with this script.
- We are moving the panel using
DOMove()from the current position of the panel to the position provided with the provided type of animation. - To give effects to the
DOMove()animation,SetEase()is added to it. The effect to be used in theSetEase()is dynamic and is set as per the selection done inopeningEaseandclosingEasefrom the inspector in Unity Editor. - If there is the CanvasGroup
thisPanelCanvasGroupthen we change its alpha value using theDOFade()method provided by DOTween.
By using just these 3 shortcut methods DOMove(), SetEase() and DOFade() and through some minor helper codes, our dynamic animation is completed. Using this, we can change the opening and closing animation of the panel by just changing the OpenAnimation and CloseAnimationnow.
Testing and Tweaking
Finally, we have to test this out in the unity editor.
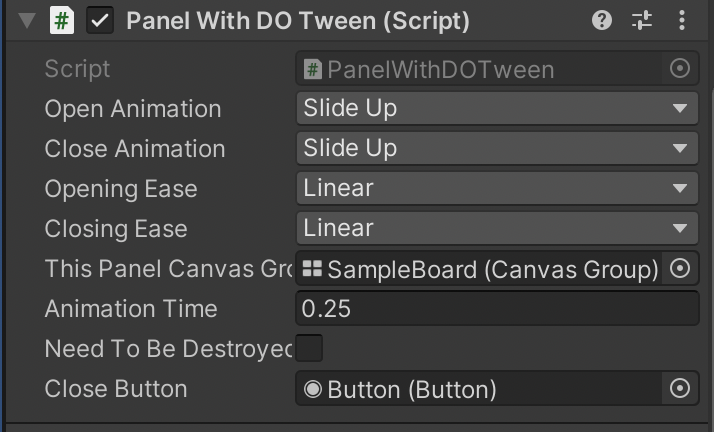
Select the panel in the Hierarchy section in the Unity editor and change the options of the Open and Close animation and the ease options for the opening and closing animation.
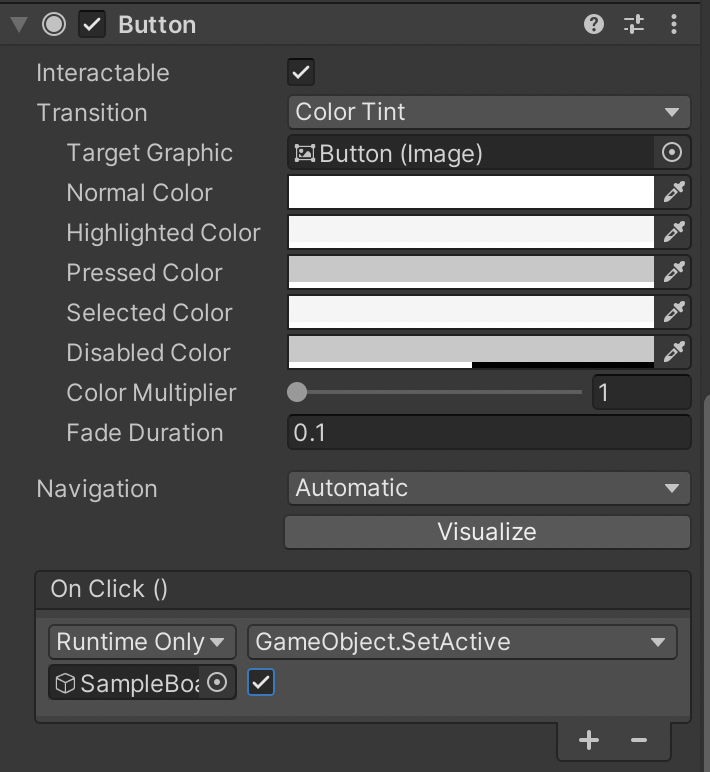
Since our code is set up so that the opening animation of the panel is played when the panel is enabled, we need to disable the panel and create a button in the scene and add a panel to enable the option as its button click as shown in the picture below.
Now click on the play button and test the panel animation yourself. Change the options of the panel script from the inspector in runtime and check the animation you have created.
Complete Code
 using System;
 using DG.Tweening;
 using UnityEngine;
 using UnityEngine.UI;

 [RequireComponent(typeof(CanvasGroup))]
 public class PanelWithDOTween : MonoBehaviour
 {
     //Enum option for opening and closing panel
     public AnimationAction OpenAnimation, CloseAnimation;

 //Animation Effect adding to the animation of the panel.
 public Ease OpeningEase, ClosingEase;

 //CanvasGroup attached to the gameObject
 public CanvasGroup thisPanelCanvasGroup;

 //total time for the animation duration.
 public float animationTime = 0.25f;

 [Tooltip("Make this true if the panel has to be destroyed after it has been closed.")]
 public bool NeedToBeDestroyed;

 [Tooltip("Provide close button reference if the panel has to be closed by a button click.")]
 public Button _closeButton;

 ///<summary>
 /// Positions of all four side of the screen. It is calculated using the screen camera .
 ///</summary>
 private Vector3
     leftScreenPosition,
     rightScreenPosition,
     topScreenPosition,
     bottomScreenPosition;


 /// <summary>
 /// offset positions of all side of the screen calculated with panel size in mind.
 /// </summary>
 private Vector3
     leftOffSetScreenPosition,
     rightOffSetScreenPosition,
     topOffSetScreenPosition,
     bottomOffSetScreenPosition;

 private bool positionSet;
 private Camera _mainCamera; //Main camera of the scene.

 private void Awake()
 {
     if (thisPanelCanvasGroup == null) thisPanelCanvasGroup = GetComponent<CanvasGroup>();
 }

 private void Start()
 {
     if (_closeButton != null)
     {
         _closeButton.onClick.AddListener(() => PlayAnimation(false));
     }
 }

 private void OnEnable()
 {
     if (!positionSet)
     {
         //Set the positions of all sides of the screen
         UpdateAllSideScreenPositions();

         //update the offset position of the scree as per the size of the panel
         SetOffScreenPositionForPanel();
     }

     //set the alpha value of the canvas group to 0 for its initial value
     if (thisPanelCanvasGroup != null)
         thisPanelCanvasGroup.alpha = 0;
     PlayAnimation(true);
 }

 //Set the all position of all the screen side positions.
 private void UpdateAllSideScreenPositions()
 {
     if (_mainCamera == null)
         _mainCamera = Camera.main;
     Vector3 screenDimen = _mainCamera.ScreenToWorldPoint(new Vector3(Screen.width, Screen.height, 0f)) * 2;
     if (screenDimen.x < screenDimen.y)
     {
         screenDimen = new Vector3(screenDimen.y, screenDimen.x, screenDimen.z);
     }

     topScreenPosition = new Vector3(0, screenDimen.y / 2, 0);
     bottomScreenPosition = new Vector3(0, -screenDimen.y / 2, 0);
     leftScreenPosition = new Vector3(-screenDimen.x / 2, 0, 0);
     rightScreenPosition = new Vector3(screenDimen.x / 2, 0, 0);
 }

 /// <summary>
 /// Set the positions outside of the screen so the panel could outside of the view/screen if necessary.
 /// </summary>
 private void SetOffScreenPositionForPanel()
 {
     RectTransform myRect = transform.GetComponent<RectTransform>();
     float sizeToAdd = myRect.rect.width / 100;
     leftOffSetScreenPosition = leftScreenPosition - new Vector3(sizeToAdd, 0, 0);
     rightOffSetScreenPosition = rightScreenPosition + new Vector3(sizeToAdd, 0, 0);
     sizeToAdd = myRect.rect.height / 100;
     topOffSetScreenPosition = topScreenPosition + new Vector3(0, sizeToAdd, 0);
     bottomOffSetScreenPosition = bottomScreenPosition - new Vector3(0, sizeToAdd, 0);
     positionSet = true;
 }


 /// <summary>
 /// Start playing the selected animation for the panel
 /// </summary>
 /// <param name="playOpenAnimation"></param>
 private void PlayAnimation(bool playOpenAnimation)
 {
     try
     {
         Vector3 posToGive = Vector3.zero;
         Vector3 initPos = Vector3.zero;
         float scale = 1;
         AnimationAction playAnimationType = playOpenAnimation ? OpenAnimation : CloseAnimation;
         switch (playAnimationType)
         {
             case AnimationAction.slideToLeft:
                 initPos = playOpenAnimation ? rightOffSetScreenPosition : transform.position;
                 transform.position = initPos;
                 posToGive = playOpenAnimation ? new Vector3(0, transform.position.y, 0) : leftOffSetScreenPosition;
                 StartSlideAnimation(playOpenAnimation, posToGive);
                 break;
             case AnimationAction.slideToRight:
                 initPos = playOpenAnimation ? leftOffSetScreenPosition : transform.position;
                 transform.position = initPos;
                 posToGive = playOpenAnimation
                     ? new Vector3(0, transform.position.y, 0)
                     : rightOffSetScreenPosition;
                 StartSlideAnimation(playOpenAnimation, posToGive);
                 break;
             case AnimationAction.slideUp:
                 initPos = playOpenAnimation ? bottomOffSetScreenPosition : transform.position;
                 transform.position = initPos;
                 posToGive = playOpenAnimation ? new Vector3(transform.position.x, 0, 0) : topOffSetScreenPosition;
                 StartSlideAnimation(playOpenAnimation, posToGive);
                 break;
             case AnimationAction.slideDown:
                 initPos = playOpenAnimation ? topOffSetScreenPosition : transform.position;
                 transform.position = initPos;
                 posToGive = playOpenAnimation
                     ? new Vector3(transform.position.x, 0, 0)
                     : bottomOffSetScreenPosition;
                 StartSlideAnimation(playOpenAnimation, posToGive);
                 break;
             default:
                 HideOrDestroy();
                 break;
         }
     }
     catch (Exception e)
     {
         HideOrDestroy();
         Debug.LogWarning($"Exception while running dotWeen animation " + e);
     }
 }

 /// <summary>
 /// Start playing the slide animation as per the opening or closing animation selected from the unityEditor
 /// </summary>
 /// <param name="openingAnimation">Open status of the panel. True for opening panel: False for closing panel</param>
 /// <param name="position">Position to which the panel should slide.</param>
 private void StartSlideAnimation(bool openingAnimation, Vector3 position)
 {
     try
     {
         if (openingAnimation)
         {
             transform.DOMove(position, animationTime).SetEase(OpeningEase)
                 .OnComplete(() => transform.localPosition = position);
             if (thisPanelCanvasGroup != null)
                 thisPanelCanvasGroup.DOFade(1, animationTime);
         }
         else
         {
             if (thisPanelCanvasGroup != null)
                 thisPanelCanvasGroup.DOFade(0, animationTime);
             transform.DOMove(position, animationTime).SetEase(ClosingEase).OnComplete(HideOrDestroy);
         }
     }
     catch (Exception e)
     {
         Debug.Log("Exception throw on panel sliding animation. " + e);
     }
 }

 /// <summary>
 /// Hide or destroy the gameObject when closing the panel
 /// </summary>
 private void HideOrDestroy()
 {
     try
     {
         if (NeedToBeDestroyed)
         {
             Destroy(gameObject);
         }
         else
         {
             gameObject.SetActive(false);
         }
     }
     catch (Exception e)
     {
         Debug.Log("NullReference exception: " + e);
     }
 }
}
This is all for the dynamic panel animation (sliding animation) with DOTween in unity. You can add other animations like popUp, popIn, etc. on this, to give more variety to the animation.
I hope this tutorial was of help to you!