
Continuing from my previous article, the steps for my digital illustration process are:
- Gather resources
- Document setup
- Concept sketches
- Clean Line art
- Flat Colour
- Shadows and Highlights
- Export File
I explained the first three planning phases in the previous part of this article. Now, I will discuss cleaning up the sketches with line art, colouring, and finalising the illustration.
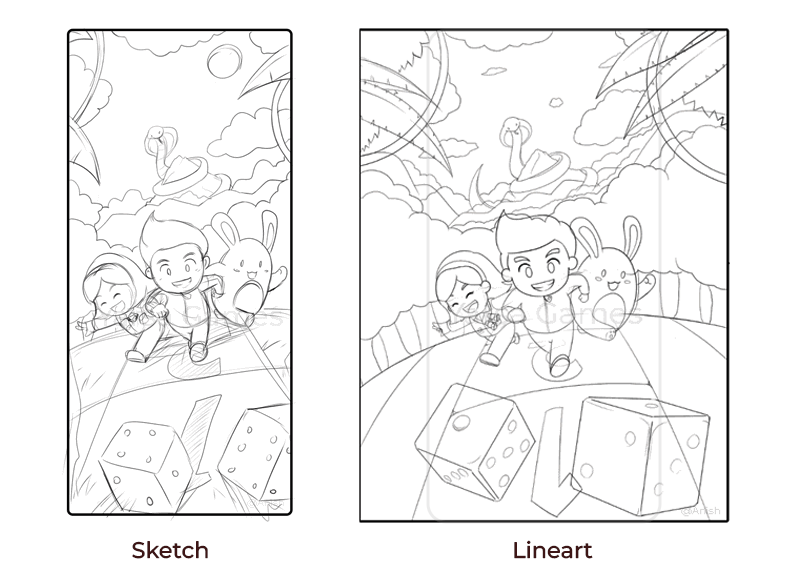
4. Clean Line Art
After the idea and sketch have been finalised, it is time to create a clean outline for it. This step is optional if you are going for a more painterly illustration style. Line art can work more for cartoon and comic styles of artwork.
To begin the line art process, turn down the sketch layer's opacity and create a new layer on top of it. While drawing, you can use different available brushes in Photoshop to get the type of drawing you want. Creating clean and closed line art will help to speed up the colouring process.
Photoshop doesn't have a vector brush. The line art you draw with the paintbrush will be a raster layer. Resizing it will cause the line to pixelate and lose its quality. If you want to work with line art that you can keep resizing and transforming, you can work with vector brushes in Clip Studio Paint.
For my illustration, I used the default Hard Pressure Brush.
Since my drawing has many characters, I created different layers for each character. Even though all the planning had been done and conceptualised, certain things may not look good together after colouring. So, to keep my options open and make it easier to move around, I used separate layers and groups for characters and background elements.
5. Flat Base Colours
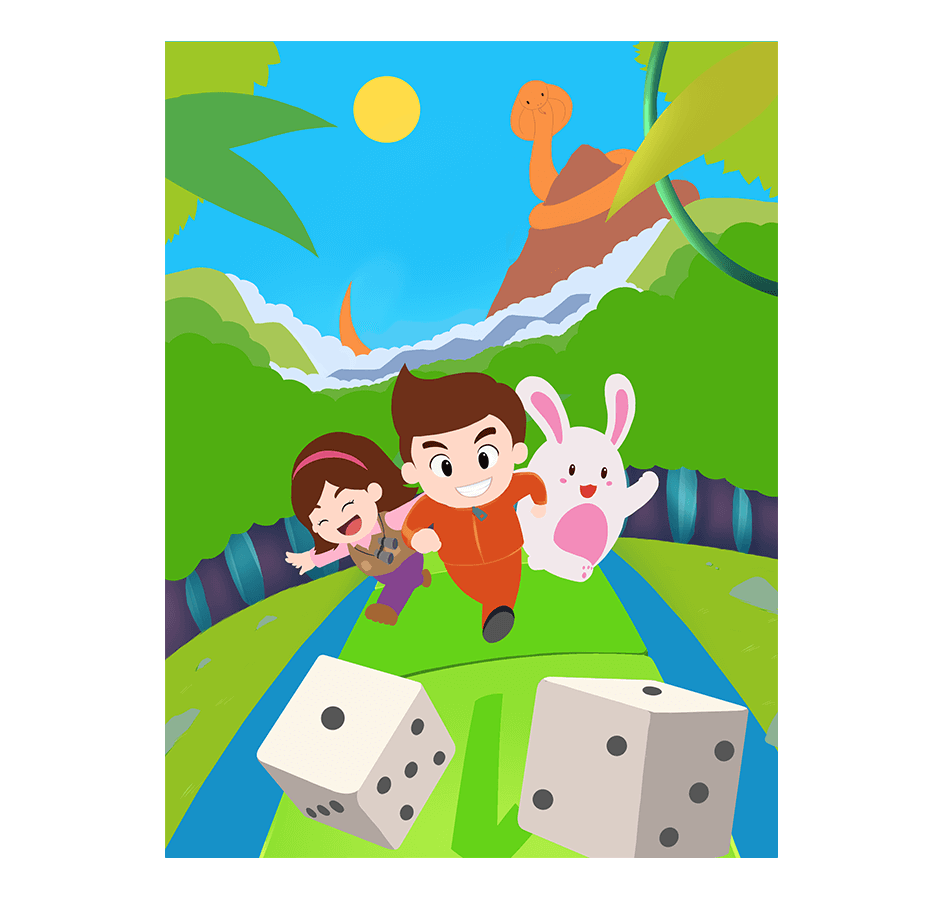
Before colouring, you can create a colour palette of colours that look good together and compare it with the reference board. This can help to find the mood for your illustration.
Since these characters were already made before, I had a colour palette for each of my characters ready. For comic, anime and cartoon styles, flat colours are used to block in the colours.
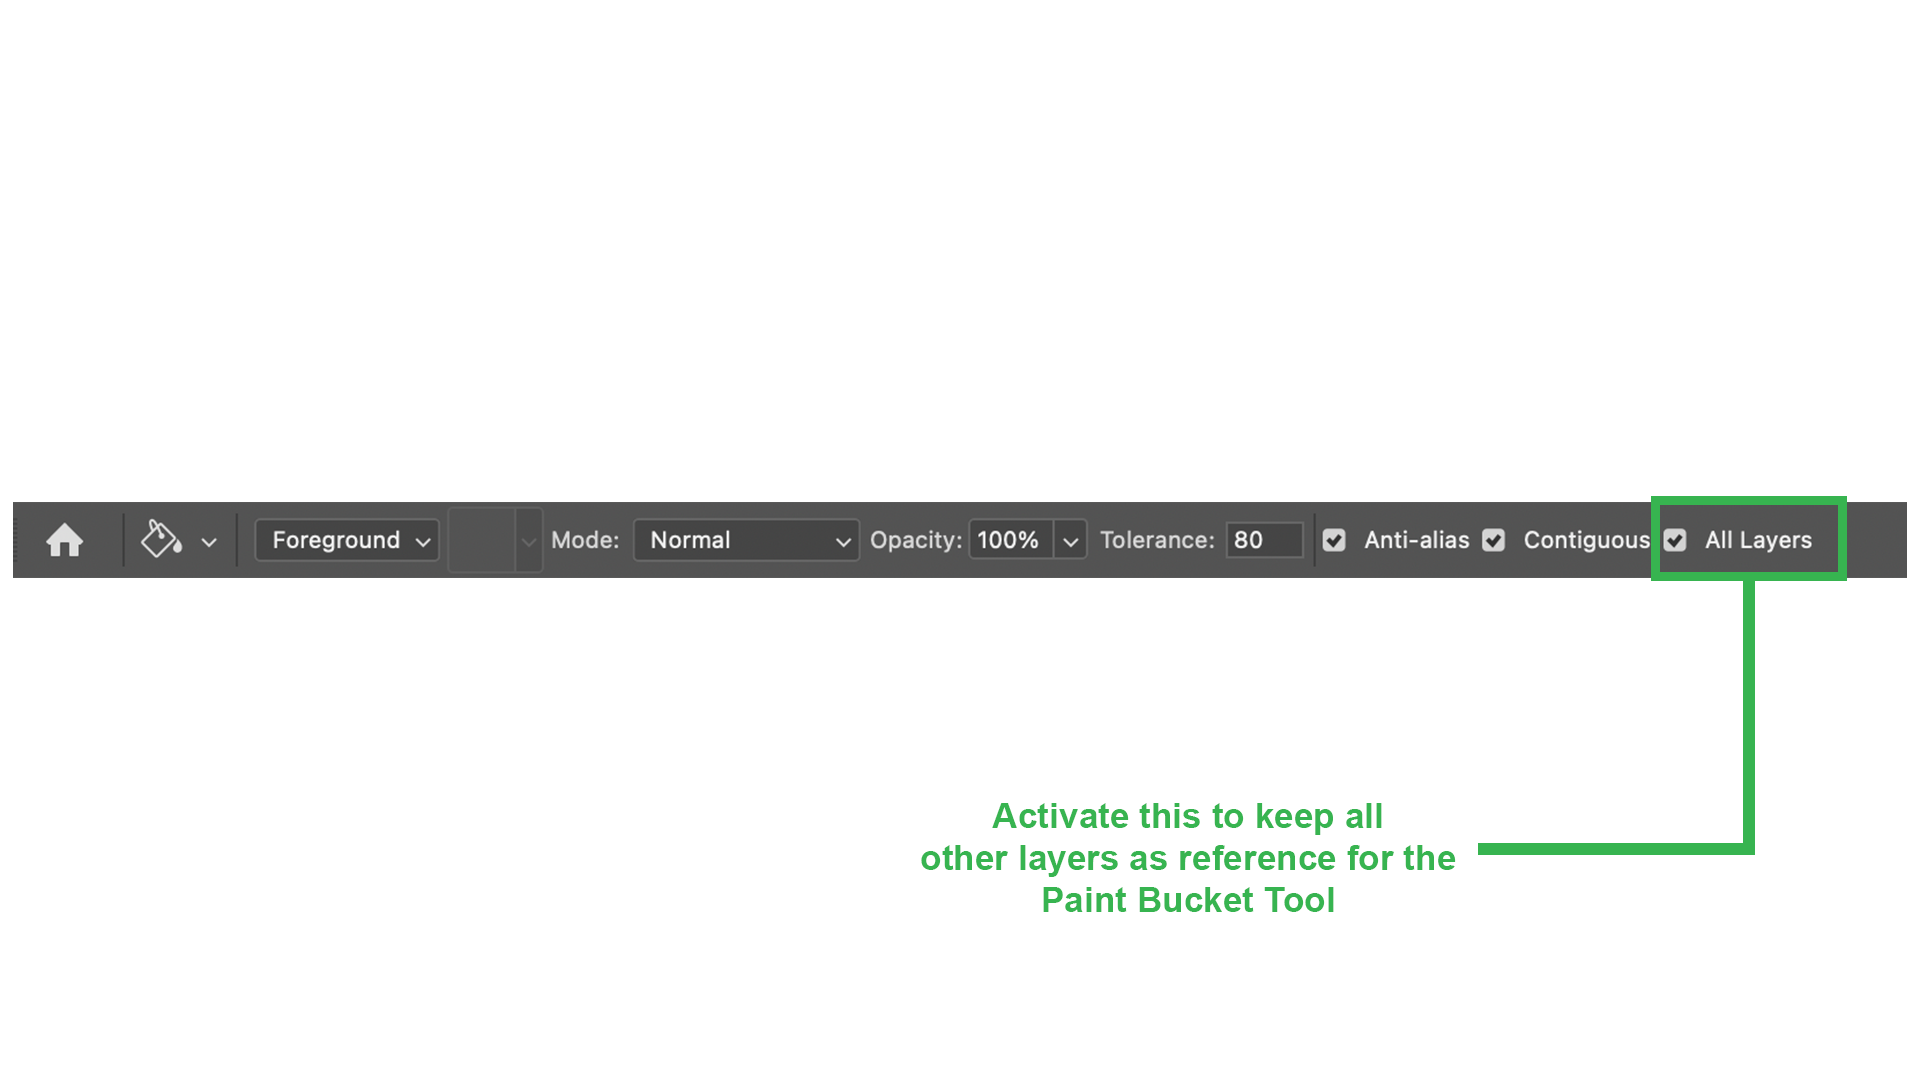
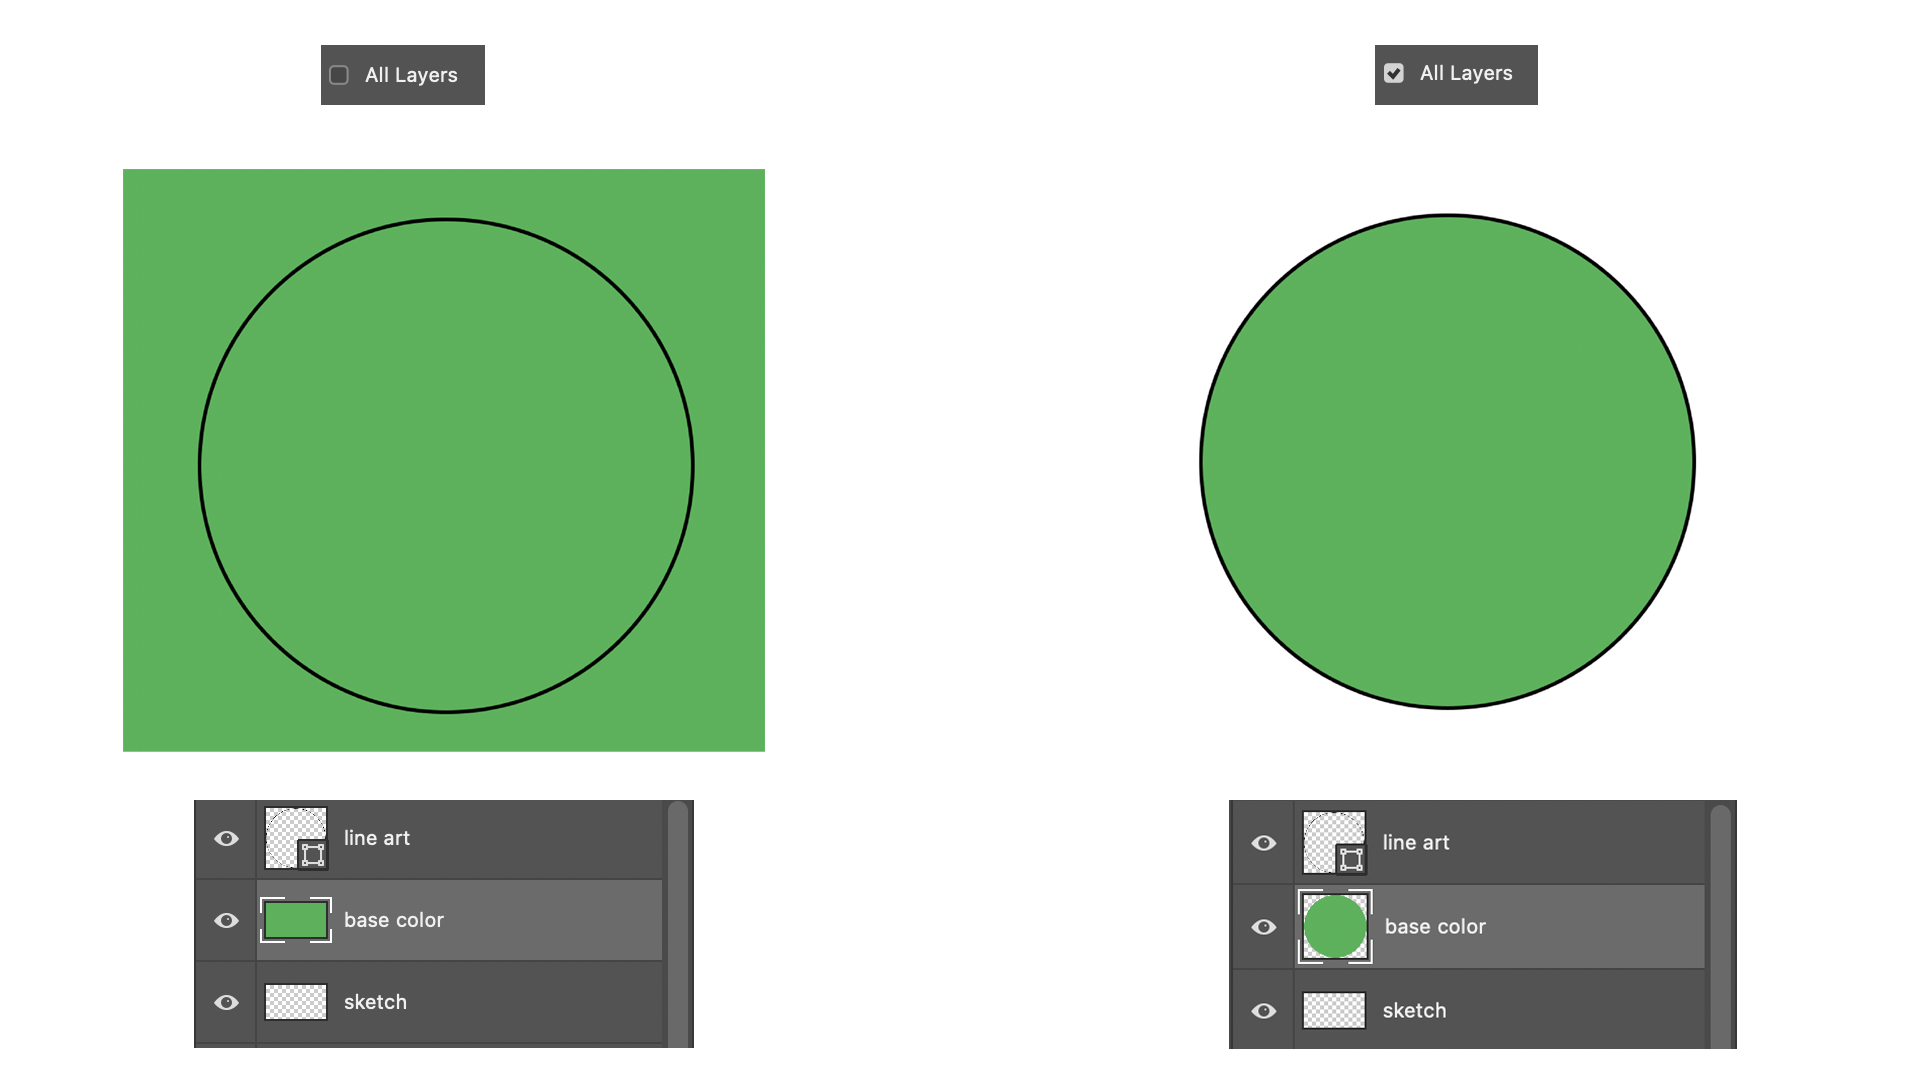
You can easily fill in the colours with the Paint Bucket Tool.
Before using it, create a new layer below the Line art layers and activate All Layers from Paint Bucket Tool's options menu bar at the top. This enables the tool to take all the other layers as a reference while filling the colours. If you don't activate this option, it will fill the entire canvas area with the picked colour because it won't detect any lines to specify the boundary area.
6. Shadows and Highlights
After filling in the flats for all my characters in the illustration, I determined the centre as the light source. Keeping that in mind, I created layers for shadows and highlights. I clipped those layers above the character's base colours.
For this illustration, since the highlights and shadows are clipped to the base colour, I only need to colour inside the base colour's boundary area.
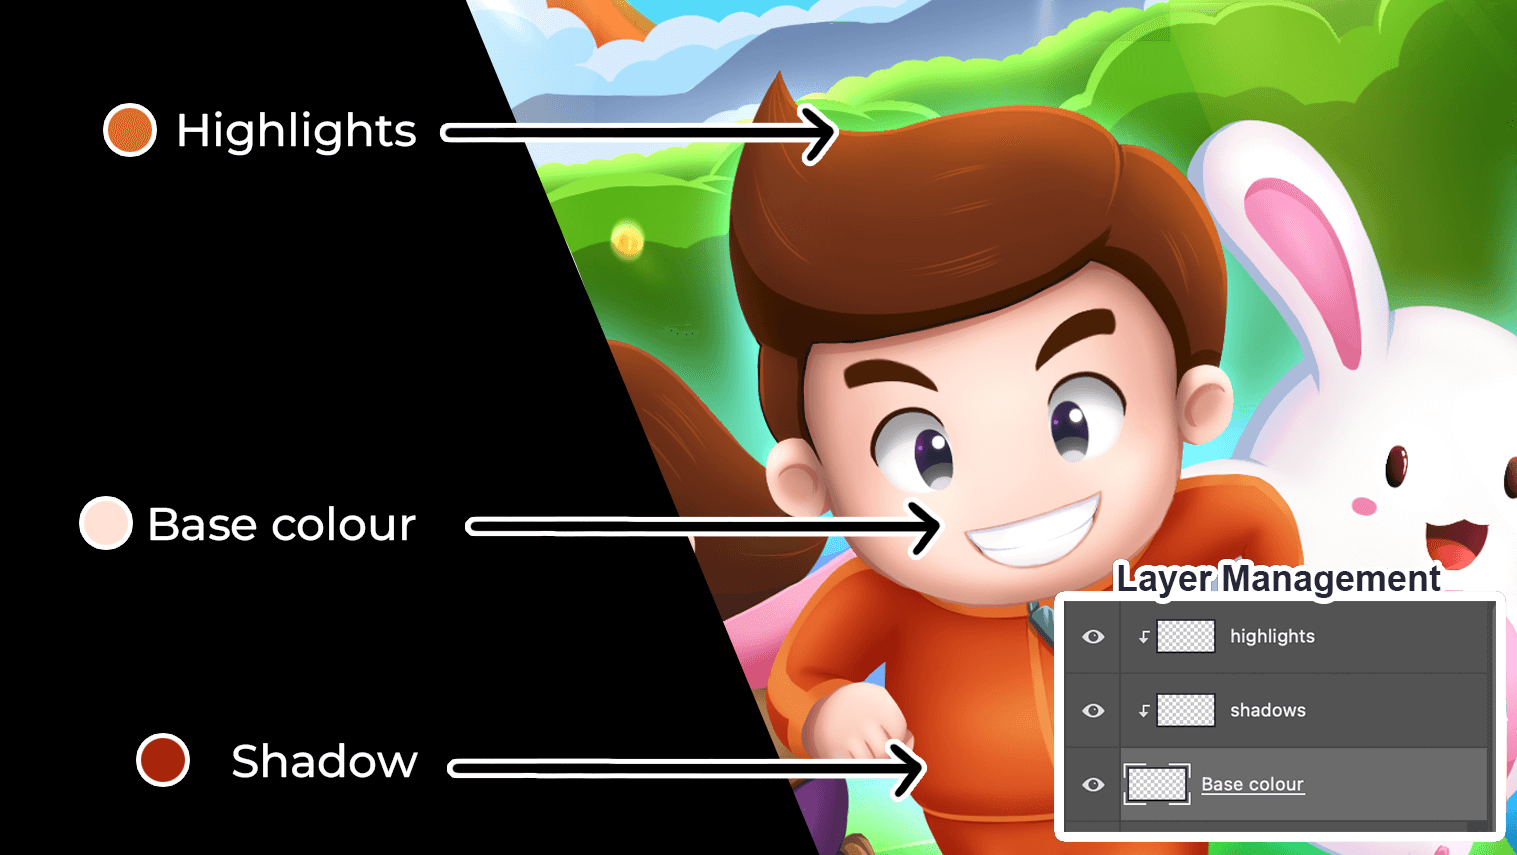
Shadows: Pick a colour darker than the base colour for the shadows. You can also use the Multiply Blend Mode with the environment's colour or with the same colour. Place these colours opposite the light source.
Highlights: Pick a colour lighter than the base colour for the highlights. You can also use the Screen Blend mode or Linear Dodge Blend mode with the same colour or the light source's colour. Place these colours in the direction of the light source. I used a similar process of making highlights for the sunlight.

7. Export File
The drawing and colouring process is finished. To show it to the world, we need to export it as an image.
In Photoshop, you can use Quick Export As and Export As. I use two methods of exporting according to the requirement and time.
- Go to
File>Export>Quick Export As. This will take the settings from Export Preferences and export them according to the current document's canvas size. - Go to
File>Export>Export As.... This will open the Export As window from where you can choose the required format and change the export image size.

I usually export my illustrations in PNG format rather than JPEG.
Conclusion
This is a brief explanation of how I usually work on illustrations. The full process still depends on the type of illustration and the purpose. For some illustrations, one step might take longer than others, or the entire step might be skipped.
Hopefully, my steps will help you get started with your digital drawing process. It might not work out as you had in mind for the first few or even several drawings. But if you keep trying and make more digital illustrations, you will get used to it and learn more things. Have fun in the drawing process, and keep drawing!
Thank you for reading. If you have any questions do comment below.