
With the increase in digital devices and software, drawing digitally has become easier. Today I will explain my workflow for digital drawing.
The Process
All work becomes easier with proper planning. Everyone has their own working process according to their style. For the purposes of this blog, I'll show an example of my drawing and outline the steps that led to the final product.
Here are my basic steps for drawing illustrations digitally:
- Gathering Resources
- Document Setup
- Concept Sketches
- Clean Line Art
- Flat Base Colours
- Shadows and Highlights
- Exporting the File
I will be writing a multi-part series covering each step in detail.
In this part, I will be explaining the first two steps, which are more focused on ideation and planning. These steps are the same for drawing simple cartoon characters and semi-realistic detailed characters.
1. Gathering Resources
A collection of images and other drawings will provide you with some inspiration for your piece and help you visualise your final product. They can inspire you with ideas for shapes, contrast, details, choice of colours, poses, and the feeling you want to replicate that you get from looking at them.
There are numerous sites to collect references from, like Pinterest, Posemaniacs, Photobash, Unsplash, Pixabay, and Google images.
2. Document Setup
Choosing the right document size and resolution is important while drawing digitally. Changing it later after the drawing is complete may affect its pixel quality.
After opening Photoshop, click on New File to open a new document. This will open a window to choose what type of document you want to draw on. You can input your own desired area size and resolution or pick from the given presets.
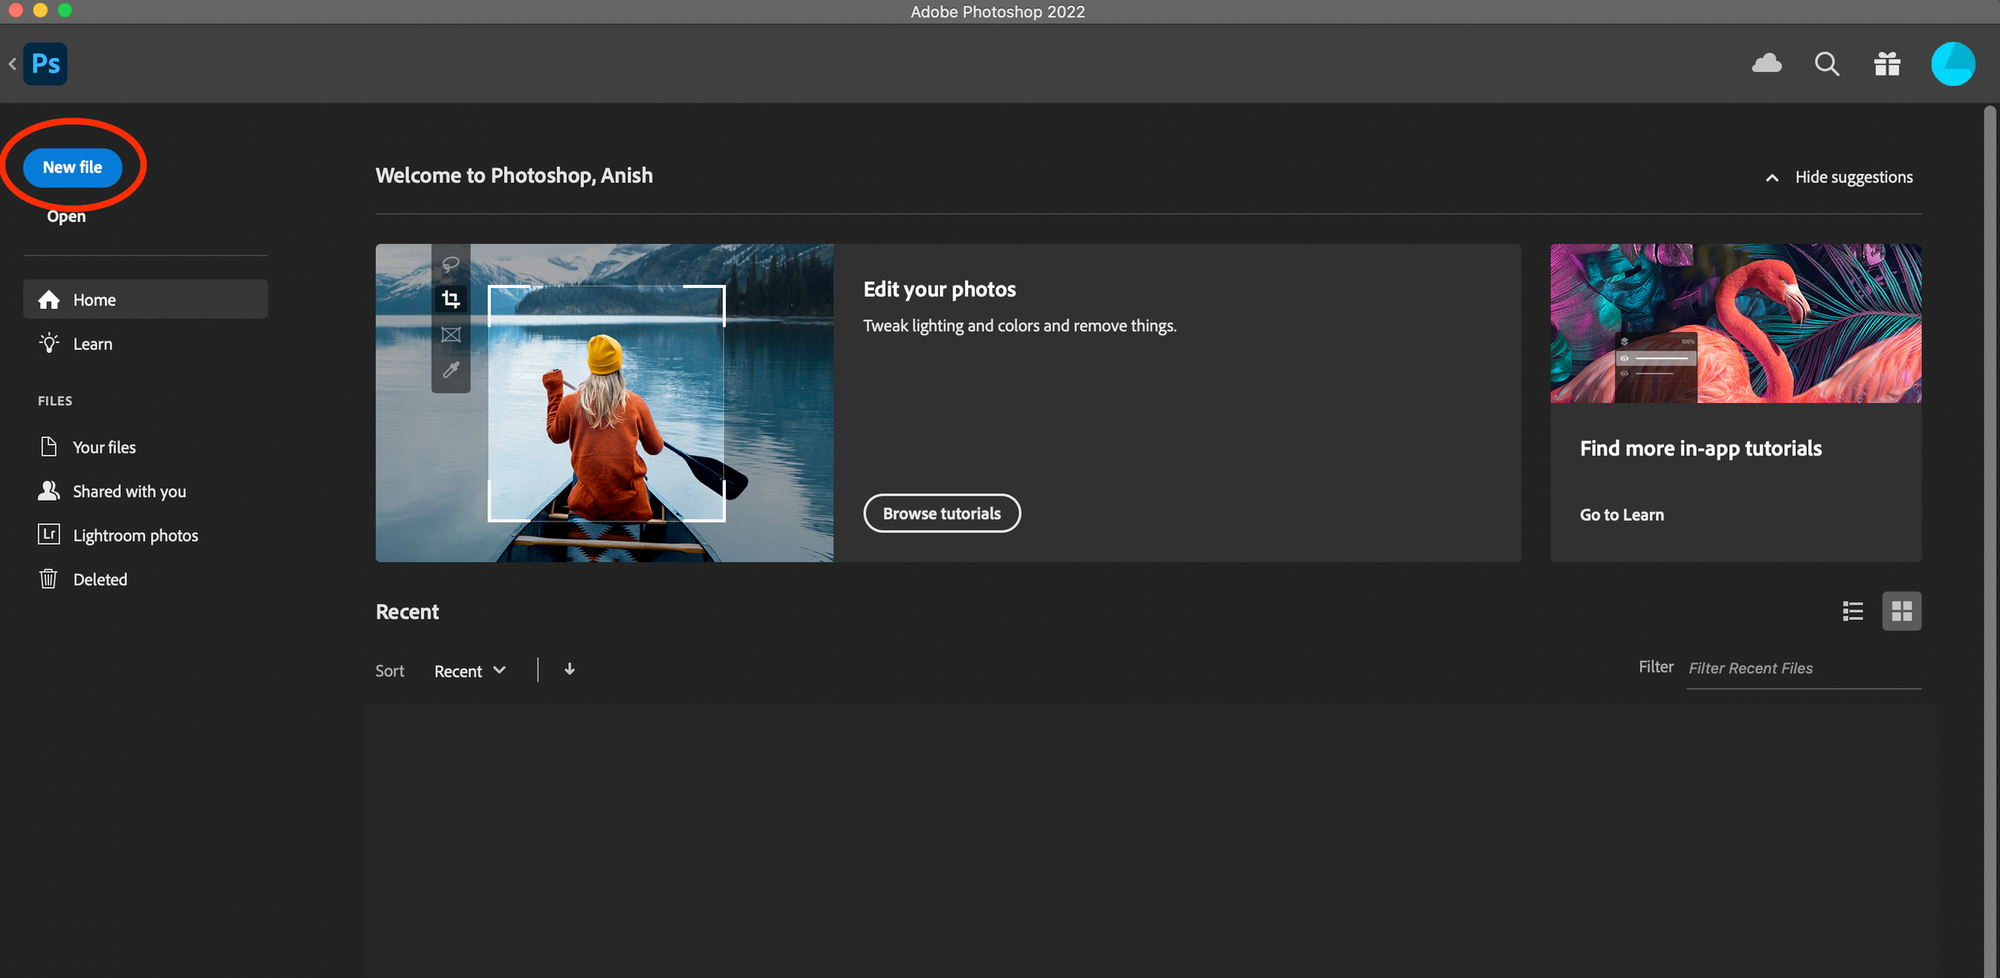
Starting out, the options may be daunting, and you may not know what type of document to work on. The type of your document will depend on what you want to use your illustration for.
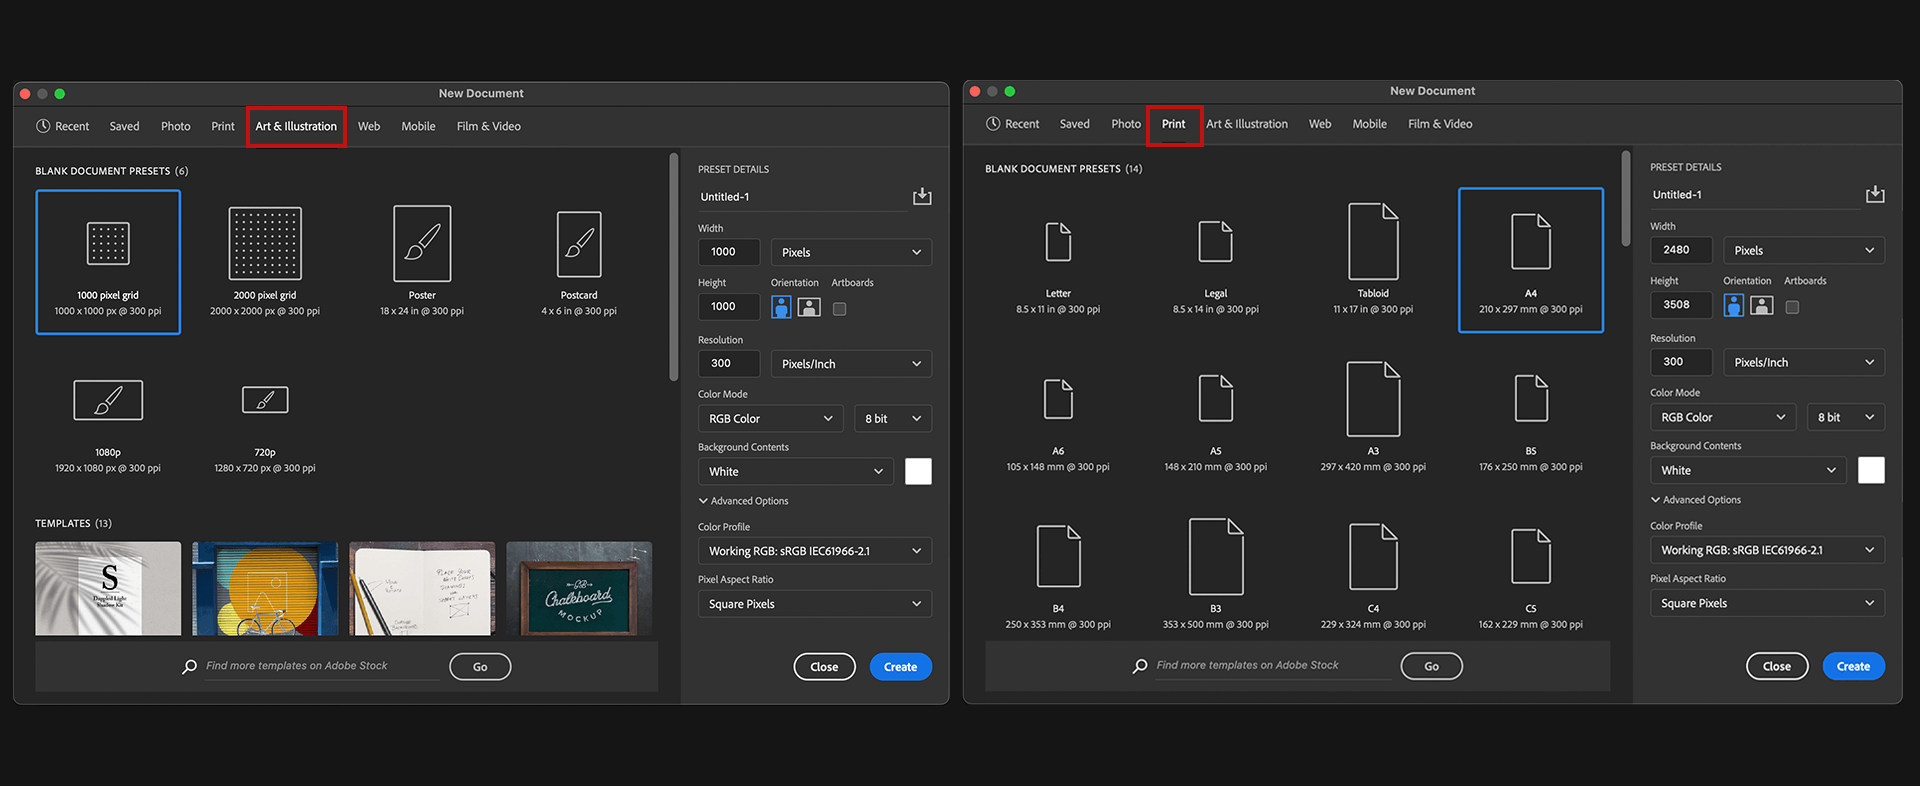
If you are making digital art, which will only be shown on screens like monitors and phones, I recommend a canvas size of height and width of 2000 pixels minimum. If you are drawing for a specific size screen or wallpapers, use that screen's size for your file.
If you are making digital art for printing, you can work on a minimum area of 3000 pixels in height and width. If you are printing your work on A4 paper, use that paper's size for your canvas.
Resolution also plays an important role in the quality of your final product. The standard is 72 pixels/inch for screens, and the standard is 300 pixels/inch for printing.
While creating a document file in Photoshop, Color modes of five types are available: RGB, CMYK, Grayscale, Bitmap and Lab Color. Use RGB (Red, Green and Blue) to display your illustrations on screens. Use CMYK (Cyan, Magenta, Yellow and Key/Black) if you are printing your illustrations.
You can leave the other settings as-is. Click on Create to make your document, and let us start the drawing process.
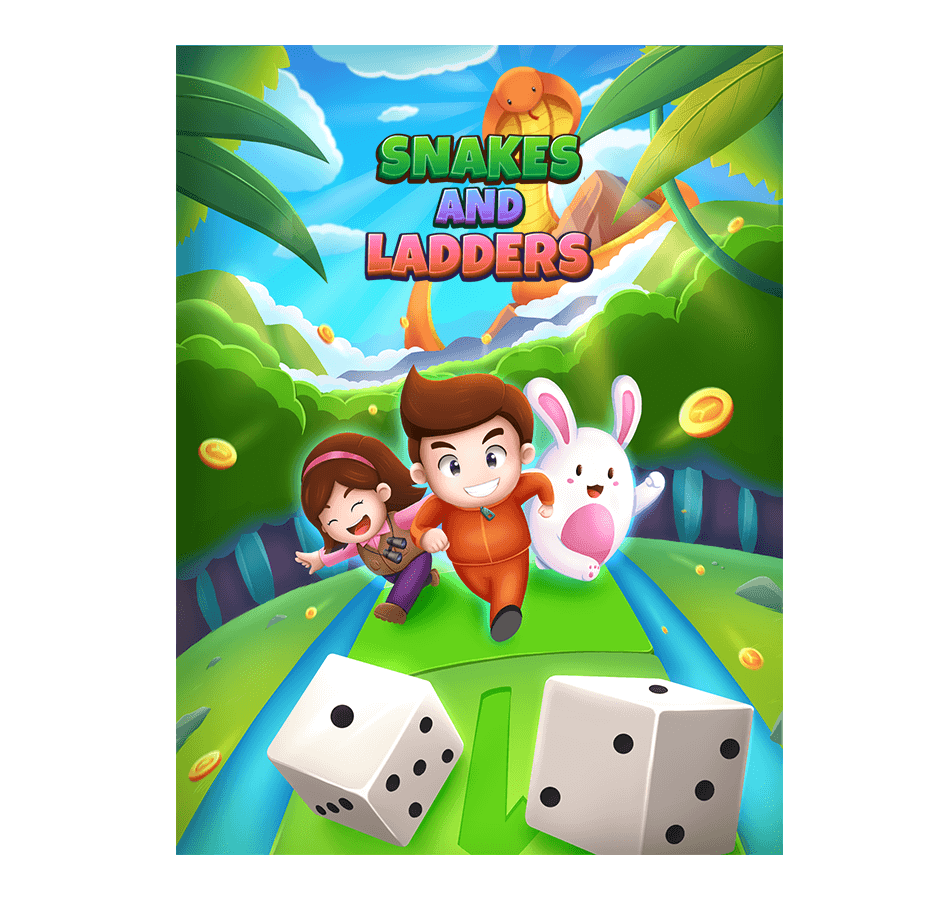
For my drawing, I used a resolution of 2048 x 2732 pixels. The size I used is for splash screens for tablets. Since I used a larger canvas size, I can also reduce it to the smaller required size and still retain its pixel quality. This splash screen was created for the mobile game, Snakes and Ladders (now called Ludo Multiplayer).
3. Concept Sketches
Concept sketches are diagrams that describe and explore ideas to find possible end products. They help us efficiently process and convey ideas to ourselves and others about the final product. They are used by most artists, architects, designers and engineers.
Concept sketches are done to investigate problems and explore a range of variations before working on the final drawing. Sketches can be made without putting too much effort into the details to get the ideas across quickly.
Sketches are also helpful while working on a project alone because it helps you see problems and variations ahead of time. When you are halfway done with your drawing, you should not find any major flaws with the composition, pose or idea. Concept sketches ensure that you don't have to start over.
Prompting (optional)
Prompts are ideas written down to provide a clear direction. They are ideas you have to explore with your drawing so that you do not get carried away and make something else completely unrelated to what you were planning to make.
An example of a generic prompt is "a wizard fighting a dragon in a dark cave. The old wizard has ice abilities, whereas the dragon can breathe fire."
For my drawing above, the prompt can be "kids and animals playing snakes and ladders in the forest".
Thumbnails
Thumbnails are quick and loose sketches useful for exploring ideas. They can also be done by shaping silhouettes. This will help to test the combination of different shapes and values. Most of the heavy lifting for ideas is done in this phase, and all you need to think about later on during the process is technique, refinement and details.
Concept Sketching
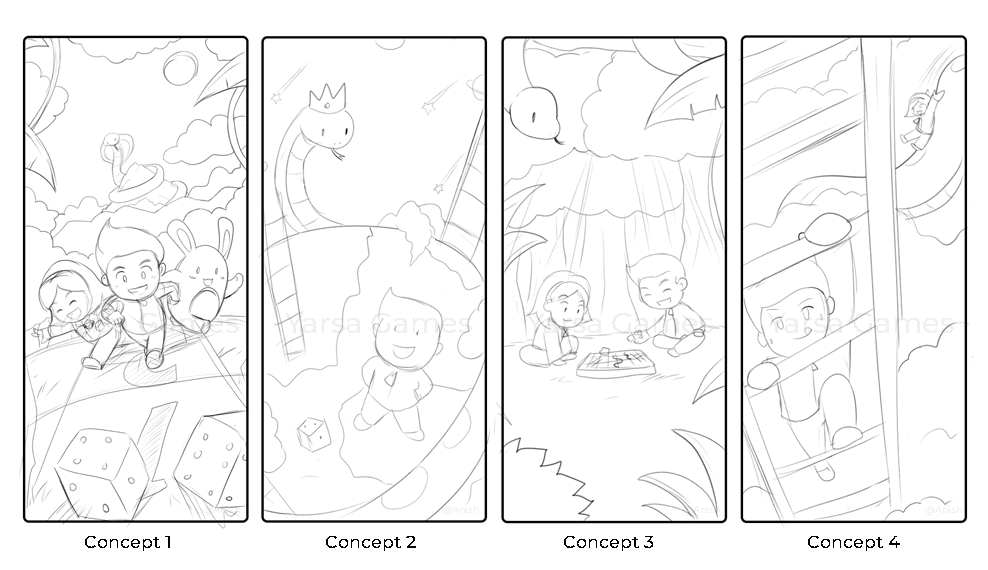
You can draw messily in this step because you will later trace over it with clean line art. But make sure to finalise your pose and perspective during the rough sketches so that while drawing the line art, you will only have to focus on the lines.
I created quick rough sketches for my drawing to get a feel of the idea and test poses and composition. I do not focus on the details in the first variation of the sketch. I simply try to get a composition and see if it works with simple shapes and stick figures.
These steps complete my planning and idea phase. In the next article, I will explain more about drawing the line art and colour.