
When creating designs for advertisement, social media, printing, comics, signboards, web layouts, or even personal projects, you might need to use words or phrases to convey a message and show important information. To create such designs, you need to know how to work with text in Photoshop.
Photoshop provides many tool options for text editing, making it flexible to create various types of text. Text in Photoshop is easy to use and has skill crossover with other Adobe products like Adobe Illustrator, so this information can be used over there as well. It is also easy to create stylized text like 3D text design.
While Photoshop is not optimal for writing long texts like novels, it can add short texts in a photo or design.
Type Tool
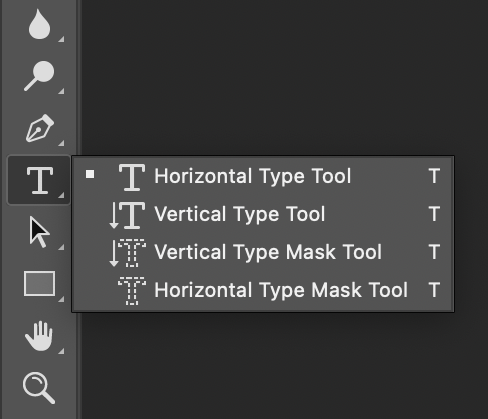
The type tool is located in the toolbar on the left side of the window screen. If you right-click on it, it will show more types of the type tool:
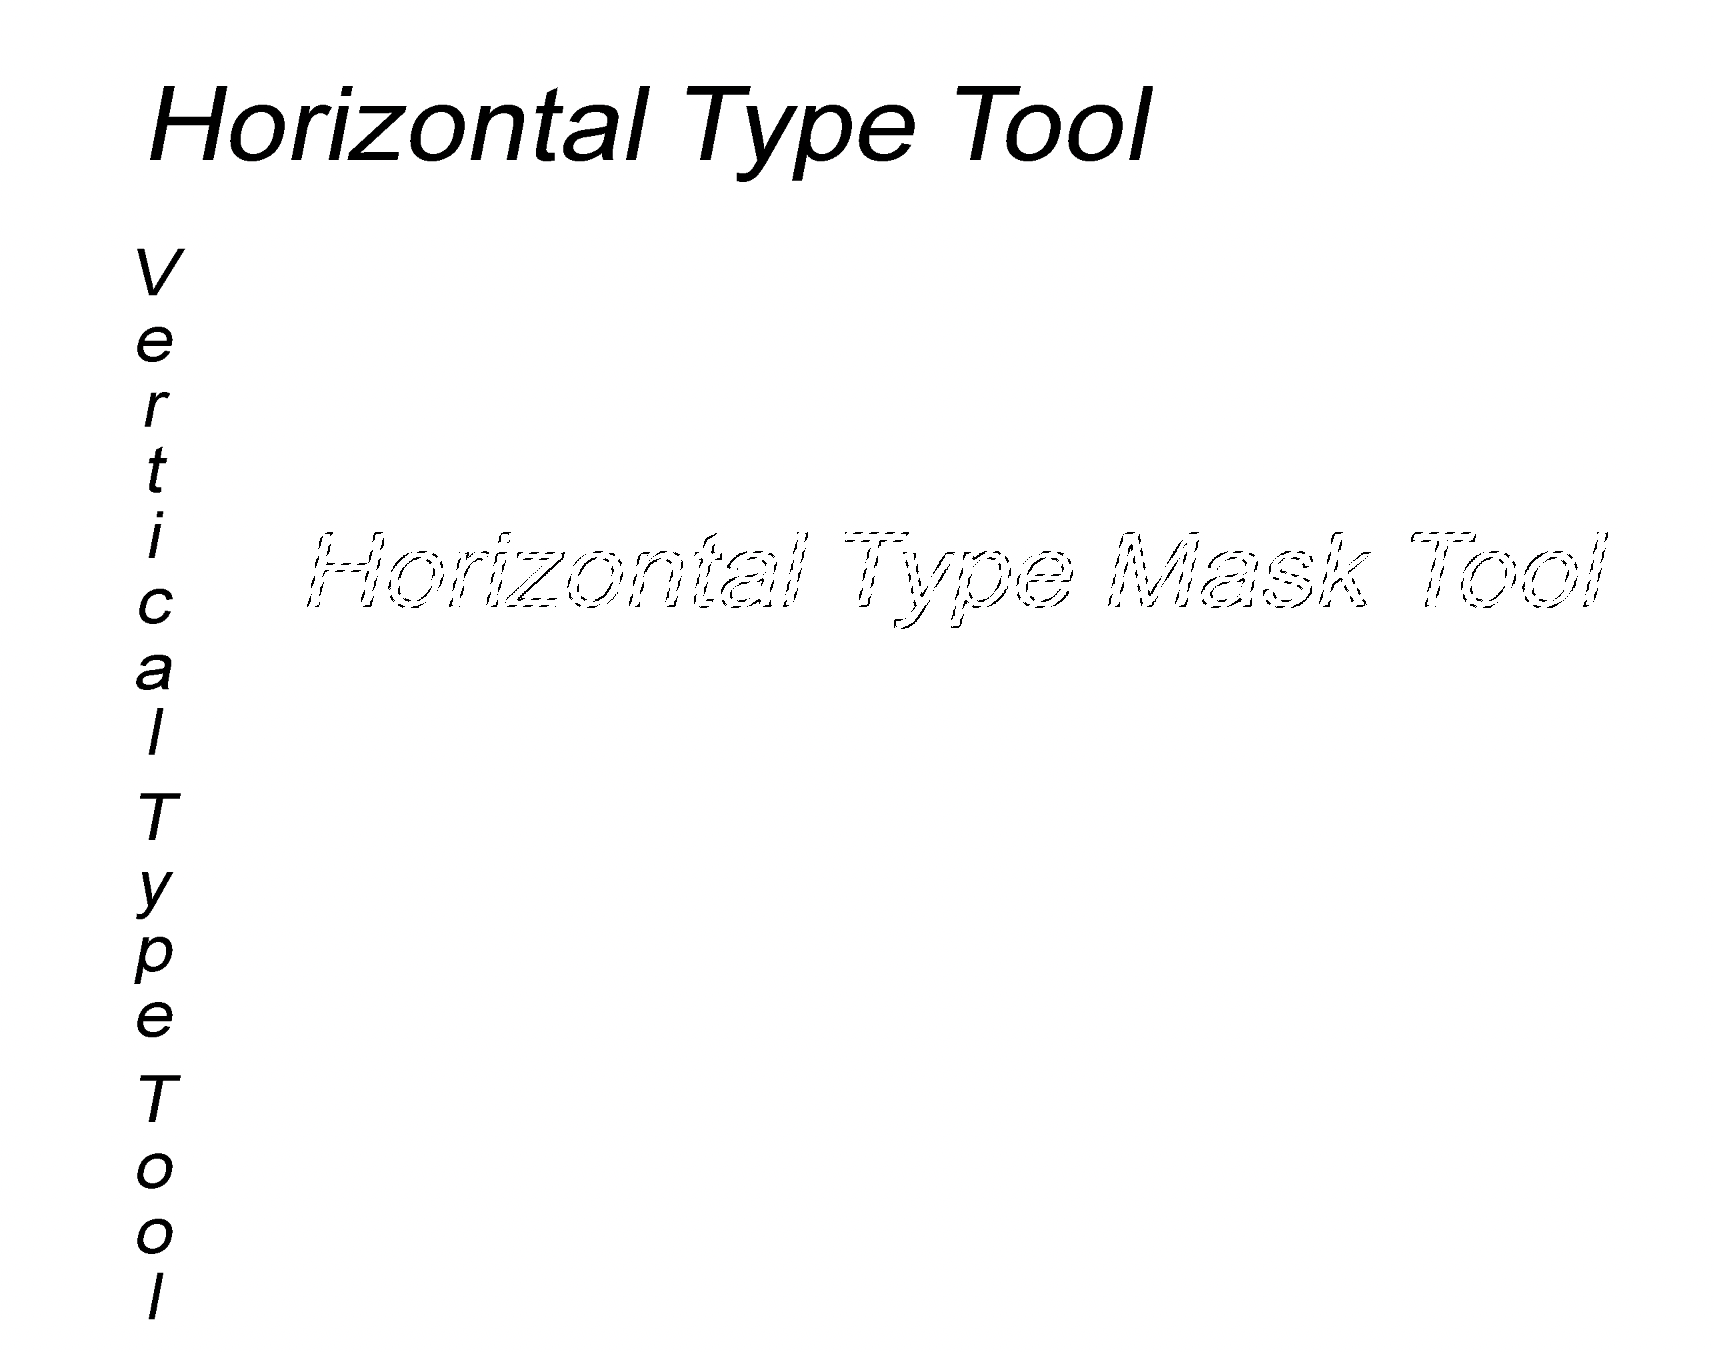
- Horizontal Type Tool: This tool is used to write words, sentences and paragraphs in a straight horizontal line. It is mostly used because we usually write paragraphs or sentences in a straight line.
- Vertical Type Tool: This tool is used to write text in a vertical straight line.
- Vertical Type Mask Tool: This tool creates a selection in text form instead of editable text like the above Type tools. This is used to type selections in the vertical direction.
- Horizontal Type Mask Tool: This is used to type selections horizontally.
Using Type Tools
- Create a new document in Photoshop.
- Select Horizontal Type Tool by clicking on the T icon on the toolbar.
- Click inside the document where you want to add the text. After clicking once, a dummy text "Lorem ipsum" will appear.
- To replace it with your own text, select it all and delete it. Type the text you want to add.
- After you are done with the text, click on the tick mark in the options bar. You can also switch to another tool to stop the typing process.
Other Type Tools work in the same way as Horizontal Type Tool.
Type Tool Options
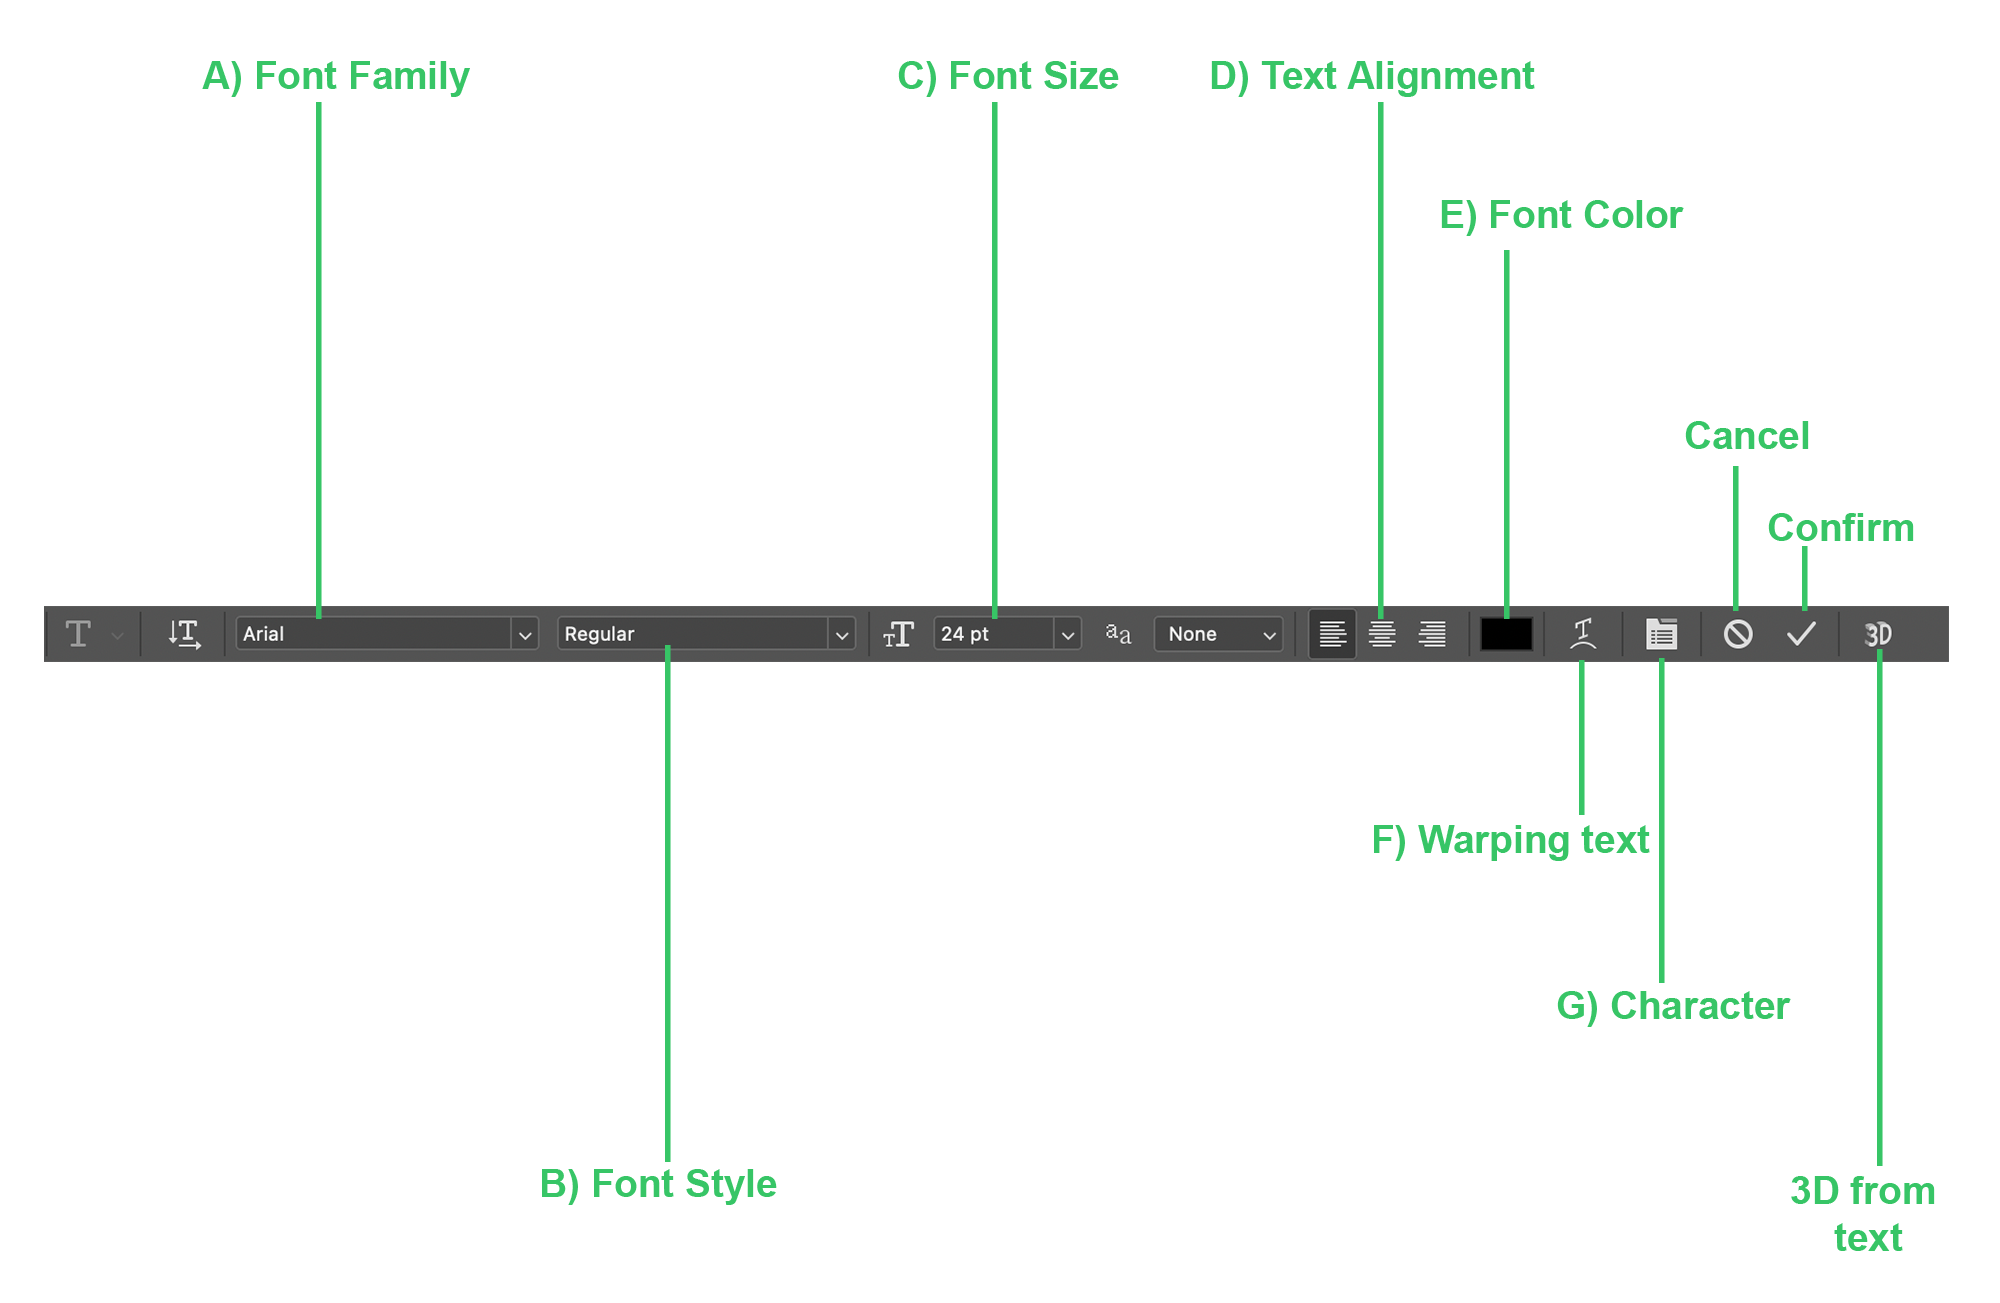
After clicking on the Horizontal Type Tool, the Options bar at the top will be changed to show options for the text's appearance and properties.
Working with Fonts
After you have typed the text, you can change the font and its properties anytime you want since the text created by Type Tool is editable until it is rasterized. To start editing the text, select the text layer and press T.
A) Selecting Fonts
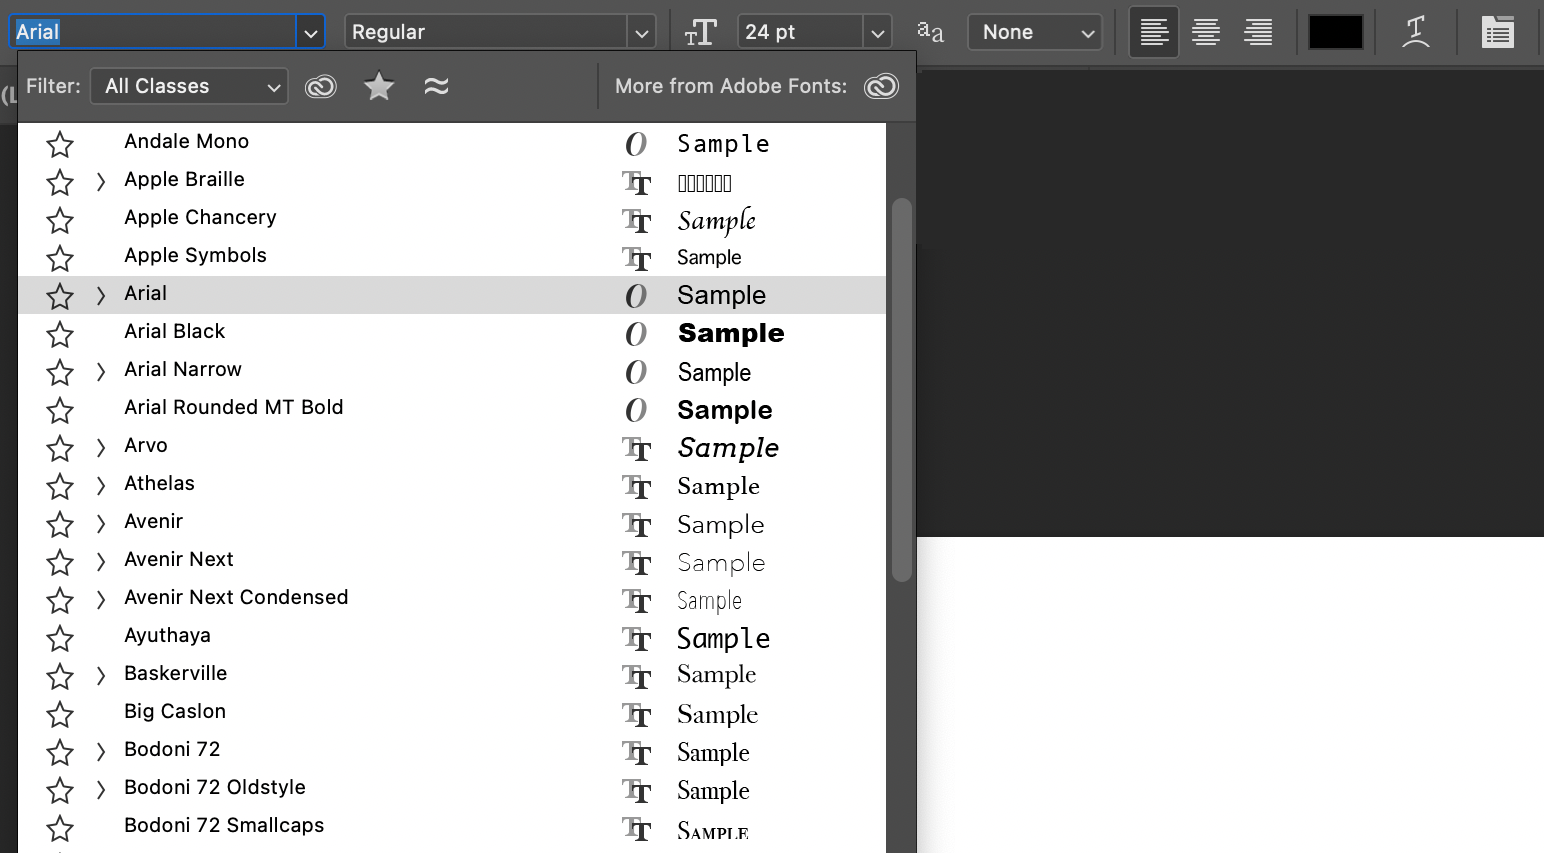
- Click on the Font family names on the Options bar.
- A drop-down menu will appear with a long list of your installed fonts. Select the font you want.
B) Changing Font Style

- Click on the menu beside the Font selection drop-down menu.
- It will open a new drop-down menu to change the font style. You can pick from Regular, Italic, Bold and Bold Italic.
C) Changing Font Size
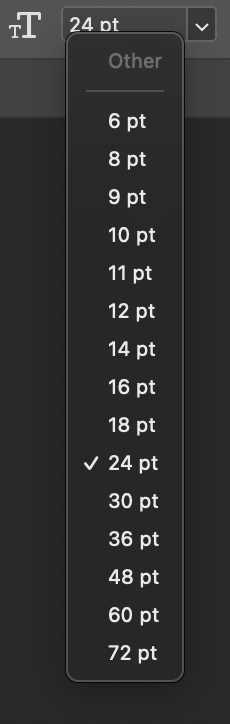
- Click on the down arrow icon in the menu shown above.
- It will open a new drop-down menu to pick the size number.
- Even though the list only shows the maximum size of 72 pt, you can create larger texts. Click on the number to input any number.
D) Changing Text Alignment
When working with long paragraphs, you might need to change the text alignment to match your overall design. You can pick from the three - Left, Center and Right align text.

E) Picking Font Colour
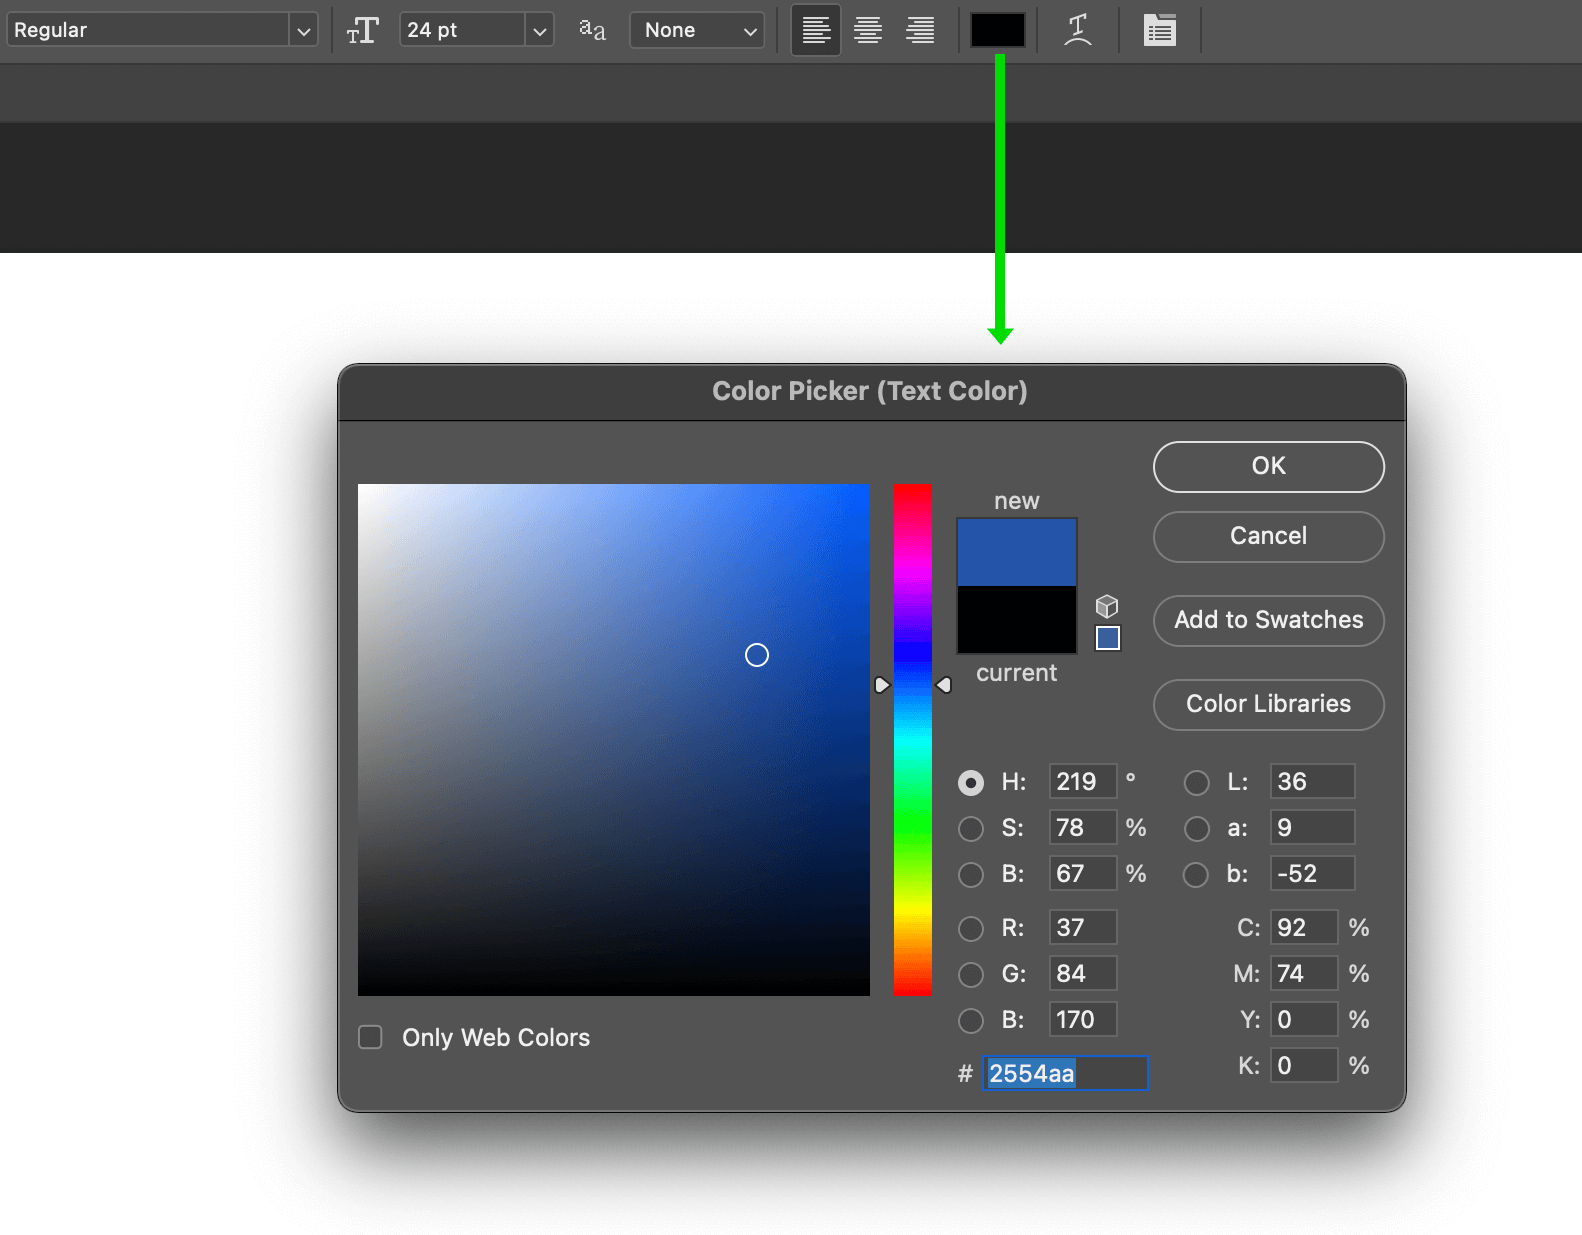
- Click on the coloured box in the Options bar.
- A new window called Color Picker (Text Color) will open.
- Pick the colour you need or type its Hex colour code.
F) Warping Text
This tool will be useful if you want the text to be warped into arcs or different shapes.

- Type the text first.
- Click on the icon shown in the above image to open a new window called Warp Text.
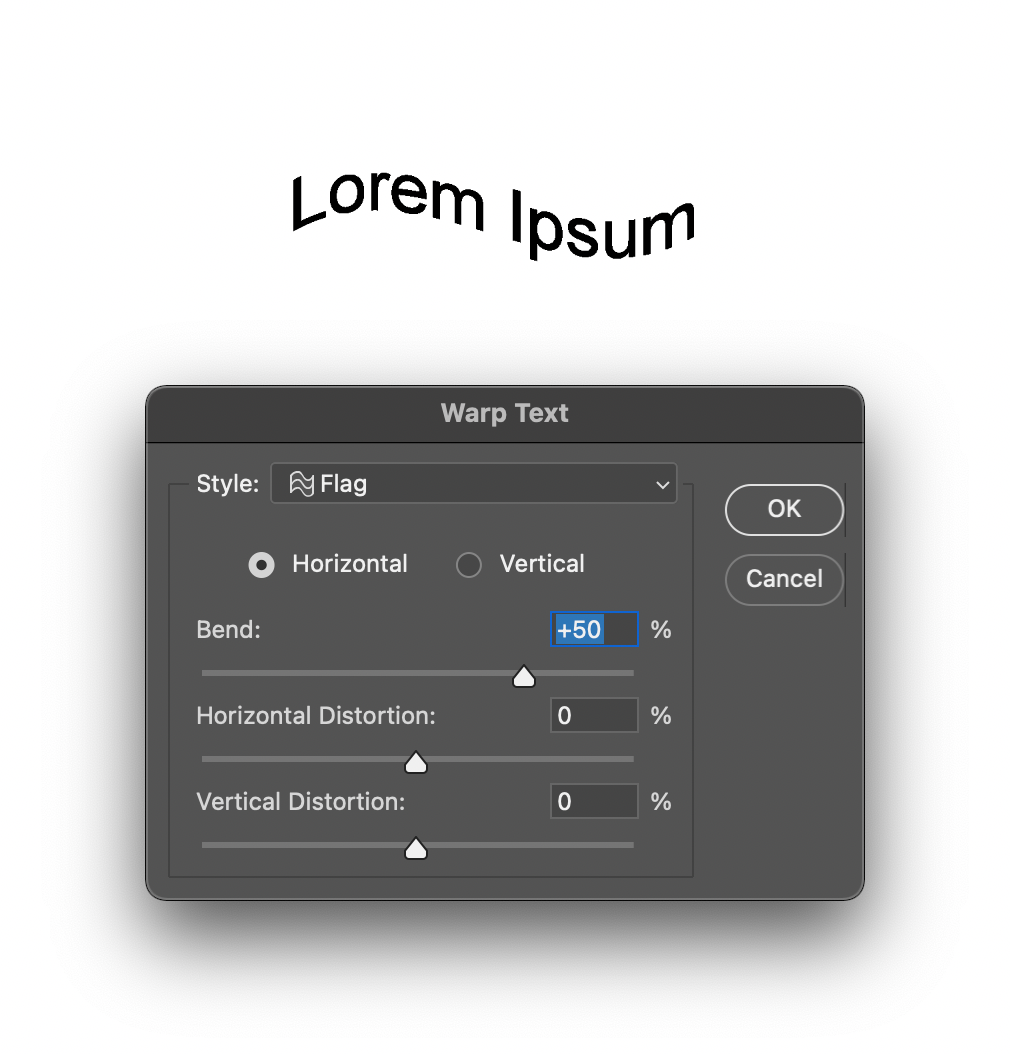
- Pick a Style. For the purposes of this tutorial, select Flag.
- According to the needs, select Horizontal or Vertical to pick the warp direction.
- Change the properties of how much the text will be warped by moving the sliders for Bend, Horizontal Distortion and Vertical Distortion.
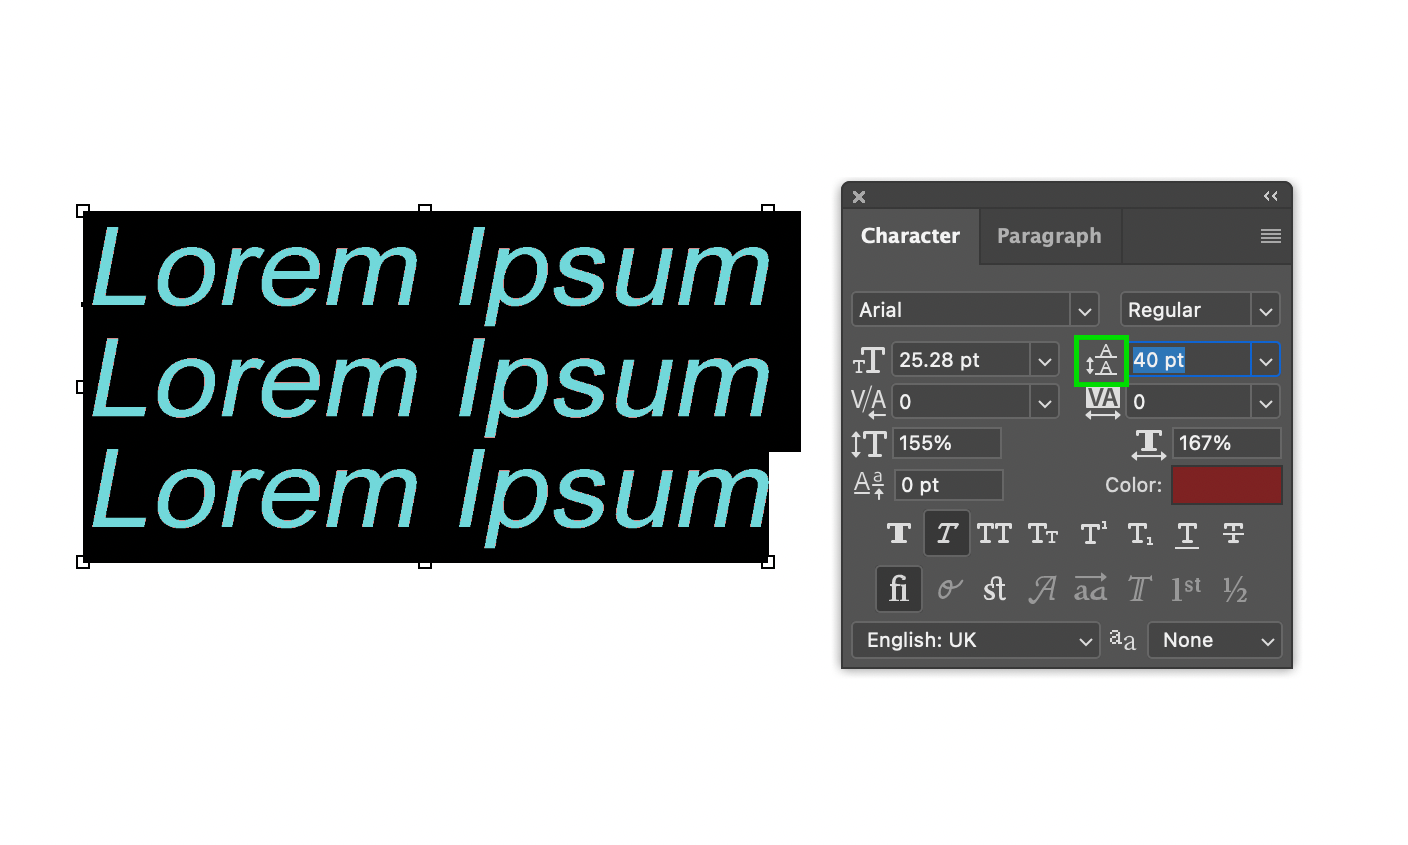
G) Changing Spacing Between Text Characters
You can also change the spacing between the letters when working in the same text layer.
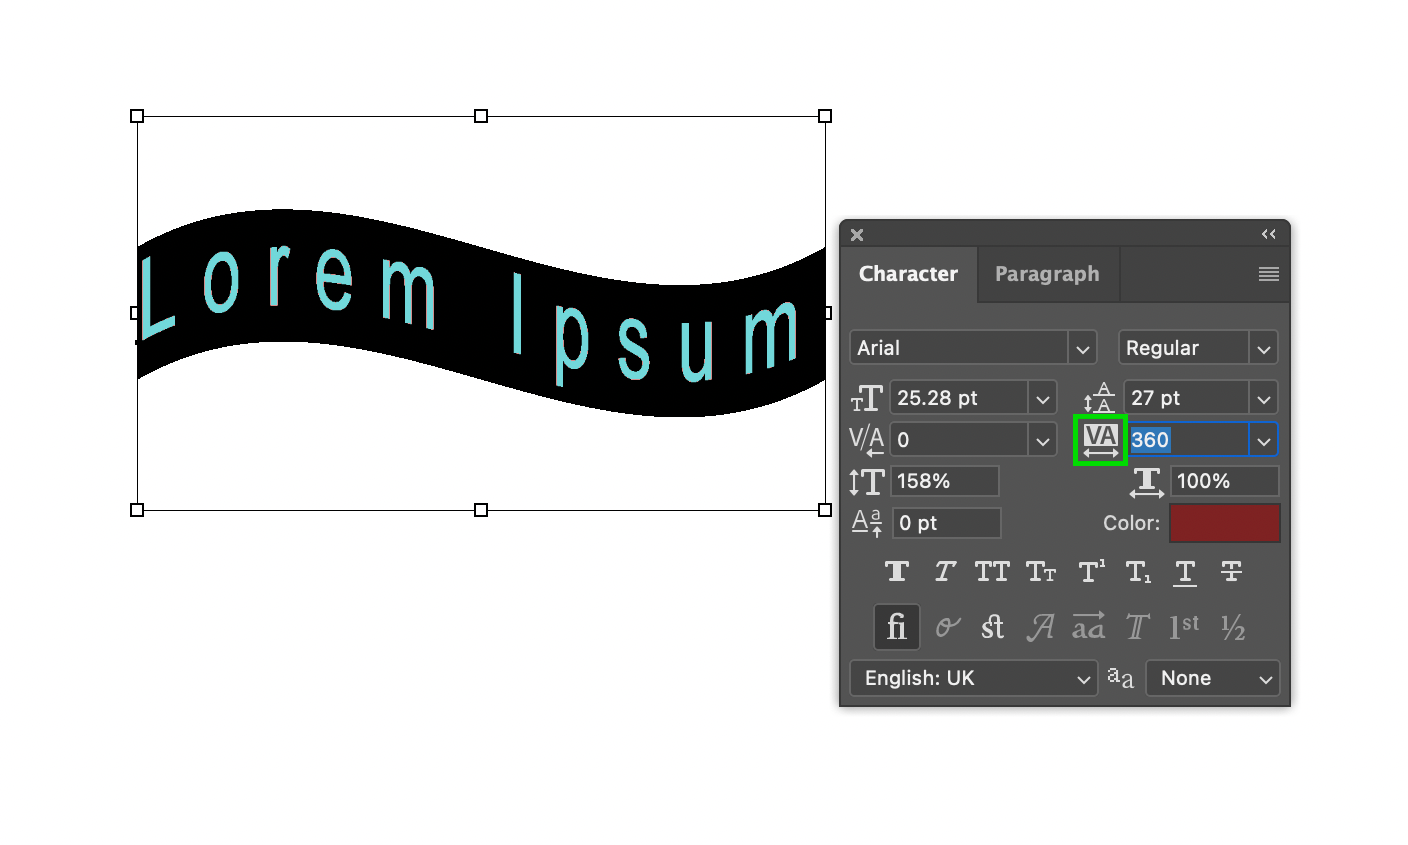
- Click on the folder icon in the Options bar. This will open a new window named Character.
- Drag the icon shown in the image shown above to set the tracking. This will increase the spacing between the characters. You can also click on the number to open a drop-down menu for selecting the distance number.
- Drag the icon shown in the image shown above to set the leading. This will increase the spacing between the lines if you have multiple lines or a long paragraph. You can also click on the number to open a drop-down menu for selecting the distance number.
H) Move, Rotate and Flip Text
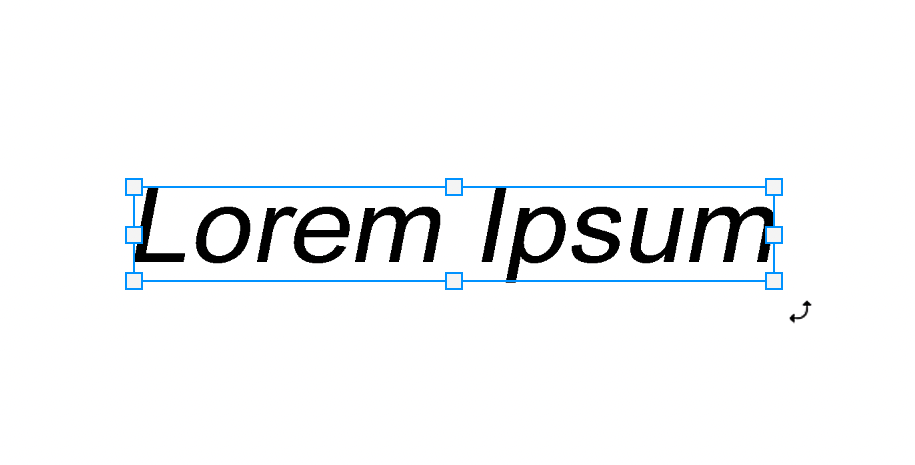
- Select the text layer and click on Move Tool or press V.
- A blue box will appear around the text. Click on the text and drag it to the specified area.
- Move the mouse to any corner edge of the blue box to rotate the text. The mouse cursor will change into a curved arrow. Drag your mouse to rotate it.
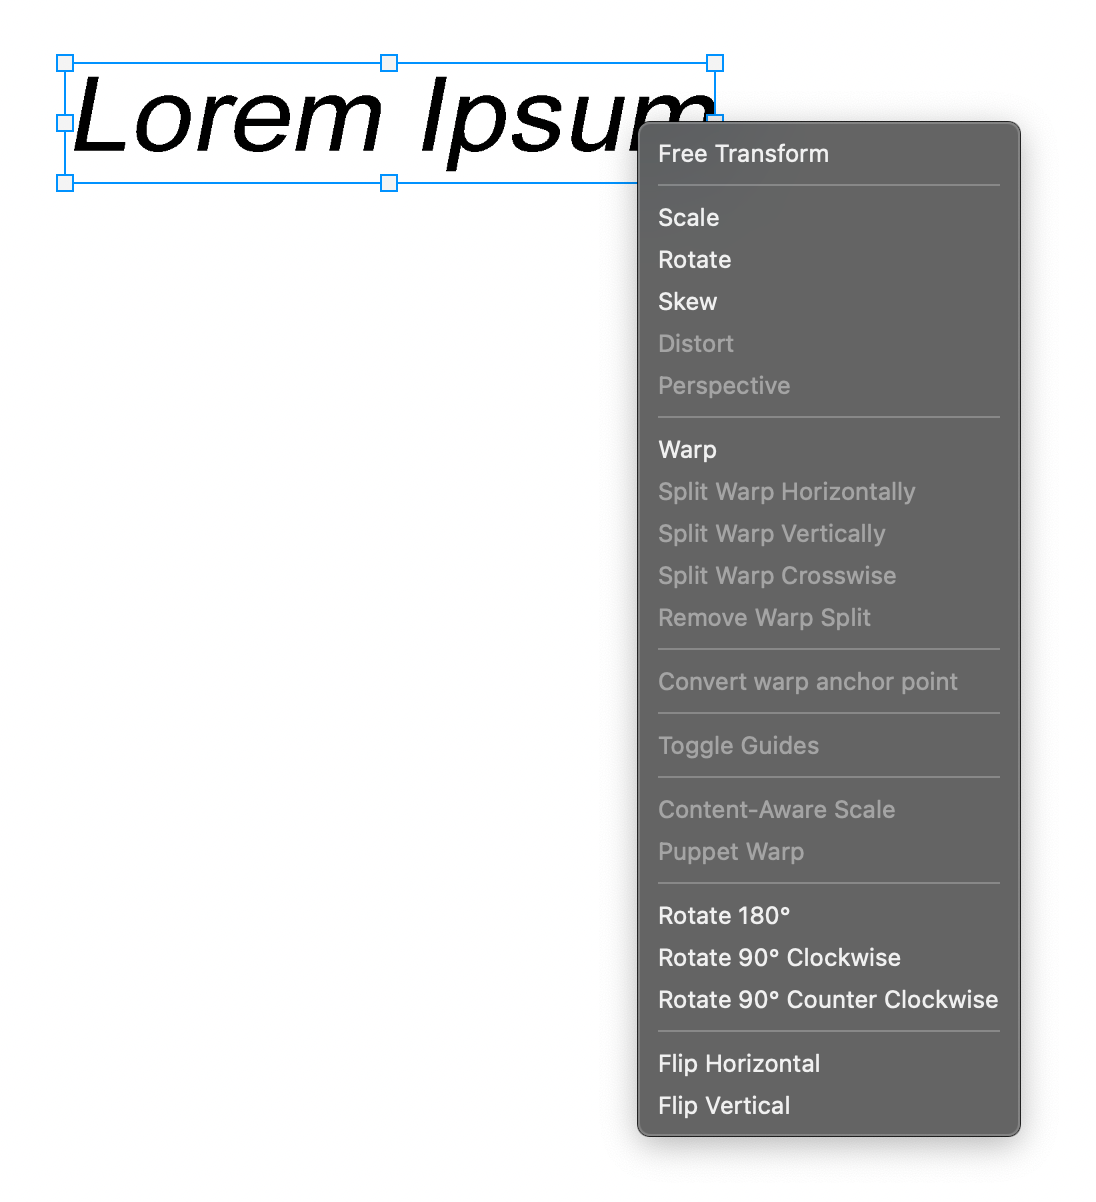
- To flip or transform text, press ⌘ + T (Mac) or Ctrl + T (Win) and right-click on the text. A list will appear from which you can flip, skew, rotate, scale, warp and free transform.
I) Text on Path
If your design requires you to write text in a curve or any type of shape, you will easily get the required result in Photoshop.
- Create a circle with the Ellipse Tool.
- Select Path from the Pick Tool mode in the Options bar.
- Click on the Horizontal Type Tool and hover the mouse over the path. The I cursor will change with a squiggly line between the I cursor.
- Click on the path, and the text will stick to the path. Wherever you click will become the start of the text.
- After adding the text to the path, you can still change the starting point and end point. Hold ⌘ (Mac) or Ctrl (Win) and move the 'x' icon on the path to change the starting point of the text. Move the circle icon with 'x' inside it to change the end point.
- Drag the mouse inside the circle path to pull the text on the inner side of the circle. Drag it outside to put the text on the outer side.

J) Layer Styles on Text
Layer styles also work on text layers. If you want to add a stroke, use gradients for the text colour, or add glow or shadows, you can use Layer styles.
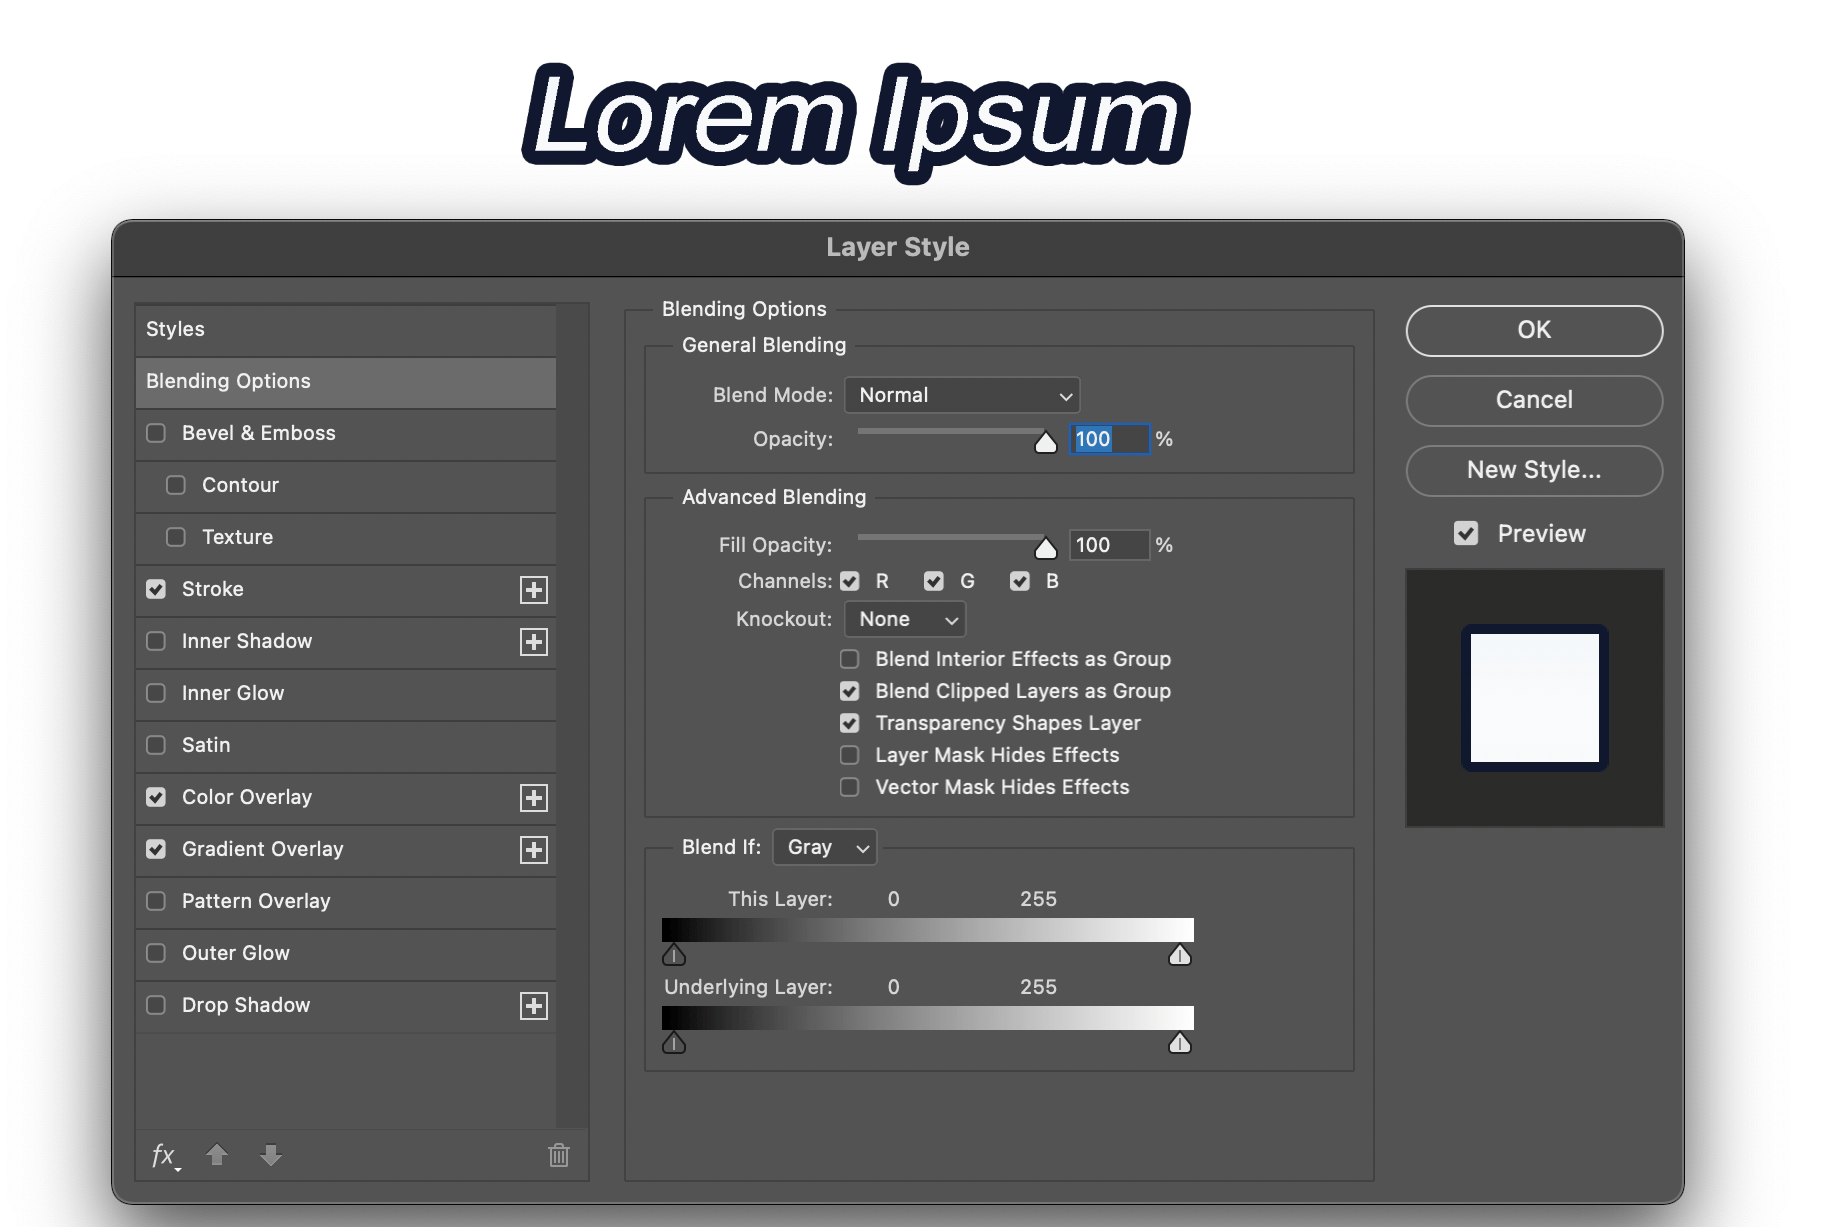
- Double-click on the layer in the Layers panel. This will open the Layer Styles window.
- Select the styles you want to add to the text. I have given an explanation about what each style does in another article, Making Buttons using Layer Styles in Photoshop.
- Click OK after you have done adding the styles.
These are the simple things that can be done with text in Photoshop. Using these in your designs will help create appealing and informative designs.
Thank you for reading. See you in the next one.