
Today, we will be using the Niagara system in Unreal Engine 5 (UE5) to create a character with a fire effect. Using this system, we can create fire simulations of high quality, all in real-time.
Anyways let's get started.
Setting up Niagara
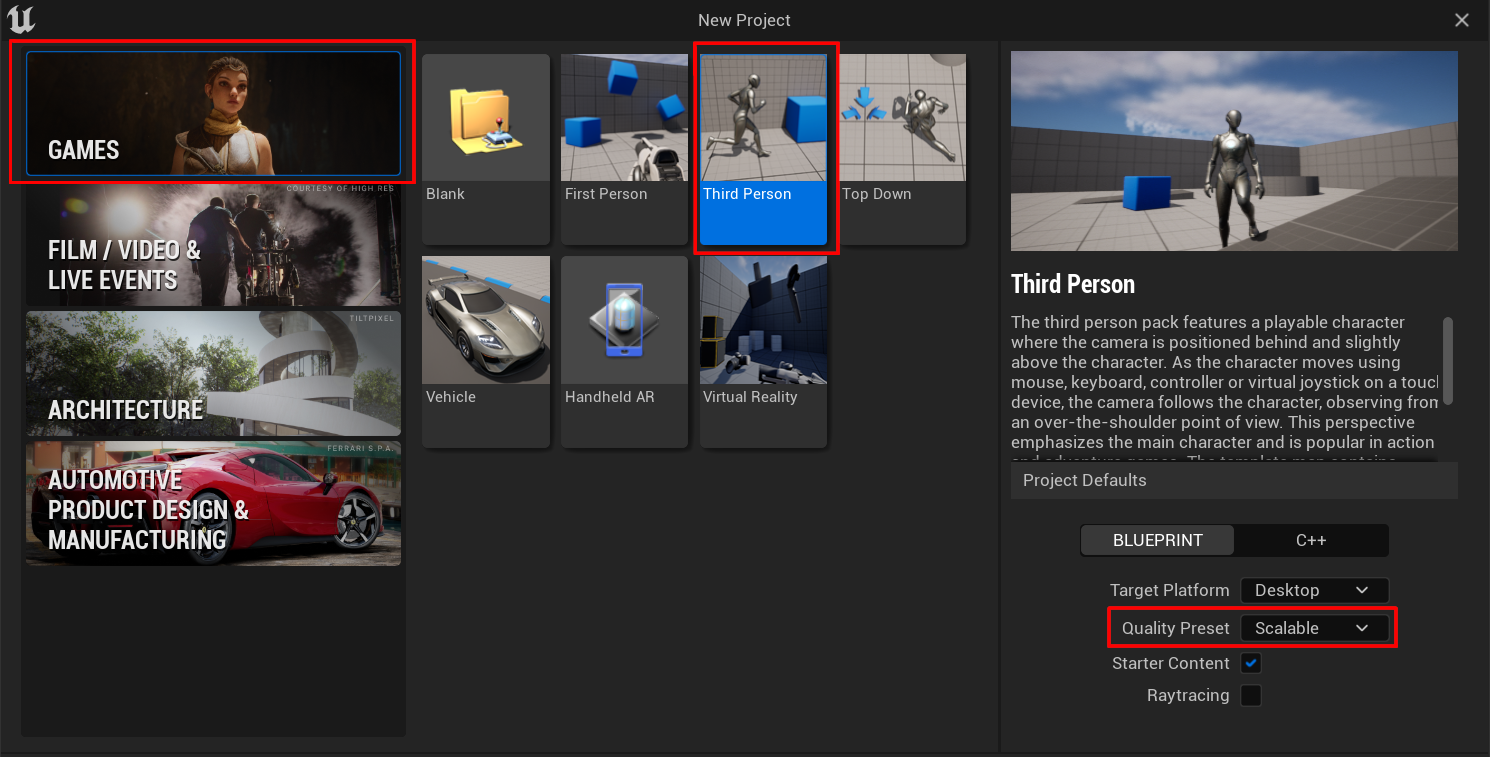
Create a project with the Third Person template, as it will come with a character ready with animations. Set Quality Preset to Scalable, especially if you don't have a high-end PC. This will make the graphics quality scalable for mid or low-spec PC.
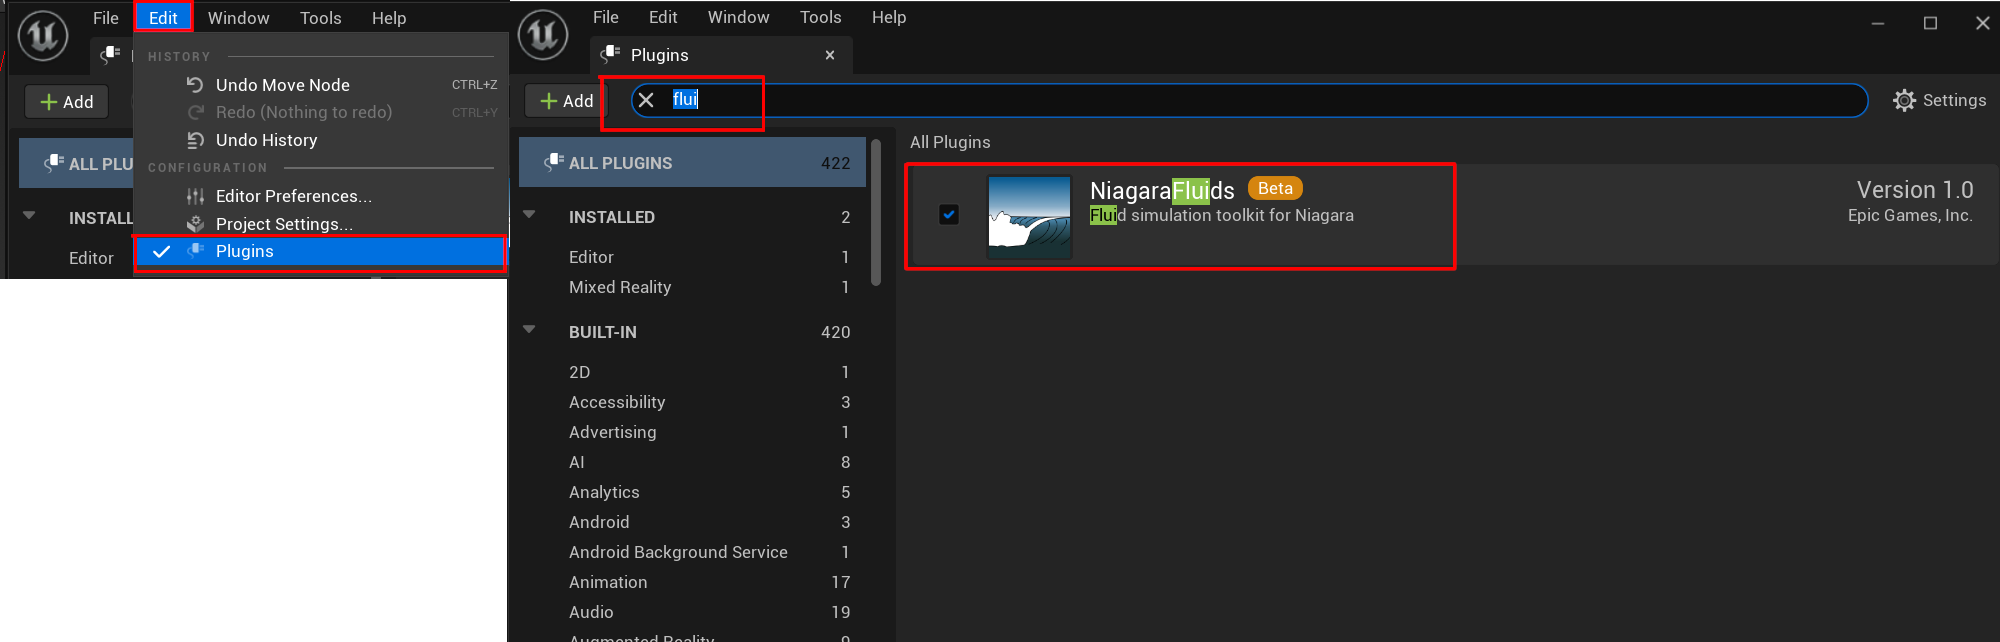
Enable Niagara Fluids plugin, if you haven't already.
Create a new Niagara System and select a template as it will make our job easier. I have selected the Grid 3D Gas Fire as I don't want any smoke in my particle simulation, and I am going for a superhero look. But you can select any preset that you would like.
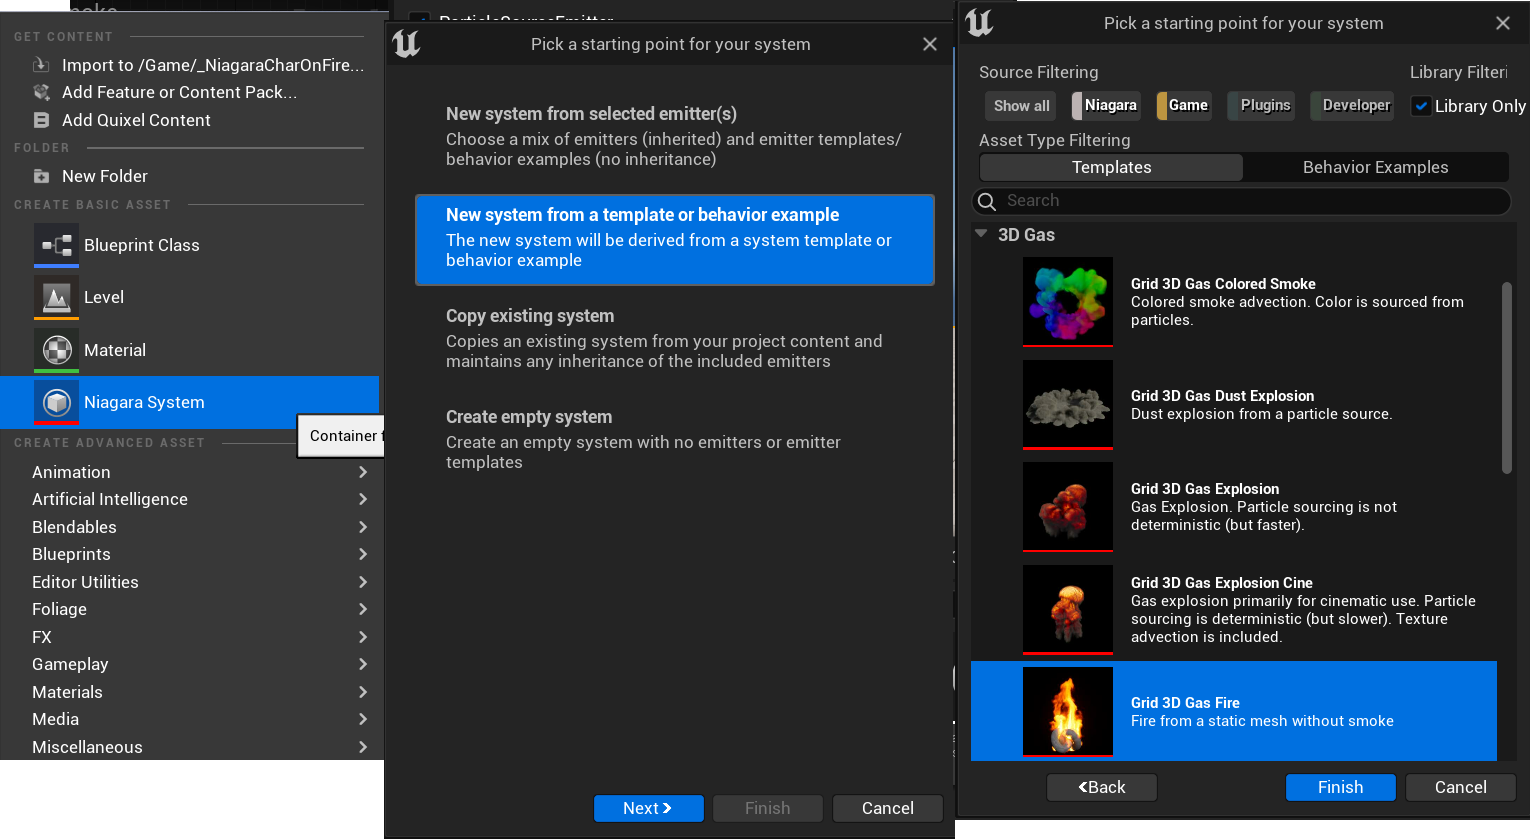
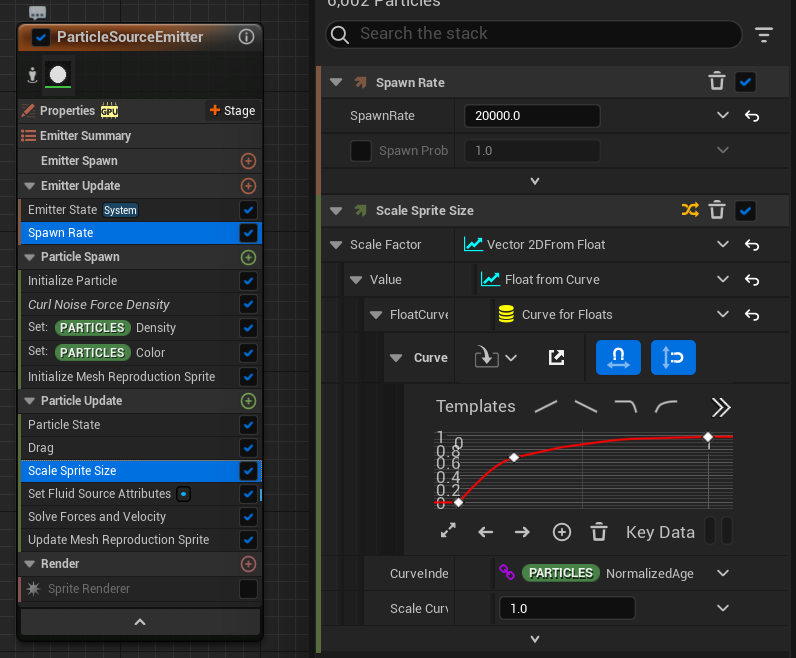
Open the Niagara particle system. Select ParticleSourceEmitter. This is where you modify the particle emitter behaviour.
Modifying Fire Emitter
We want the particle to envelop our character. So, add an Initialize Mesh Reproduction Sprite. This will spawn the particle in the character's shape selected in the Preview Mesh option. Also, add an Update Mesh Reproduction Sprite to update the particle on any animation changes of the character.
If you can't see any changes, you may need to change the Whole Mesh LOD option value to 0. But if you are using the default character from the third person template like I am, it will work fine.
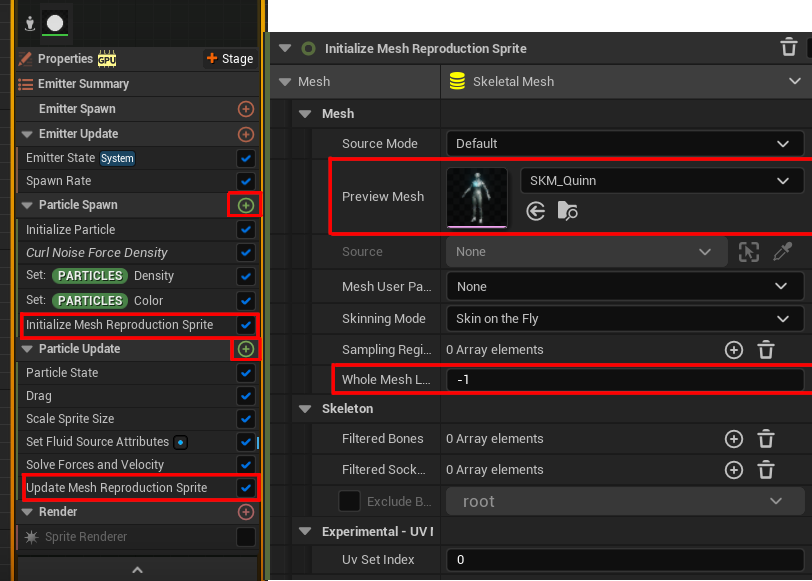
You can reference the image above for any additional modules I have used. They are self-explanatory.
I have also tweaked the Scale Sprite Size value with a curve to modify the scale of the sprite. In Spawn Rate, I am using a value of 20000. Make sure you don't increase it by too much as it will slow down the simulation, and a low value won't look as good.
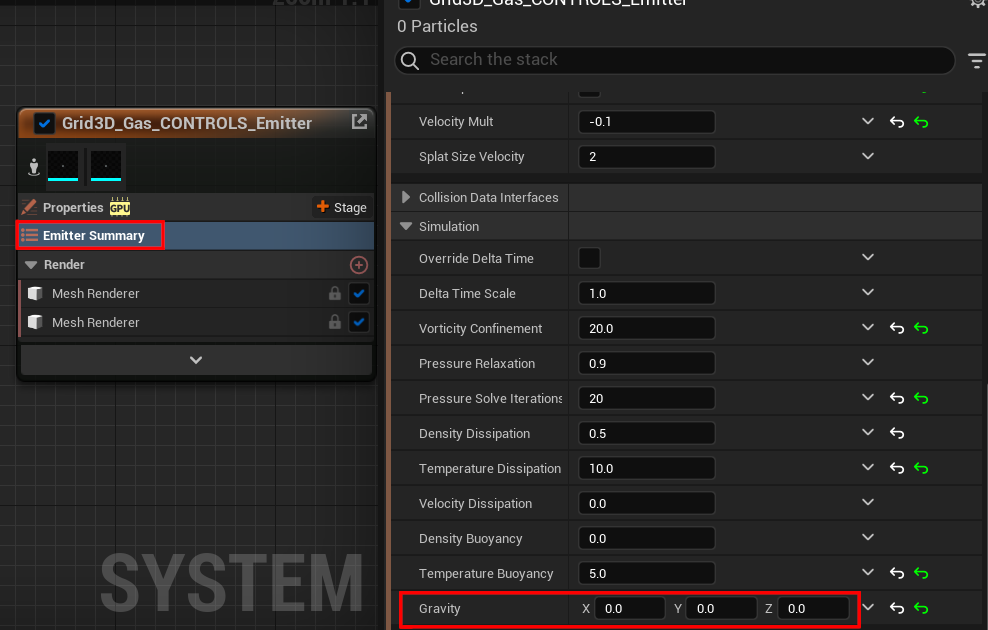
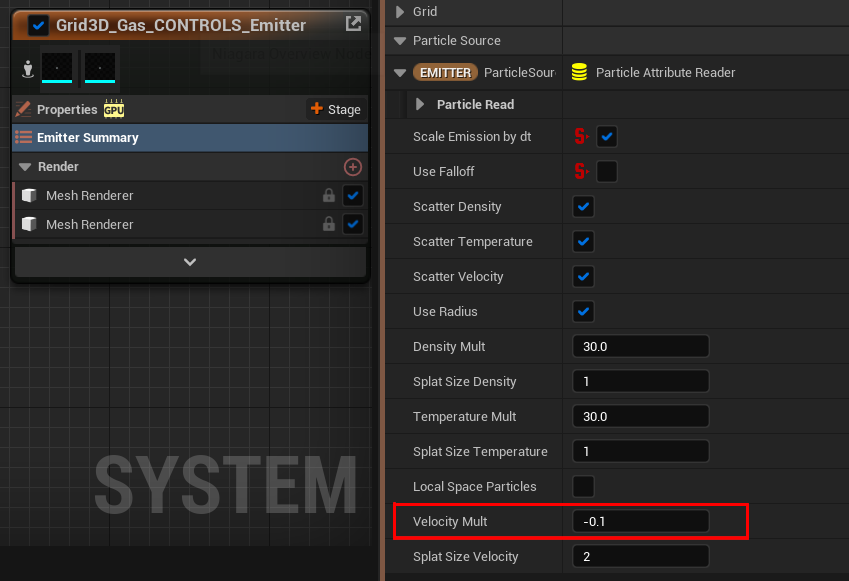
Select Emitter Summary under Grid3D_Gas_CONTROLS_Emitter. Here you can modify the fire particle behaviour. I decided to turn Gravity off, so the particles don't all go upward.
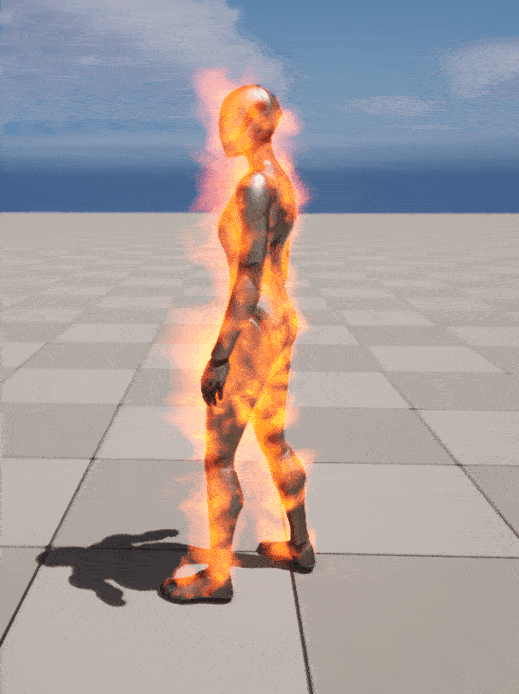
Here is the result you should end up with:

Adding the Effect and Tweaking
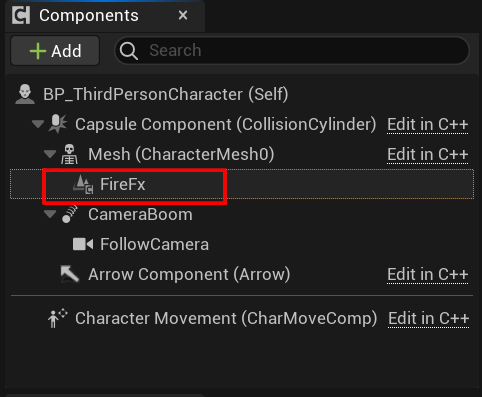
Now to add the effect on your character. Open the third-person character blueprint and add your Niagara fire effect there.
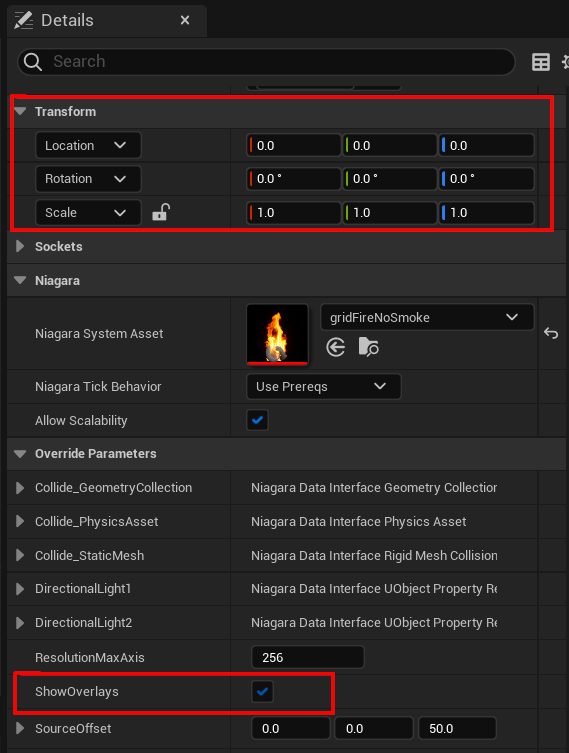
Make sure your transform is at the origin. Turn off ShowOverlays if you don't wanna see the bounding box of the fire simulation.
Let's playtest it in the scene.
The effect works fine when idle, but the fire acts weird when you move the character. This can be solved quickly by changing the Velocity Mult value to a negative float. Change the value to how much fire trail you want. I am using a value of -0.1.
Conclusion
Finally, the effect is done. It may take a while to compile. Anyways, here is what the final effect looks like:
I changed the material to a transparent one to better showcase the effect. But in the next blog post, I will teach you how to create a fire material shader, so the effect is even more enhanced.
That's it for this post. As you have seen, high-level stimulation can be achieved in real-time using Niagara. The system is very versatile, allowing you to do all sorts of effects. Hope you enjoy creating different effects on your character.
Thank you for reading.