
Introduction
If you have followed all the steps shown in the part 1 of this tutorial, you should already have a barrel with texture on it. But this model has some issues with its UV, as this barrel uses single material with a texture just for it, which is not viable if there are hundreds of props in a game. To resolve these issues, we use texture atlas and texture baking which we will cover in this part of the tutorial.
Implementation
- Modeling Low Poly: We created a high-poly barrel model with over 350 triangle count. To optimize it for game use, we’ll create a low-poly version for texture baking. This approach will reduce the polygon count while enabling us to bake detailed textures from the high-poly model onto the low-poly one. This process ensures the asset maintains visual quality with a simplified geometry and allows for the application of a single material across multiple props, enhancing efficiency and performance in the game environment.
- Modifying Shader & Baking: To create a material for your low-poly model, start by adding a new base material to the low poly model and an Image Texture node. Add a new image to this node to serve as your baked texture. Ensure the low-poly model has proper UV mapping to accurately receive the texture. Align the high-poly and low-poly models in the scene, then configure the baking settings to transfer details from the high-poly model to the low-poly UV map. Bake the texture onto the new created image, which will be applied to the low-poly model. Finally, verify and adjust the texture as needed before exporting.
Modeling Low Poly
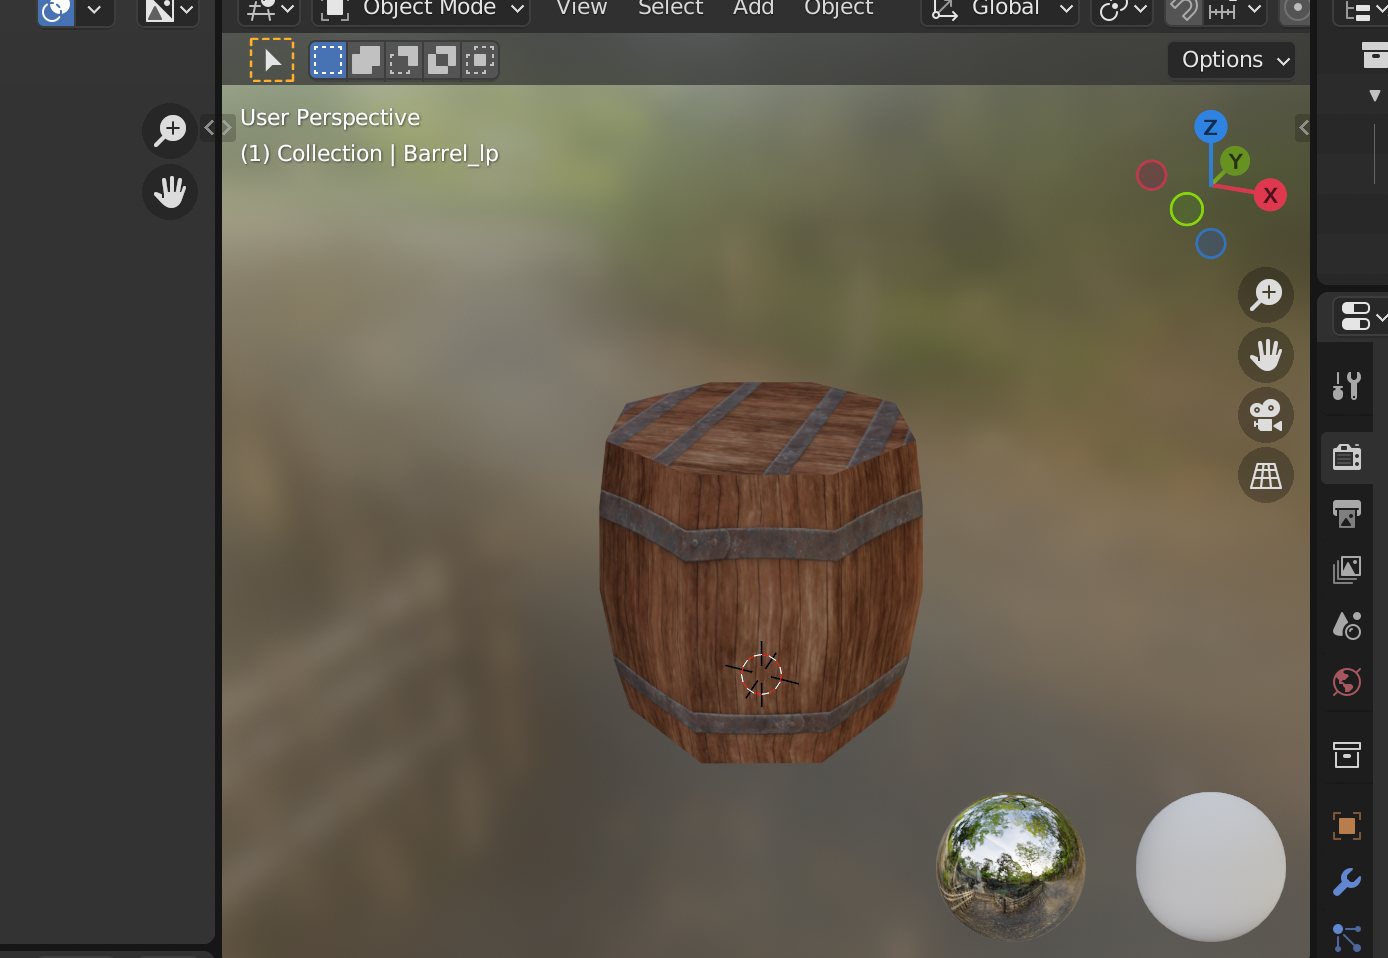
Step 1: Create a low poly version of the existing mid or high poly model. For this tutorial, I am using same barrel mesh from the previous part so I can perform retopology on it. For smoothing the edges, I followed the steps mentioned in the part one of this tutorial.
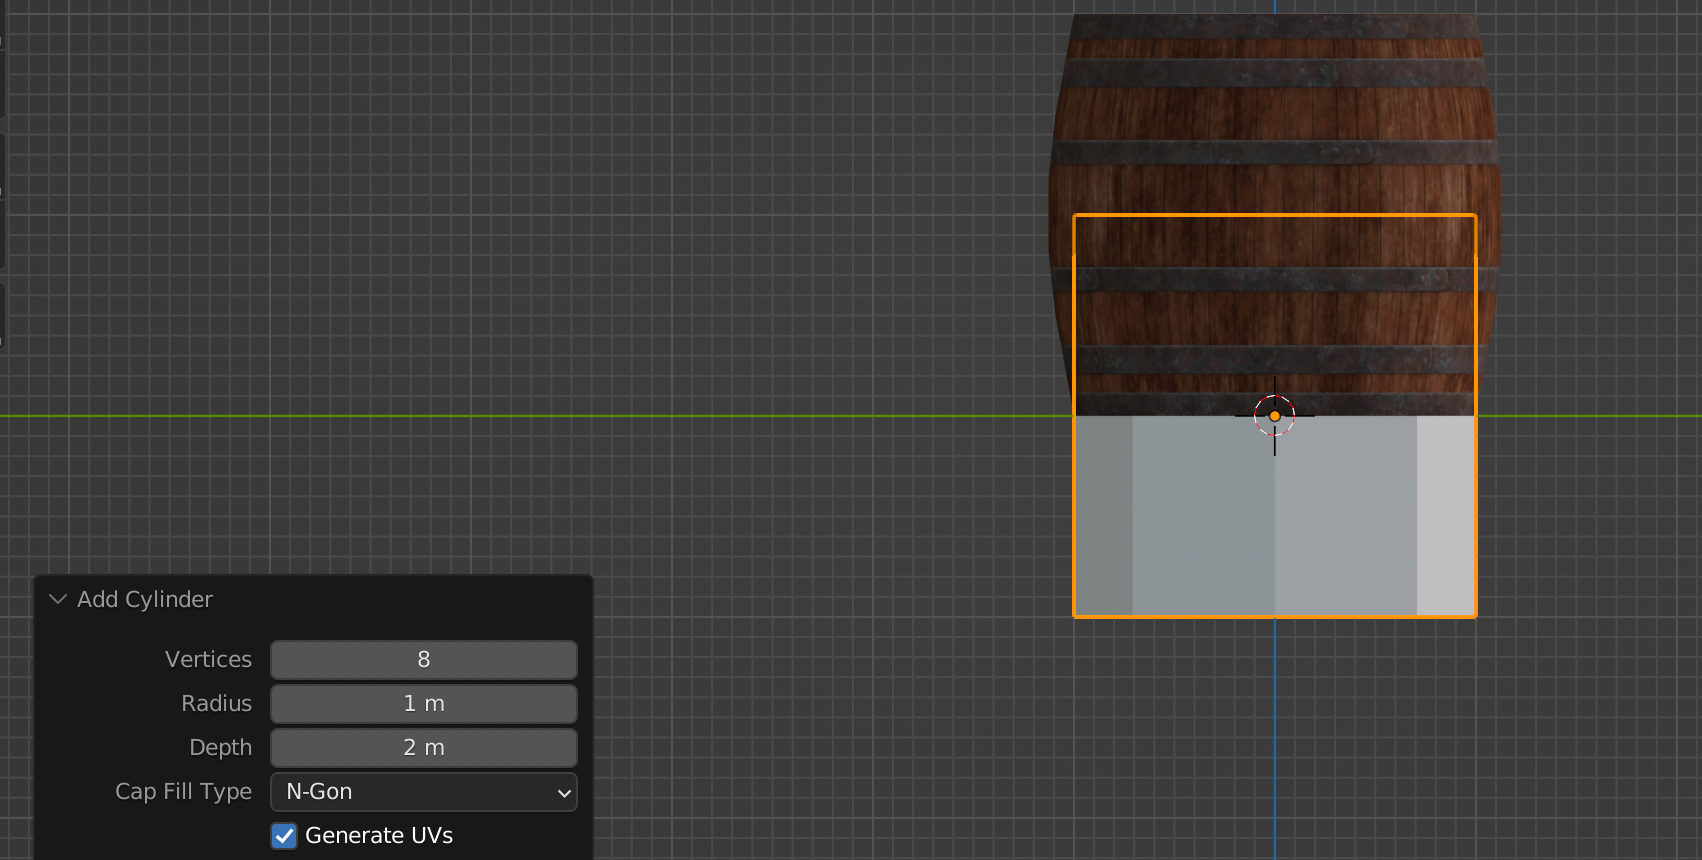
- After creating cylindrical shape with less vertices count make it into existing high or mid poly shape.
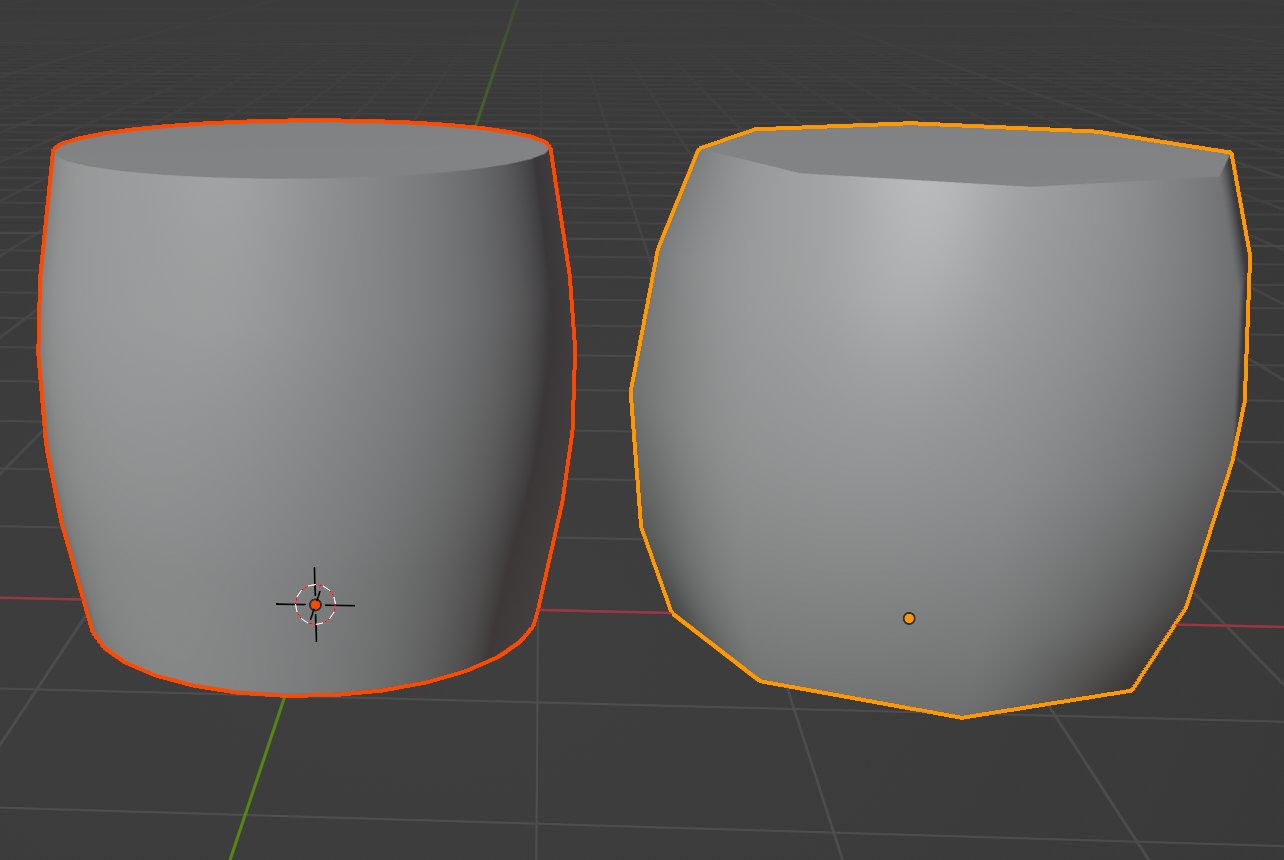
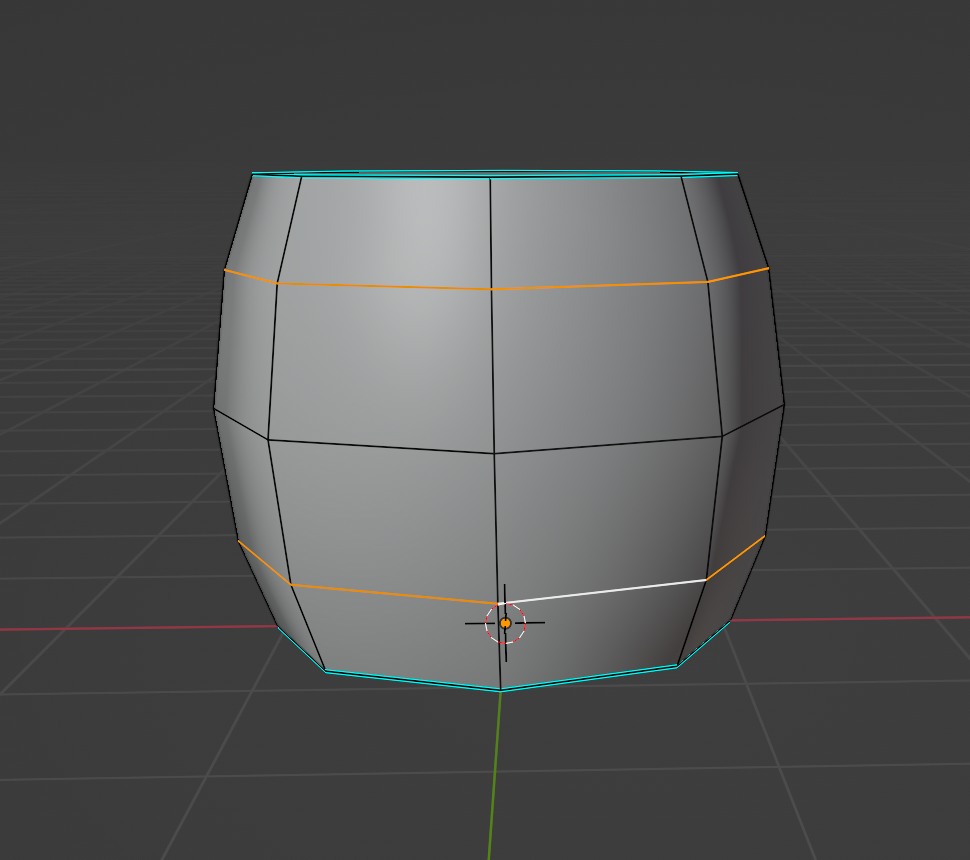
- I made this low poly by adding loop cuts in both upper and lower section of x-Axis and then modified those loop cuts to fit the high poly scale.
Step 2: As we have a low poly model, now we are required to create a UV map that can be used for creating texture atlas. For this, I used the same steps as shown in the part one of this tutorial.
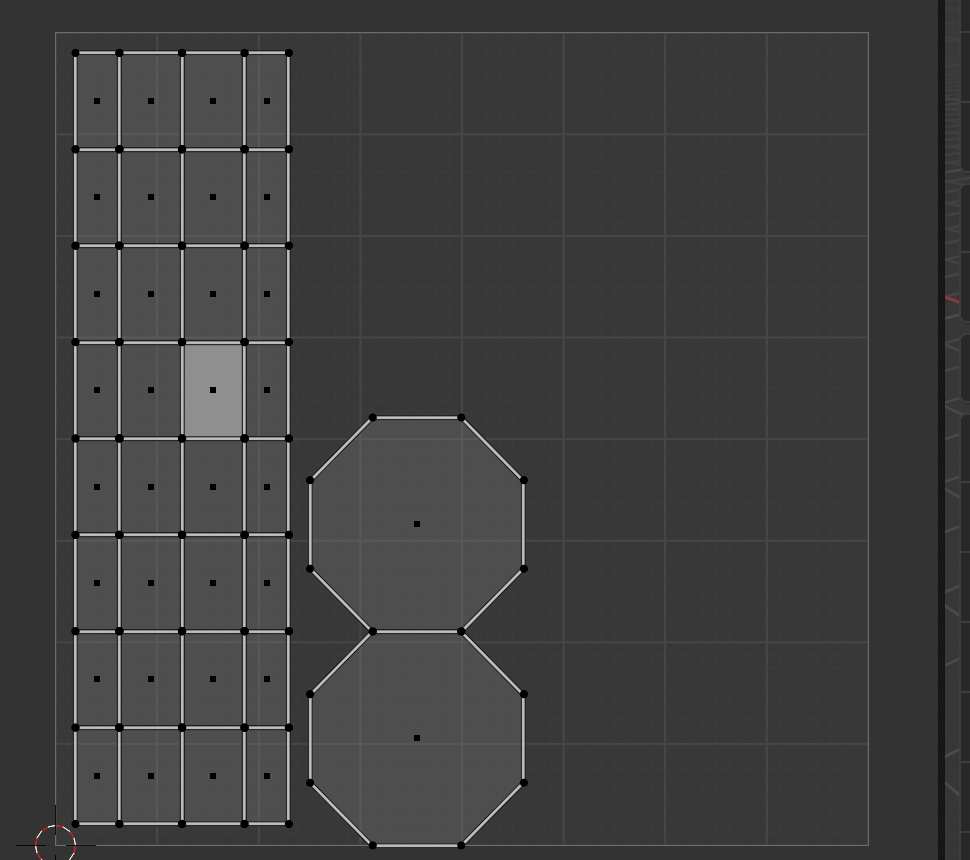
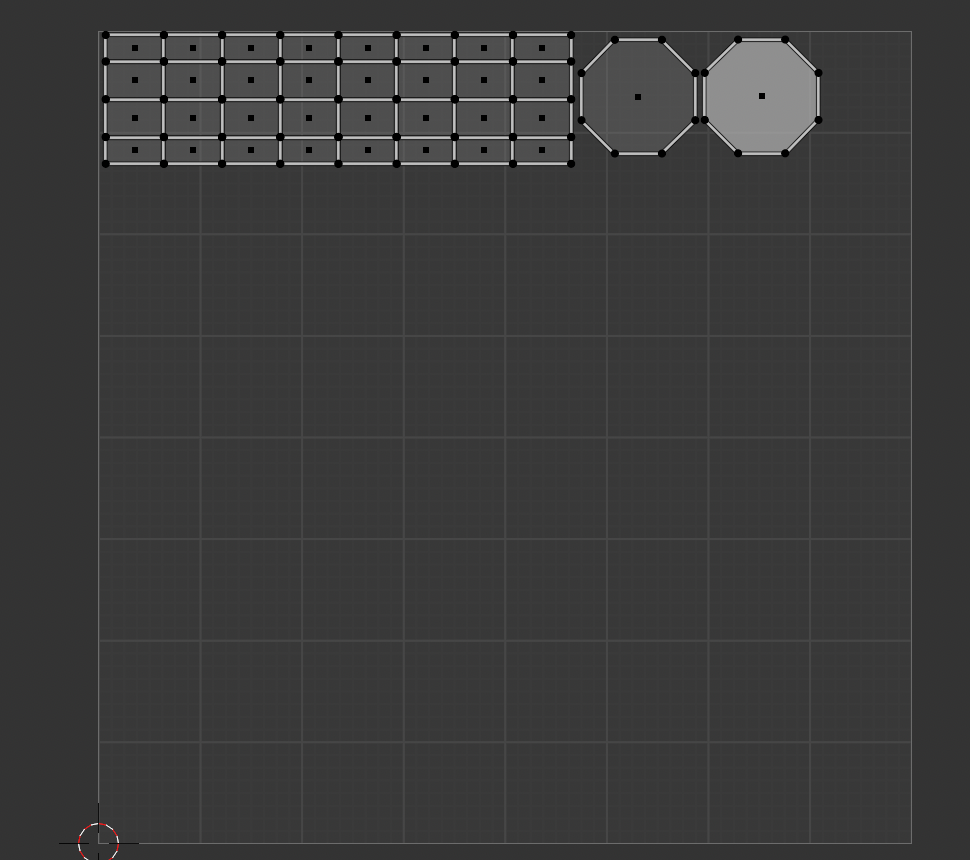
- As you can see, now we have more area for storing other UV maps for other assets, which will help with creating a global single material for various assets in game environment which improves batch call and overall frame rate for the game. This texture will be about 2K resolution but can be lowered if required.
Modifying Shader
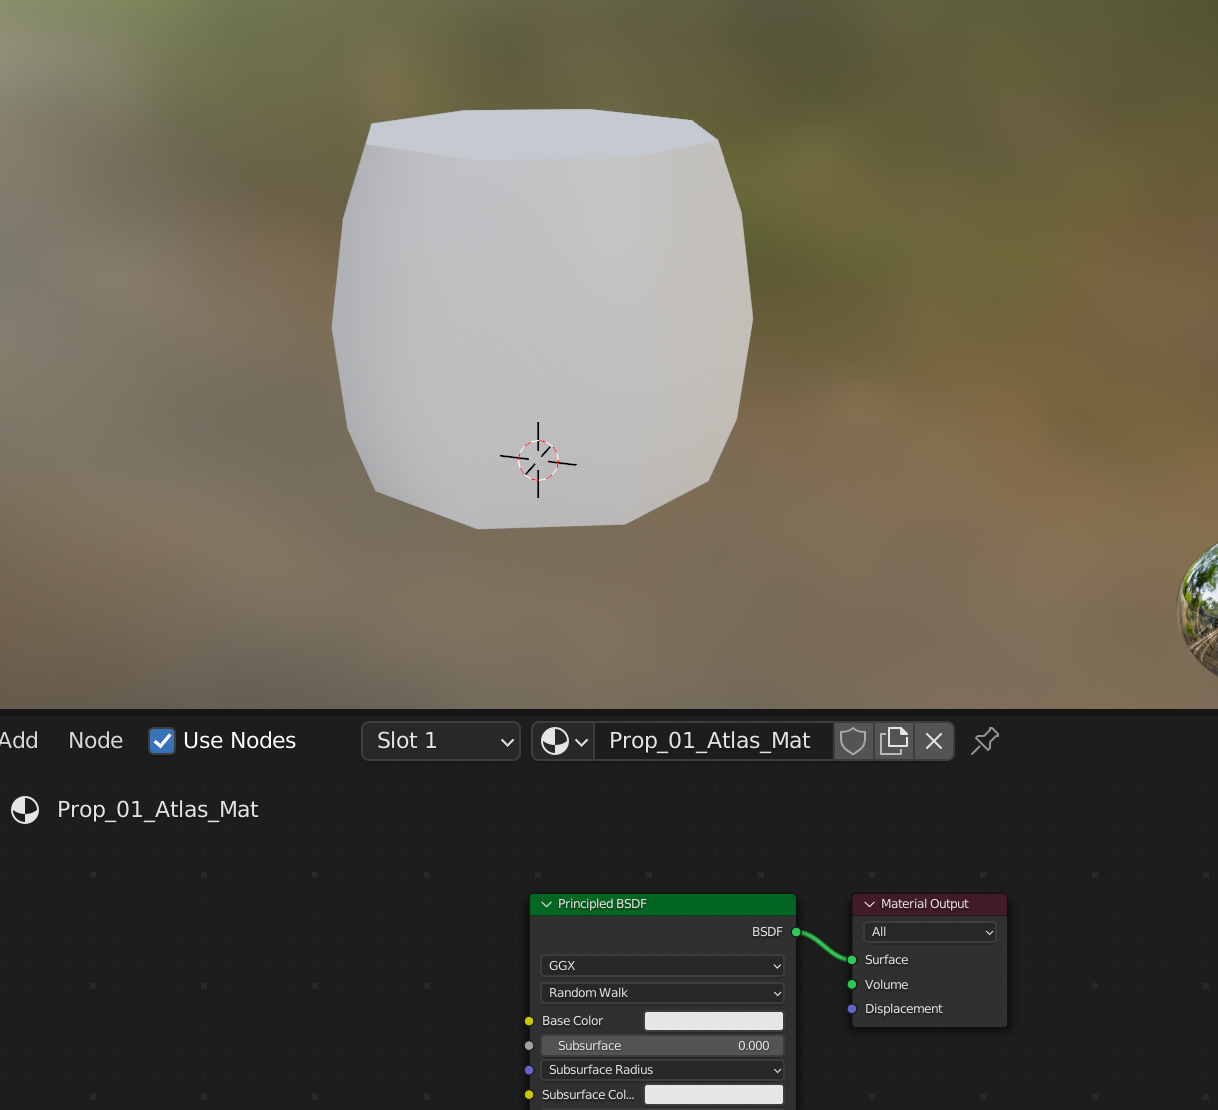
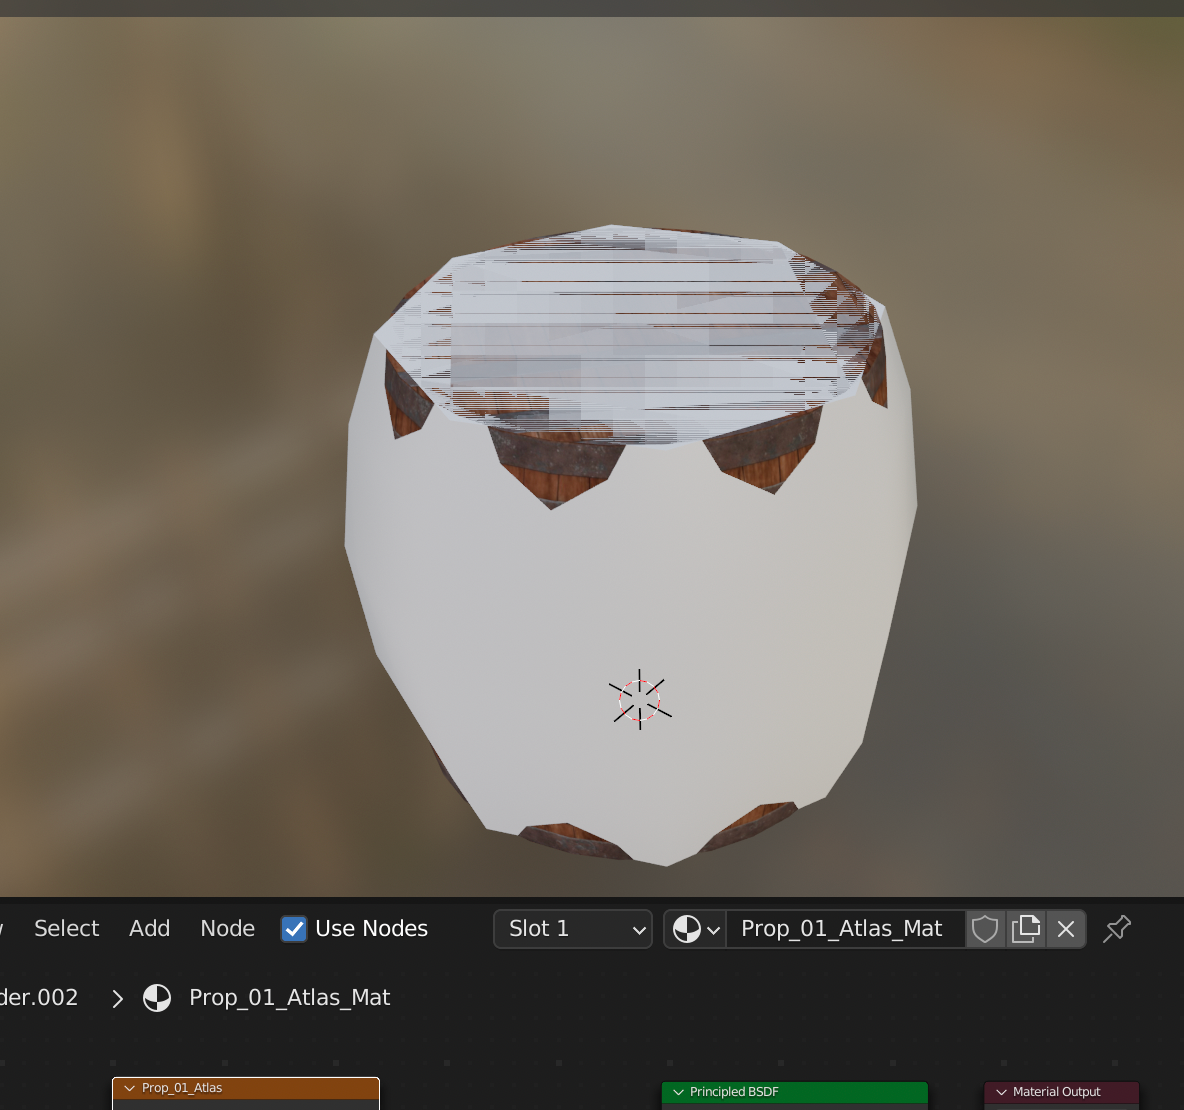
Step 3: Now we have a finalized low poly model which is ready for it's texture baking. For this to work we need to assign a new material to low poly model and let's name the material Prop_01_Atlas_Mat ,which was demonstrated in the part one of this tutorial .
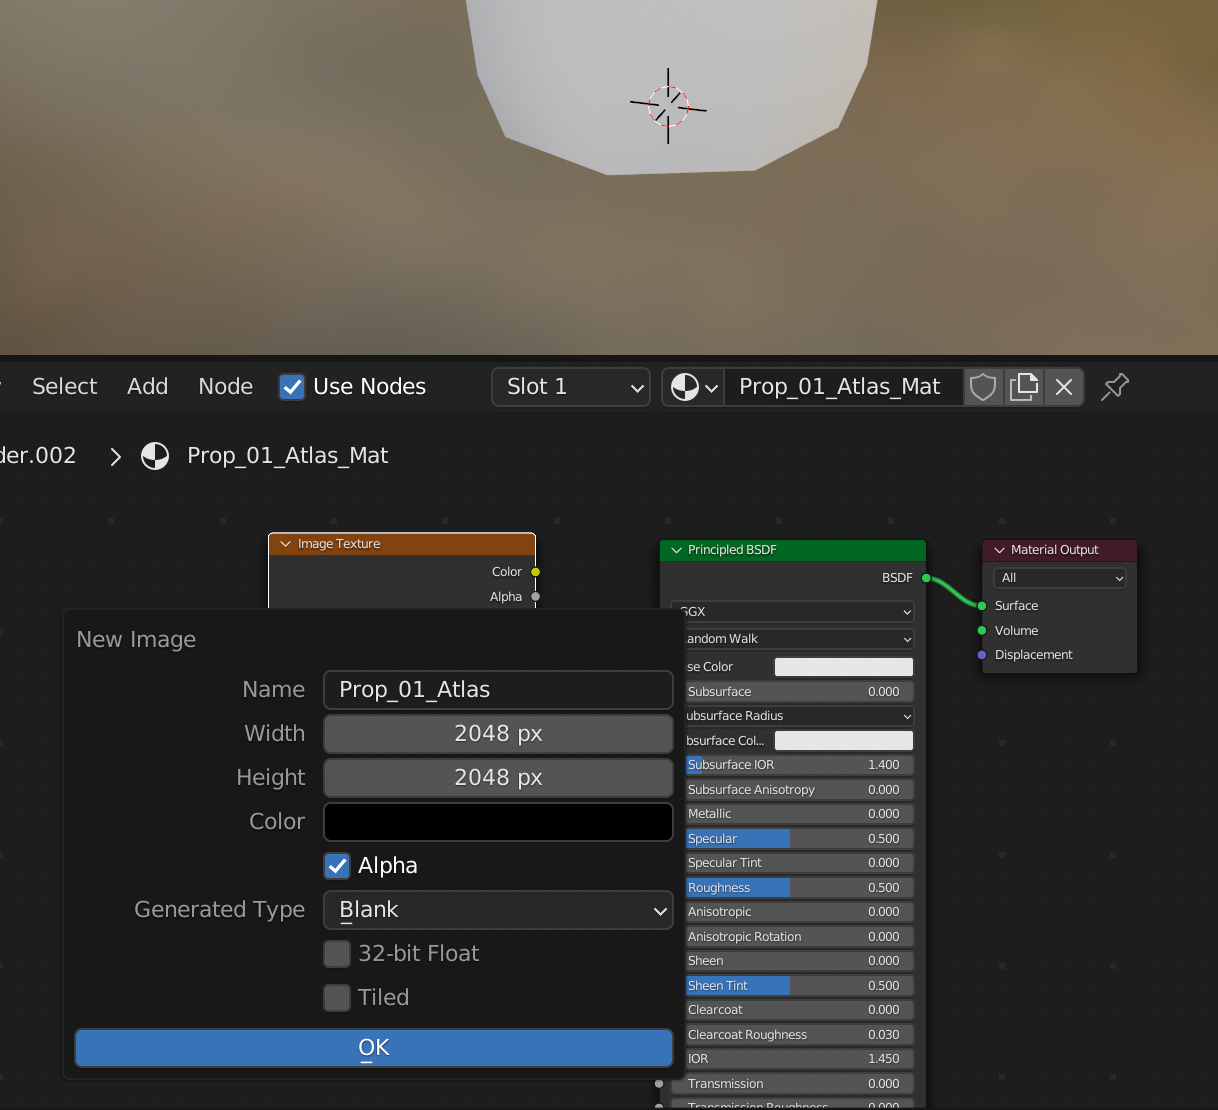
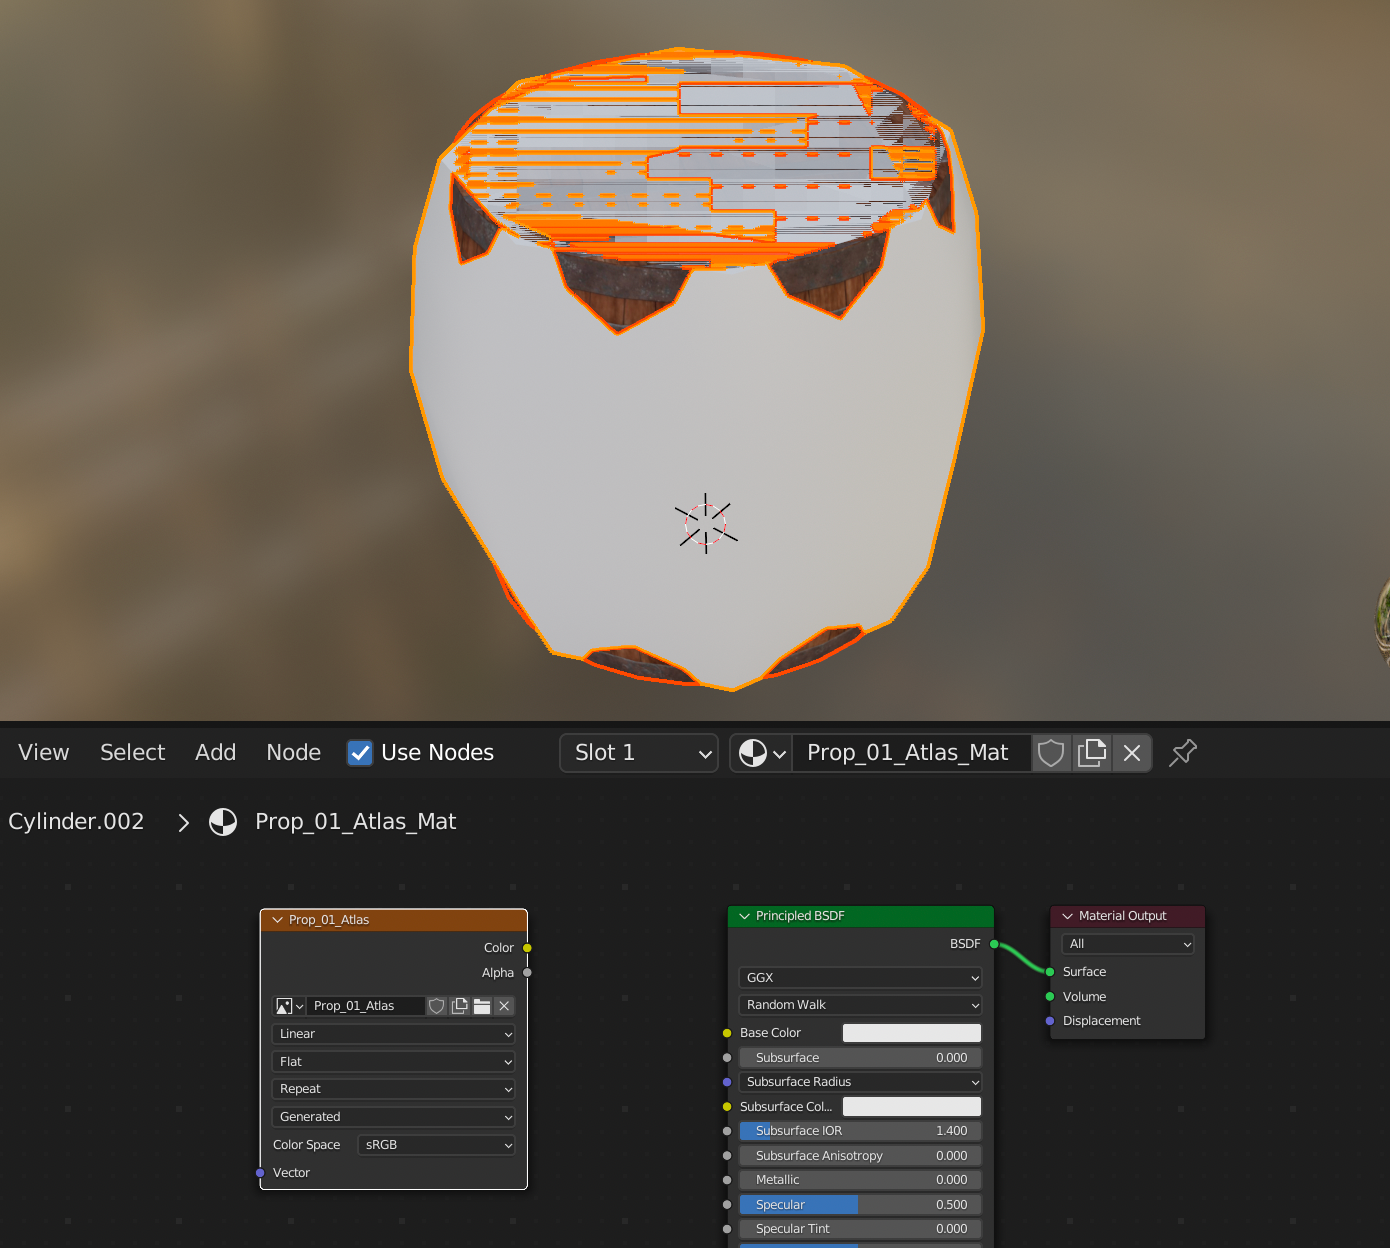
- Lets create a new image for baking and call it
Prop_01_Atlas. Connect it to the base color node so that while baking, the baked data will be stored and saved to the texture where UV map determines where the baked texture will be located at , which was also shown in the part 1 of this tutorial.
- For baking to work the model must overlap the high or mid poly poly model. So, if your low poly model position is not at the center of the high poly model, then recenter the low poly model to it and apply all the object transform to its data. Now, we are one step away from the texture baking.
Baking
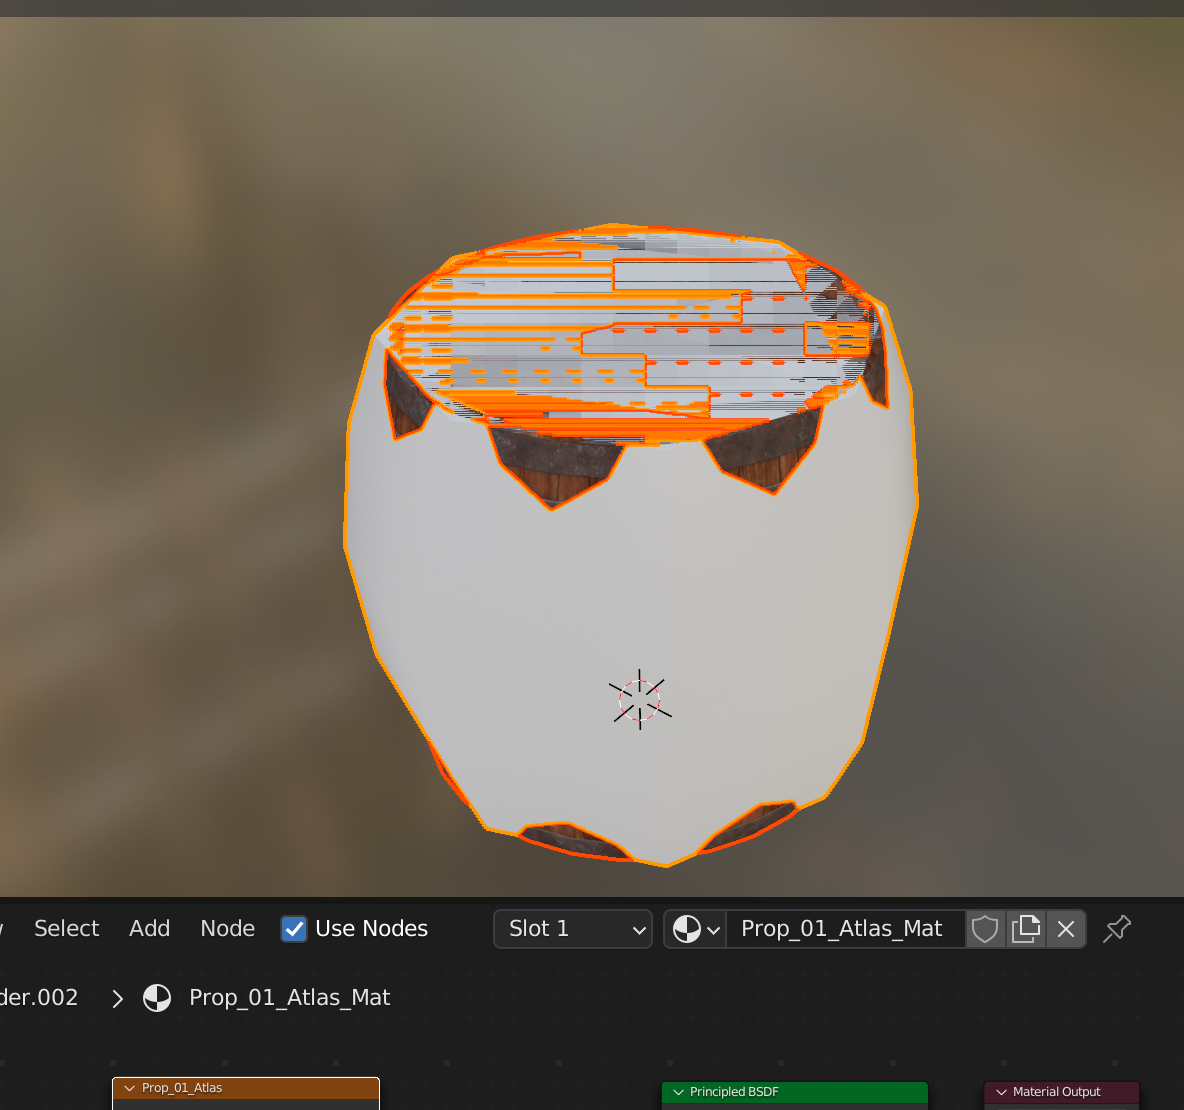
Step 4: For baking a texture or detail from high poly to low poly model, select high poly model and then select low poly model. The selected low poly model will have bright outline than high poly model.
- After selecting the low poly model go to shader tab and select newly created texture
Prop_01_Atlas.
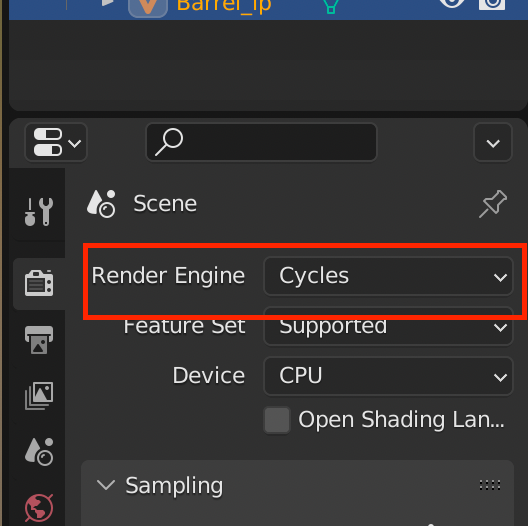
- After selecting
Prop_01_Atlastexture open render property which will be on right side panel with an camera like icon.
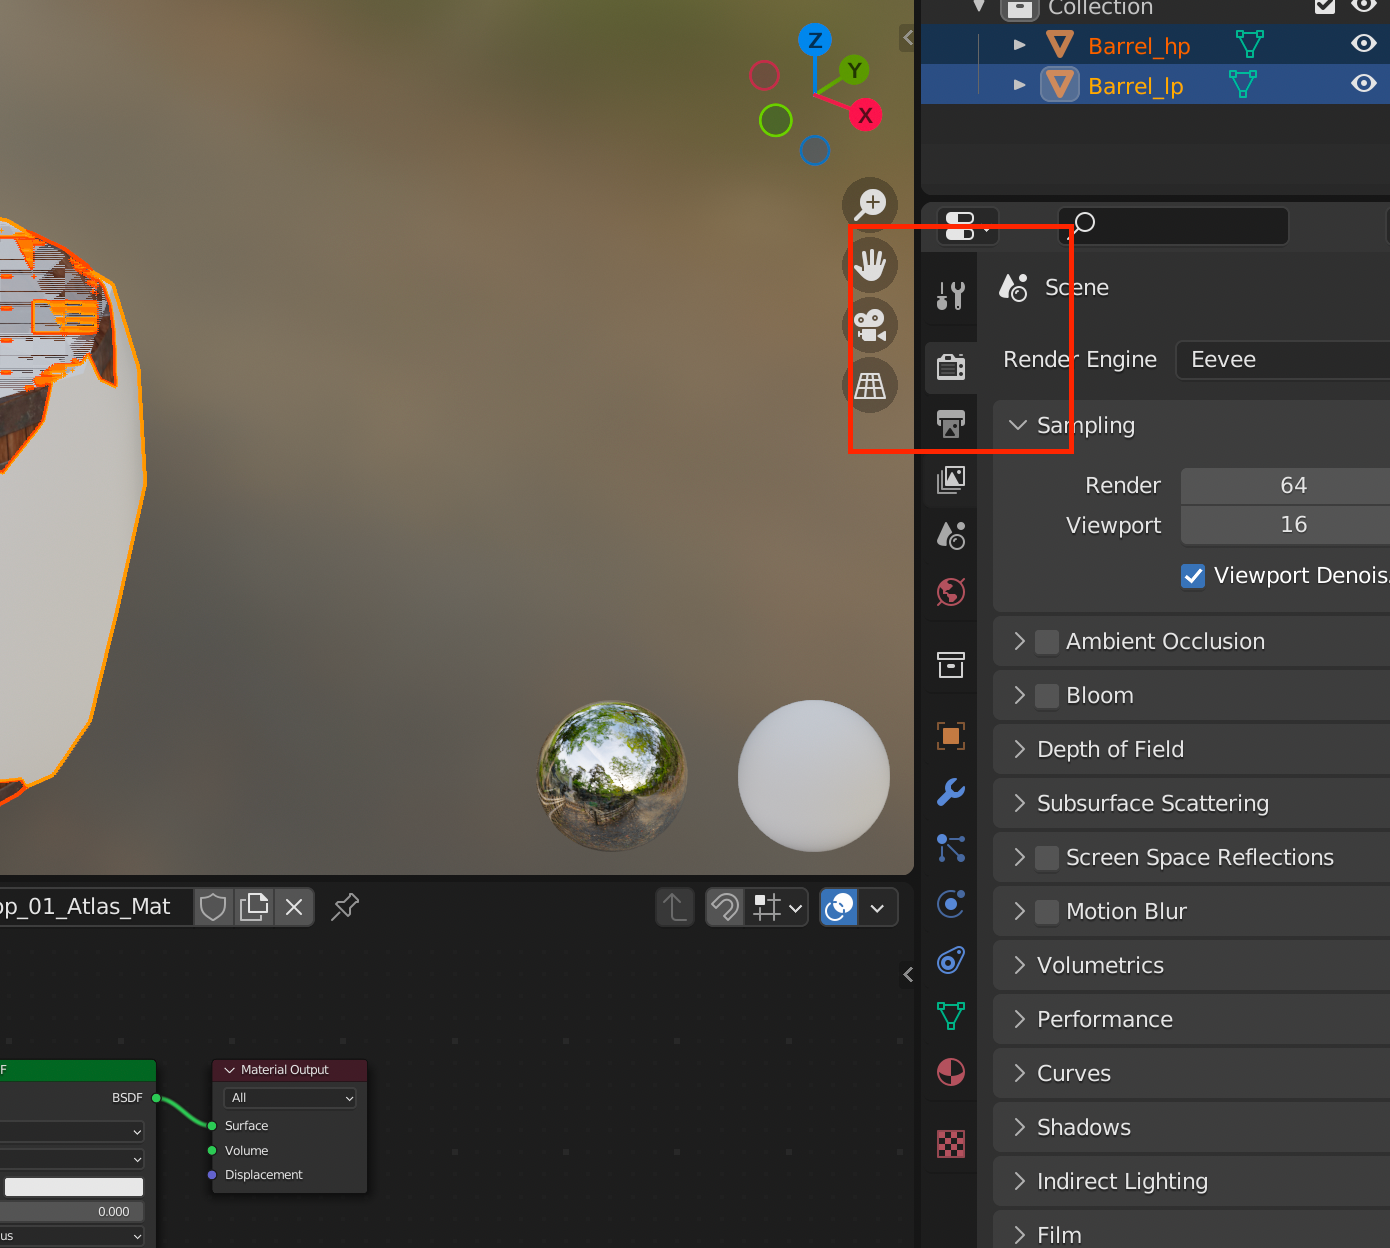
- Set the
Render Engineoption toCyclemode.
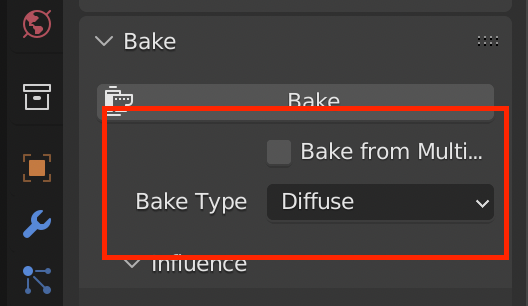
- Now, you will see new options
BakeaboveBake vertex colordrag bake tab and change thebake typefromcombinedtoDiffuse.
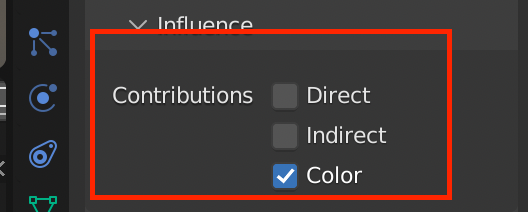
- Deselect
directandindirectcontribution option as we don't want to affect our baked texture with lighting.
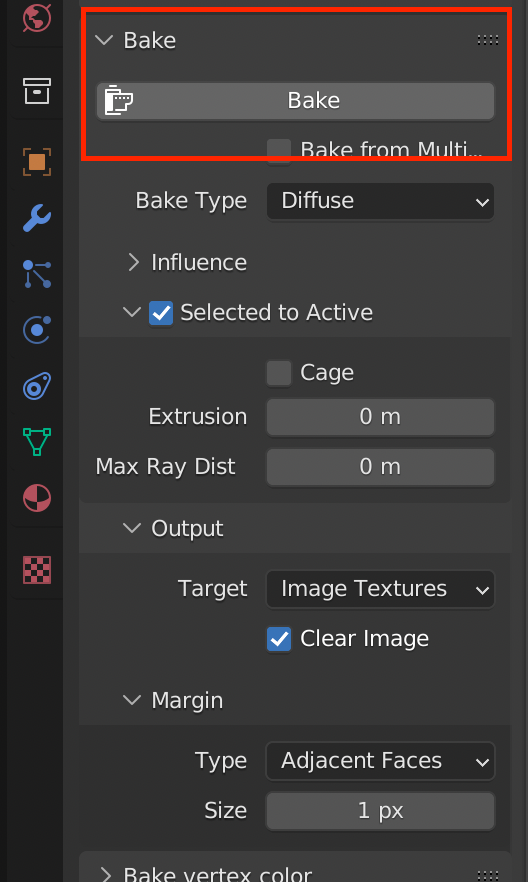
- Select
Selected To Activeoption which ensures that the diffuse texture is being baked from selected model to active selected model which is our low poly model. After enablingSelected To Activeoption, we will also enable baking properties which areCage,ExtrusionandMax Ray Distance. For this tutorial, I will not be using cage method but extrusion method for baking the texture. Set theextrusionandmax ray distancetozeroso that even if your model is not overlapping at certain points, it can still provide data for baking and also our model is not overlapping at certain points as it should, due to which some of the portion can have irregular baked texture.

- After all the setting are configured, press the
Bake buttonand wait for baking to be completed. Save the image file to any directory of your liking and you will have a texture atlas containing diffuse texture data for your low poly model. - For the problem of irregular baked texture ,we can add more loop cuts to the low poly model as well as modify it so that it can overlap the high poly texture more accurately or if the model is simple as used in this demo we can use
shrink wrapmodifier and wrap the low poly model outside of the high poly model surface.
Result
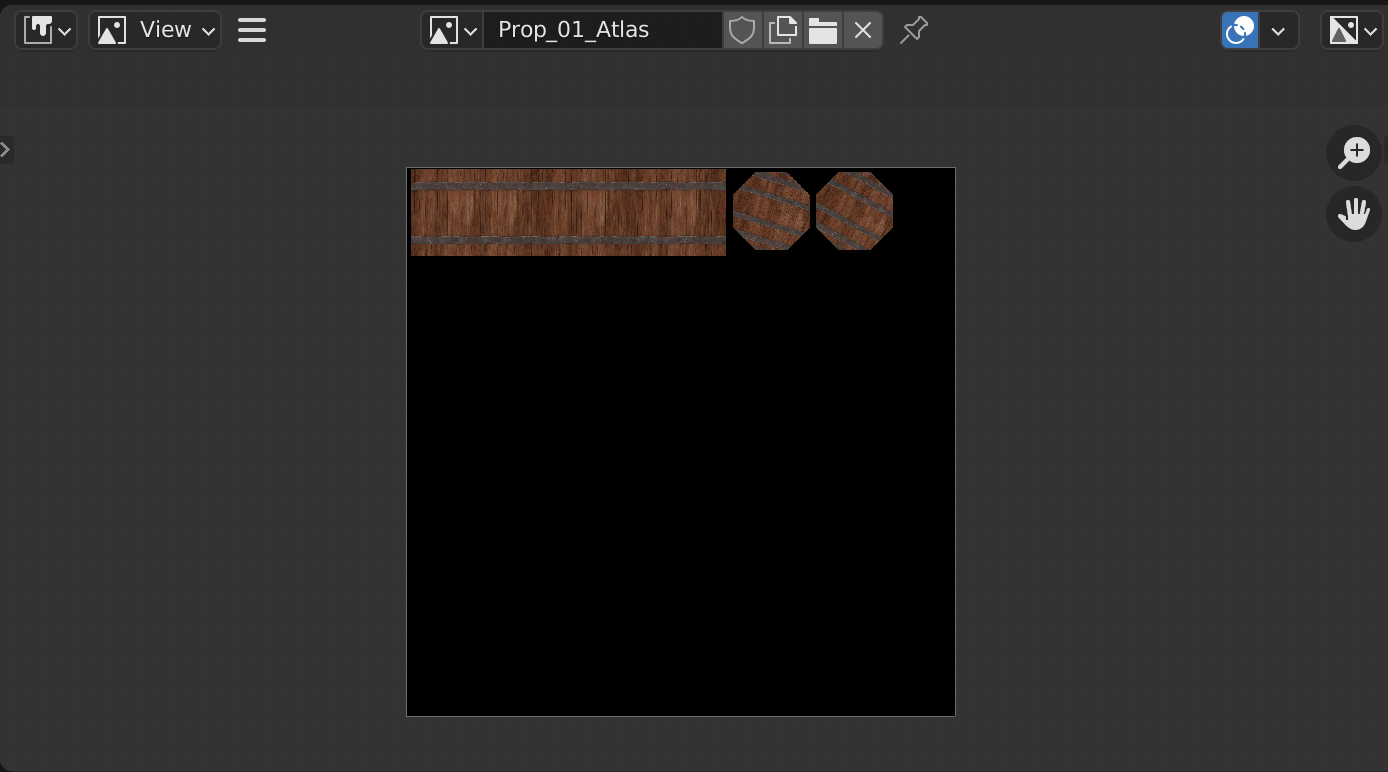
Here, we get a texture which has more extra space for baking other asset textures as well as it contains all diffuse texture data of high poly model which is being used by low poly model. For baking other texture to this baked texture disable Clear Image option and start baking otherwise it will clear all previous bake data and override it with new bake data.
Conclusion
By following the outlined steps, you should have successfully created a low-poly barrel with a texture atlas for its diffuse map. The process allowed you to utilize a single material and texture map, optimizing texture space by reusing areas for other multiple high-poly models. This approach not only conserves texture memory but also ensures efficient use of UV space. The baked texture effectively captures the high-poly details and applies them to the low-poly model, making it visually rich while maintaining performance. With this setup, you can efficiently manage and apply textures not just for diffuse map but for creating normal map, metallic map, smoothness map as well across different models, streamlining your workflow.
Thank you for reading this article. Please consider subscribing for more such insightful articles.