
The last article discussed transform tools, resizing images without losing quality, and changing reference points, scale, and rotation options. This part will further explain other transform options - skew, distort, perspective, warp and flip.
Skew
The Skew option slants an image horizontally or vertically.
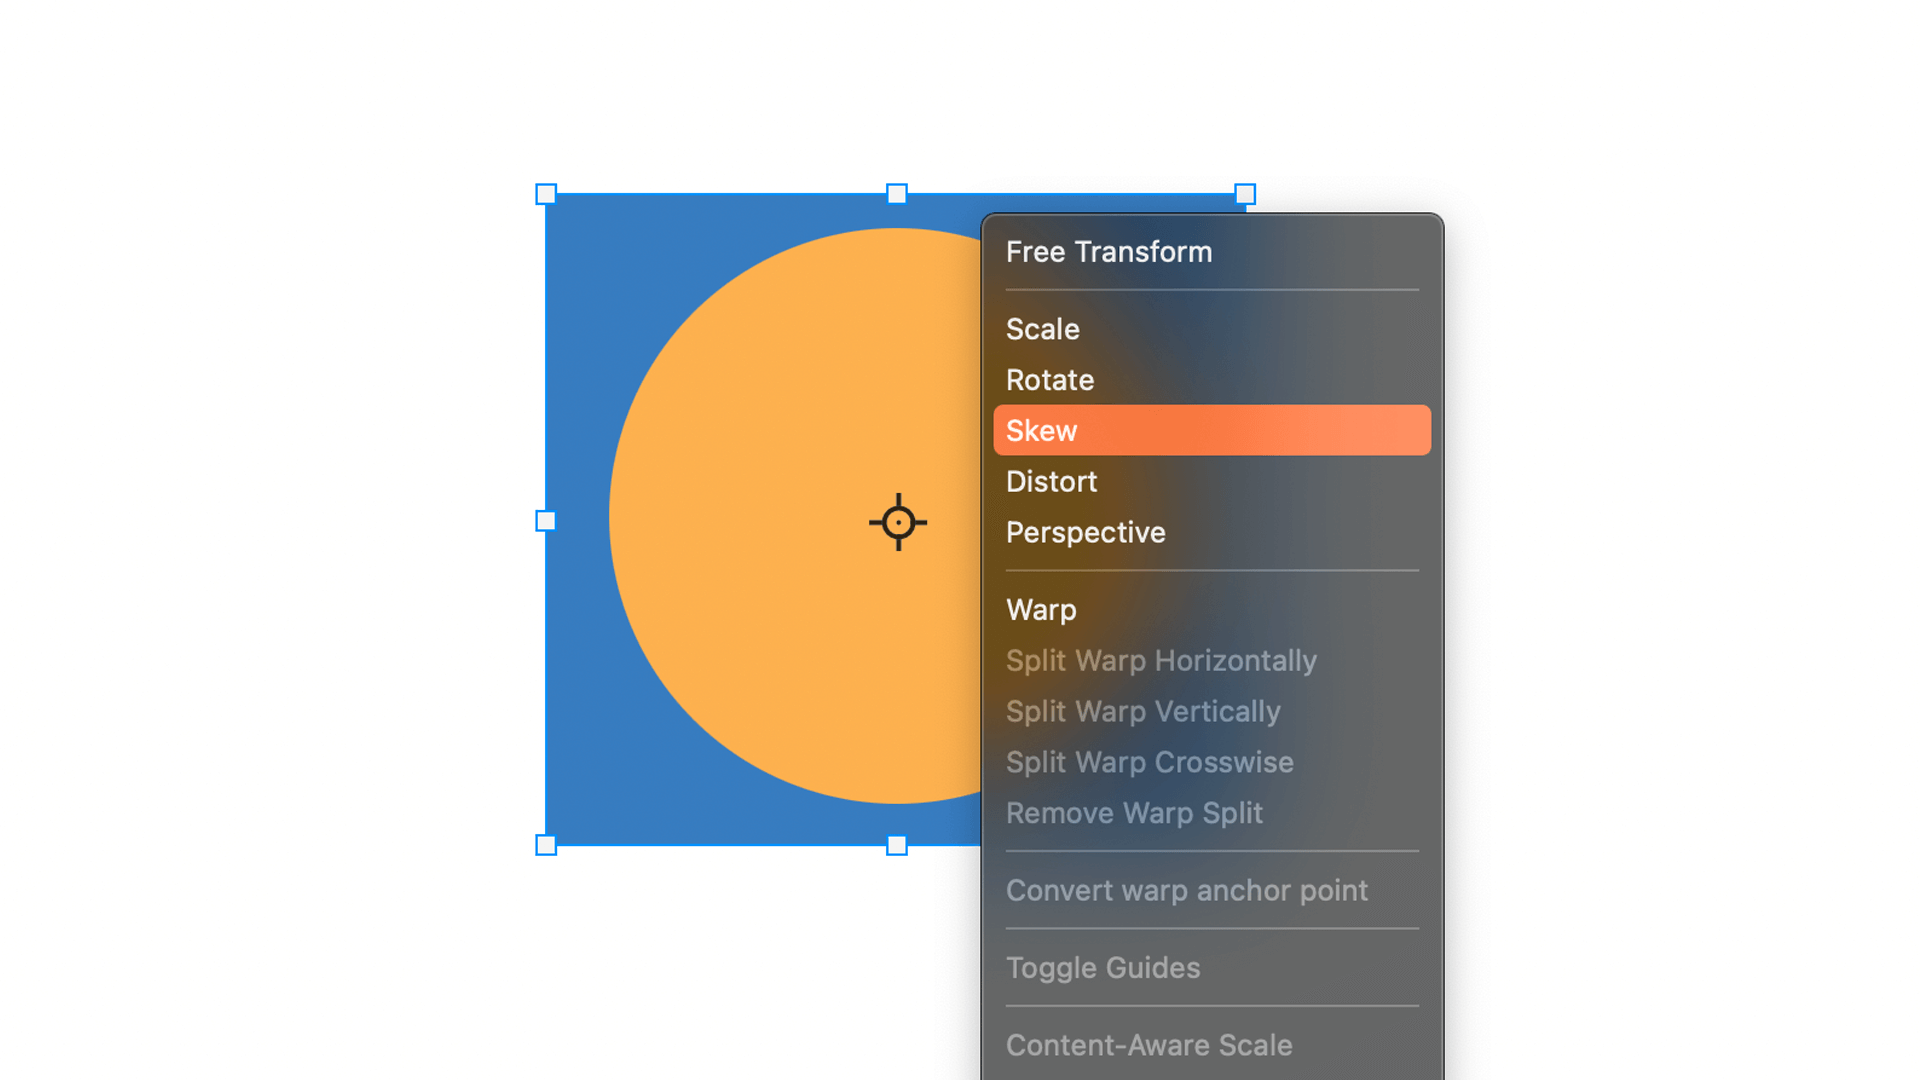
- Press ⌘ + T (Mac) or Ctrl + T (Win) to get the Free Transform bounding box.
- Right-click on the box and select Skew.
- Click on the centre side handle and drag it to skew it to the top or down. Click on the centre top handle and drag it to skew it to the left or right.
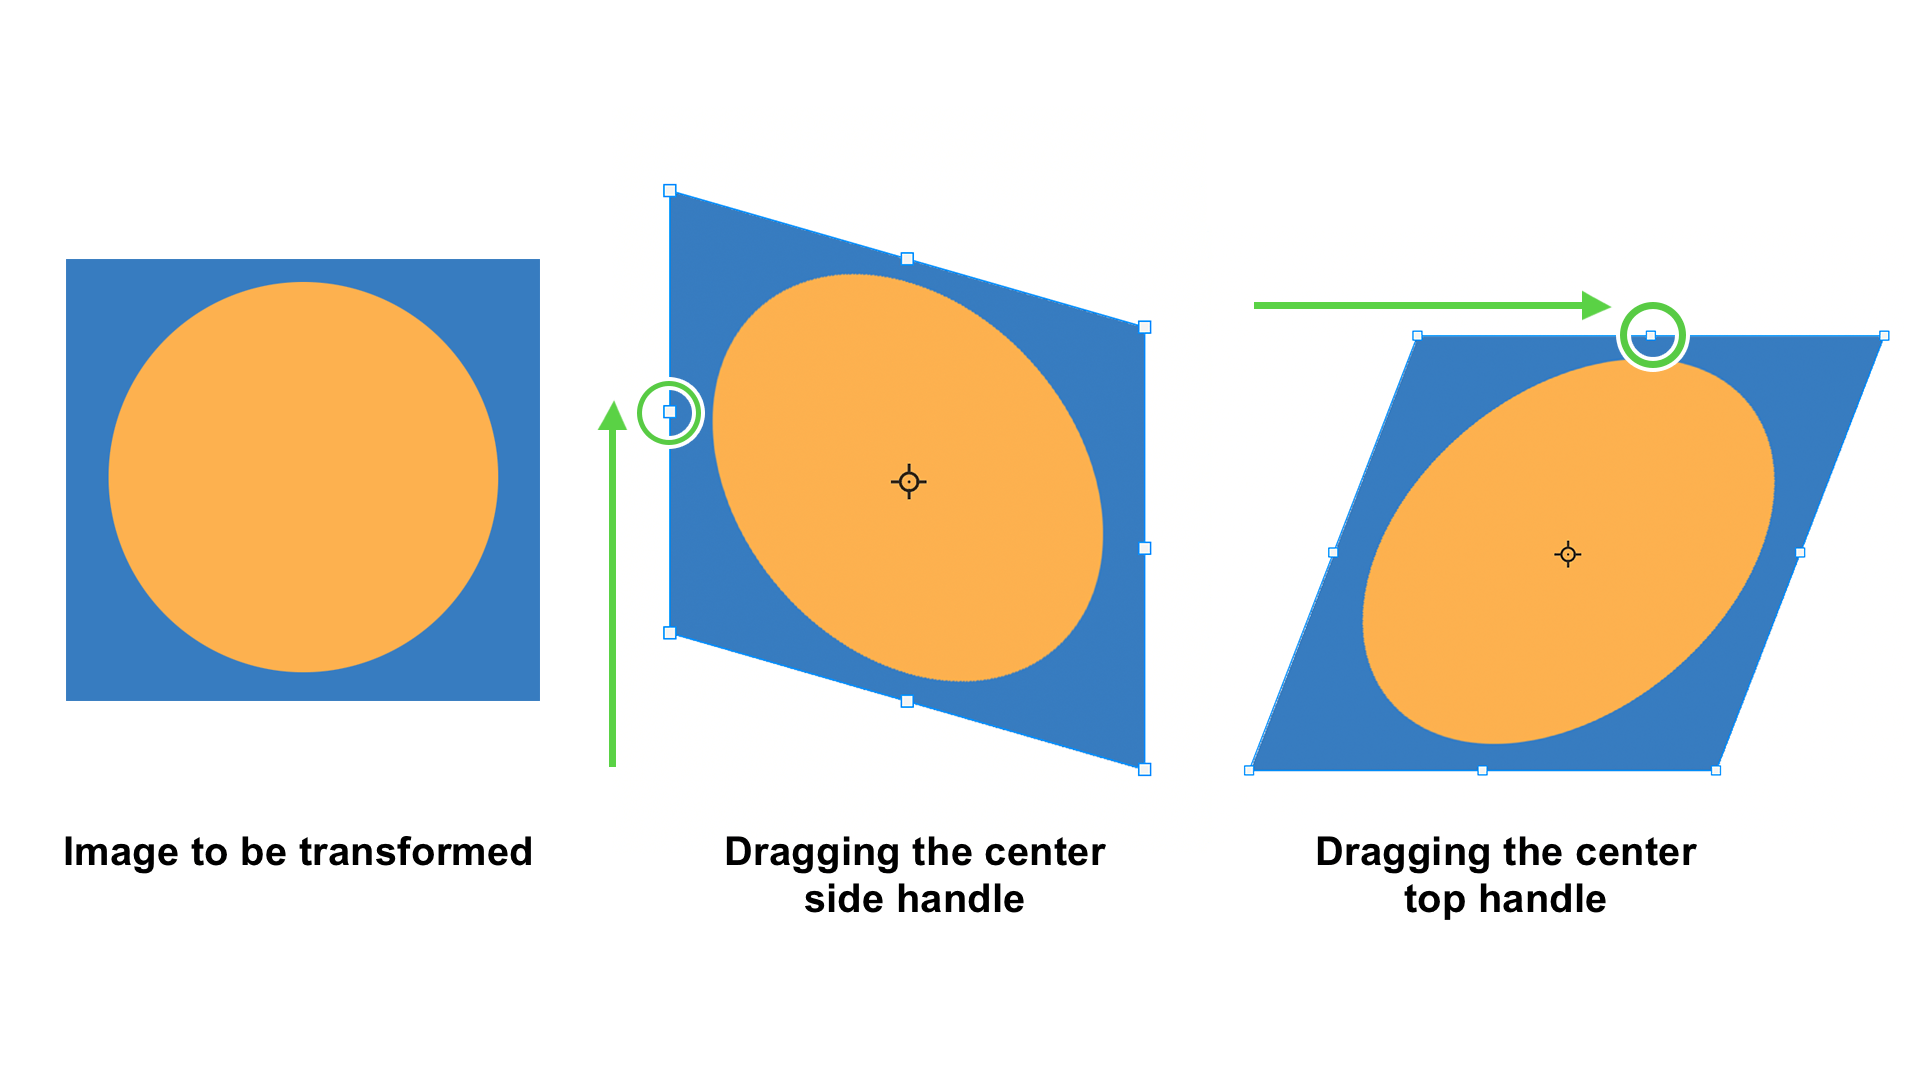
- Click on any of the corner handles to drag that corner of the image in any direction you want.
- You can skew both opposite sides at once by holding Option (Mac) or Alt (Win) and dragging the centre handle.
- Hit Return (Mac) or Enter (Win) to apply the transformation.
Distort
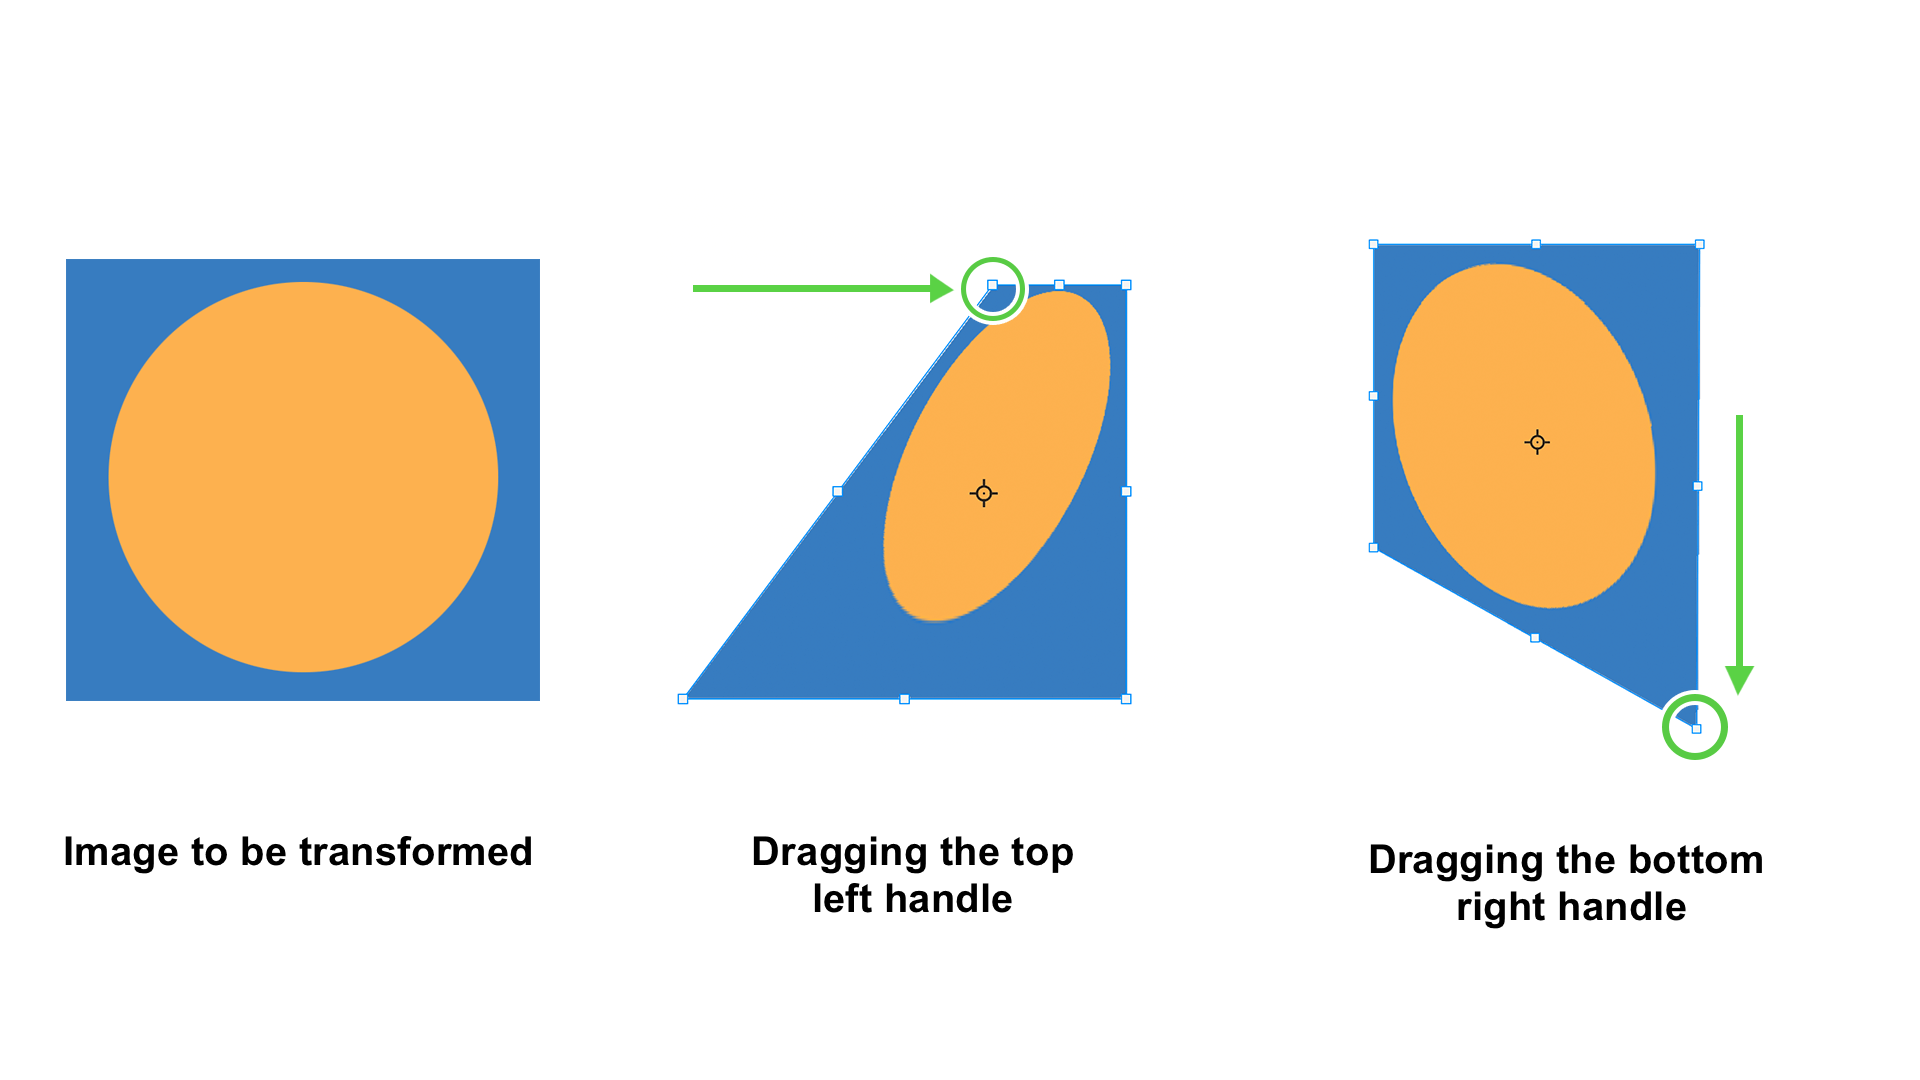
Distort works similarly to Skew. However, Distort also stretches and compresses the image.
- Press ⌘ + T (Mac) or Ctrl + T (Win) to get the Free Transform bounding box.
- Right-click on the box and select Distort.
- With the Distort option selected, drag any of the corner handles to pull or push the image.
Perspective
Perspective is used to make an image appear as if it is being viewed from another angle and distance. It drags two handles simultaneously in opposite directions to create a perspective effect. It helps transform an object to match the perspective of other images and make it appear 3D.
- Press ⌘ + T (Mac) or Ctrl + T (Win) to get the Free Transform bounding box.
- Then, Select Perspective and drag one corner of the box.
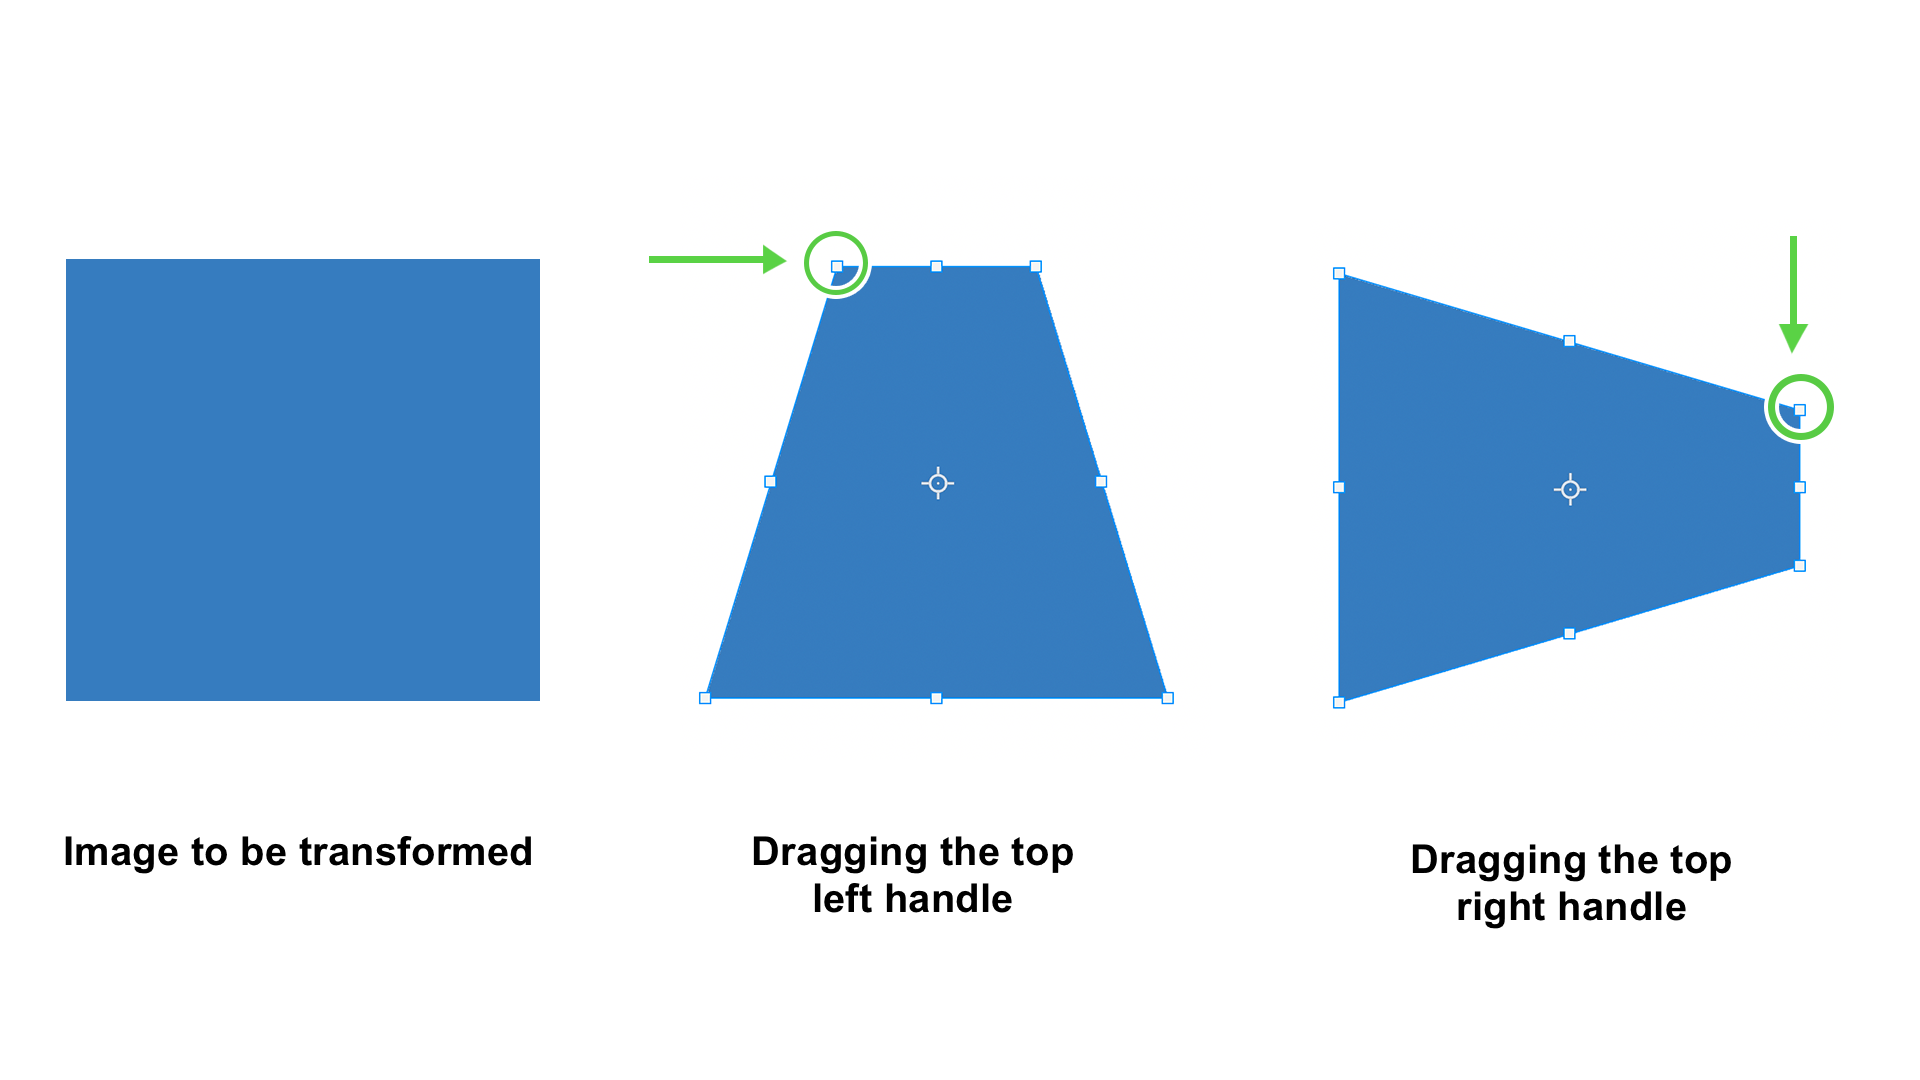
If the left top handle is moved to the left, the right top handle will move to the right. This will make it appear as if we are looking at the object from a top point of view. Dragging the handles will make the point appear farther or closer.
Warp
With the Warp tool, you can alter and reshape an image in any way you want. This can be used in commercial graphic design editing to alter objects. It can also be used in photograph retouching to make a person slimmer or change some features.
- Press ⌘ + T (Mac) or Ctrl + T (Win) to get the Free Transform bounding box.
- When you select Warp, the box will be changed to show gridlines in the middle (as shown in the image above.)
- Drag any point in the grid to alter the image to your liking.
This tool might be challenging to use at first because it can alter images in drastic ways. But after you keep using it a few times, it will be easier, and you can warp objects however you want. You can also wrap text on an image of walls to make it appear as if it was actually there in real life.
Flip
Flip turns an image over like a mirror reflection.
- Press ⌘ + T (Mac) or Ctrl + T (Win) to get the Free Transform bounding box.
- Select Flip Horizontal. If the image or the objects in the image are facing left, they will now face right. This will flip the image as if a mirror was placed beside it.
- Select Flip Vertical. It will flip the image upside down.
If you duplicate an image, flip it vertically and reduce its layer opacity, it can be seen as a water reflection. Furthermore, you can take a soft eraser and erase the bottom of the reflection.
These were the basics of using transform tools to modify the shape of images. You can use these tools for photo retouching and basic and advanced types of graphic design work.
Thank you so much reading this blog. If you have any questions related to Photoshop transform tools, you can ask me about it below.