Note: This is part 1 of a multi-part series.
Part 2 is here.
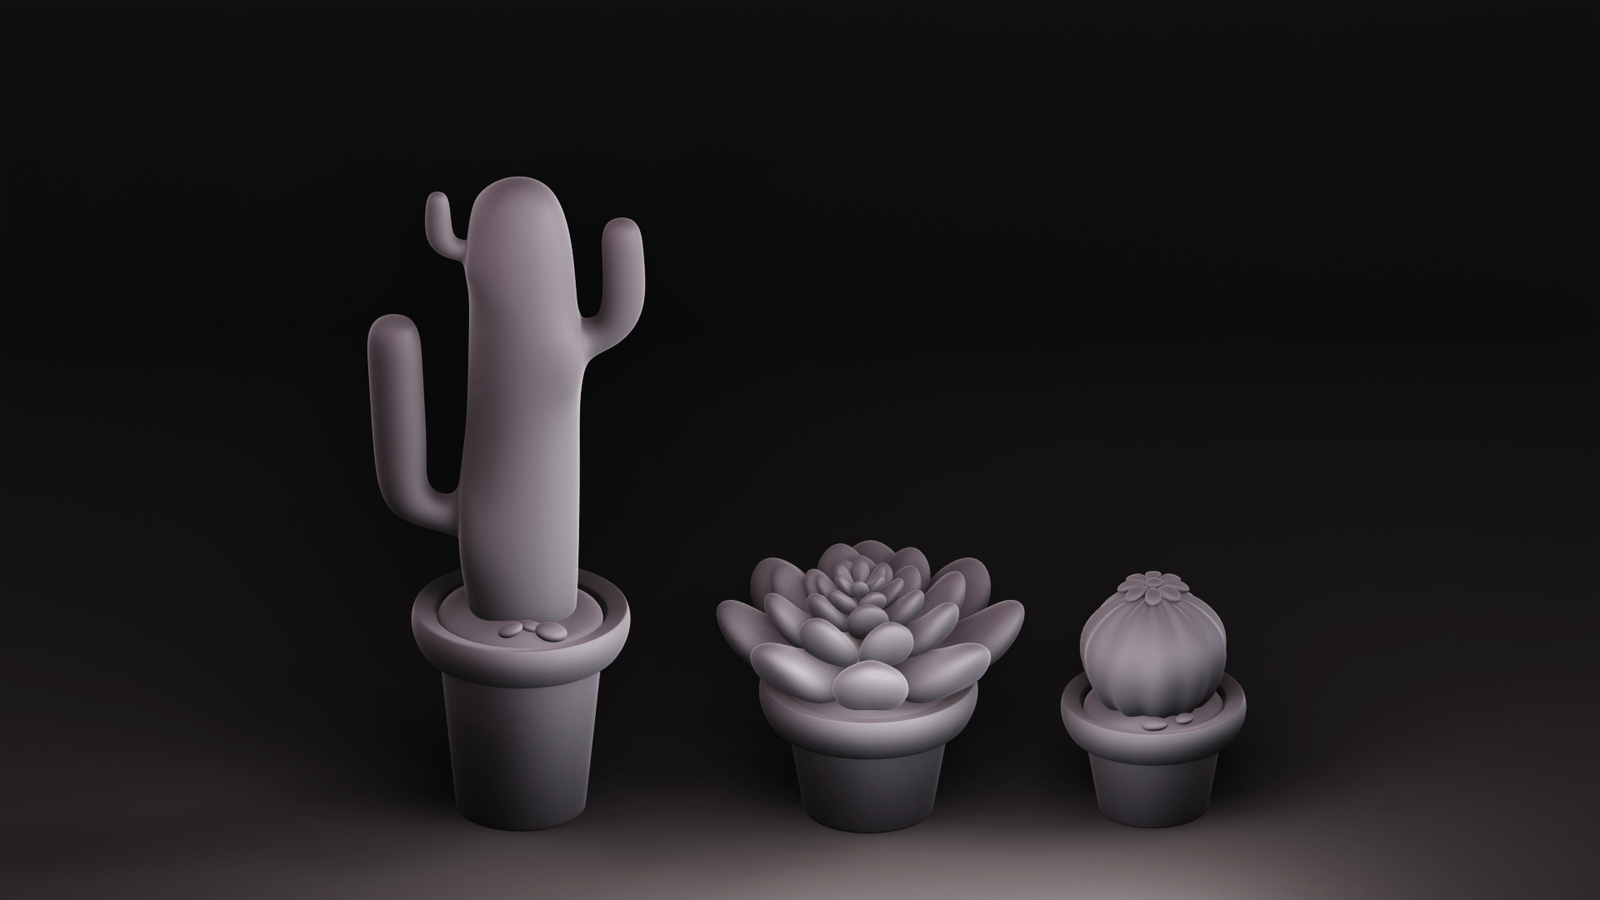
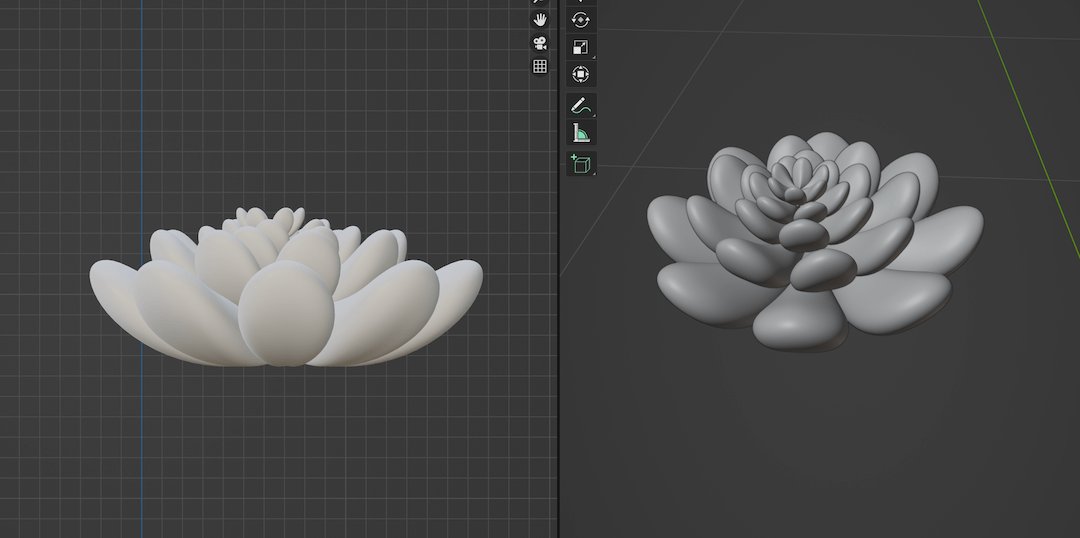
One of the main reasons why I wanted to learn Blender was because I saw so many cute 3D illustrations all over Pinterest. And the first Blender tutorial that I followed through on was on making cute froggy. Once I got my handle on the basics of the interface of Blender, I was well on my way to creating stylized cute illustrations with my severely limited skill set. After a year, I have picked up a few different ways to create succulents and cacti.

I always begin by collecting reference images before I start any project. I use Pinterest and Google Images for that. So, let's get started creating some cute cacti and succulents.
I have three methods for creating them:
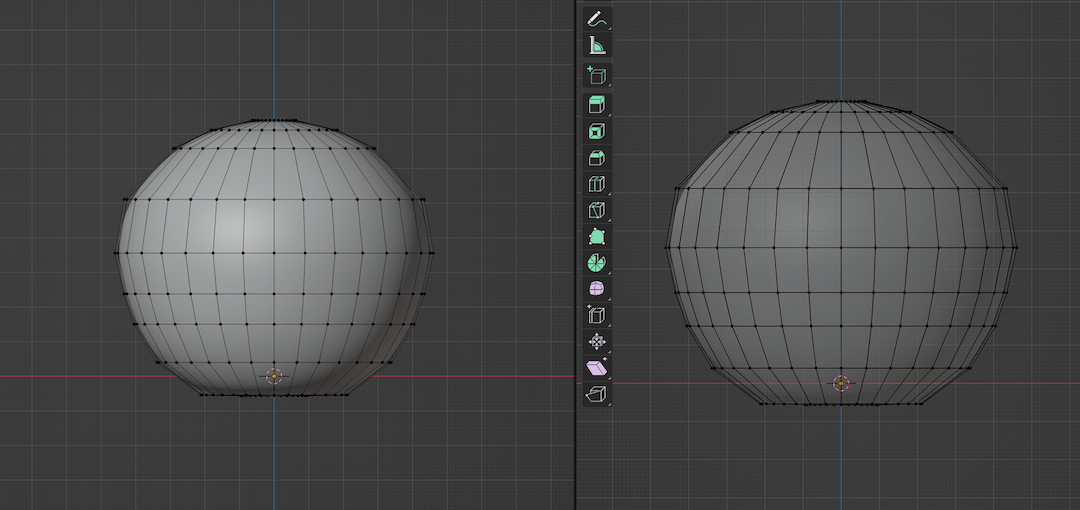
1. Using Skin Modifier with a Single Vert
Skin Modifiers are a great way to generate shapes quickly.
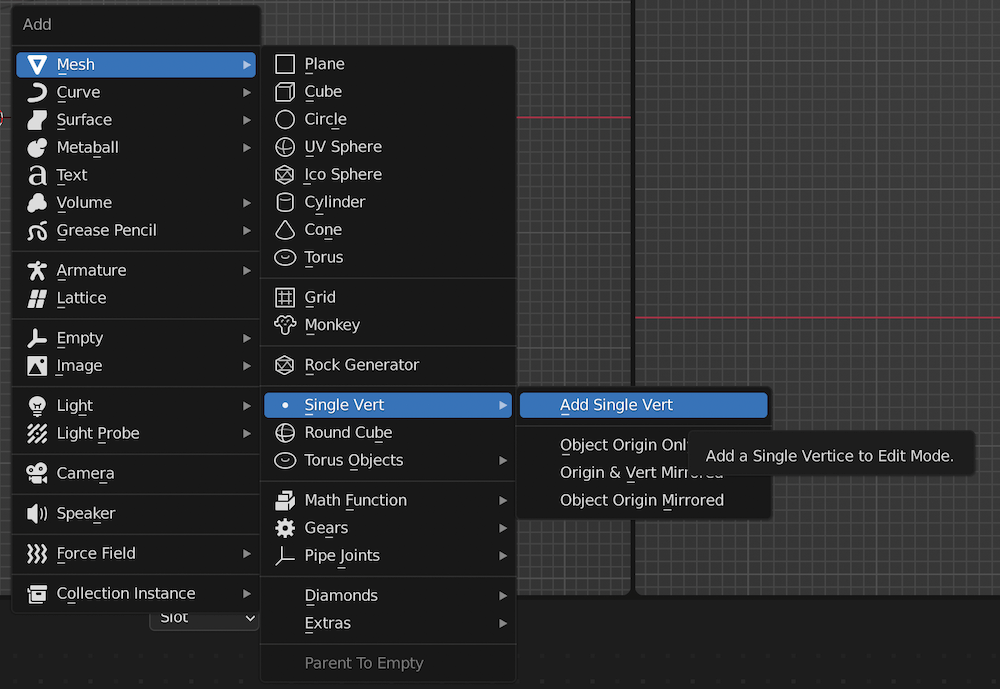
- I began with a single vertex.
Shift+A > Mesh > Single Vert > Add Single Vert - Then adding a skin modifier, and a subdivision modifier to the vert.
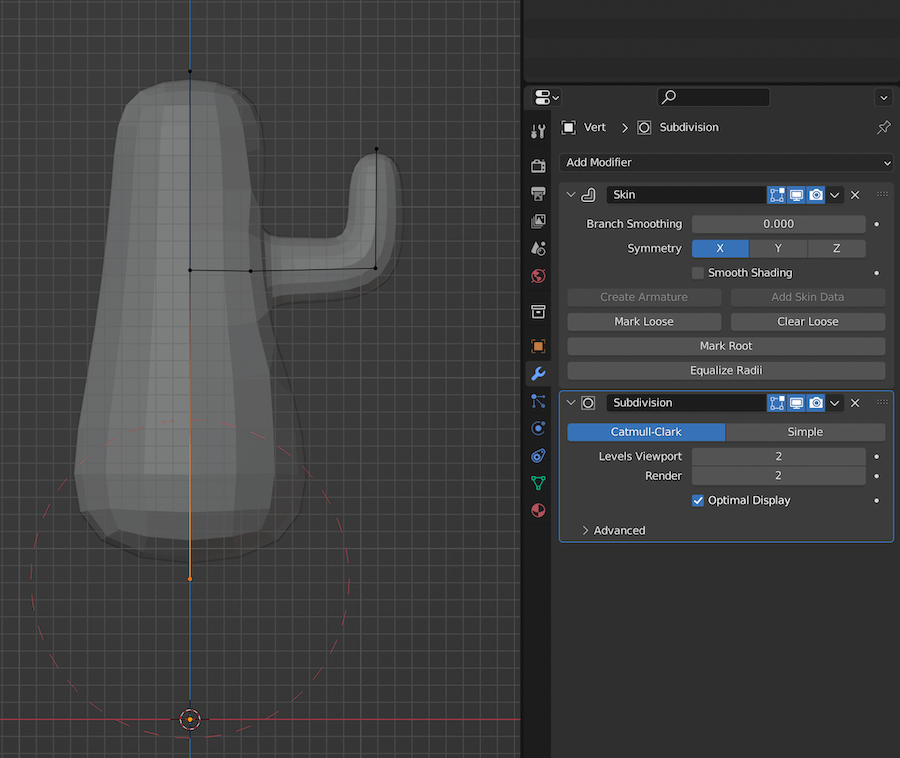
- Then tabbing into Edit mode, and in vertex selection mode, extruding the single vert to create the cactus shape.
Vert editing tips:
- To scale the size of the individual vert, use
Cmd+A - If you are using a mirror modifier, it should always be at the top otherwise, it messes with the other modifiers.
- If you want a new vert in-between two verts, you can always subdivide the single edge.
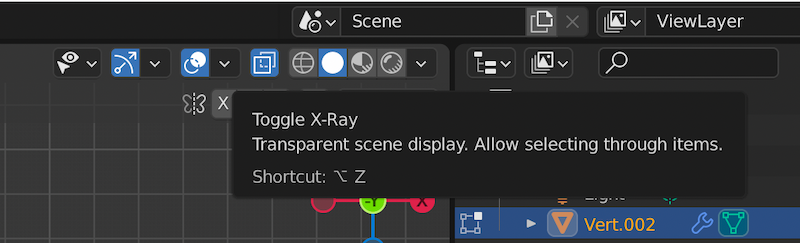
- Stay on X-ray mode to see the vertices while modelling. You can do that with
Alt+Zor toggling the X-ray button next to the viewport shading modes.
Here is what I ended up with after messing with the vertices.
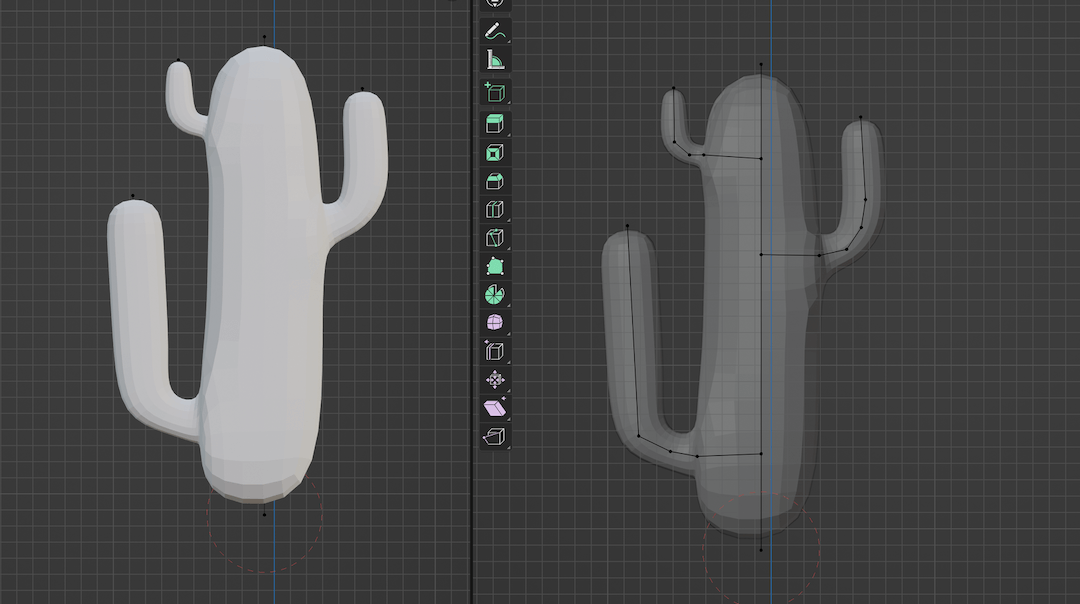
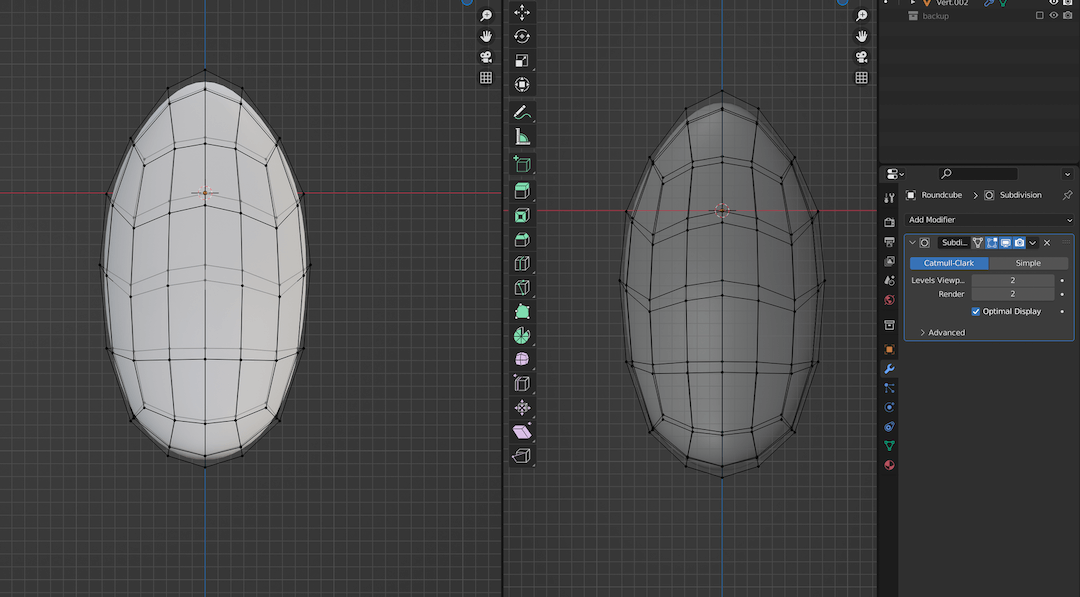
After I was satisfied with the shape, I made a backup copy and applied the skin modifier and subdivision modifier. So, it is now a single object. Then added another subdivision modifier.
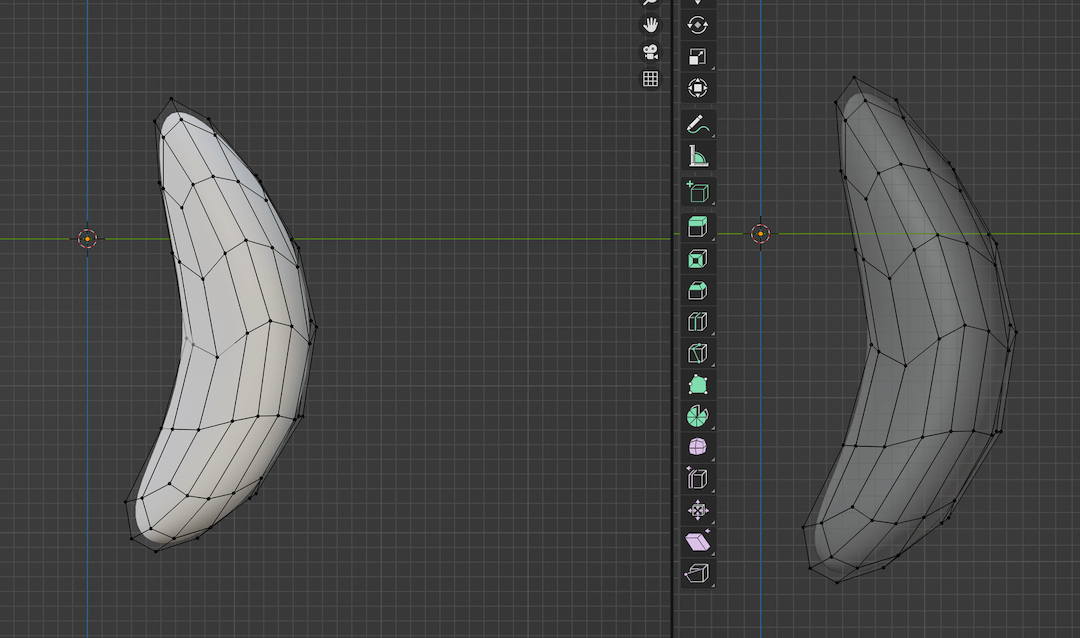
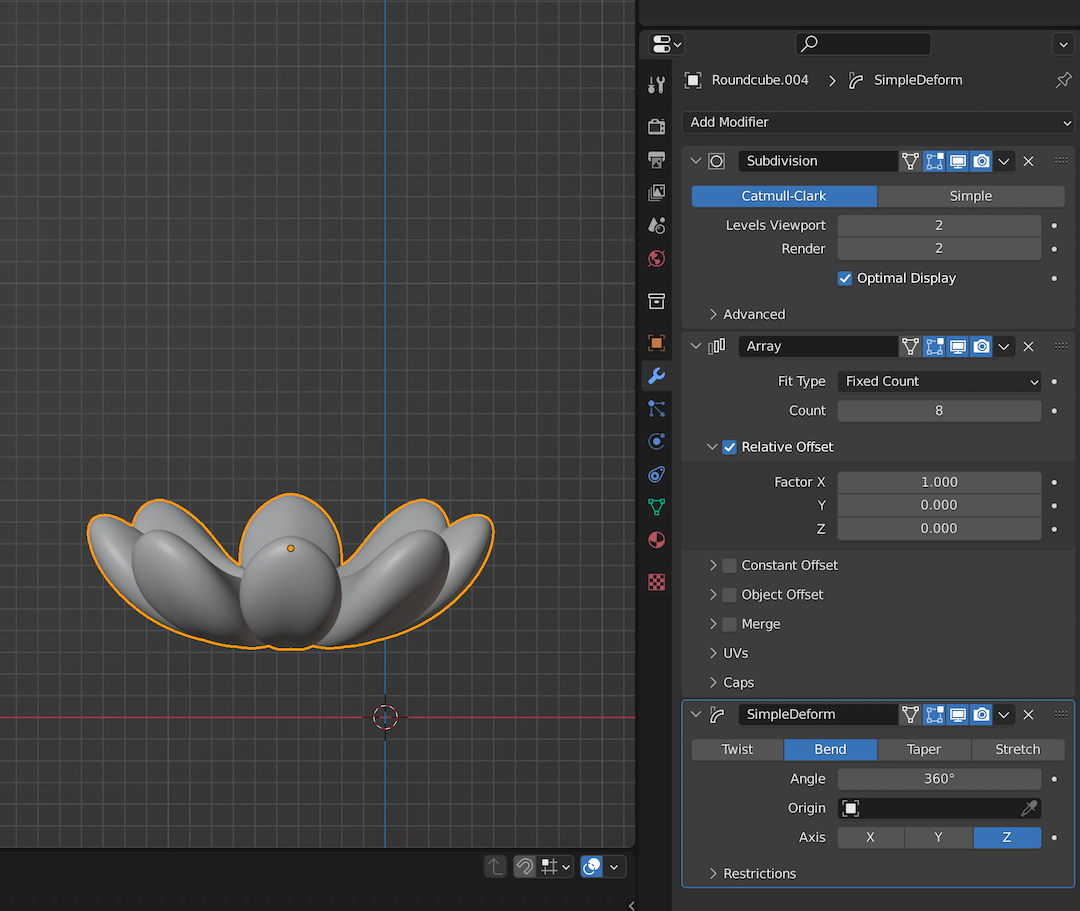
2. Using Simple deform Modifiers
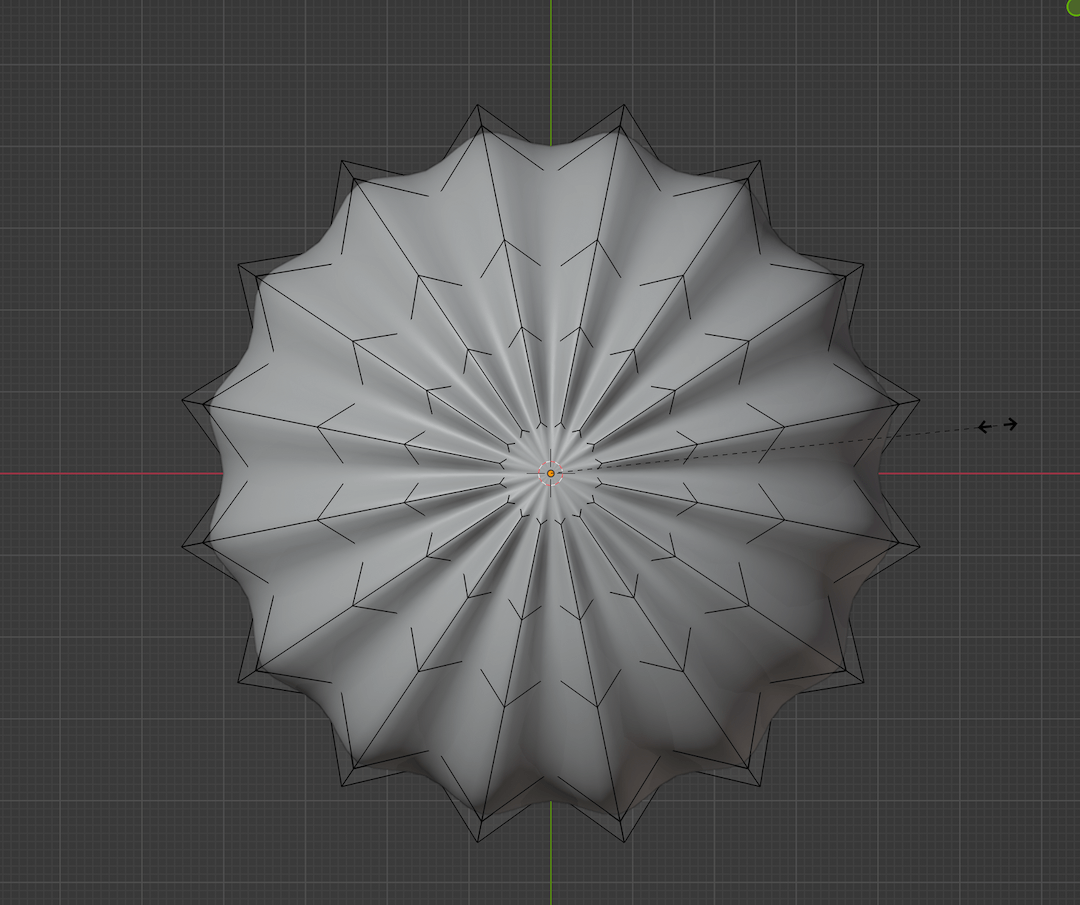
For this method, we are going to create a single leaf and then multiply it with Array Modifier, and bend it into the shape of the succulent with the Simple Deform Modifier.
I started with a single Roundcube, then with proportional editing, I grabbed the vertices and moved them to create a leaf shape.
Once I was happy with the leaf, I added the Array modifier to increase the number of leaves.

Then, I added the simple deform modifier to bend the leaves into a succulent shape. Then rotated and edited the single leaf to arrange the leaves.
Then duplicated and arranged the leaf group to create the succulent.
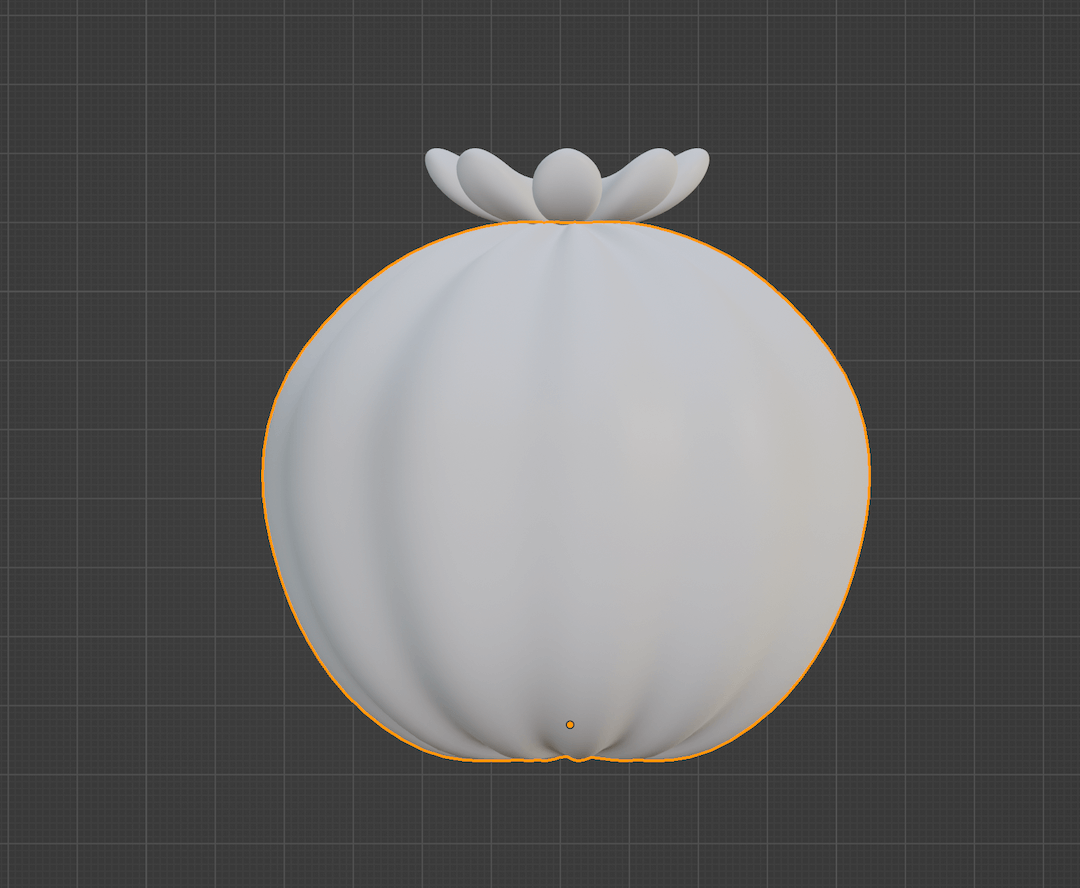
3. Using Cylinders
Using cylinders is probably the most basic way to get a cactus shape.
- I began with a cylinder, then extruded the topmost face and scaled it down.
- I repeated extruding and scaling down the top face to create the dome shape.
- For the lower half, I added loop cuts with Ctrl+R and scaled and moved them to create the cactus shape.
- Then I selected alternate edge loops on the cactus and scaled them in.
I added one set of leaves from the second succulent on top of this one. And another cactus completed.
And there we have it, three ways to create these succulents. I quickly created the pots with cylinders and added some rocks and mud to them.