
Masking is a tool to reveal or hide an element (image, video, and text) by creating the desired shape. Another simple way to explain it is that masking is a cut-out to make the object below it visible.
Masking is one of the simplest and most helpful techniques available to graphic designers. It is used everywhere, from small projects to high-budget Hollywood movies. By using masking, you can cut out areas of a layer and combine different elements in one scene. It is useful in making quick transitions and shapes or isolating elements of a scene.
So, without further delay, let us move on to how we can use Masks.
Creating a Mask Over an Image
First, I'll explain the process of creating a basic mask with the shapes tool.
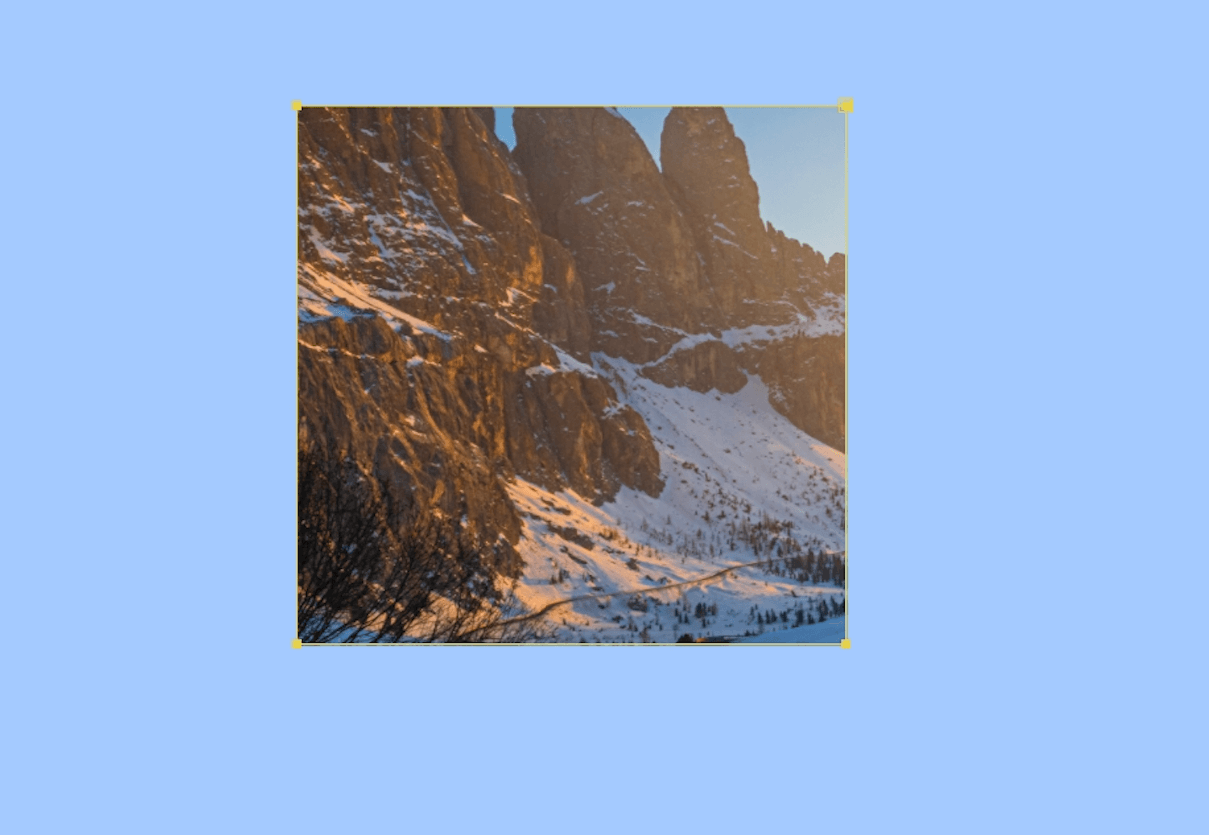
- Firstly, drop an image onto your composition.
- Select the Rectangle Tool (Q), one of the shapes available in the tools panel at the top.

3. Draw a rectangle while the image layer is selected. You can simply drag your mouse diagonally or Shift-drag to form a uniform rectangle (square).
4. You will be able to view this shape applied as a mask under the selected image/layer.
Similarly, using the Pen Tool (G) is also another viable option if you want to make custom shapes or if you want to mask a person or irregular shapes.
Mask Modes Settings
After creating the mask on the selected image, Press M to reveal all applied masks on the timeline and their properties. There are seven different modes of mask:
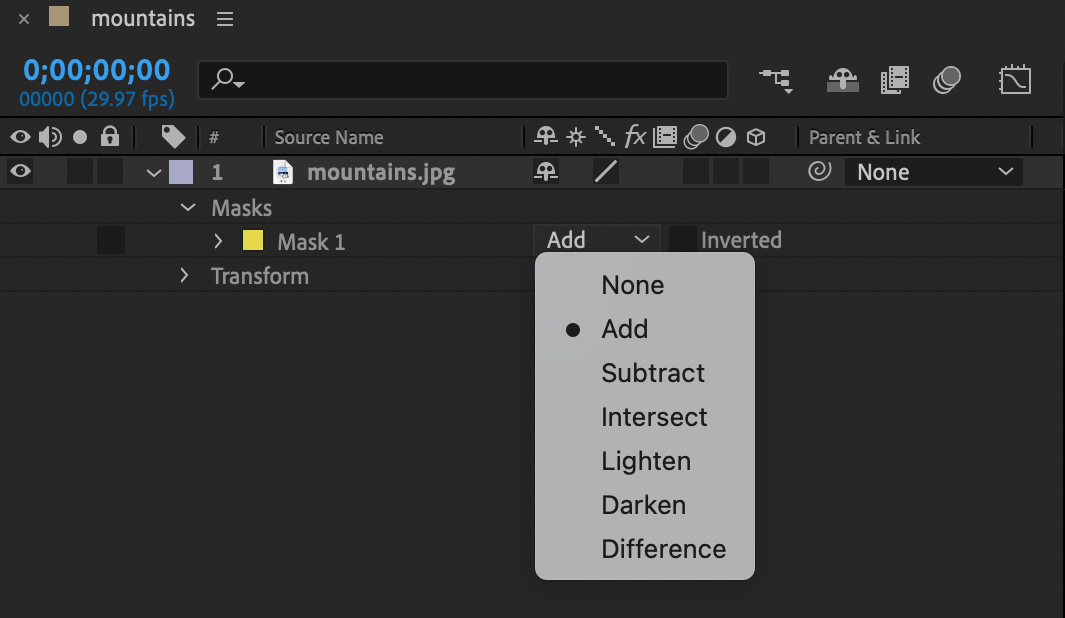
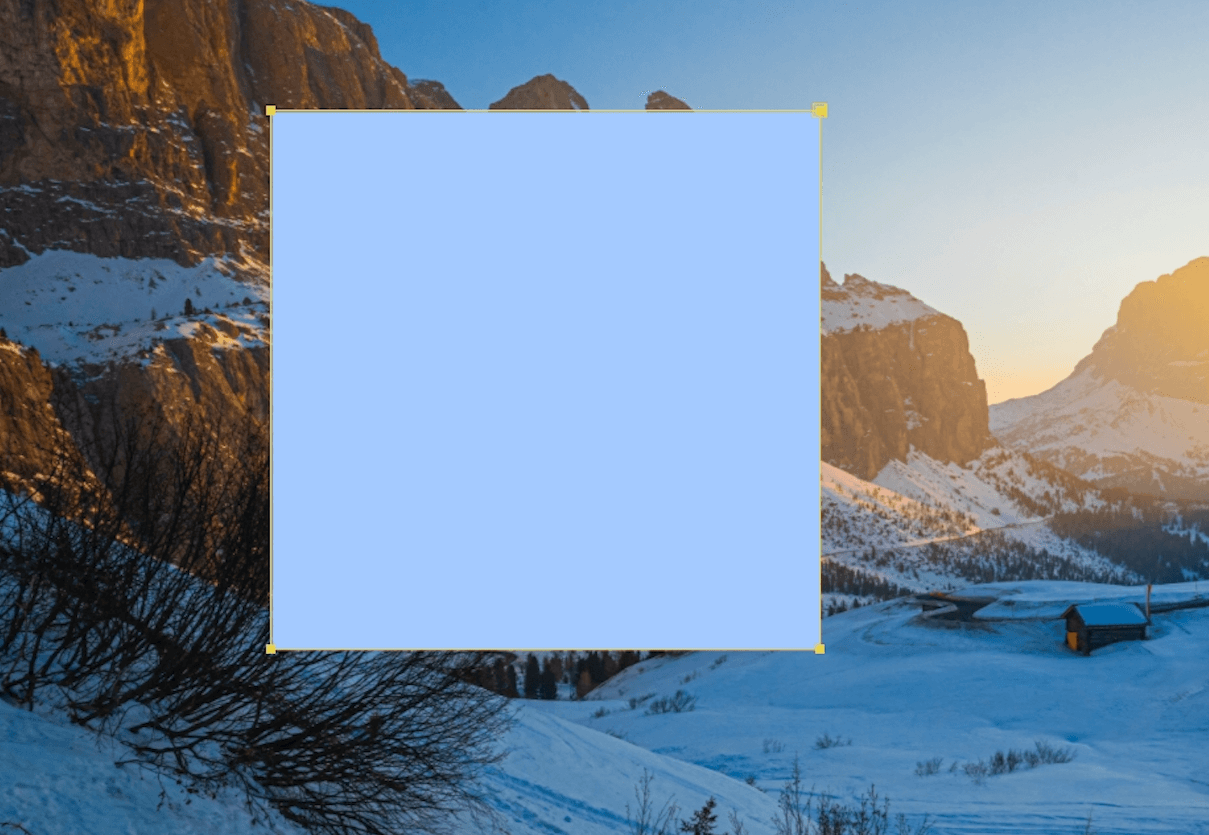
- None: This will show the entire image or layer without the mask. This is helpful to check the contents of the rest of the layer while working with masks.
- Add: This is the default masking mode applied when any type of shape is created on the selected layer. This will only show the contents inside the mask.
3. Subtract mask: This mask works opposite to the Add mask. The contents outside the mask will be visible in this mode.
4. Intersect: This mode comes in handy when adding multiple masks to a layer. Everything that is not overlapped will be visible in this mode.
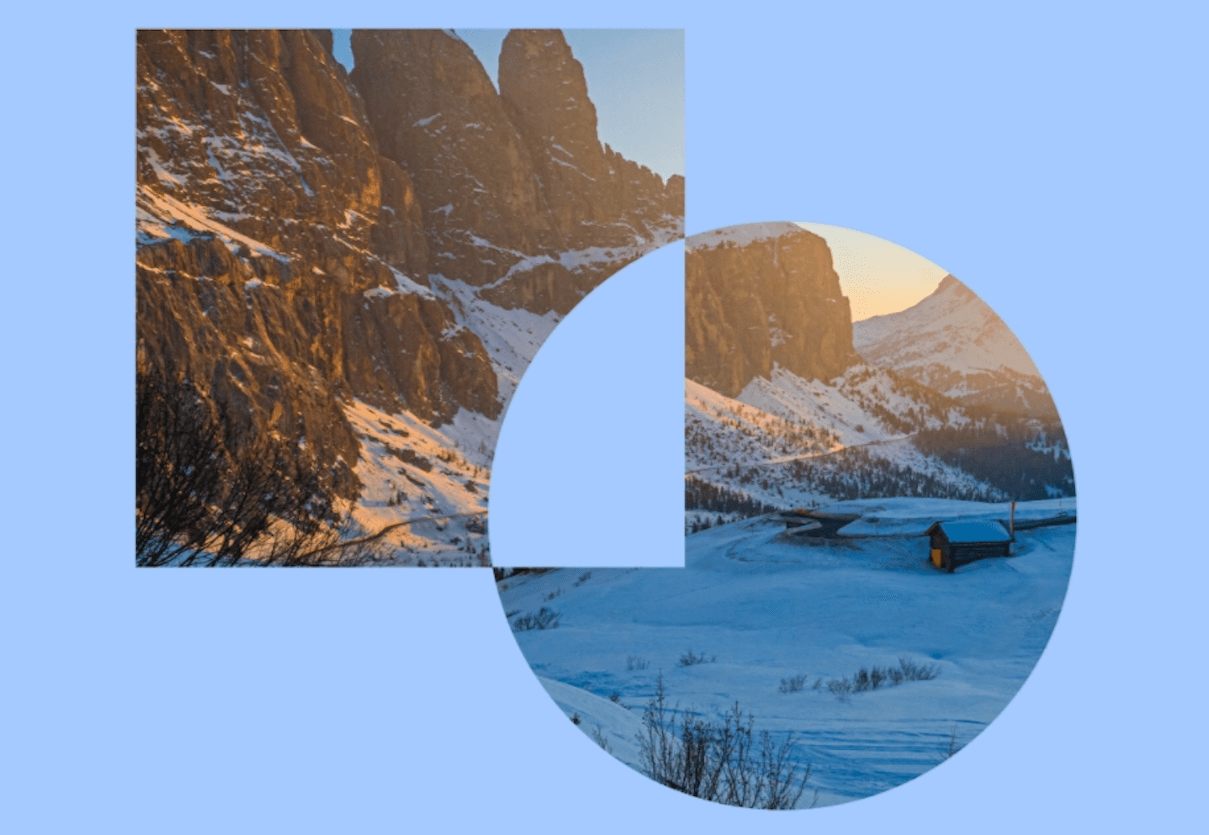
5. Difference: This mask is the opposite of the Intersect mask. Everything that is overlapped is visible in this mode.
There are two other options for masking mode (Lighten and Darken), but they are rarely useful, so we can skip them. If you still want to know what they do, you can toggle the mode and see the effects, but make sure you have different mask opacities applied on all masks, or the effect won’t be visible.
If you click on Inverted beside the modes, it will create the opposite effect of the mask. For example, if you pick Add and select Inverted, it will only show contents outside the mask.
Mask Properties
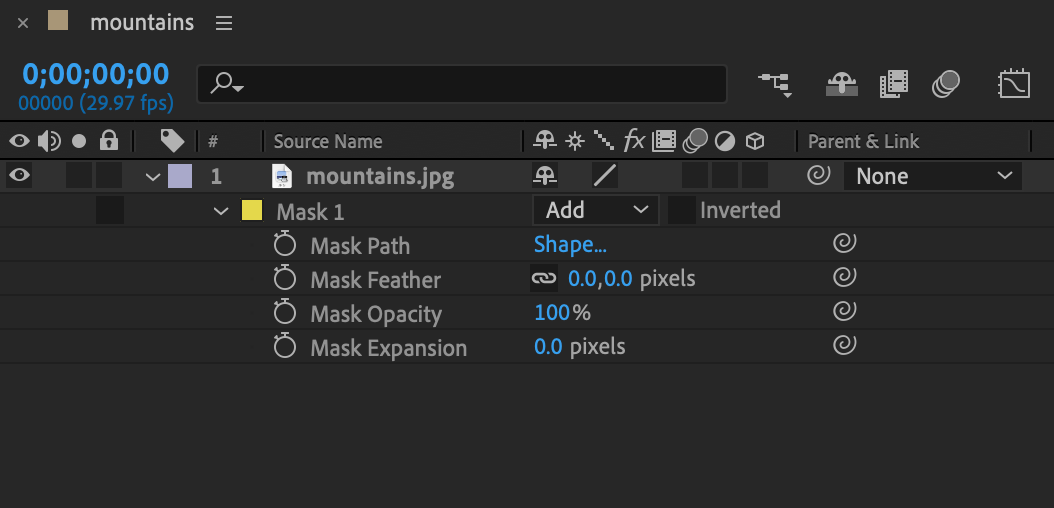
- Make path: This option will help you animate the mask.
- Feather: Like any other feather property, this option will let you blur the edges of the mask.
- Opacity: This is the visibility of the masked image/layer.
- Expansion: This option is used to increase or decrease the area of the mask.
Text Animation using Masking
For this tutorial, I will show a simple text masking process. It is a starting point for any beginner to try out what they have learned today.
- Create a text layer by clicking on the Horizontal Type Tool; then, type "Something".
- Now, make a rectangular mask on top of it to cover the entire text.
- You can find an option to move position under Animate > Position.
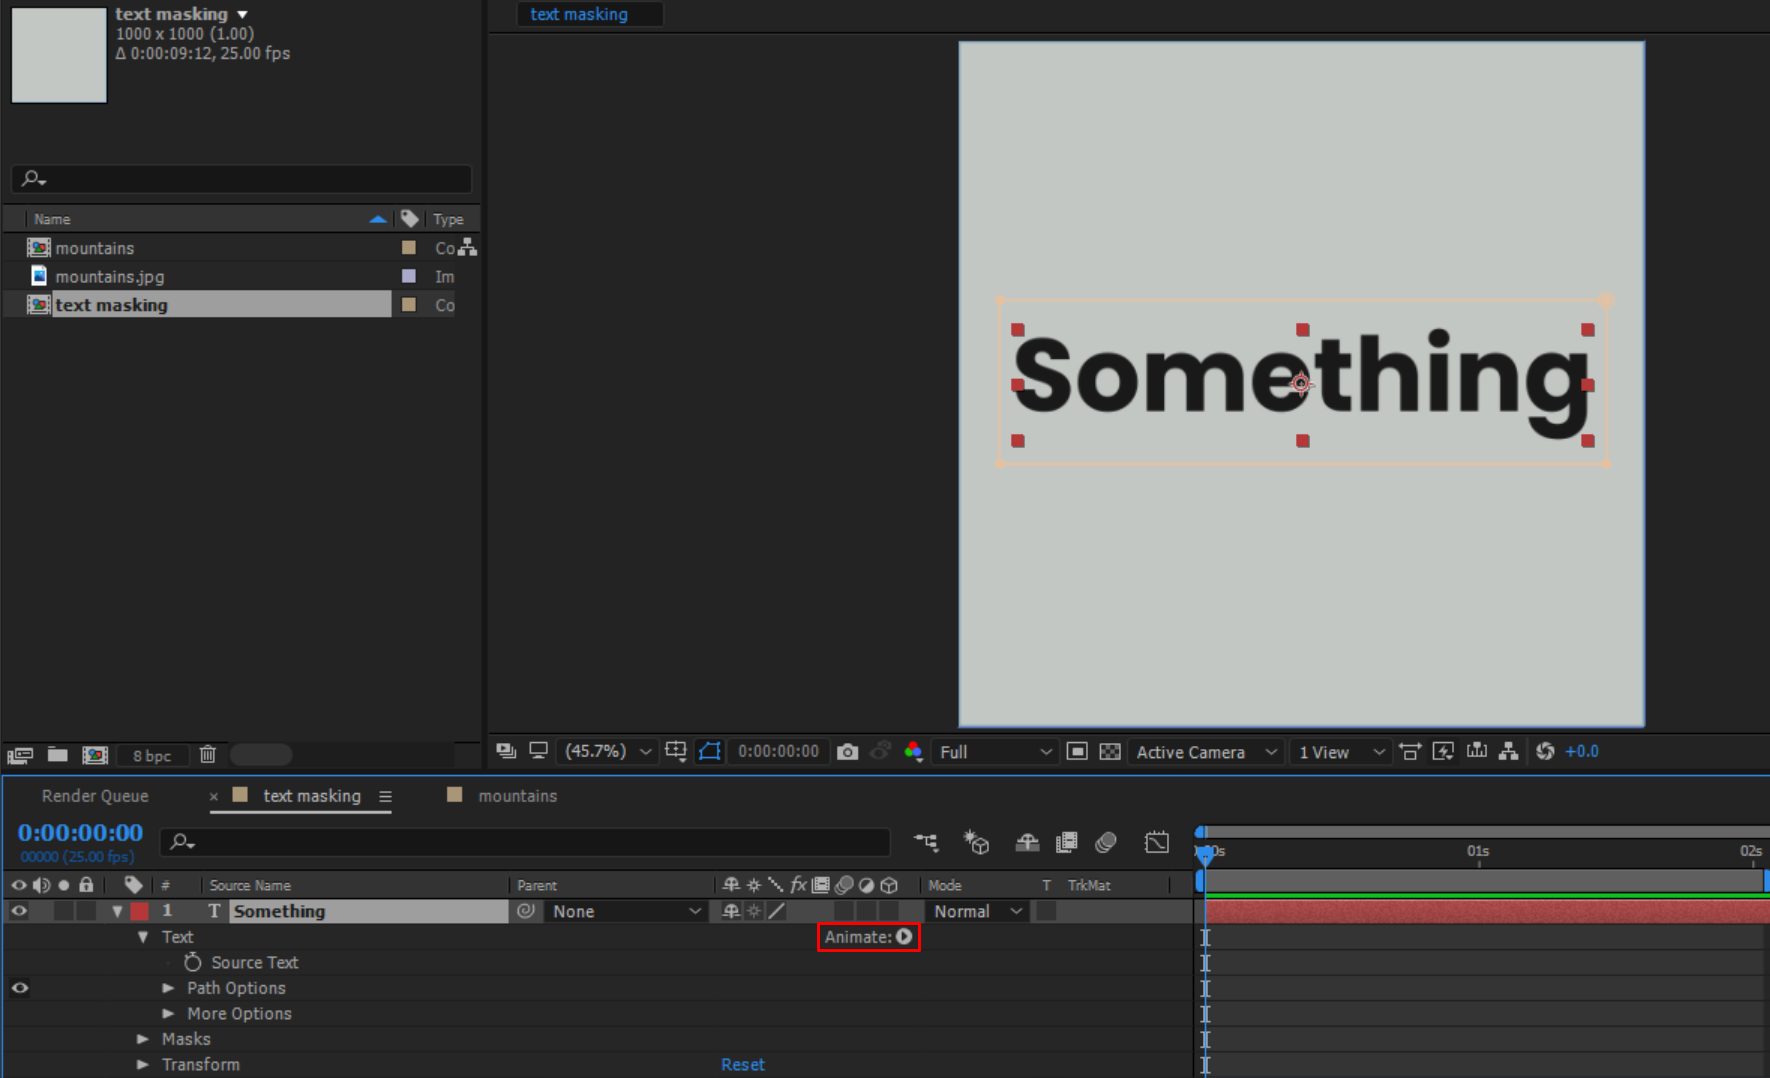
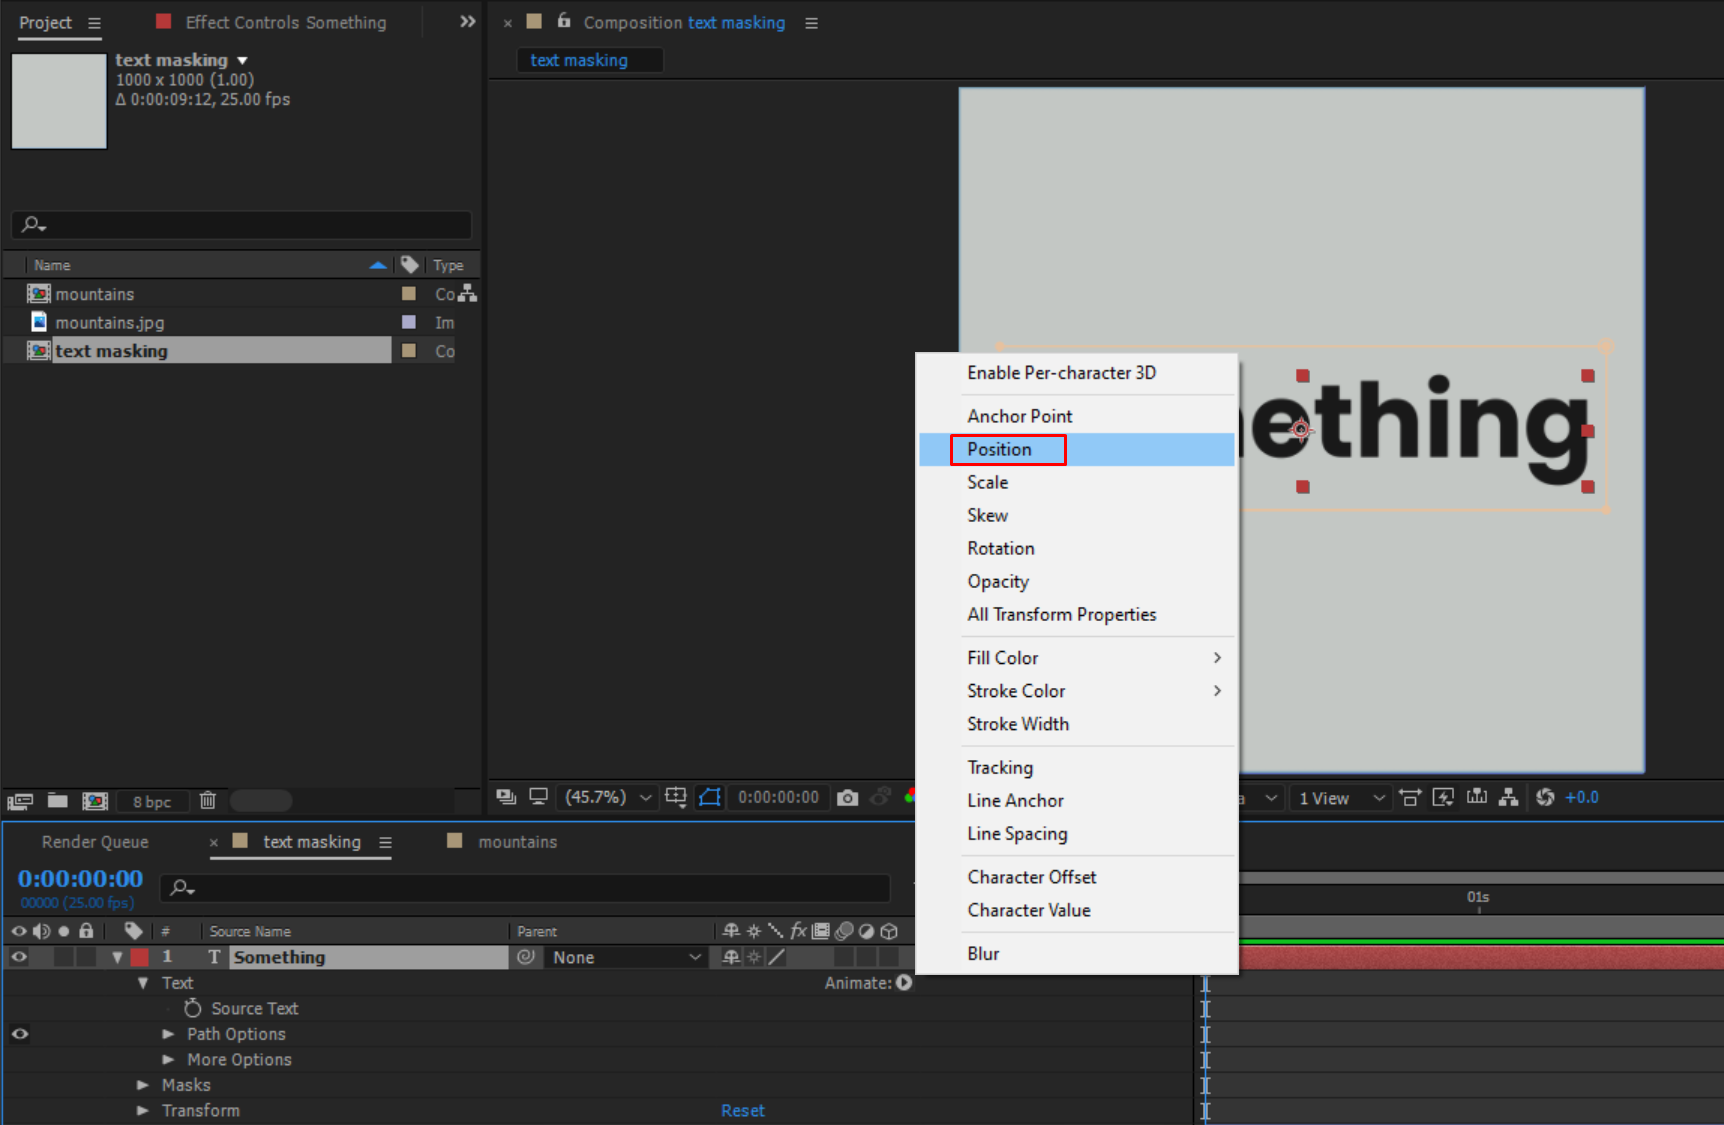
- Click on the watch icon to add a keyframe to a position. A keyframe is a starting or ending point of a transition.
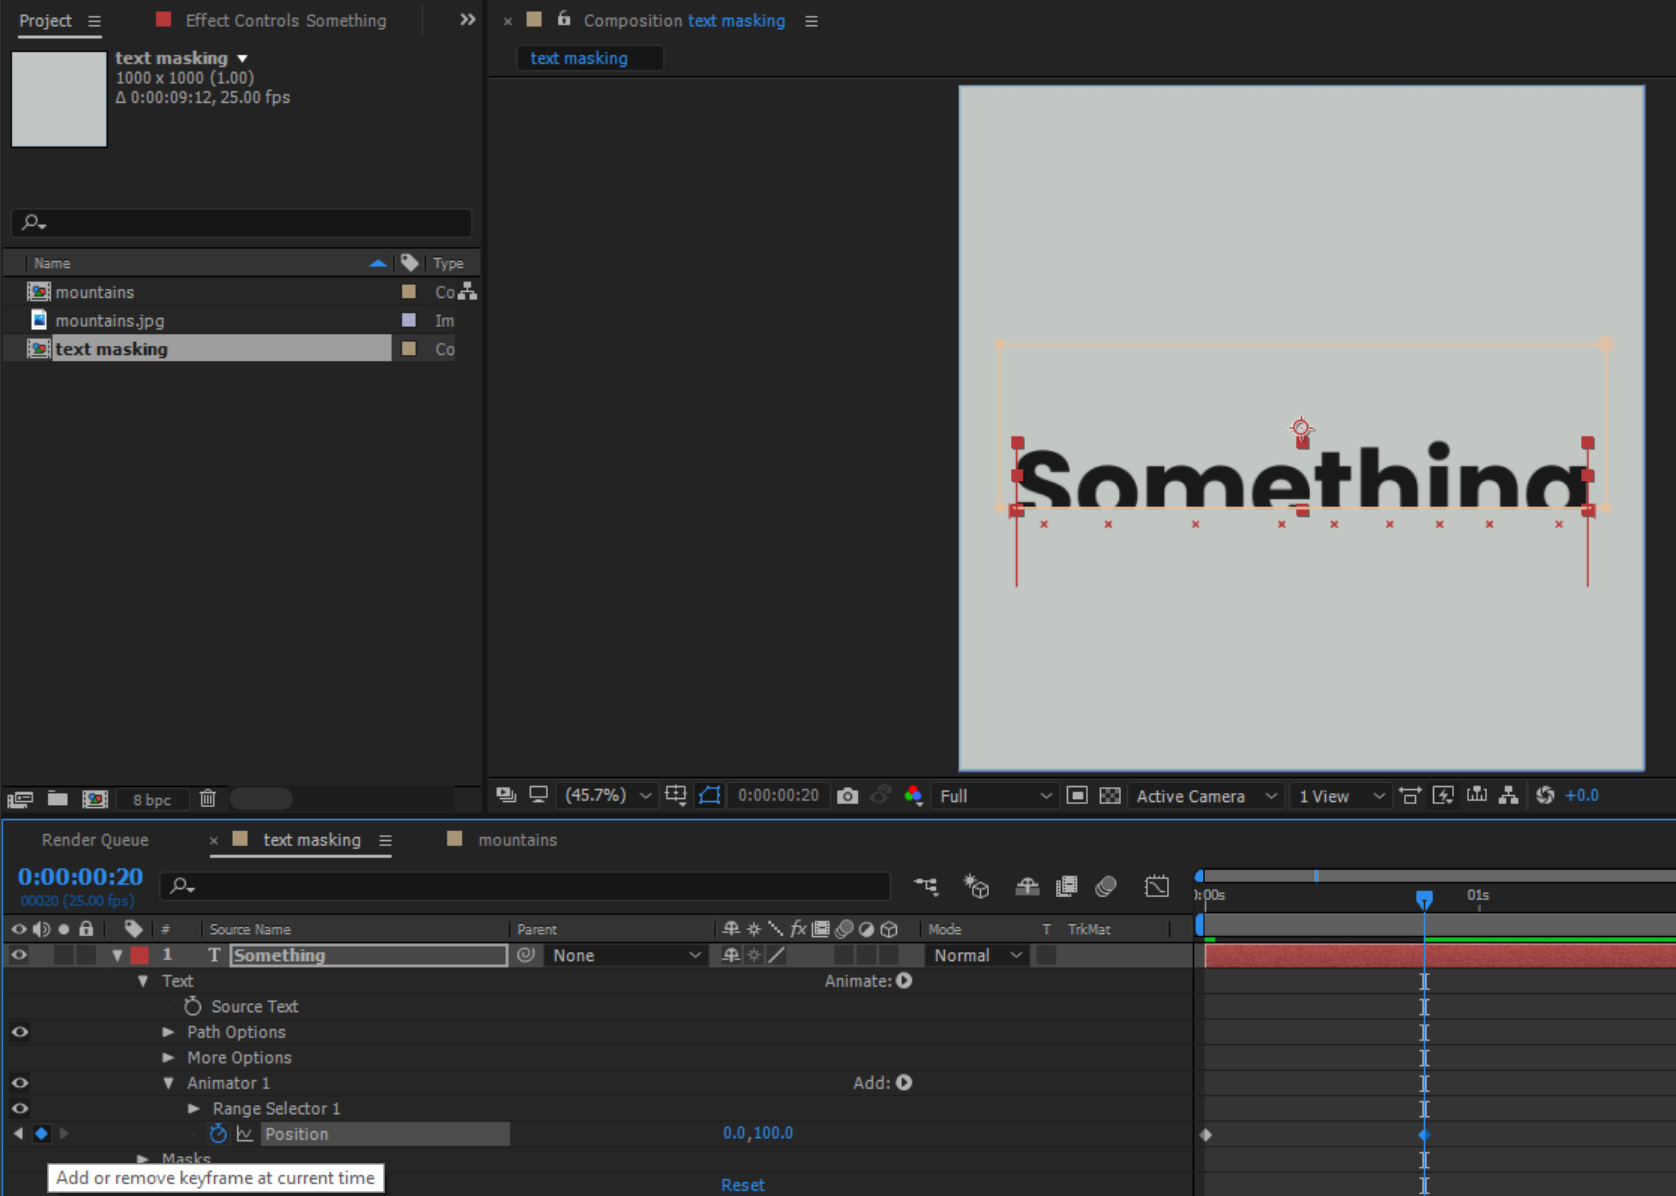
- Add a keyframe to a point roughly after a few frames and increase the Y-value (0.0, 0.0; x- value are horizontal value & y-value are vertical) to 250 or until the whole text disappears.
Shape Animation
Let's look at an extended technique by simply animating the mask of selected layers.
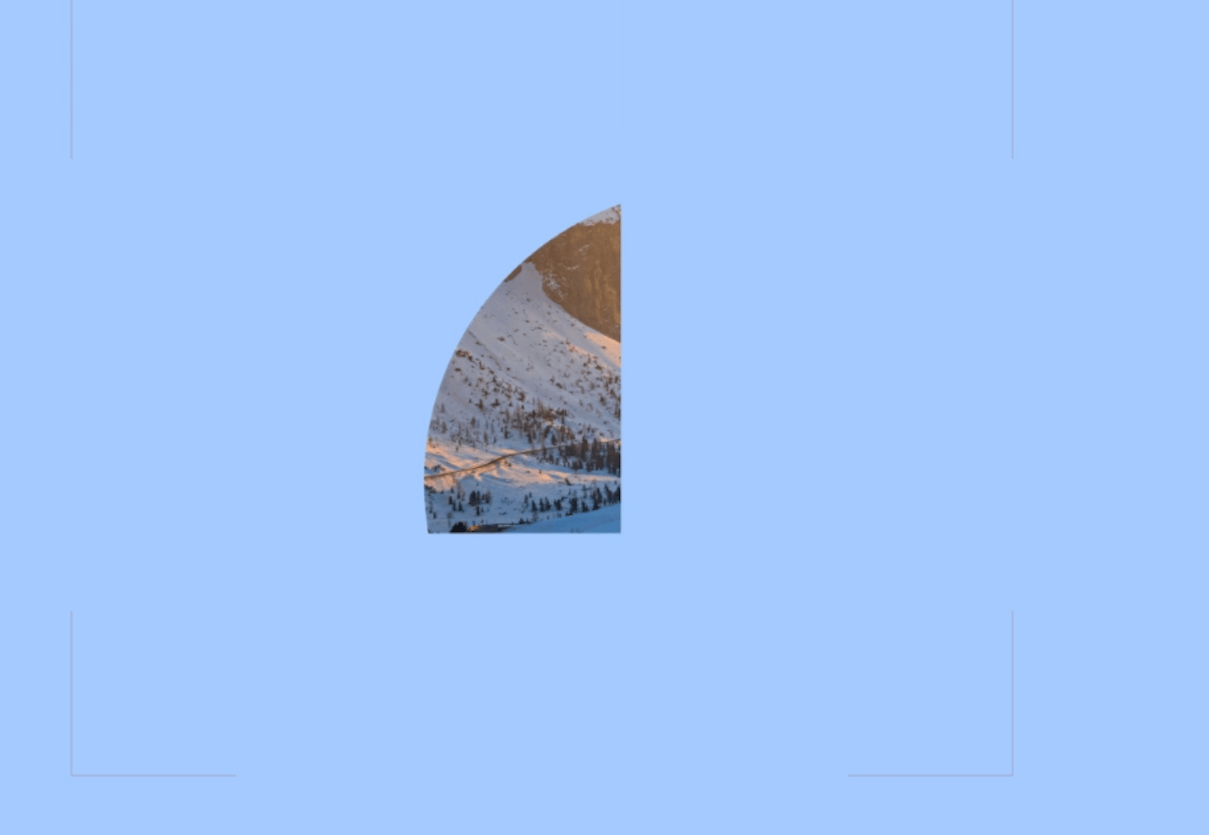
- Click on Ellipse Tool (Q) and create an ellipse covering the entire image.
- Press M to view the mask under the selected layer.
- You can use multiple methods here, but for the sake of simplicity, we will use Mask Expansion.
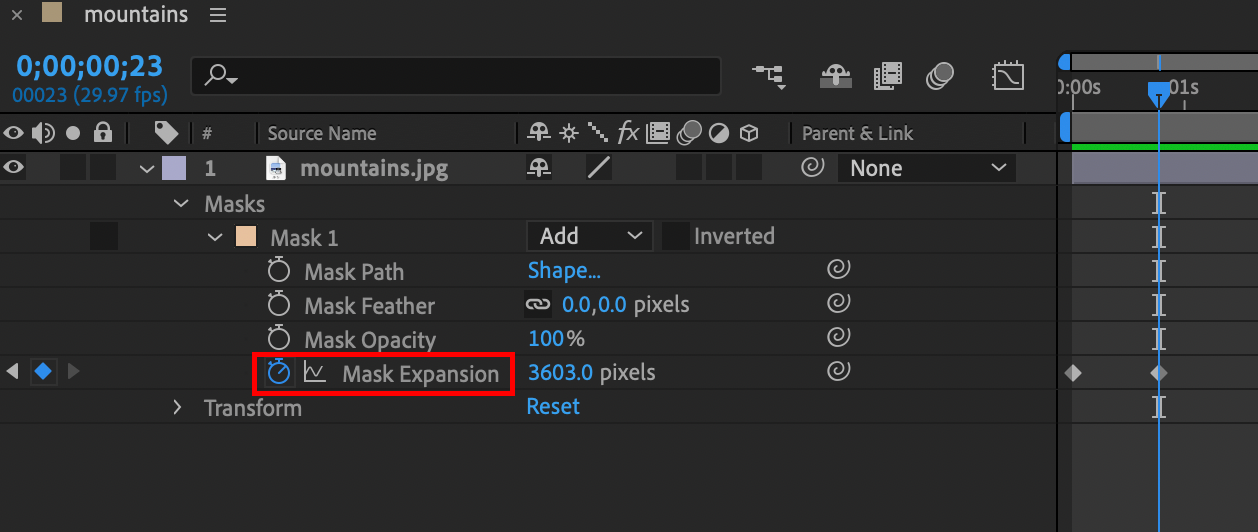
- Add one keyframe at the start and add another one a little ahead.
- In the first keyframe, change the Mask Expansion to -4395 (or any number which will make the entire image disappear). You will now have a reveal animation.
Everything explained up until now is the basics to show how basic masks are made and which masking modes can provide what kind of effect.
Thank you so much reading this blog. See you in the next one.