
In this boot camp, you will learn about masking the objects and images in illustrator using different ways without cropping the images.
Clipping Mask using Object
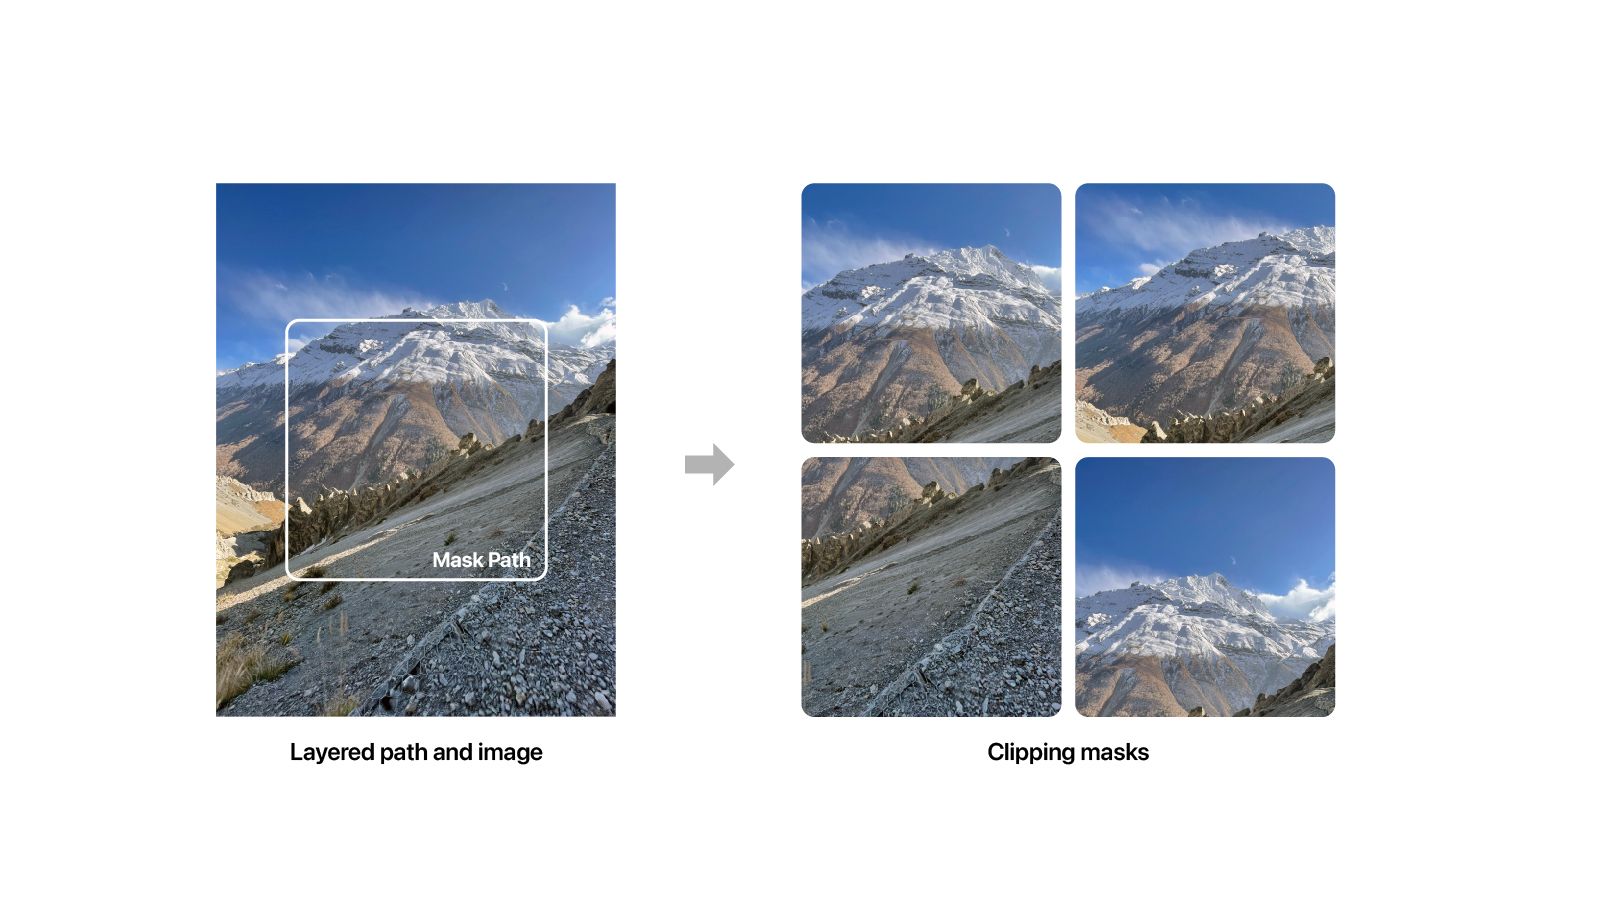
Clipping a mask means masking the object to desired shape or path. It is a very simple and widely used technique to mask images and objects in Illustrator.
❗
Using a clipping mask is not the same as cropping. It is a way of masking the object or images in Illustrator without losing its content. You can still move and edit the position of the content within the clipping mask, which is not possible if you crop it.
Creating a Clipping Mask
- Place the image or object on the artboard.
- Now create the desired shape or path above the image or object on the artboard.
- Select both the path and the images.
- Then, right-click and select Make Clipping Mask, navigate to
Objectin the top menu, selectClipping Mask>Make, or use the shortcut ⌘ + 7 on Mac or Ctrl + 7 on PC.
Clipping Mask using Text
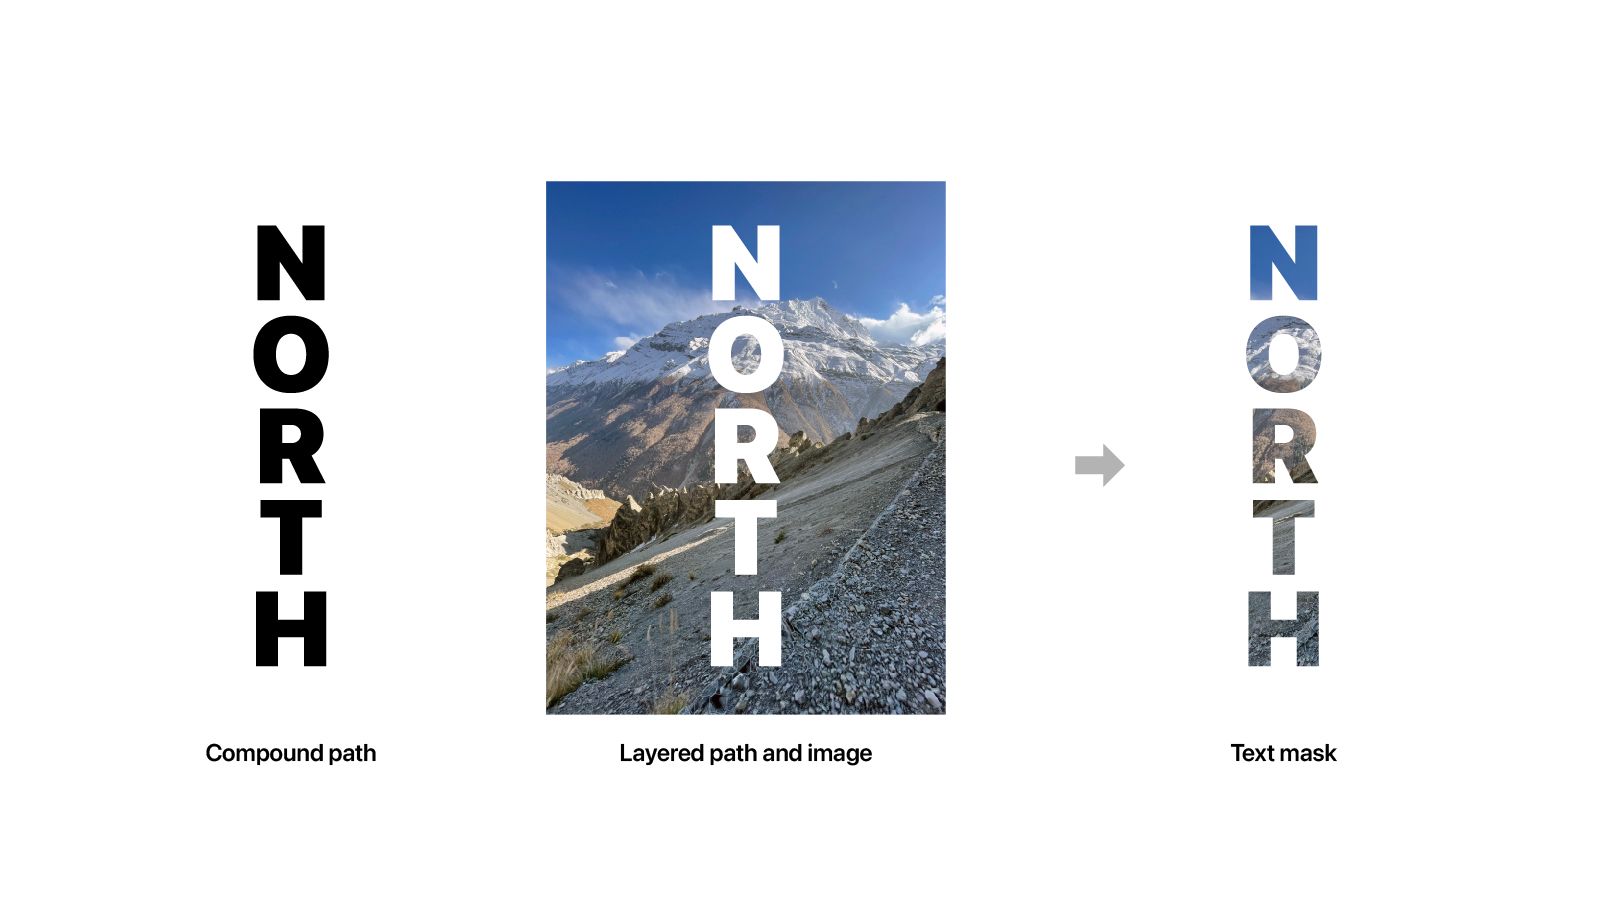
Like an object clipping mask, there is a way to mask objects and images using text.
Creating a Clipping Mask Using Text Outlines
- Type in the text you want to create
- Right-click and select Create Outline, or go to
Objectand expand the text. - Now you get the text mask. If you try to mask the images using the expanded text, it will mask the images with only the top letter. To prevent that, you need to select the text mask and go to
Object>Compound Path>Make. - Turning the expanded text into a compound path converts the layered text object to a whole object. This will prevent the problem of masking only the top layer text object.
- After doing so, you follow the same step to create a clipping mask. Move the expanded text layer above the image, and select both the object and the image to create a clipping mask to achieve the text mask effect on the image.
Opacity Mask
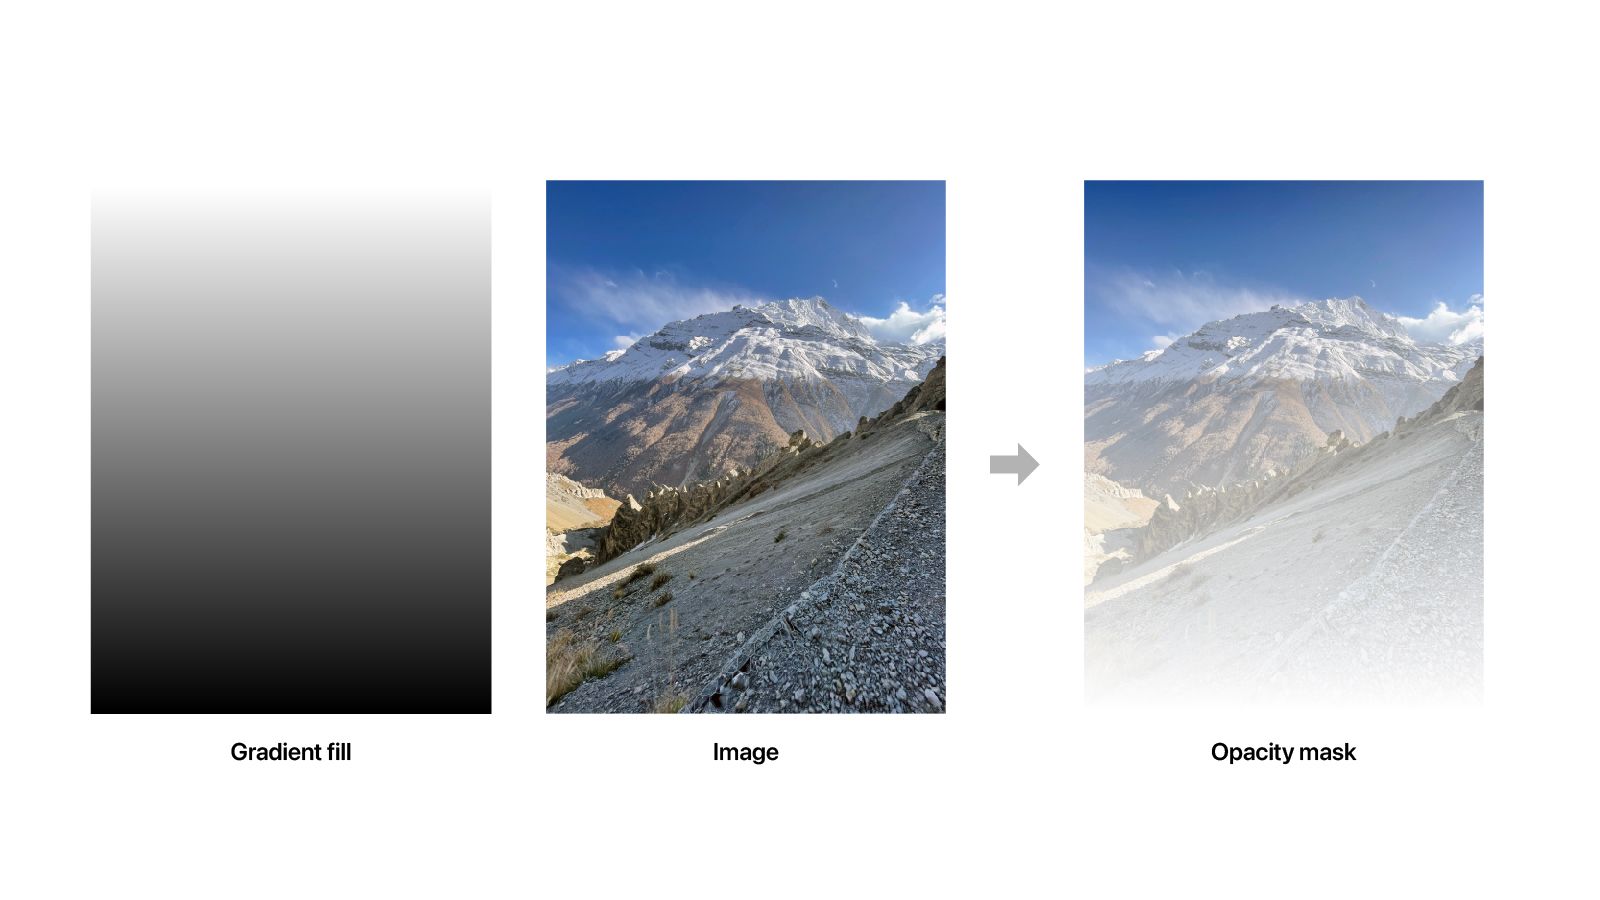
An Opacity Mask, also known as a transparency mask, is a technique to mask the images and objects to the desired path with gradual transparency. These are very helpful in creating social media posts and web content. It is also used to achieve the Photoshop-like gradient mask effect in Illustrator.
Creating an Opacity Mask
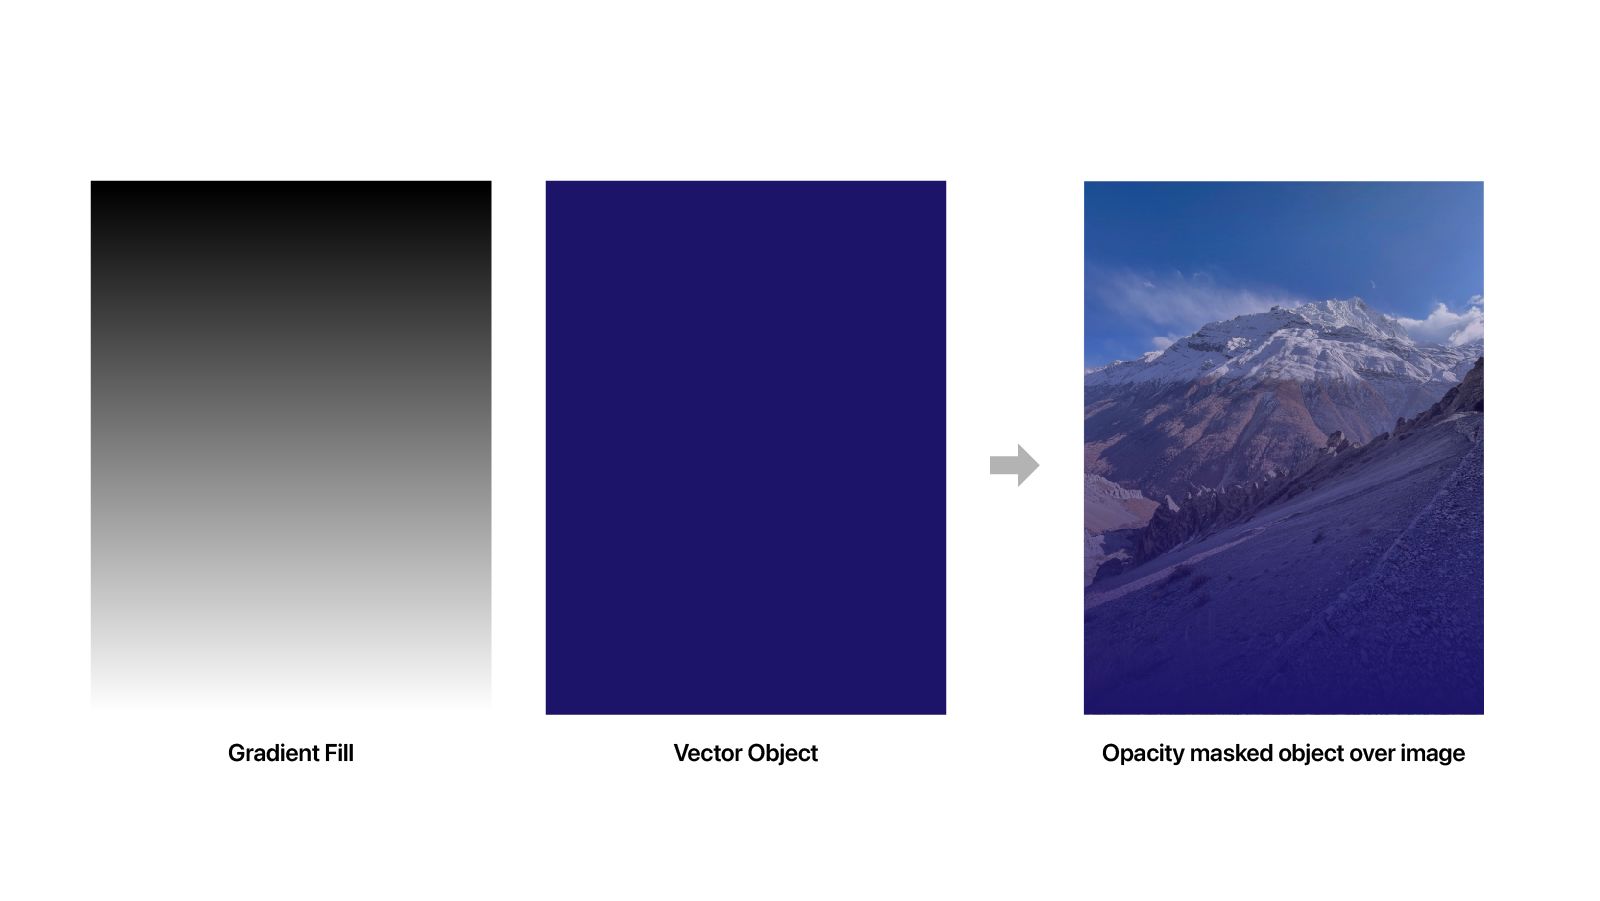
- First, create an object and apply the default black and white gradient (where black means opacity 0% and white opacity 100%).
- Like a clipping mask, place the gradient mapped object above the desired images or object.
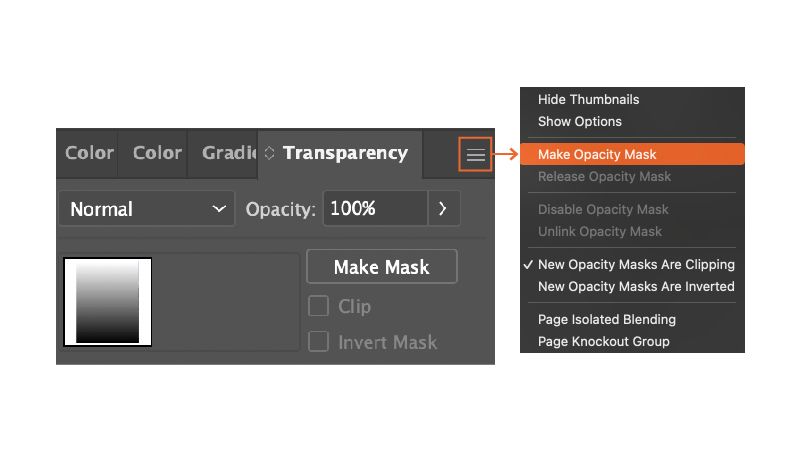
- Select both the object and the image and navigate to the transparency panel. Select
Make Opacity Maskfrom the transparency option menu.
- To edit the opacity mask, you have to navigate to the transparency panel and select the opacity mask. After this is selected, you can add and edit the gradient. Like masking in Photoshop, the black gradient represents the alpha or transparency channel, and white is opaque or filled in Illustrator.
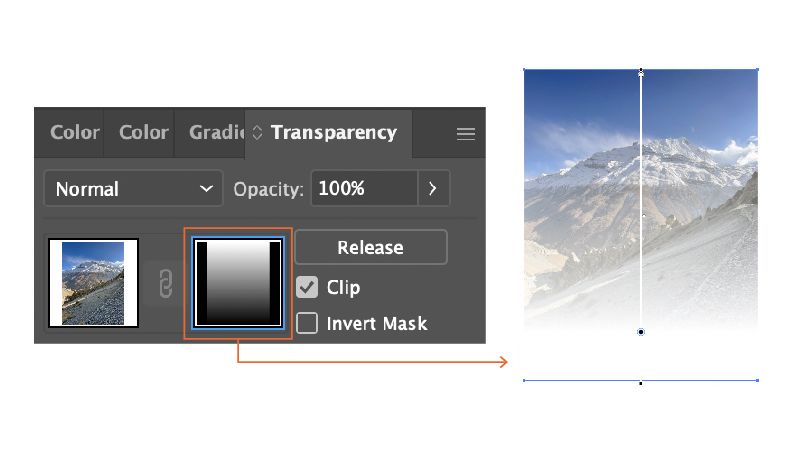
- Make sure you uncheck the opacity mask before editing other Illustrator objects. You won’t be able to select objects other than the opacity mask if the opacity mask is selected.
In this way you will be able to use the clipping mask and opacity mask in Illustrator with ease. Let me know if you found this tutorial helpful.