
We mostly make mobile games at Yarsa Games. Reducing the number of polygons in the in-game objects is one of the most important aspects of runtime optimization. This is a short, step-by-step tutorial on how to make a low poly water fountain that is cheap on computing resources.
Game Plan
You cannot simulate water in real-time since it is quite resource-intensive and a bad idea for a mobile game. That's why we need to use a trick to make the water look like it's flowing. This tutorial assumes that you have a basic knowledge of Blender and Unity.
When creating a 3D model for a mobile game, you must have just a few faces/edges/vertices in your model. You can't have hundreds of faces. Dozens are already too much if your scene has several models rendering at a single frame. That said, either you can start by creating a realistic design and then reduce poly counts or simply design low-poly designs.
Step 1: Modelling the Fountains
Let's start by modelling a low poly fountain using Blender. We design two different models for the fountain and the flowing water. Then align the two models together.

Step 2: UV Unwrapping
The next step is UV-unwrapping, so we can design a matching texture for our model. You can unwrap the model of the fountain in any way you like because we're not applying any texture to it. However, the water model needs to be rectified and unwrapped in a specific way.
For best results, unwrap the models as shown in the screenshot. The cylindrical mesh's vertical and horizontal parts must be rectified and unwrapped along the Y-axis. The water texture will move along the Y-axis, so ensure all the UV Islands align accordingly.

The stretched areas of the UV Island mean the water will flow faster, and the condensed parts mean the water will flow slower in those areas. Then, stretch the bottom areas of the plane a bit more than the areas near the top. You can add support edges to fine-tune the UV Map.
Step 3: Adding Textures
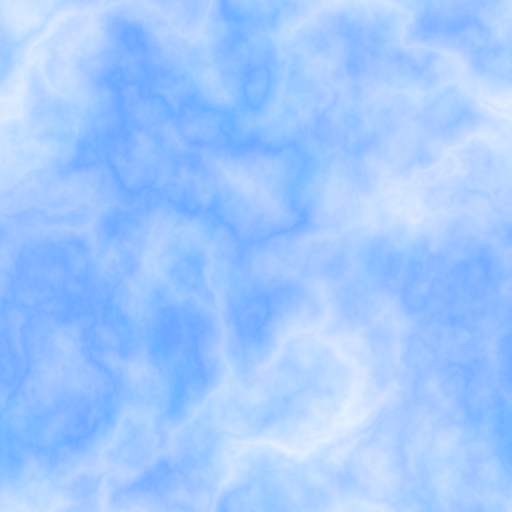
For the water texture, set the foreground colour to light blue and the background to white. I'm using a texture that looks like a sparsely cloudy sky. Designing a cloudy texture is pretty trivial on both Gimp and Photoshop.
If you're using Photoshop, from the menu bar, select the Filter → Render → Difference Clouds option to generate a cloud.
If you're using Gimp, from the menu bar, select the Filters → Render → Noise → Difference Clouds option.
You can repeat the command using the Ctrl + F shortcut. Repeat the process to change the difference cloud to your perfection.
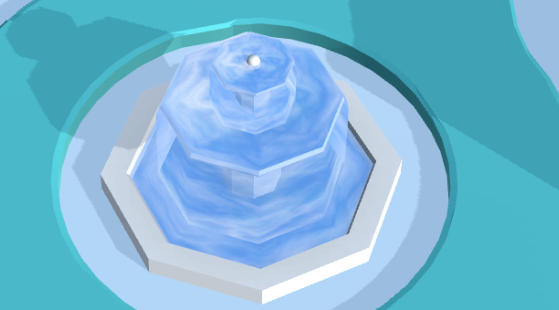
Step 4: Importing to Unity
After you're done with the texture, import the mesh and texture to Unity. Ensure the Wrap Mode of the water plane texture is set to Repeat.

Then add new material to the water model and apply the water texture to the material.
Step 5: Make the Water Flow
To make the water look like it's flowing, you can simply slide the texture outwards by changing its offset using a shader or with a script.
Using a Script
We can use the Material.SetTextureOffset() function to increment the values of the offset of the texture, so it looks like it's moving outwards. Attach the following script to the water surface model object. The script simply gets the instance of the Renderer component of the water surface and, in each frame, changes the offset.
using UnityEngine;

public class FountainRenderer : MonoBehaviour
{
    float speed = 0.2f;
    Renderer renderer;

    void Start()
    {
        renderer = GetComponent<Renderer> ();
    }

    void Update()
    {
        float offset = Time.time * speed;
        renderer.material
        	.SetTextureOffset("WaterTexture", new Vector2(offset, 0));
    }
}
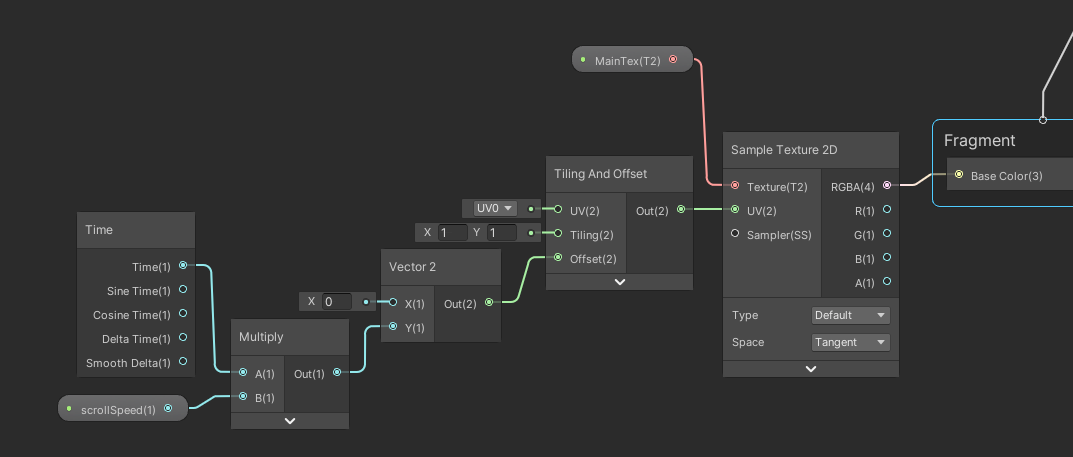
Using a Shader
Alternatively, if you prefer using a shader, you can create a new shader using the following screenshot as a reference. The results should be similar to using a script.
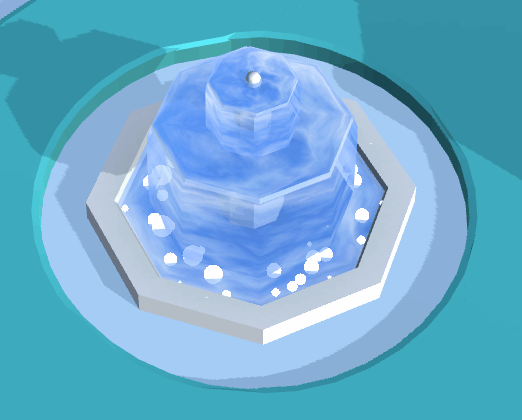
Final Results
You can add a basic particle system to represent water splashes and bubbles as a final touch.
What Next?
You can also play with the water texture and add additional textures to make the water more realistic in the PBR setup. The possibilities are unlimited, but remember, the more maps you add, the more computing resources it will take to render your model.
Thank you for reading this far! Subscribe for more and until next time.