
I always wondered how people integrated images and text in their UI, as seen in many tutorials. I used to write the text and drag the image near it to make it look like it was integrated along. The problem with my method was that the anchor for text and image didn't always fit properly, making the images appear at different locations compared to text on different resolution screens.
I came across TextMeshPro, a really cool text for Unity that supports multiple features unsupported by the default text system from Unity. Follow the listed steps to integrate this text solution.
Step 1: Find Your Image
You need an image you want to integrate with the text. I made simple Xbox button icons to demonstrate.
Step 2: Import Image Settings
Set your imported image's Sprite Mode to Multiple. Note that this texture must have multiple sprites that can be sliced so that we can use a single atlas to show different images.
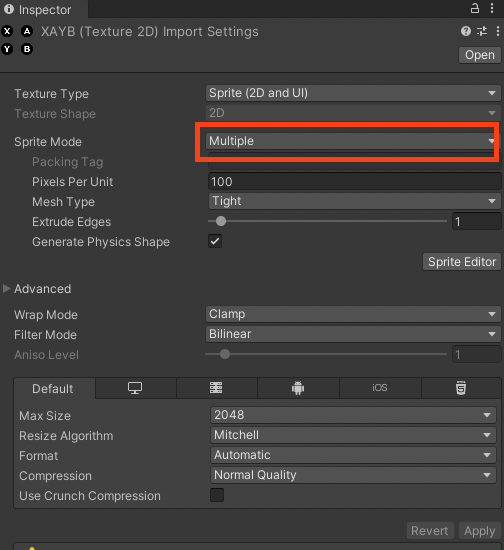
Sprite Mode to MultipleRelated article: Level Generator Using Image Texture in Unity
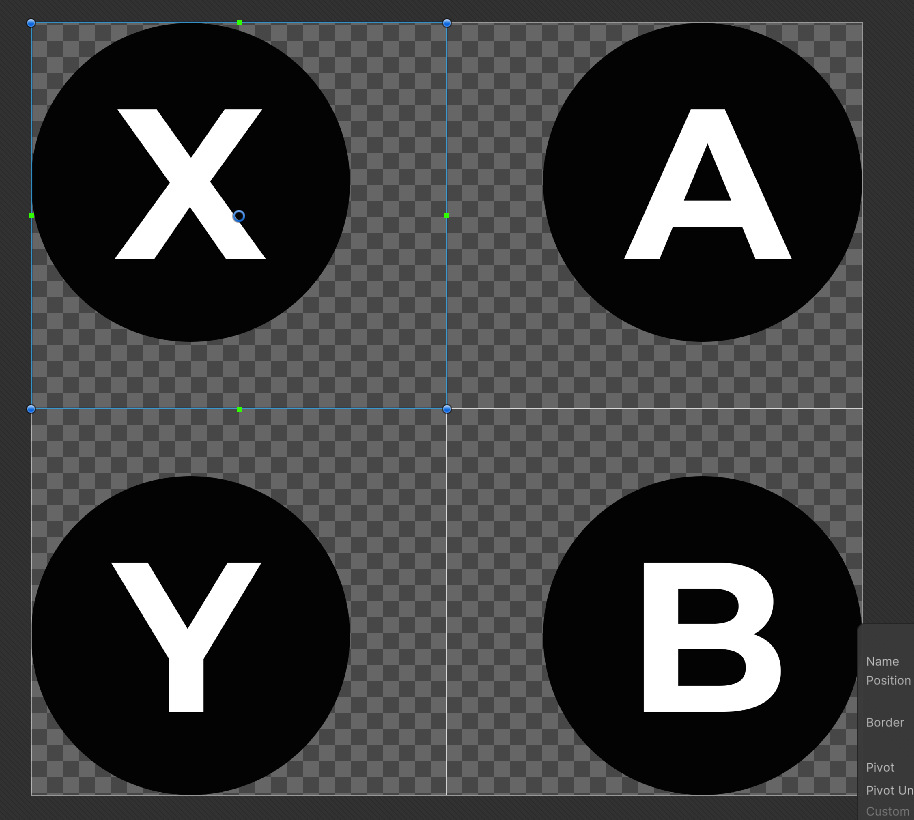
Step 3: Slice the Images
Slice the images by opening the sprite editor.
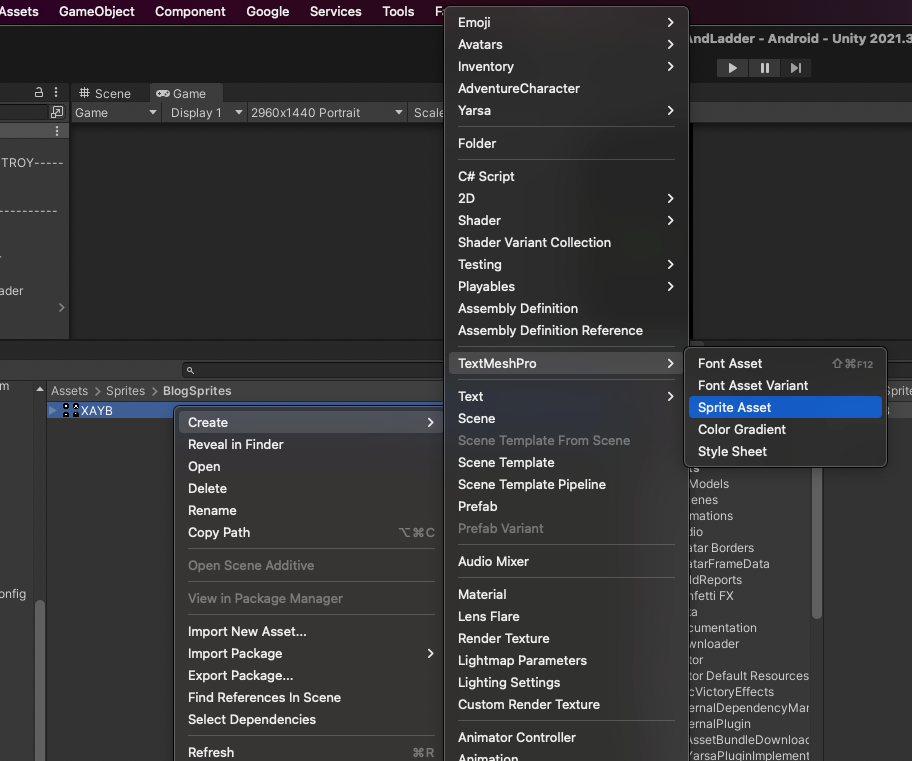
Step 4: Create the Sprite Asset
You need to create a sprite asset for TextMeshPro use. To do that, you must first select the image you want to create a sprite asset from.
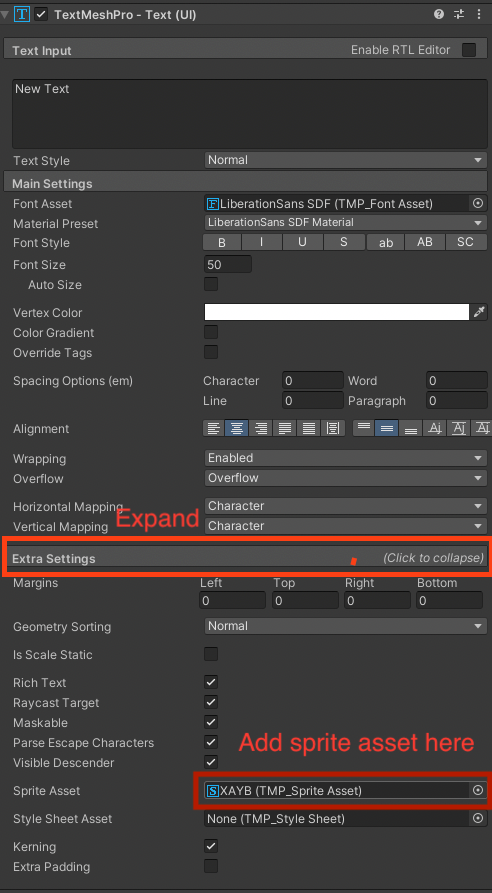
Step 5: Add TextMeshPro to the Canvas
Now, create TextMeshPro text in canvas. Expanding the extra settings allows you to find a location to put newly created sprite assets.
Also read: Tagged Unions in Typescript
Step 6: Using Text With Images
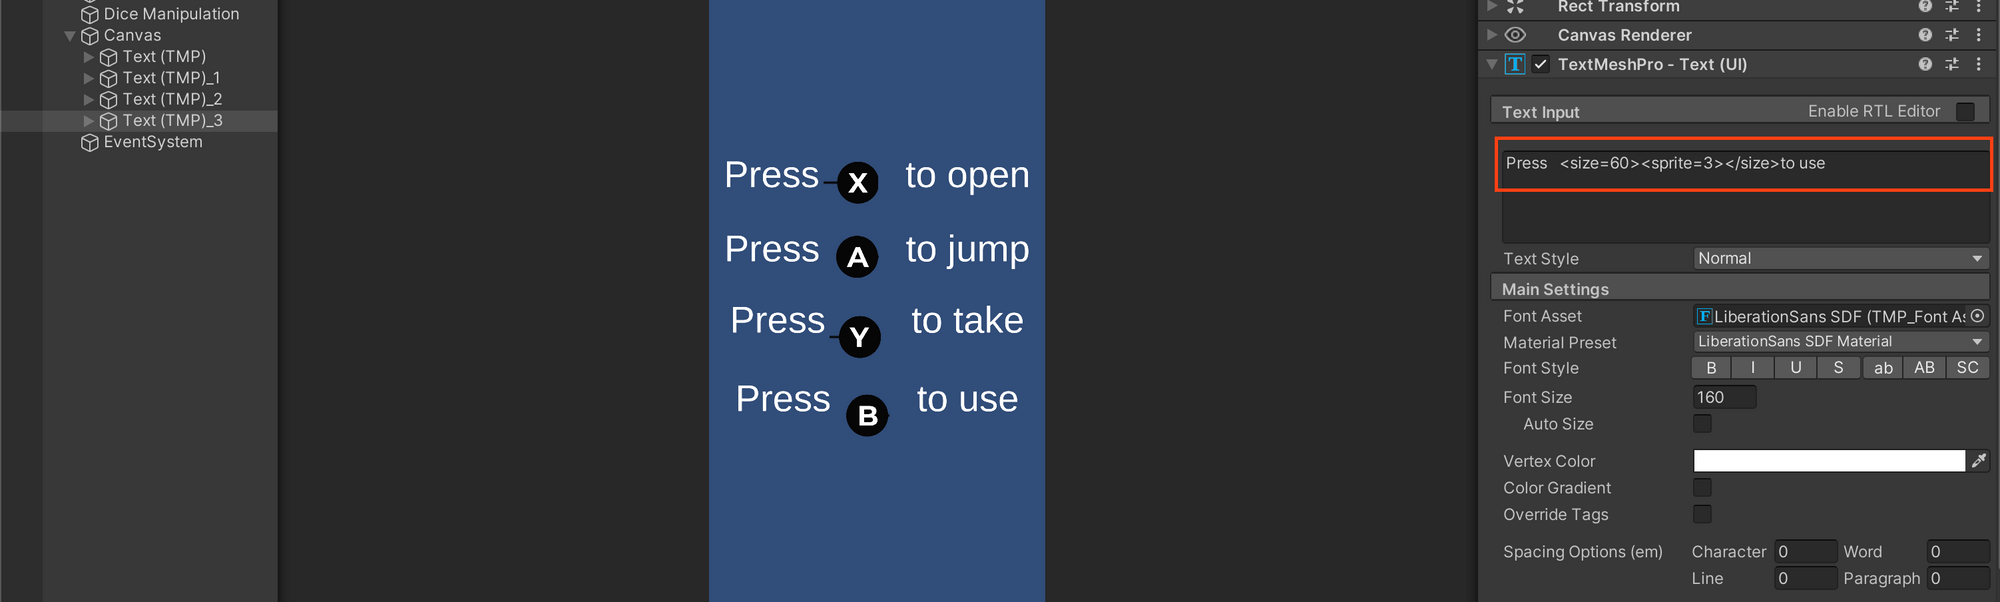
After setting these up, we can simply write any text we want. When we want to add an image, we can use the index of the sprite in our sprite atlas. All the images sliced are indexed while creating the sprite asset. A simple example of how we can use an image is:
Press <size=60> <sprite=0> </size> to jump //
Here, 0 is the index of the sprite. To increase the image size, I am using a size tag.
I have used all the sprite indices to show different images in the example below.
Using these steps, you can integrate images easily using TextMeshPro.
In the example above, I used different tags like size and sprite, which are rich text supported. To learn more about all the different tags supported, please refer to TextMeshPro's official documentation.
That's it I hope you learned something new. Please leave any comment you have about this article.