
I remember the days when I was first starting to learn Blender and I loved learning about modeling and texturing and creating 3D models. However, the bane of my existence was setting up the scene with proper lighting to do justice to my somewhat decent modeling skills. After catching up with a few tutorials I caught up with using HDRIs, and it completely changed the game.
Here’s how you can set up a simple environment texture for your scene on Blender.
What are HDRIs?
HDRIs or High Dynamic Range Imaging technology expands the dynamic range of an image so that it captures both the shadows and highlights. In simpler terms, it captures the whole lighting situation from a scene. We can then use HDRIs as environment textures in Blender. So, it's like a ready-made lighting set-up that can be imported into your scene.
Where to get HDRIs?
There are a ton of great resources out there for getting free HDRIs. However, I prefer getting them from Polyhaven. They have a great collection of HDRIs, textures, and even models that are free for personal and commercial use.
Remember the lighting you choose will set the mood and tint in your renders. For a neutral look, I prefer using studio setups, or ones with urban or greyish lighting. If you choose a sunset HDRI, your scene will have a yellowish tint/glow.
So head on over to their site, download the HDRI that you want and let's get started. I am choosing Studio Small 09.
Using HDRIs on Blender
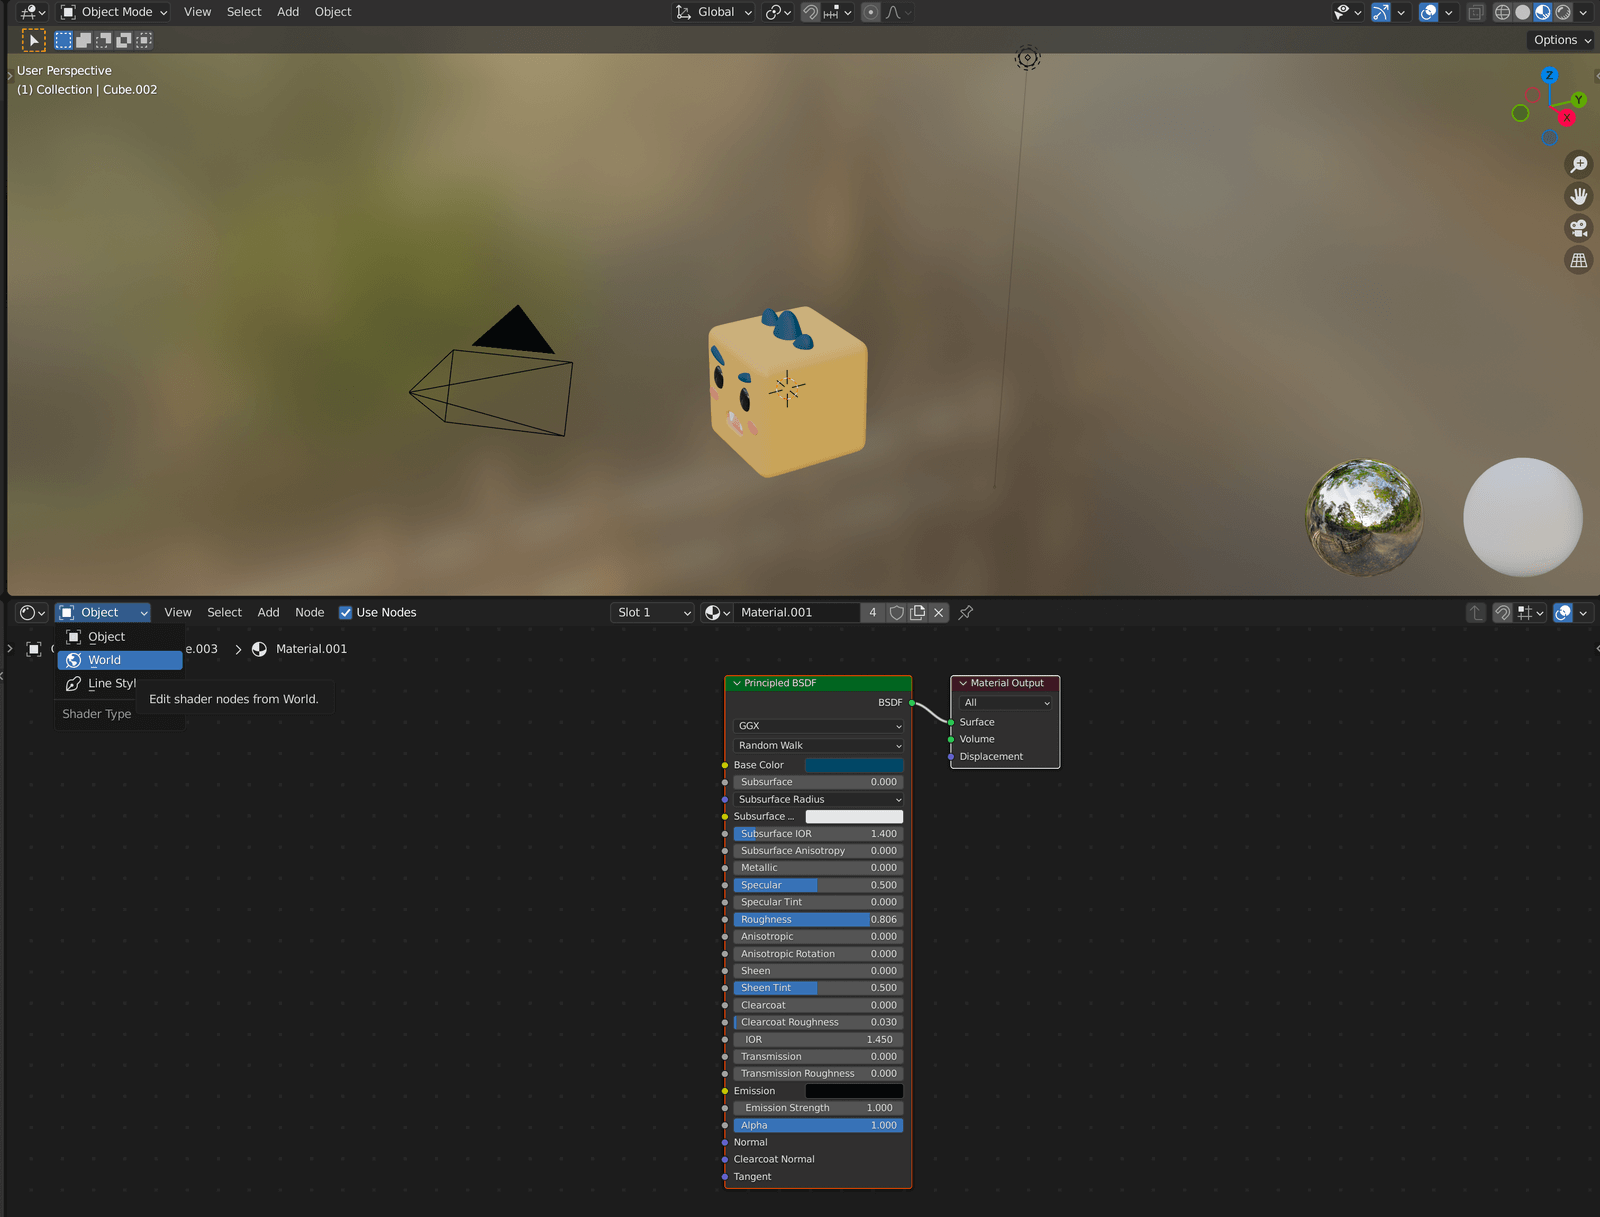
Here, I have a small square monster who looks enraged at the fact that he is in fact a glorified default cube.
First, let's tab into the Shading viewport, by clicking on it at the top bar.
You should see something like the window below.
On the Shader Editor panel, tab into the world instead of the object by choosing the option from the drop-down menu.
Add an environment texture node by Shift+A > Texture > Environment Texture.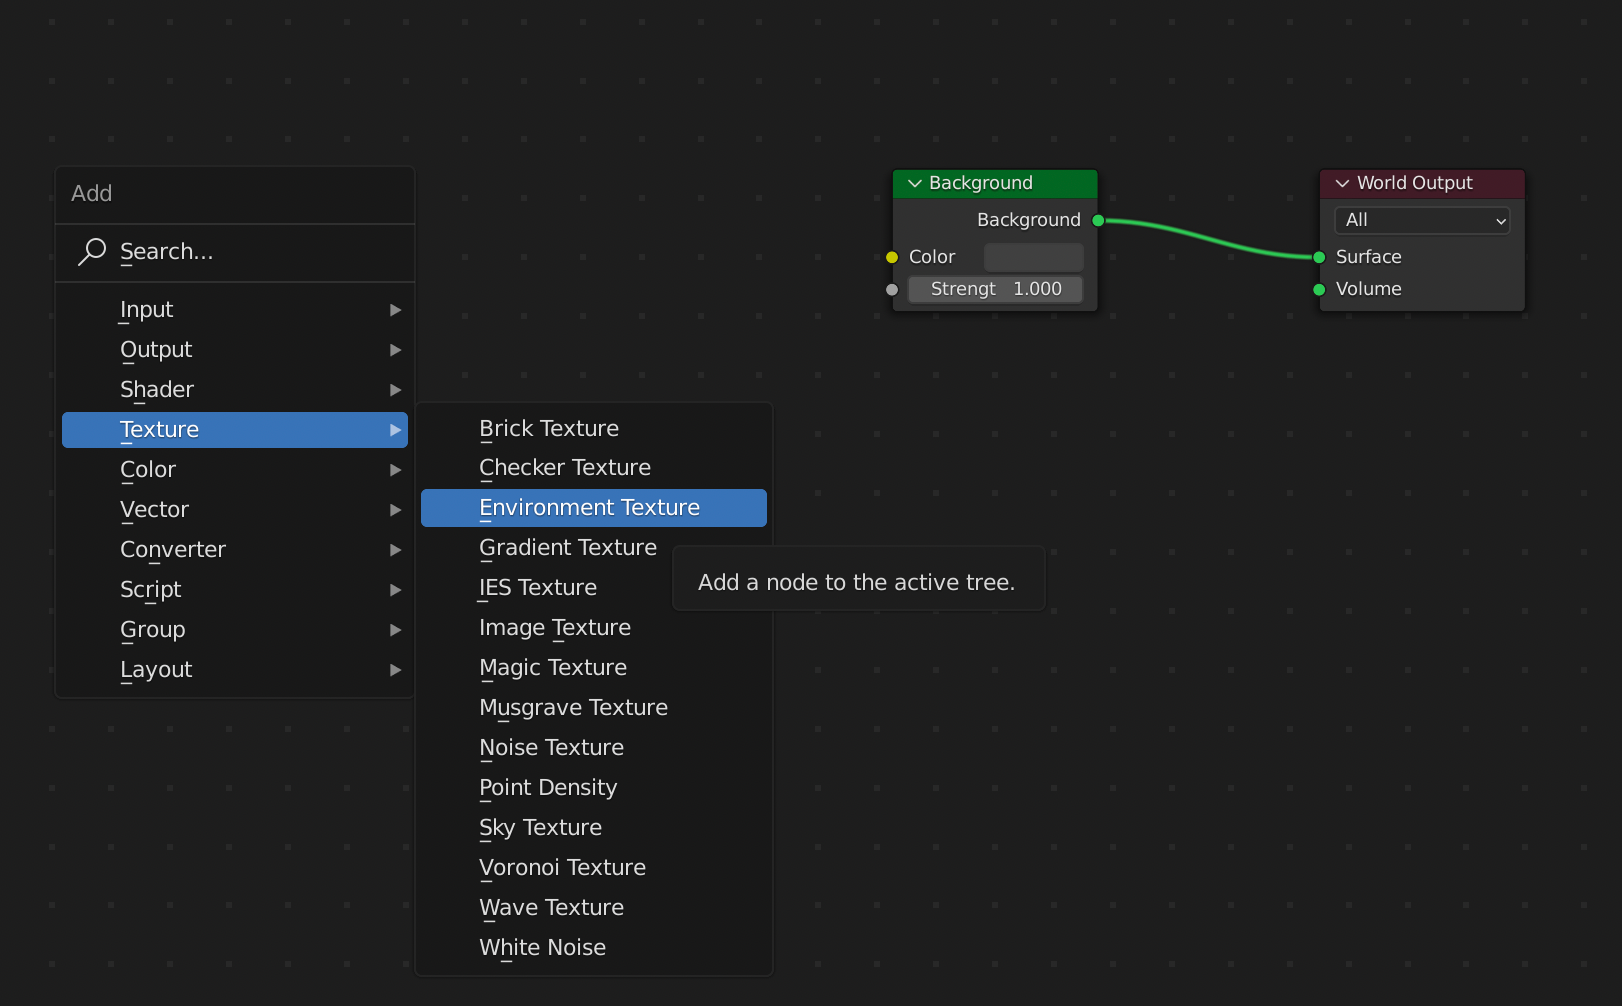
Click Open and locate the HDRI that you have downloaded. It should be a .hdr file. Then connect the yellow-coloured nodes from the environment texture to the background.

There, you're done setting up your HDRI. Tab back into Layout mode and check your scene in Render mode to see the environment lighting.
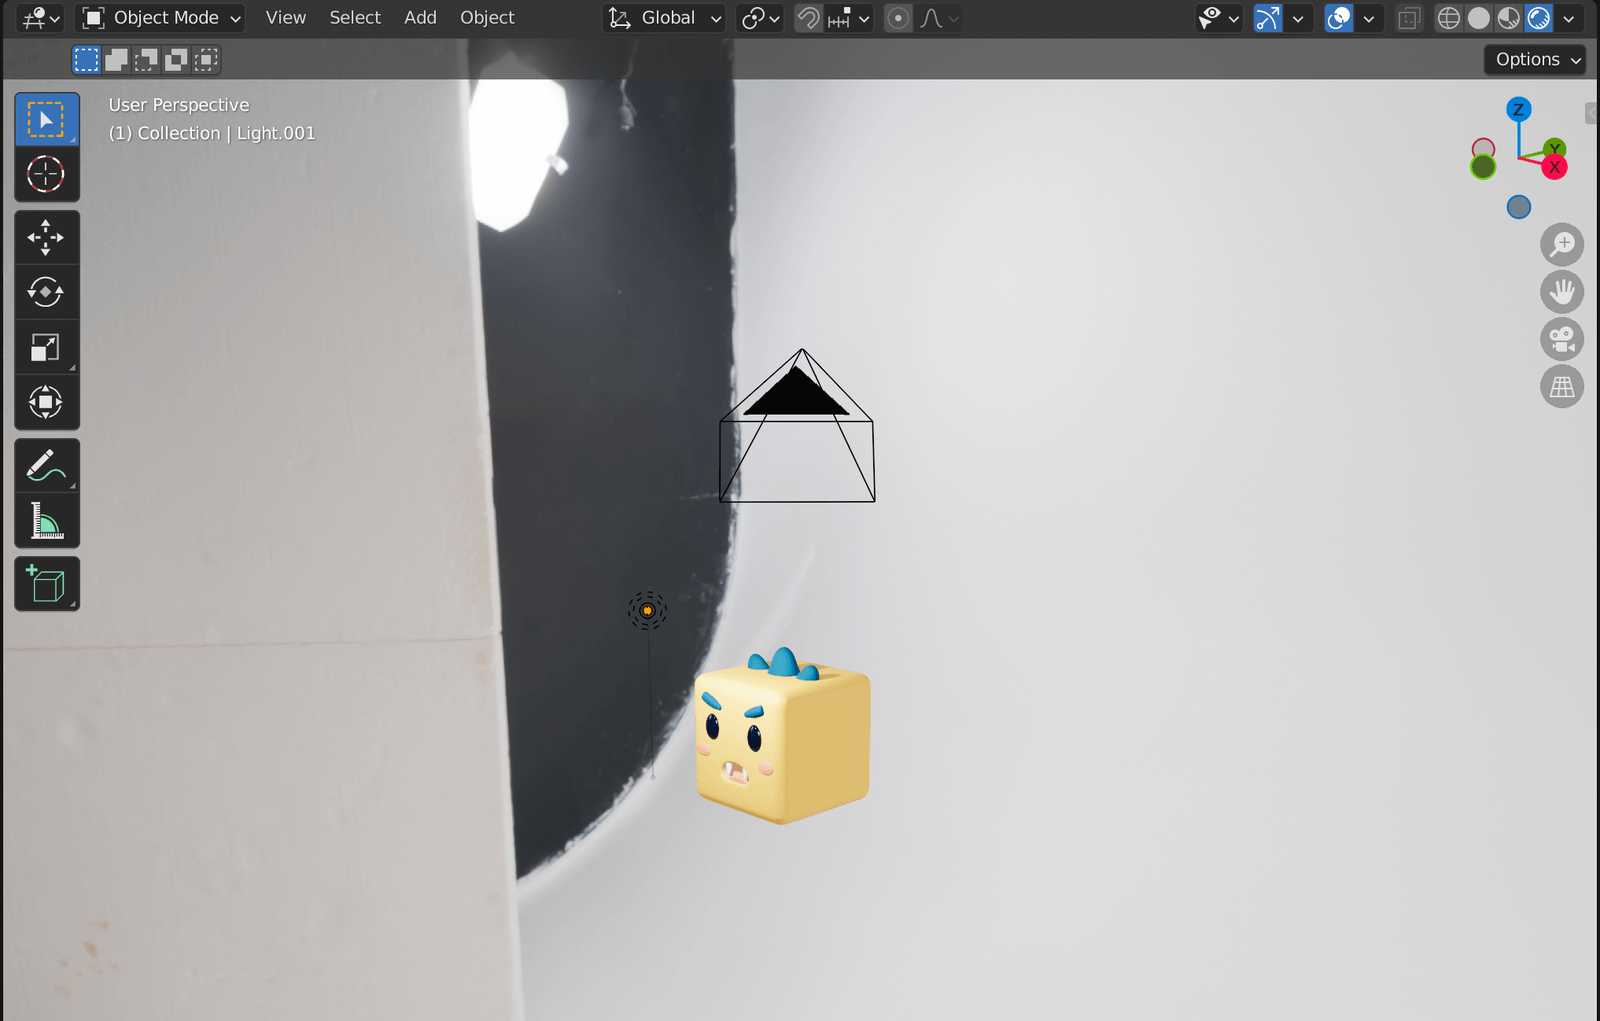
There we have it, our cute and angry cube in the HDRI environment!
Quick tip:
You can always play around with the strength of the HDRI light by changing it at the Background node.
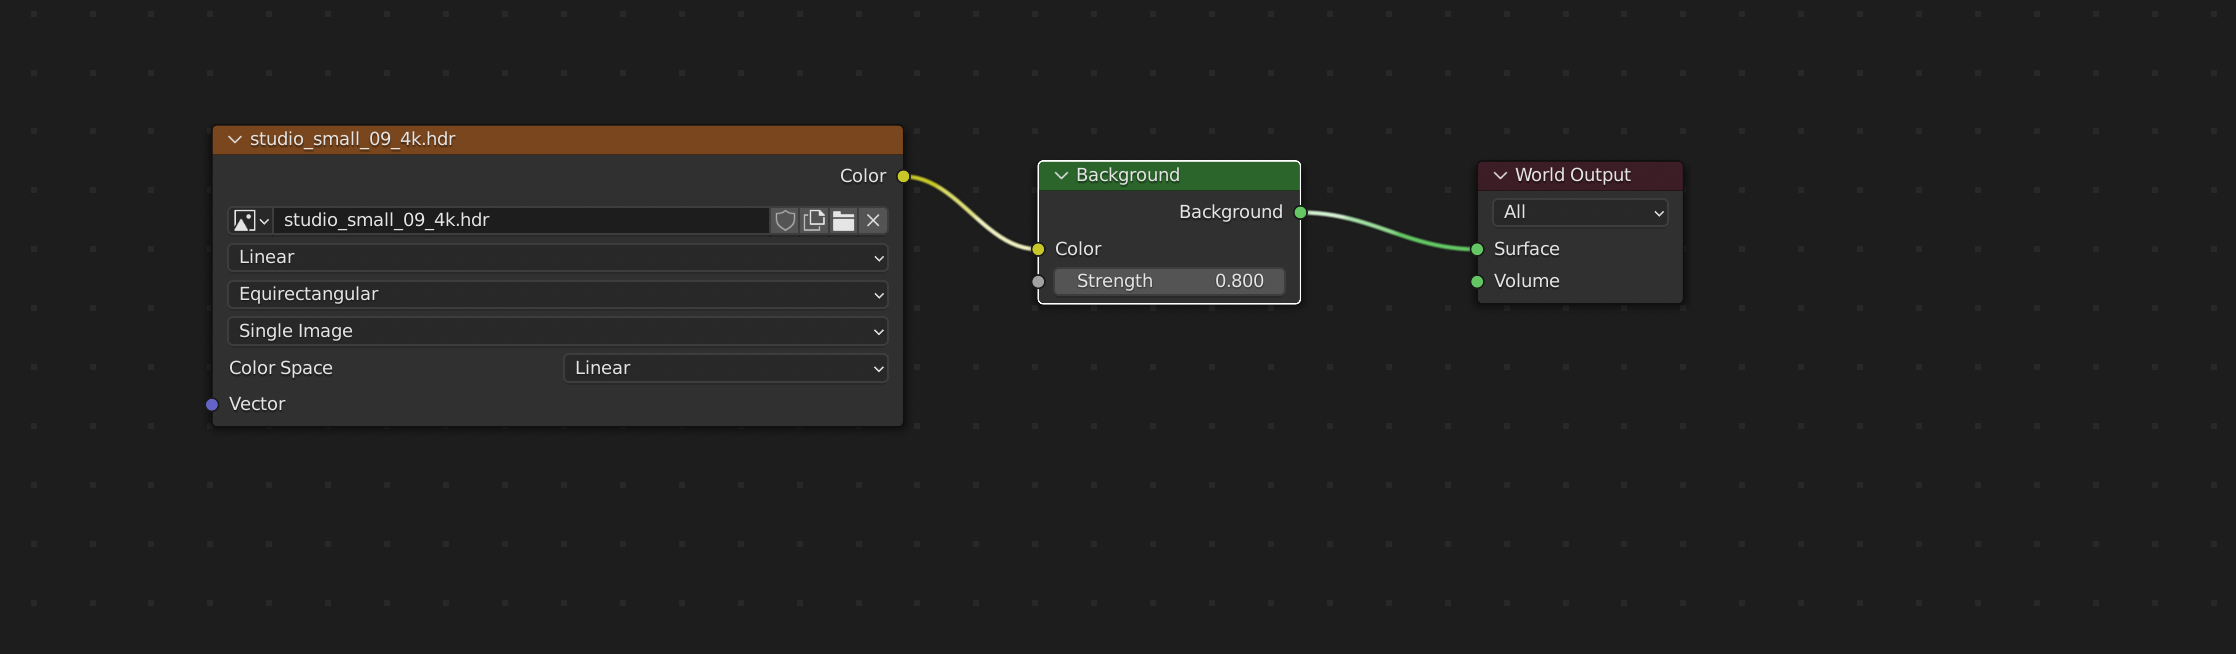
If I have more lighting set-ups in my scene then I prefer setting the HDRI strength anywhere from 0.5 to 0.8 or if I want more glow to a scene, I bump up the strength to 1.5 or 2.
Great! there you go. Quick and easy lighting setup with HDRI environment textures! For polishing up your renders, you can always play around with adding different lights and messing with the Color Management panel in your render settings.