
3D icons and illustrations have been popular for a while, especially in UI design for web and mobile applications. There are many free and paid 3D icons and illustrations resources in the interwebs, but here is how you can make your own hand icons using Blender.
Here is a breakdown of my process.
- Create a 3D hand using vertices and skin modifiers
- Texture the hand model
- Create a rig for the hand
- Set up the scene for the render and create poses
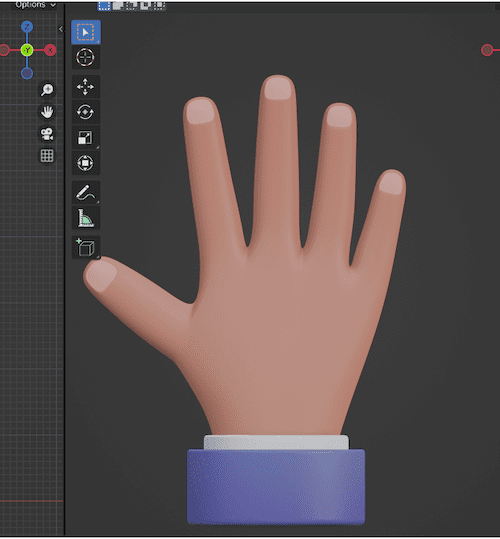
Modelling the Hand
First thing first, we have to make a hand. We are going for a very stylized cartoonish hand. You can start with a sketch if you like, but since I am not that good at drawing hands, we will look for a reference picture on google.
Once you have found a suitable base, drag your image into Blender and lower the opacity so we can start building the model using that as a reference. The reference image can be of a real hand; we just need the fingers and palm ratio to build our model.
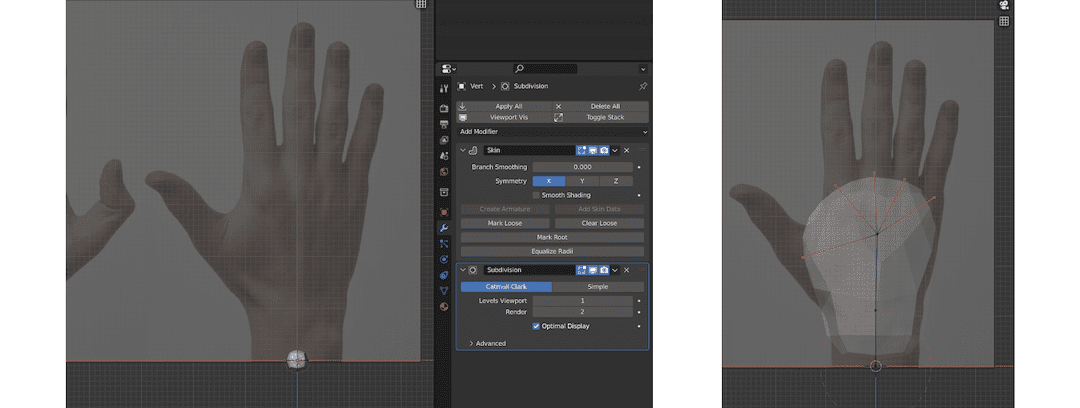
- Add a single vertex with Shift + A >
Mesh>Single Vert>Add Single Vert. - Add a Skin Modifier and a Sub-division Modifier to the single vertex from the modifier tab.
- Extrude the vertex by pressing E, and scale the vertices with Ctrl + A.
- Go on extruding the vertices to create the hand shape. After you are satisfied with the hand model, you can apply the skin and sub-division modifiers to get the solid hand object.
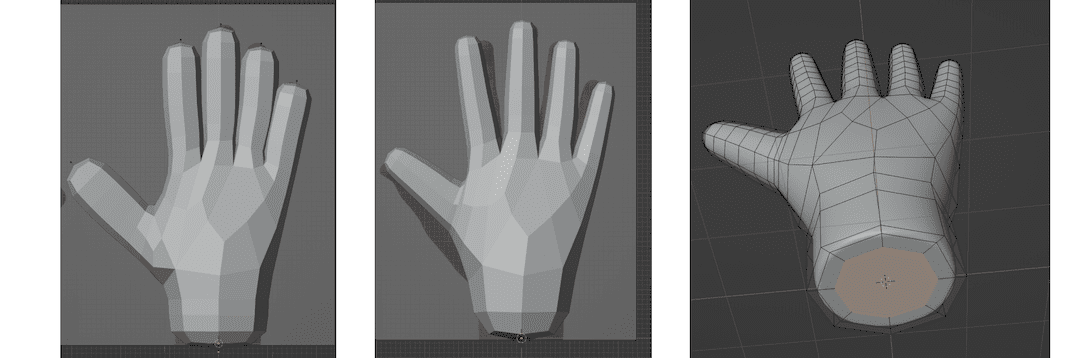
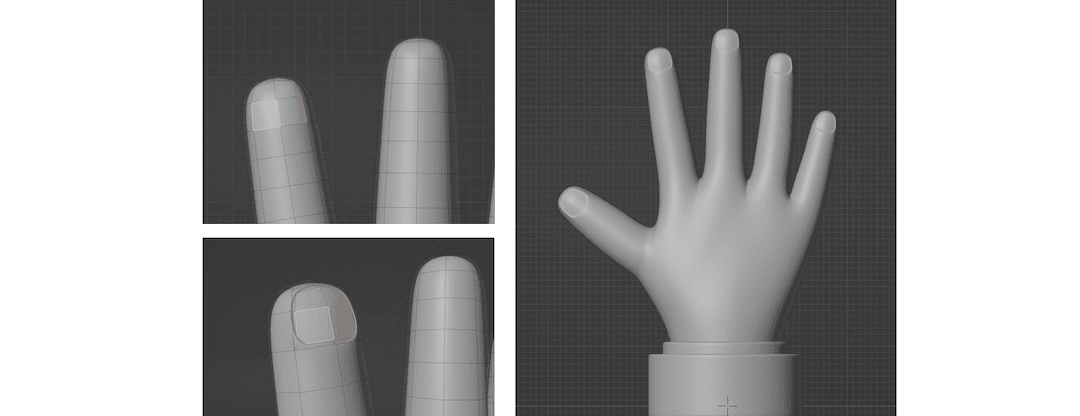
You can stop the modelling process here, but I have decided to add some more details to the model, such as nails and the ends of a shirt and suit cuffs.
Texturing the Hand
Texturing is always the best part of my 3D modelling process. Since this model will only be used for 2D image renders, I will only use Blender materials for texturing – there is no need for UV maps and image textures.
So, we just need to assign the colours to the coloured parts of the hand.
Hand Texture
First, we are creating the hand texture. For that, I used a colour ramp to get a colour gradient. I want the tips to have a little pinkish colour than the base. After the texture material is created, assign the material to the whole hand.
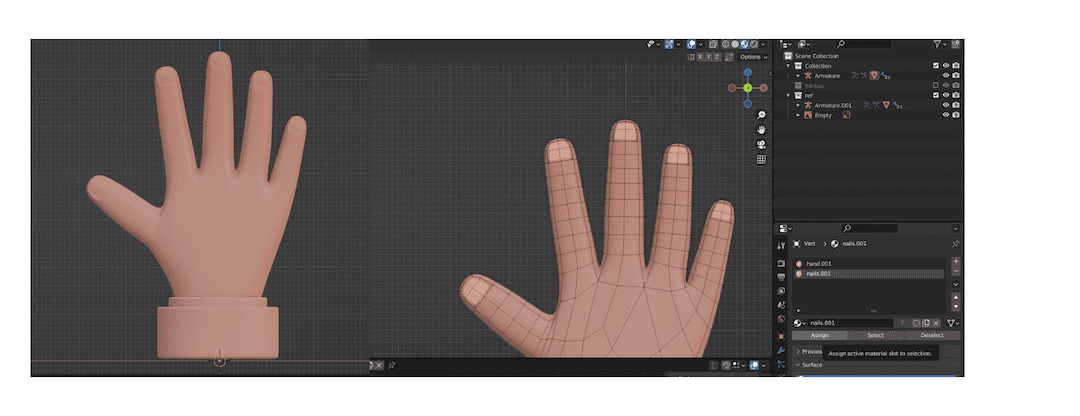
Nail Texture
Create a new material for the nails in the hand model's material tab. Then in edit mode, select all the faces that are part of the nail, and click the Assign button to assign the colour to the selected faces.
Shirt Texture
Repeat the same process on the hand model for the shirt and suit ends. Create a new material, select faces in edit mode, and assign the material to the faces of the cuffs.
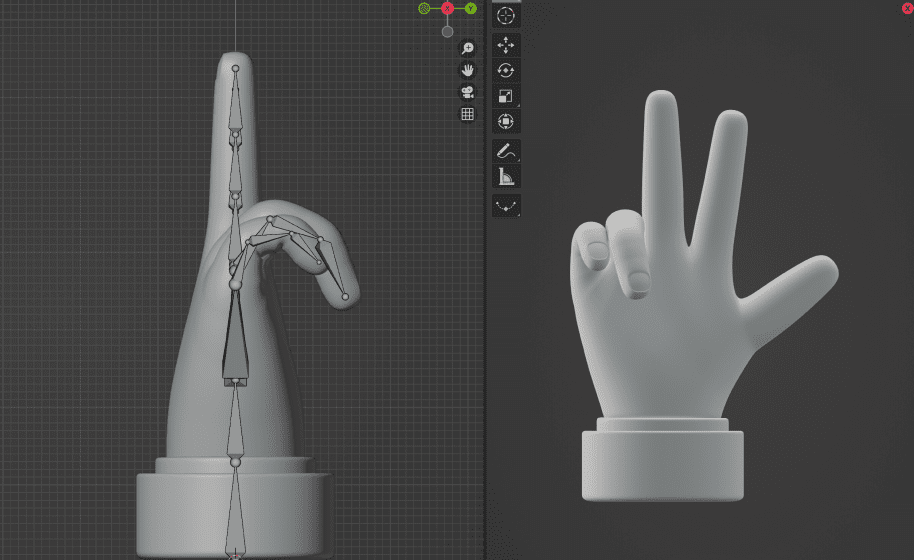
Creating the Hand Rig
Once you are satisfied with the hand model, you can move on to creating the rig for it. Creating the rig is a straightforward process.

- Start with a single bone, then work your way upwards. The concept is to add new bones where the fingers would bend. It should resemble a simplified realistic bone structure.
- After creating the armature, parent the hand to the bone as bone. Select the hand first, Shift select the bone, then press Ctrl + P to bring the parenting menu. Then select the Automatic Weight option. This should parent the hand to your armature. Tab into pose mode with the skeleton to check out the rig.
- We are almost done. Now, all we need to do is use the rig to create the hand poses for our icons. Select the bone and tab into pose mode. Then select individual bones and rotate them or move them with Blender shortcuts G for moving and R for rotating.
Setting up the Render Process
Now that we are ready to pose, we will set up a camera with studio lights to start rendering our hand icons. Here is how I have set up the scene.
- One main camera in orthogonal mode
- A studio light HDRI plugged into the world as environment texture
- Three-point lights are set up to focus on the hand
- Flim settings on transparent mode to render an image with a clear background
Since we are making multiple poses, we need some sort of stack to save all these different poses, or we will lose them once we move on to making a new pose.
So, we are using a little animation hack. Here is how we can save all these poses as keyframes so that if we need to re-render a pose, we can simply pick those keyframes instead of modifying the armature every time.
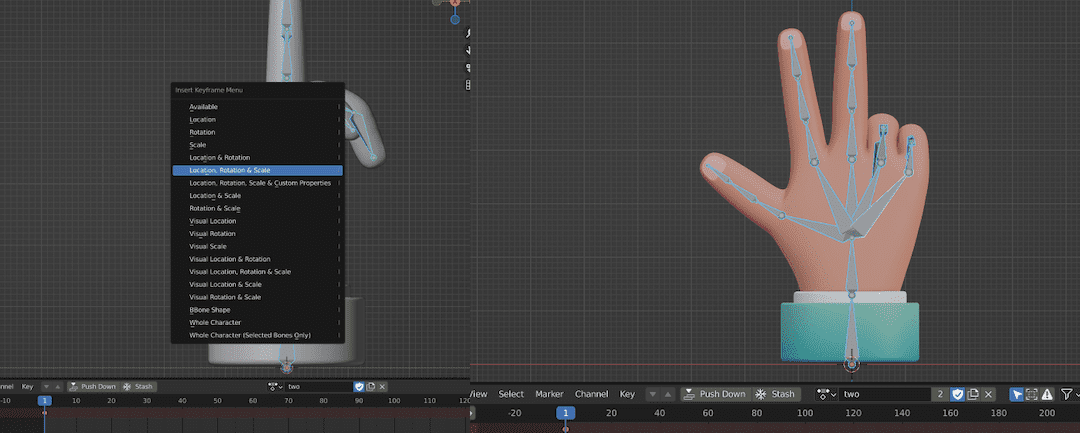
- Tab into pose mode and modify the bones to create a pose. In the action editor tab, add a new action and give it a name you can remember.
- Select all the bones by pressing A. Hit I to bring up adding a keyframe menu, then select the Location, Rotation & Scale option to add a keyframe for all the bones.
- Select the Fake User button in the action tab to save the action even when no armature is actively using it.
- To add another pose, clear the action by removing it by clicking the cross button. Select all the bones by pressing A, then open the pose menu and select the clear all transform option from
Pose>Clear Transform>All. This will reset your armature to the default pose. - Now, create new poses by rearranging the bones and save them as actions!
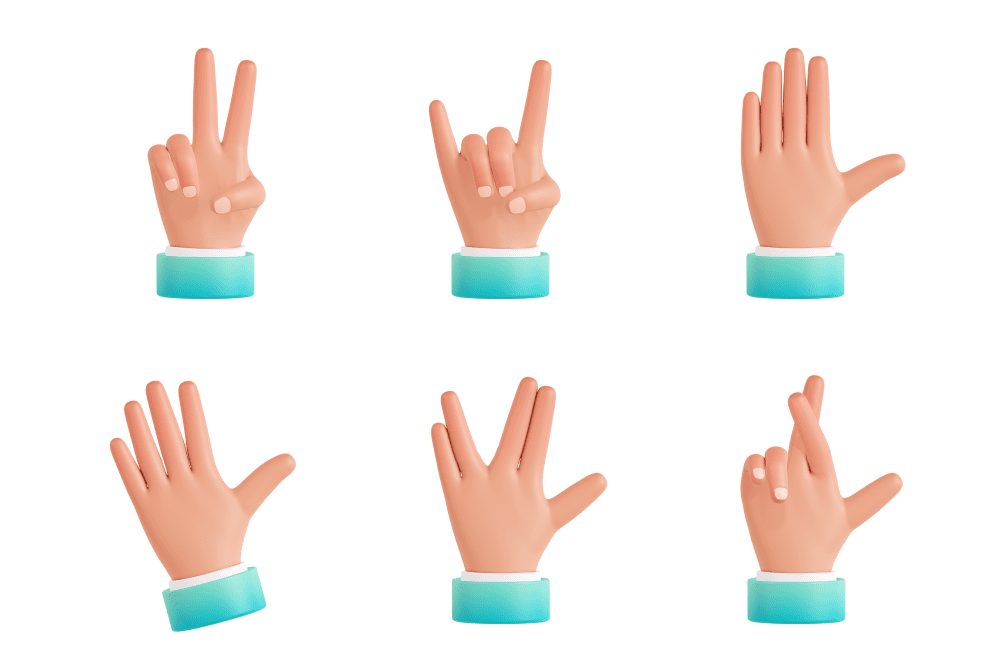
And that is how we make our very own 3D hand icons! Thanks for reading, and catch you in the next one!