
You’ve modeled your character in Blender, and now you are looking to export your character into Unity, this is the article for you! This article will be much easier to digest if you are already familiar with Blender.
There are many different ways to export your character into Unity but we focus on exporting a character that has been modeled and rigged in Blender and with simple animation sequences for a mobile game.
The entire process can be broken down into the following four steps:
1. Making the character game ready.
Low poly! the horror!
I know.. I know if you are used to making clean models with as many subdivisions as your device can possibly handle, making something low poly sounds a lowkey nightmare.
Mobile games have to be lightweight and since the model is going to appear on a smaller scale, having a super high-poly mesh is only going to make the game experience slow when all the details are not even going to be visible on the screen.
The best way to approach making game characters is to start as low-poly as possible. It is best practice to keep the vertex count below 10k for mobile games.Quick tip:
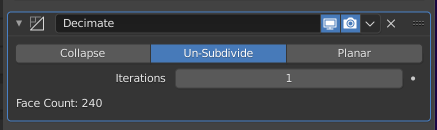
You can use Decimate modifier to undo your subdivisions. If you have modeled your character in high-poly or you have applied your Subdivision modifier, this is a really cool modifier to use.
2. Rigging your character
Rigging your character can seem very daunting at first, but you'll learn by doing it multiple times and experimenting with exactly what type of rig you need for your model. Don't be afraid to mess things up and start over! It's always faster and easier the second time around.
If you are planning to rig your character with Unity's default humanoid character rig then check the bone requirements and make you have matching bones in your own rig as well. Unity's default humanoid rig needs the following bones:
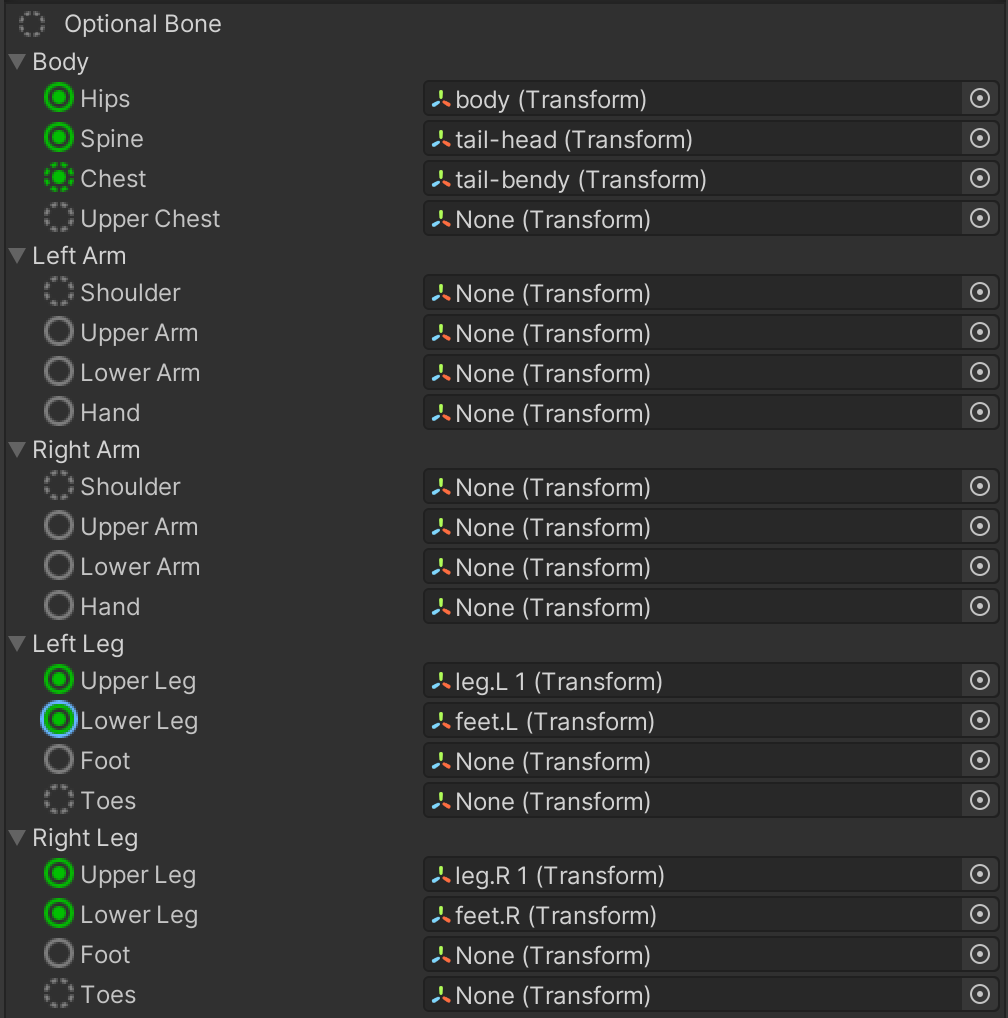
The dotted circle bones are optional i.e. not necessary to be present in the model.
Quick tip:
It's better to have all the different parts of your character joined as a single object. If you don't want to do that then you need to make sure that all the different parts are parented to the rig.
A simple way to do that is to parent your object to empty objects (which is parented to the rig) instead of parenting them to a bone.
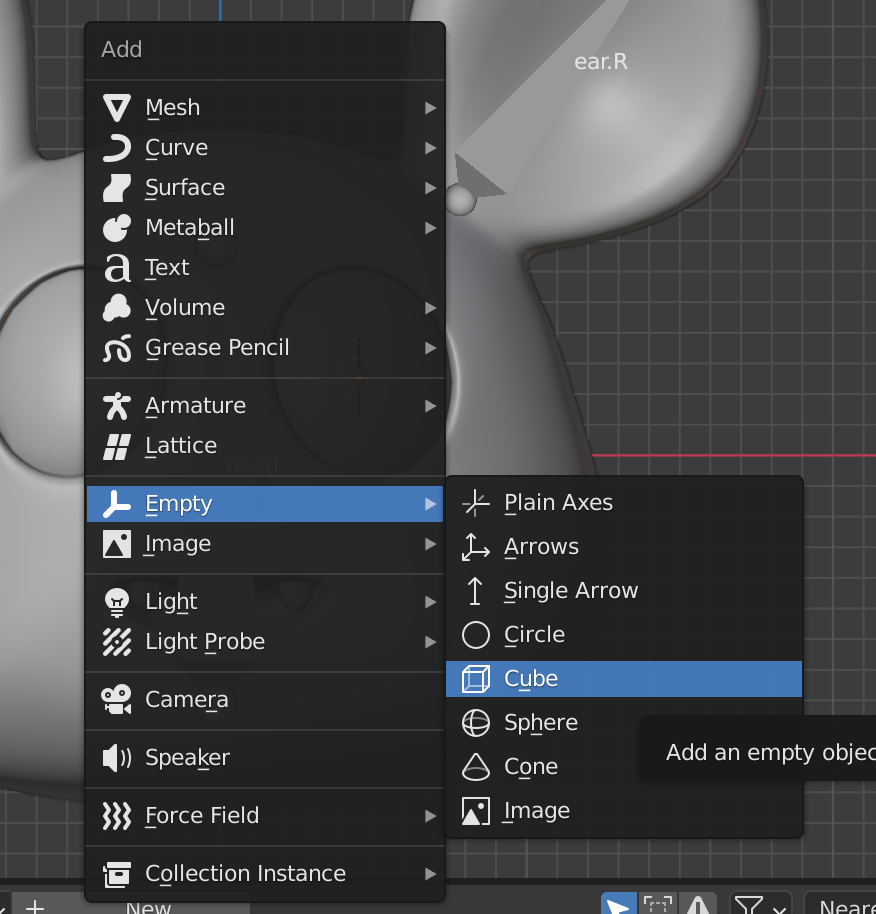
For instance, here I am parenting the eye to an empty object, which is parented to the head bone.
First, make sure, the empty object holds your object, you can do that by making sure the 3D cursor is in the centre of your object by pressing:
Shift+S > Cursor to Active
Then, Shift+A > Empty> Cube
Second, we parent the empty object to your rig.
With the rig selected in pose mode, you can parent the empty object to the rig as bone.
Ctrl+P> Bone
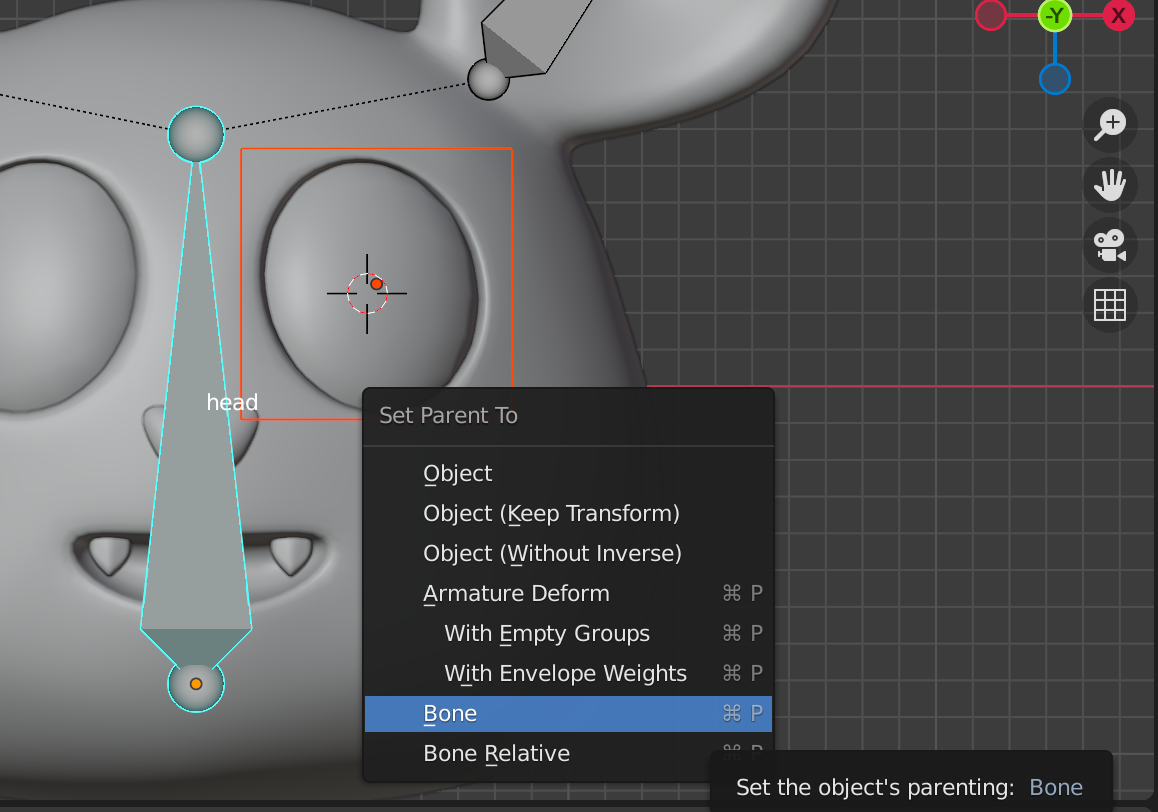
This way, the empty object moves along with the rig.
Third, we parent the eye to the empty cube.
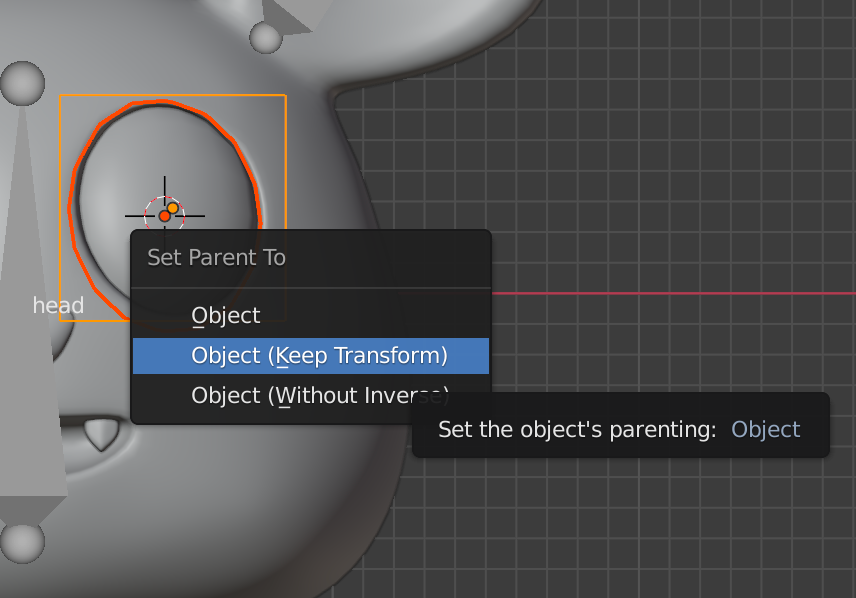
This way, your eye is connected to the rig, without any extra bones. This way, you can also be sure that all the parts of your character appear attached when exported into unity.
Quick tip:
The parenting order is as follows:
- Parent
Empty Object(holder) toBone - Parent
Target ObjecttoEmpty Object
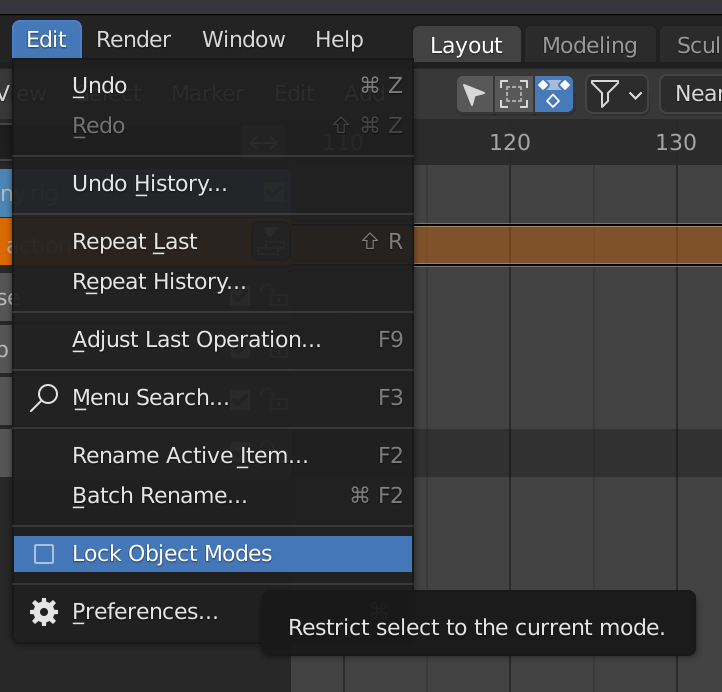
If you cannot select the empty object and the rig at the same time, it is because Blender has selection restricted to the currently active object by default.
You can change this by going over to the Edit tab and unchecking the Lock Object Modes option.
3. Turning your animations into NLA strips
When you are exporting your character as an .fbx object you can also export different animation sequences. This can be done by arranging your animation sequences into non-linear animation (NLA) strips.
Instead of using Dope Sheet, you can tab into Action Editor:


Then, you can create different animation sets as actions, by pressing +New
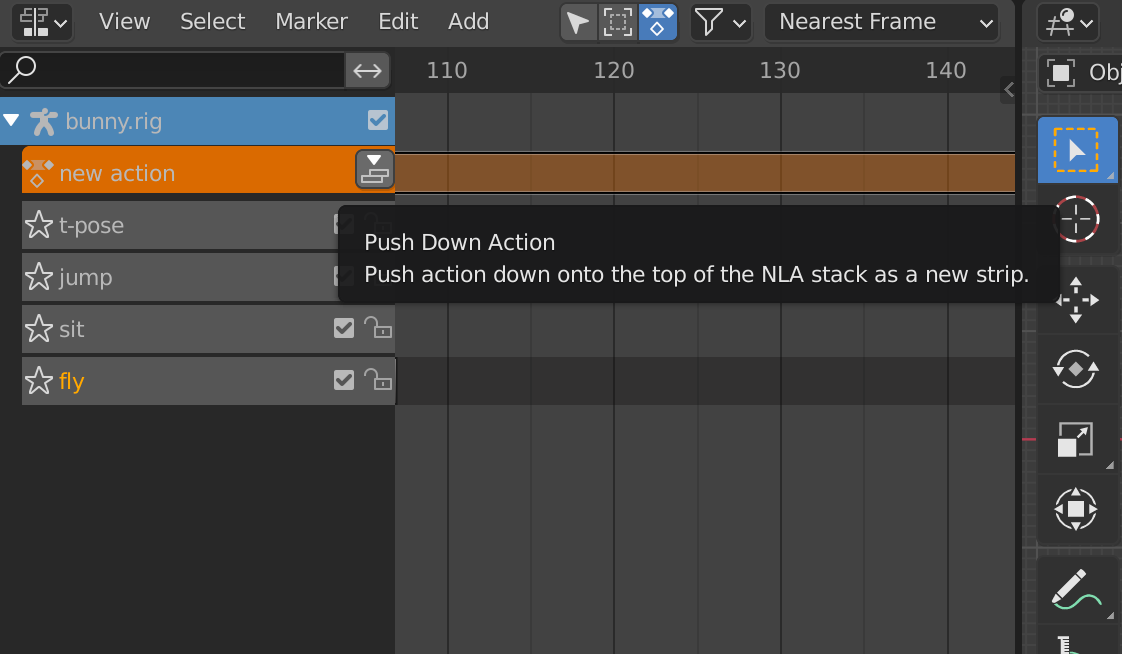
After you have key-framed your heart out, you need to put the action as an animation strip over on the Nonlinear Animation tab.
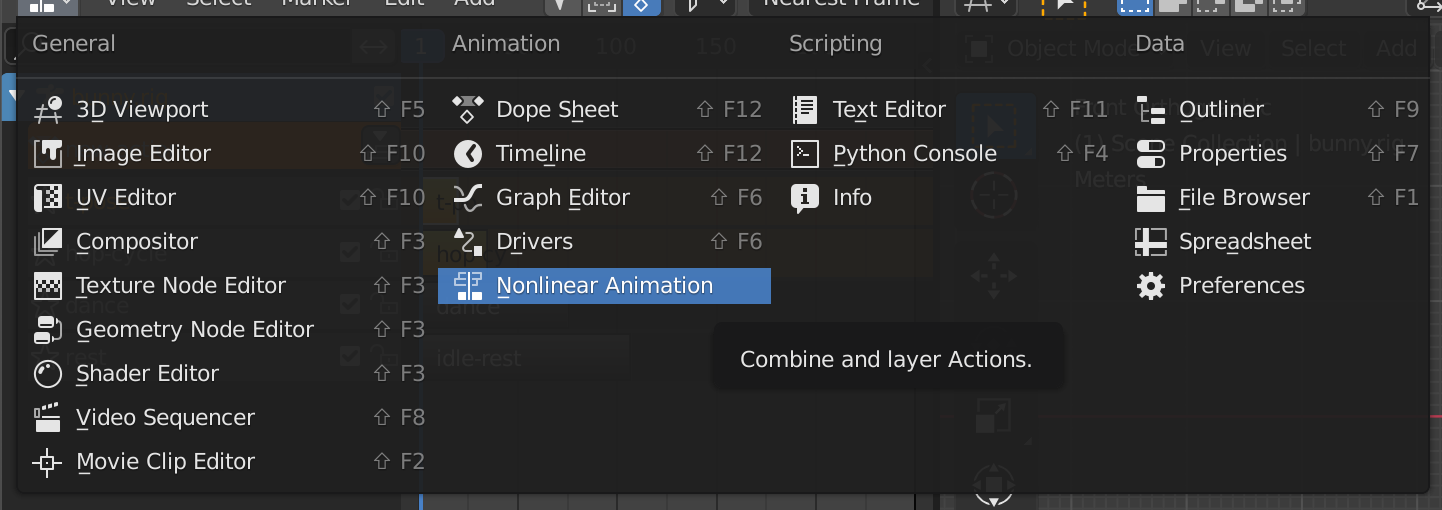
In the NLA tab, click the Push Down Action button, to create the animation strip.
Quick tip:
You can delete the extra animations that are not needed to reduce the export size.
Make sure all the necessary animations are ticked on during export, or they won't be exported.
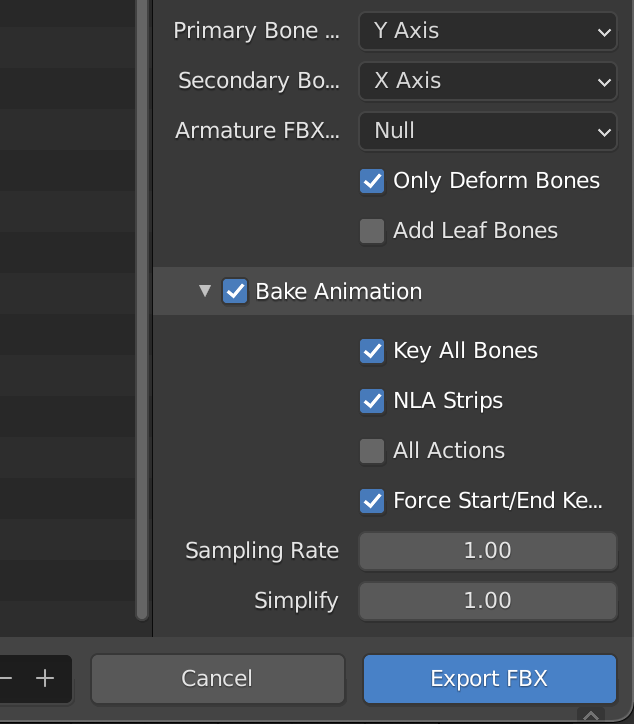
4. FBX export settings
Finally, it is time to export your character as an .fbx object. All the hard work is about to pay off!

First things first, to match the axis info to unity, to need to make sure that your character is facing Y-axis.
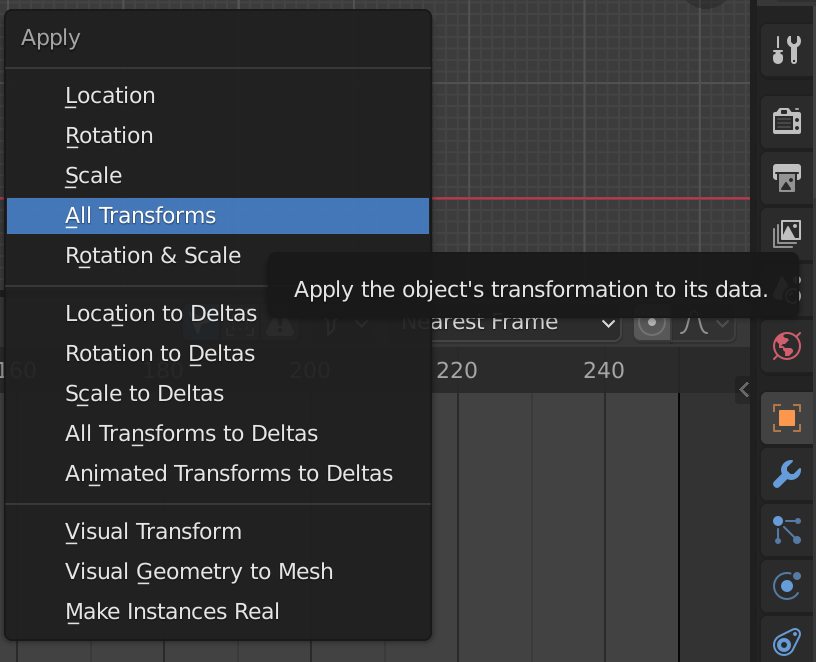
Second, all the transformations on your character need to be applied.
You can do that by:
Ctrl+A > All transforms
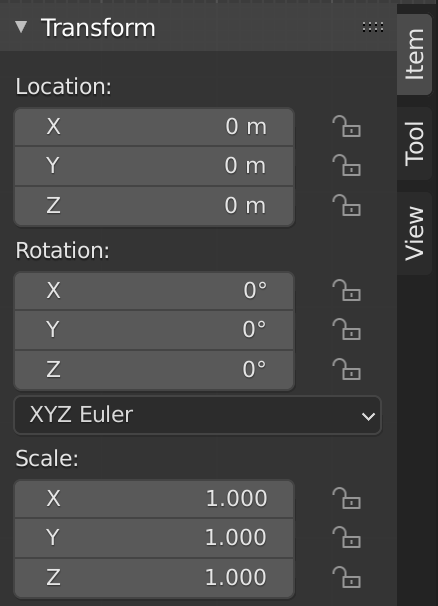
You can check the transform values quickly by pressing N on the 3D viewport. The location and rotation values should all be zeroes, and the scale should be 1.
On to the export!
File > Export > fbx
You can make the following changes:
- You can limit your export to the active collection.
- Change the scale from local to FBX Units Scale.
- Change the forward axis from Z Forward to
Y Forward.
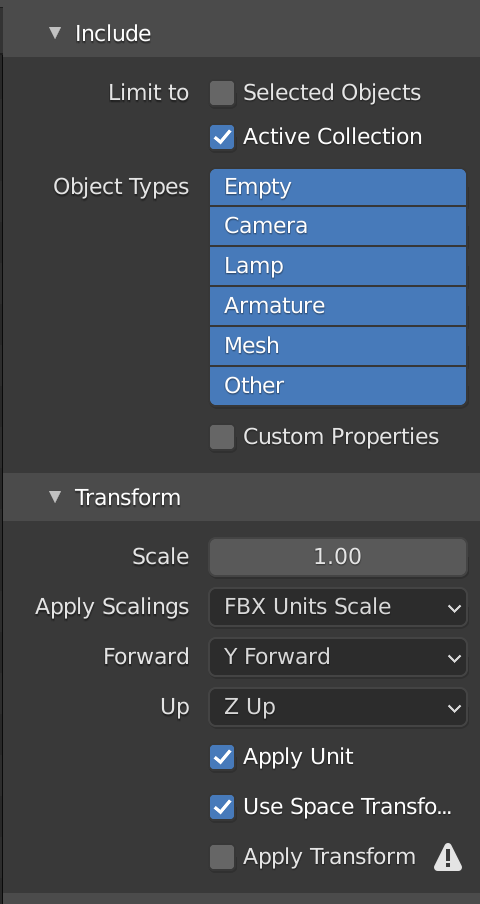
Over on the Bake Animation section, make sure NLA Strips is selected, which is on by default and you can uncheck All Actions, to reduce unnecessary action exports.
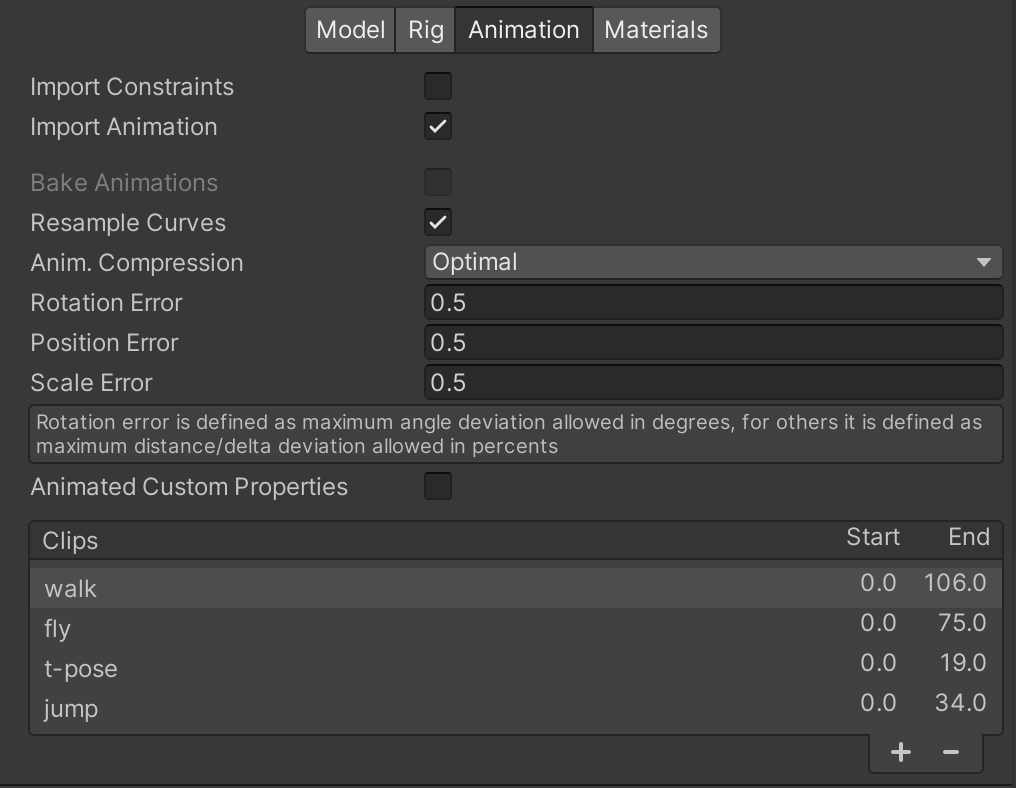
If you have completed these steps successfully, then over on Unity, you will get your character with animation clips as follows:
The key points can be summarized as follows:
- It is best practice to keep the vertex count below
10kfor mobile game characters. So low-poly for the win! (and cleaner geometry!) - Make sure the rig is working well, and all the different parts of your character are either joined as one object or parented to the rig.
- The animation sequences are on
NLAstrips and active. - Your character is facing
Y-axisand all the transformations (location, transformation, scale) are applied. - On
.fbxexport settings, the scale should be FBX units scale, the forward axis should be set toY-axis, and only the necessary animations should be set for export.
This article doesn't dive deep into the entire character creation and rigging process. It is intended for people with an intermediate understanding of Blender and character creation, to understand the different things to consider before exporting the character into Unity.