
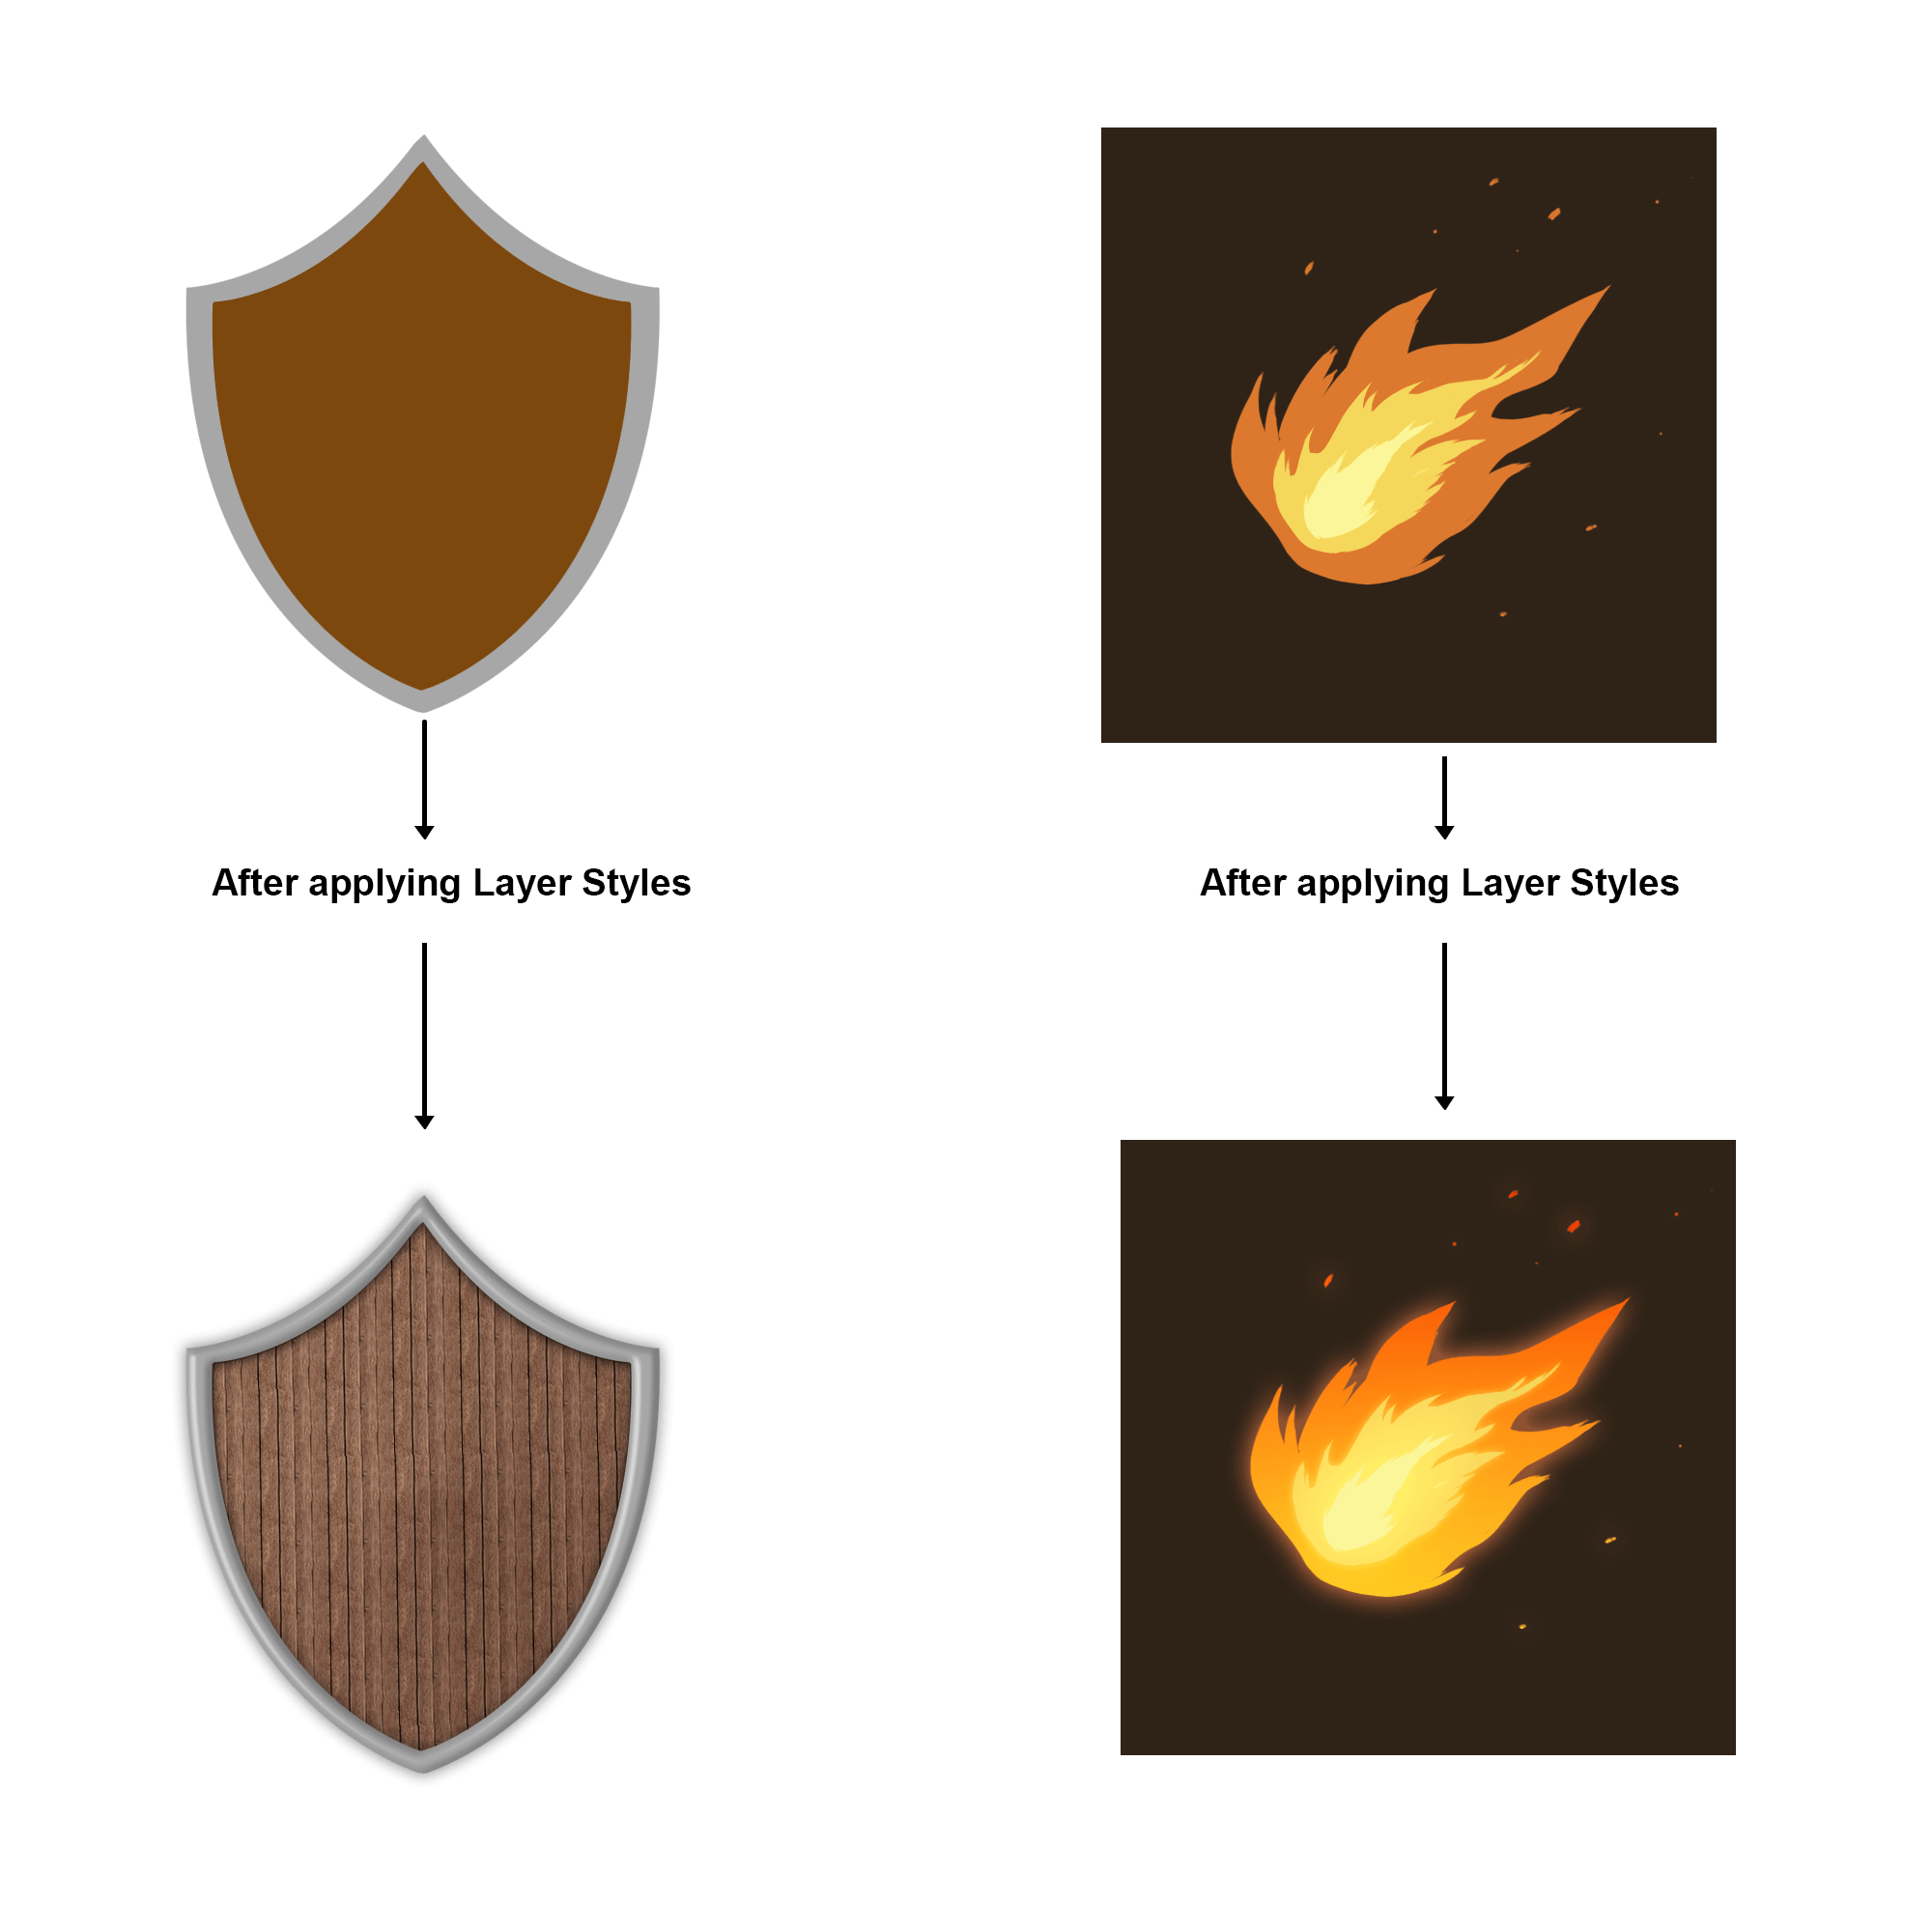
A Layer Style is an effect applied to layers and layer groups in Photoshop like shadows, bevels, a stroke, glow (and more) to make an image appear 3D. The basic use of Layer Styles to make a button was explained in a previous article, Making Buttons using Layer Styles in Photoshop. Today, I will explain how a similar process can also be used in drawings while colouring objects.
Colouring objects to make them appear 3D requires knowledge about light, shadow, depth and perspective. You can paint shiny objects by painting with a lighter colour or simply use Layer Styles to make them shine. Using Layer Styles for certain objects will get results faster and in a non-destructive way.
A. Colouring a Shield
In this tutorial on using Layer Styles, we'll colour a wooden shield with a metal frame.
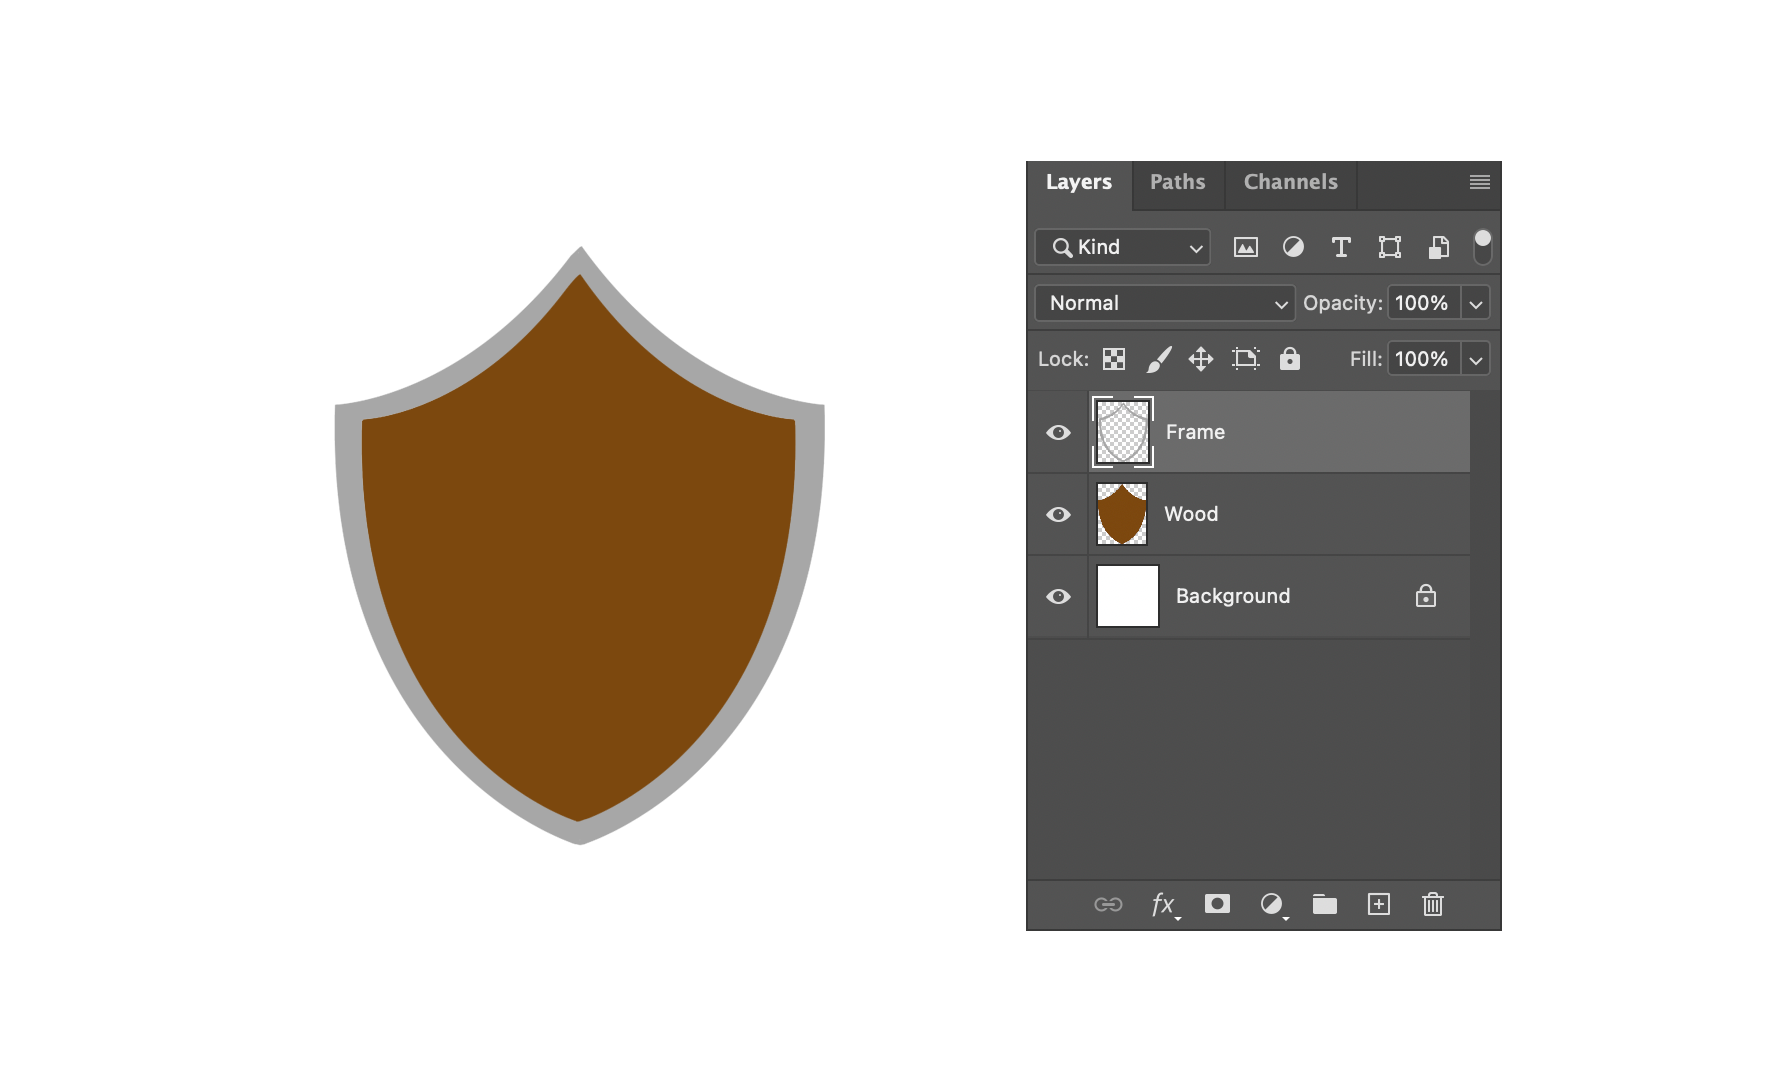
Step 1: Creating the layers
- Click on Create a New Layer to make a layer and draw the wooden part with one colour using the Brush tool.
- Rename the layer to "Wood" by double-clicking on the Layer name (Layer 1 in the image).
- Create another layer on top of it and draw a grey frame.
- Rename this layer to "Frame".
Step 2: Adding a Pattern
There are many default textures in Photoshop that can be used to get a wooden texture. They can also be found in the Adobe library.
- Right-click on the "Wood" layer and click on Blending Options to open the Layer Style pop-up window.
2. In the Layer Style window, click on Styles. It will have a list of preset options. Click on the Natural folder and select Wood. This will automatically add different Layer Styles to make it appear like a real wooden texture. We can also change each style to our liking.
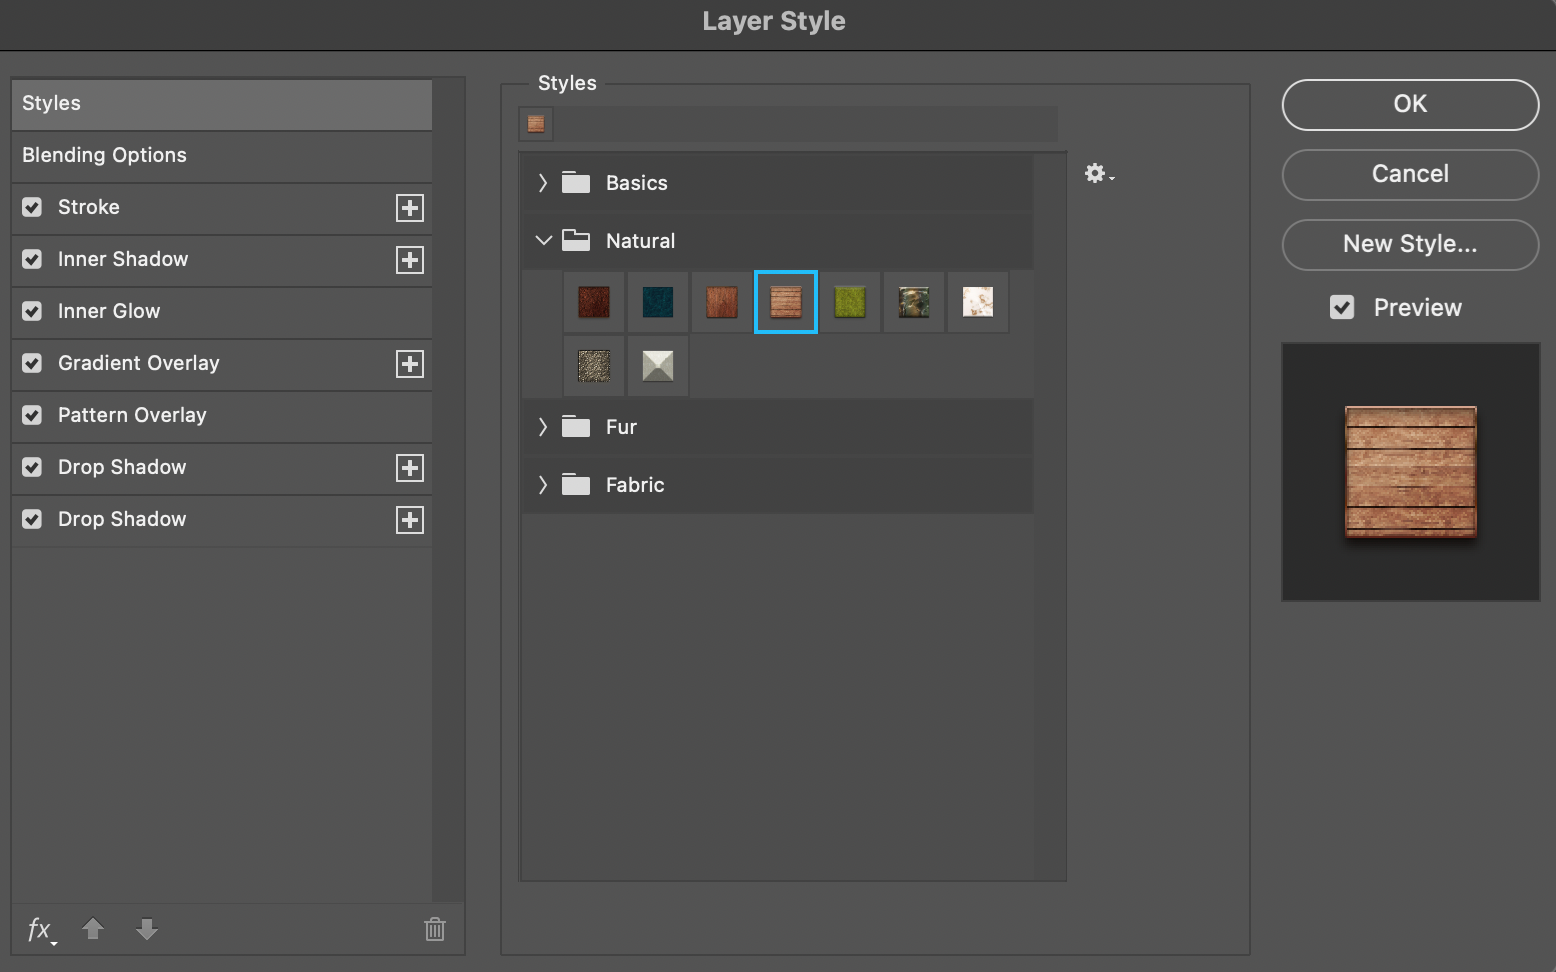
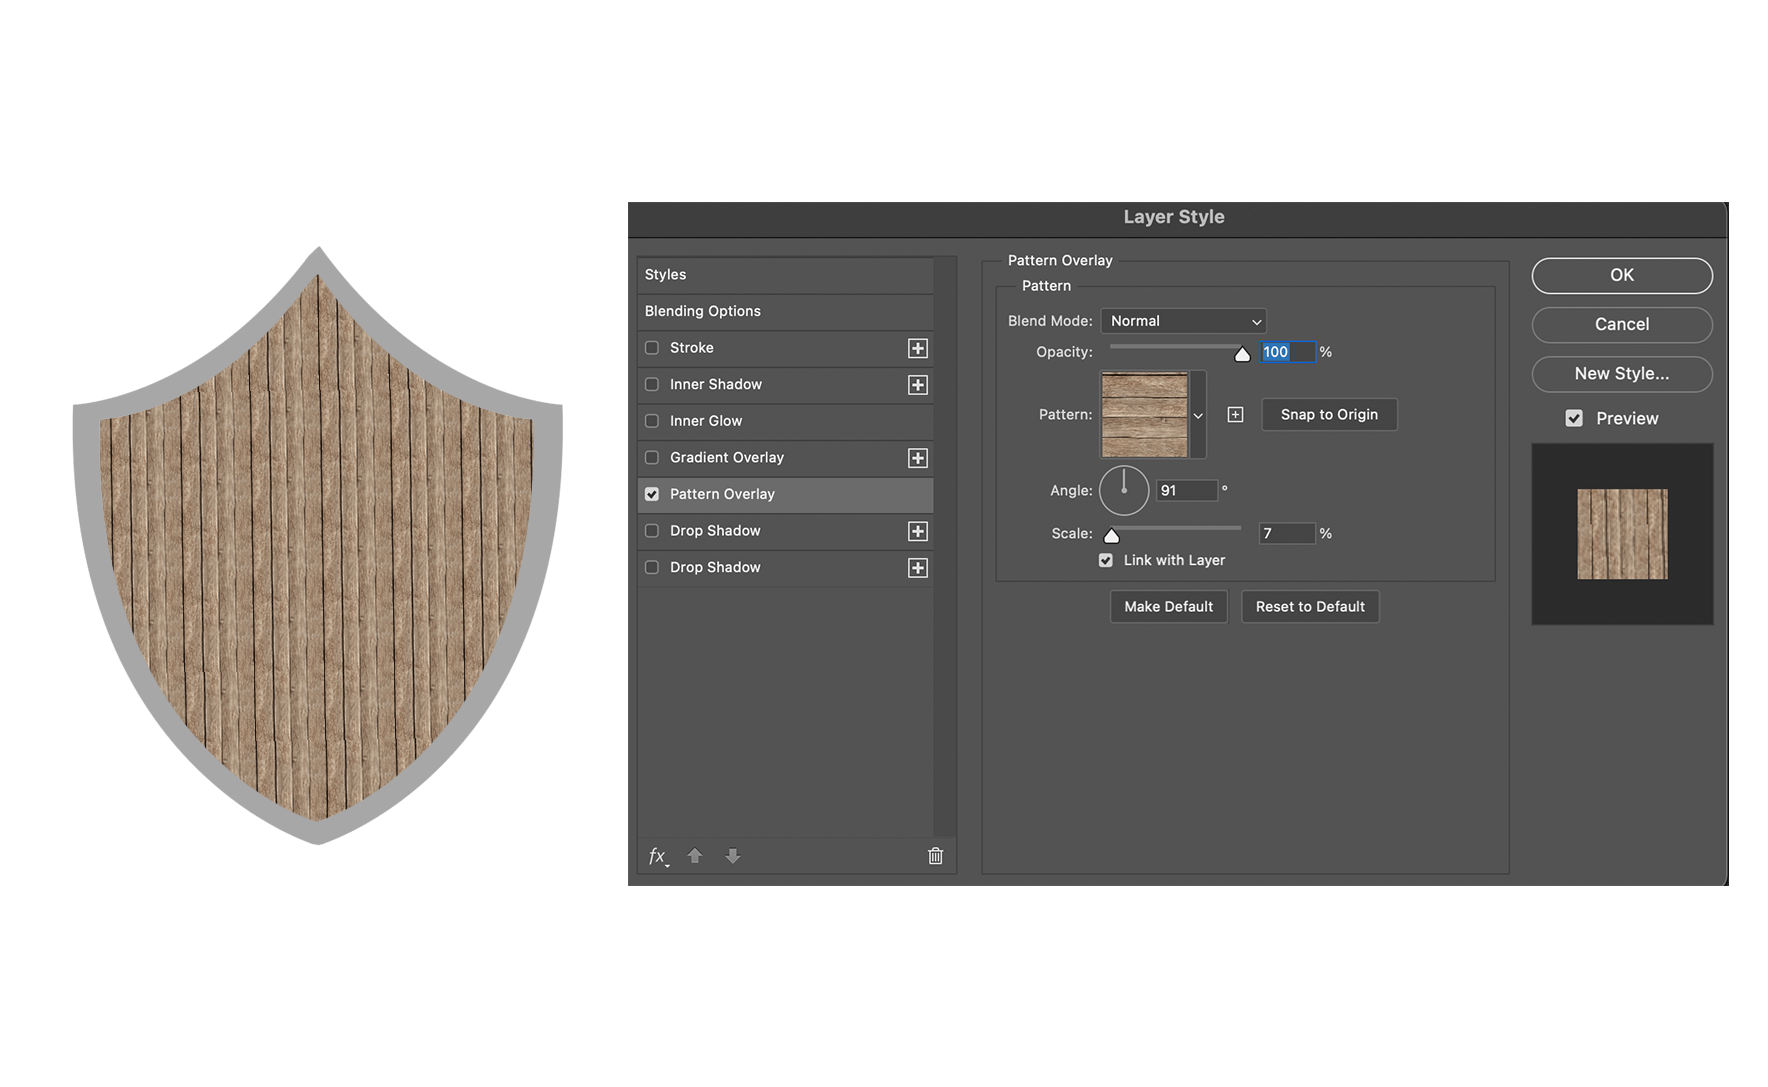
3. This step can also be done manually without getting many unnecessary style effects. In the Layer Style window, click on Pattern Overlay. Find the wood texture and select it.
4. In the Pattern Overlay section, change the angle, scale and opacity.
Step 3: Adding Depth and Shadow
After adding the pattern, the shield looks realistic. But, it still needs depth and shadow to make it look even better.
- In the Layer Style window, Click on Gradient Overlay.
- Click on the box of Gradient. Select a darker brown colour with light brown in the centre.
- From the drop-down menu of Style, click on Angle.
- Rotate the Angle wheel to -52 degrees. This will make the middle part of the shield appear as if it's moving outwards.
- Now for the shadows, click on Inner Shadow in the Layer Style window.
- Change the opacity, size and distance to your liking. Since the wooden edges of the shield will be inside the metallic frame, they have to be darker. These shadows will make it look appear so.

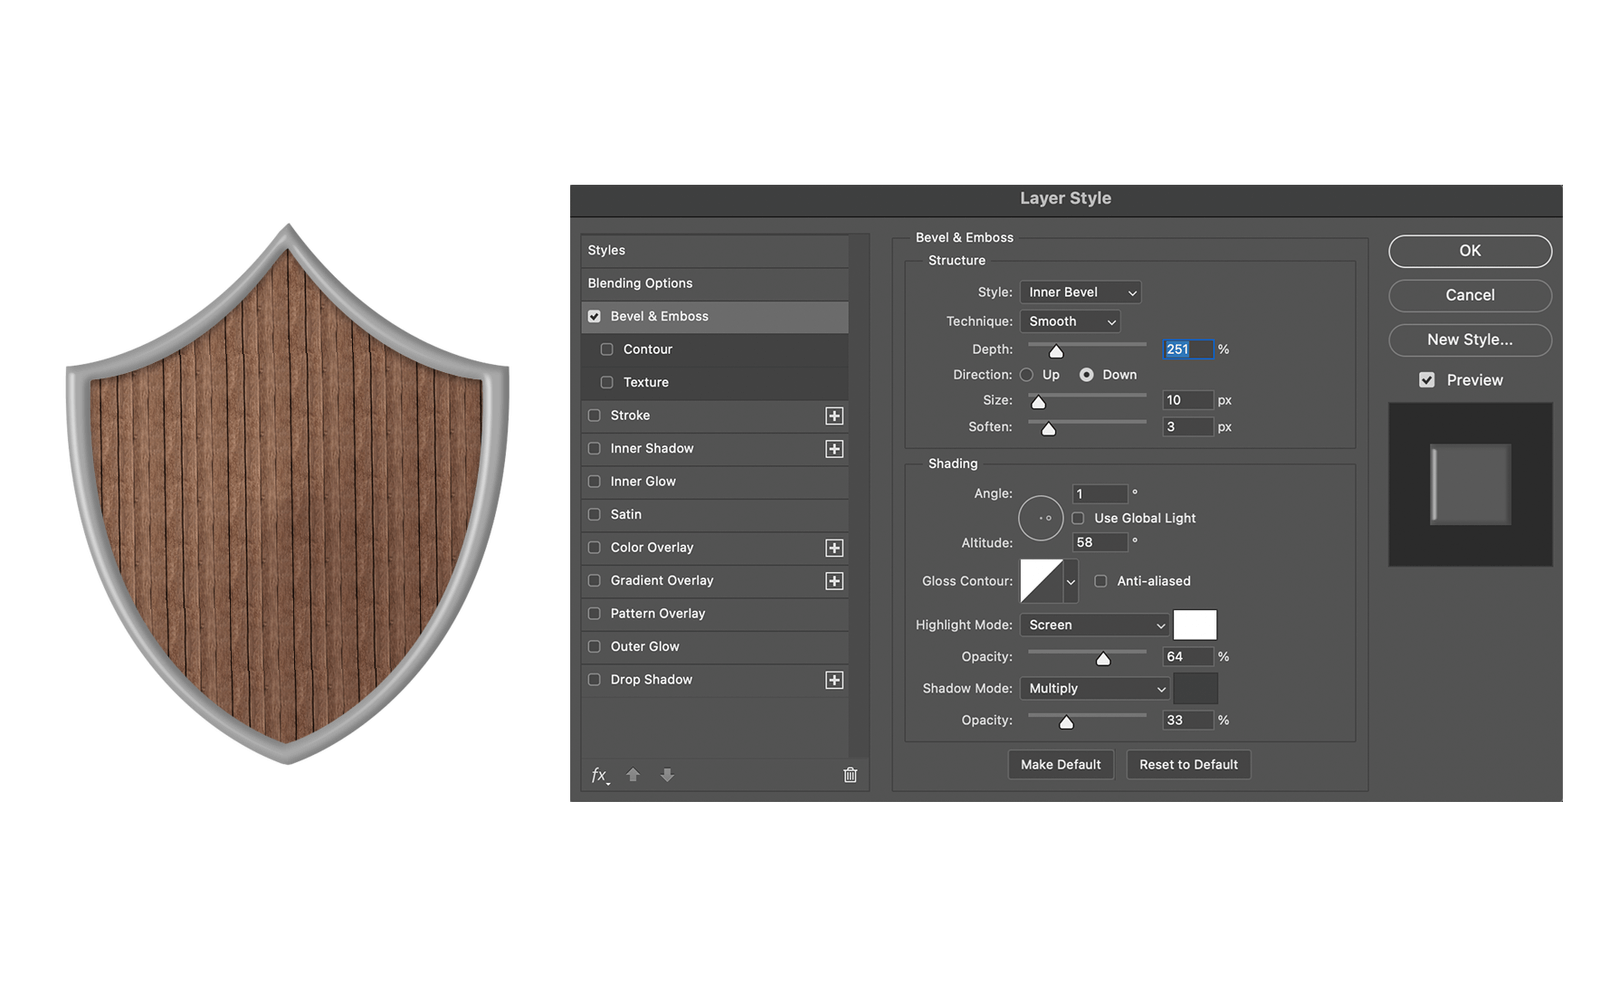
Step 4: Adding Depth to the Frame
- Now for the frame part, select the "Frame" layer. Double-click on it to open the Layer Style window again.
- Click on Bevel & Emboss.
- From the Style drop-down menu, select Inner Bevel.
- Change the depth, direction, size, soften and angle. You can play around with the numbers to get various results. For this tutorial, you should copy the values from the image below.
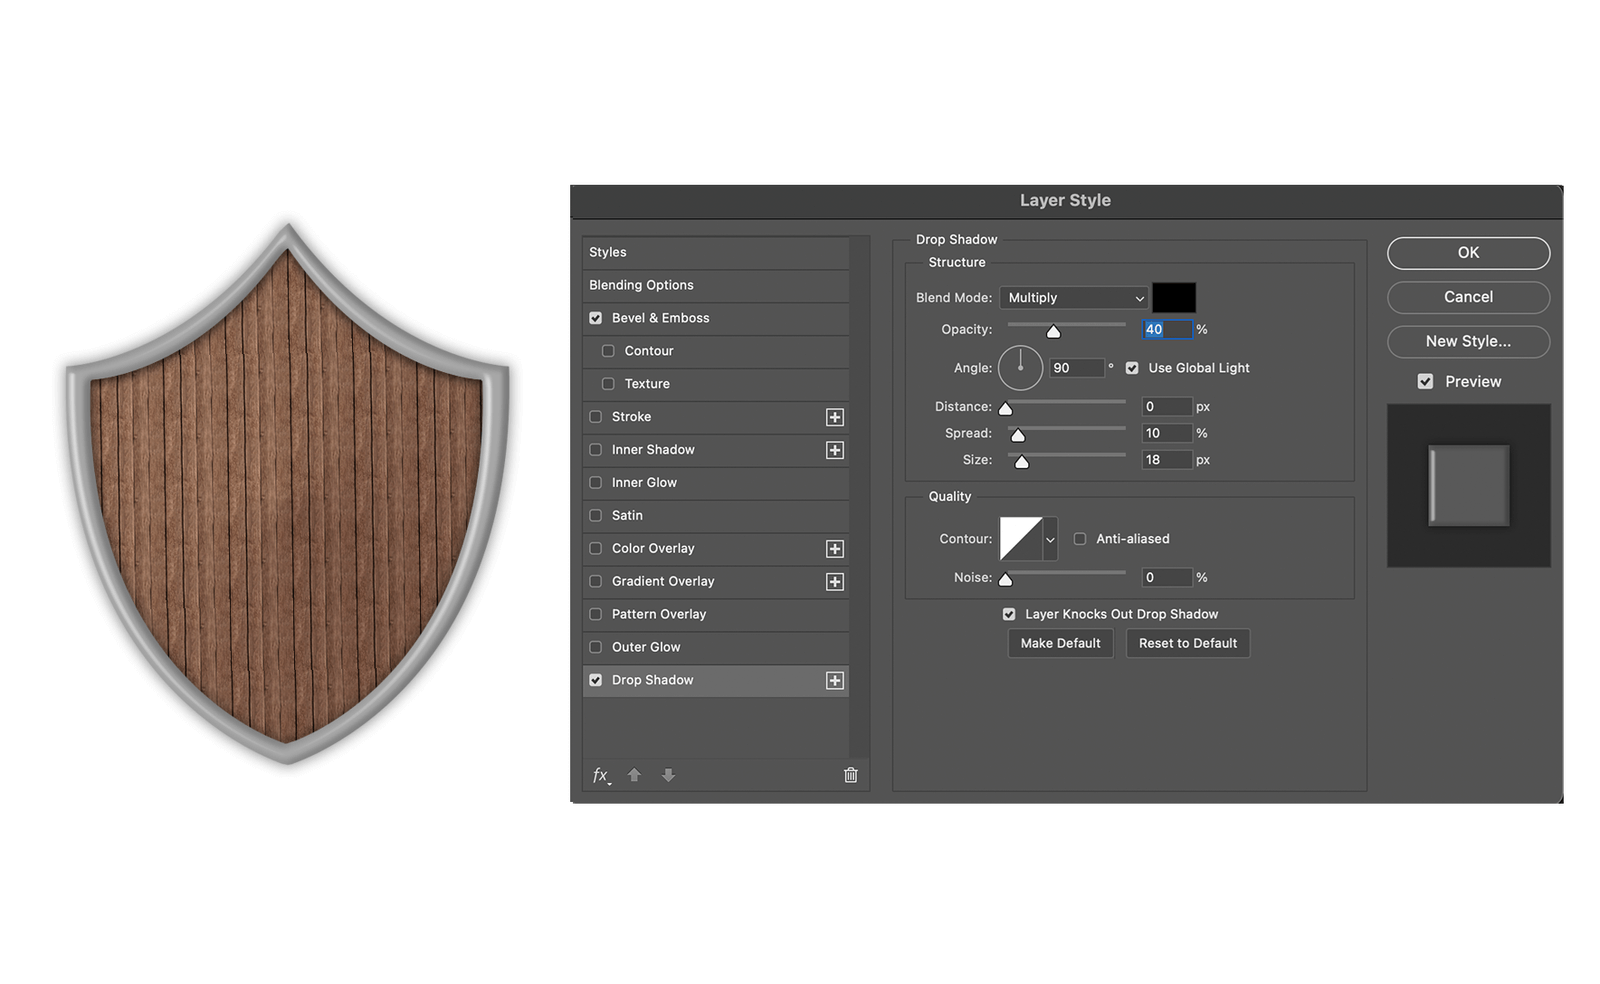
The shield already looks more realistic than the flat image before. While not technically required, you can also add a shadow to the frame to make it pop from the background.
- Select the "Frame" layer and double-click it to open the Layer Style window.
- Click on Drop Shadow.
- Change the opacity, angle, distance, spread and size.
B. Adding Glow to a Drawing
We can also make images shine with the help of Layer Style. This can be achieved by using Blending modes and painting over the image, but Layer Style makes it easier without painting anything extra on top of the image.
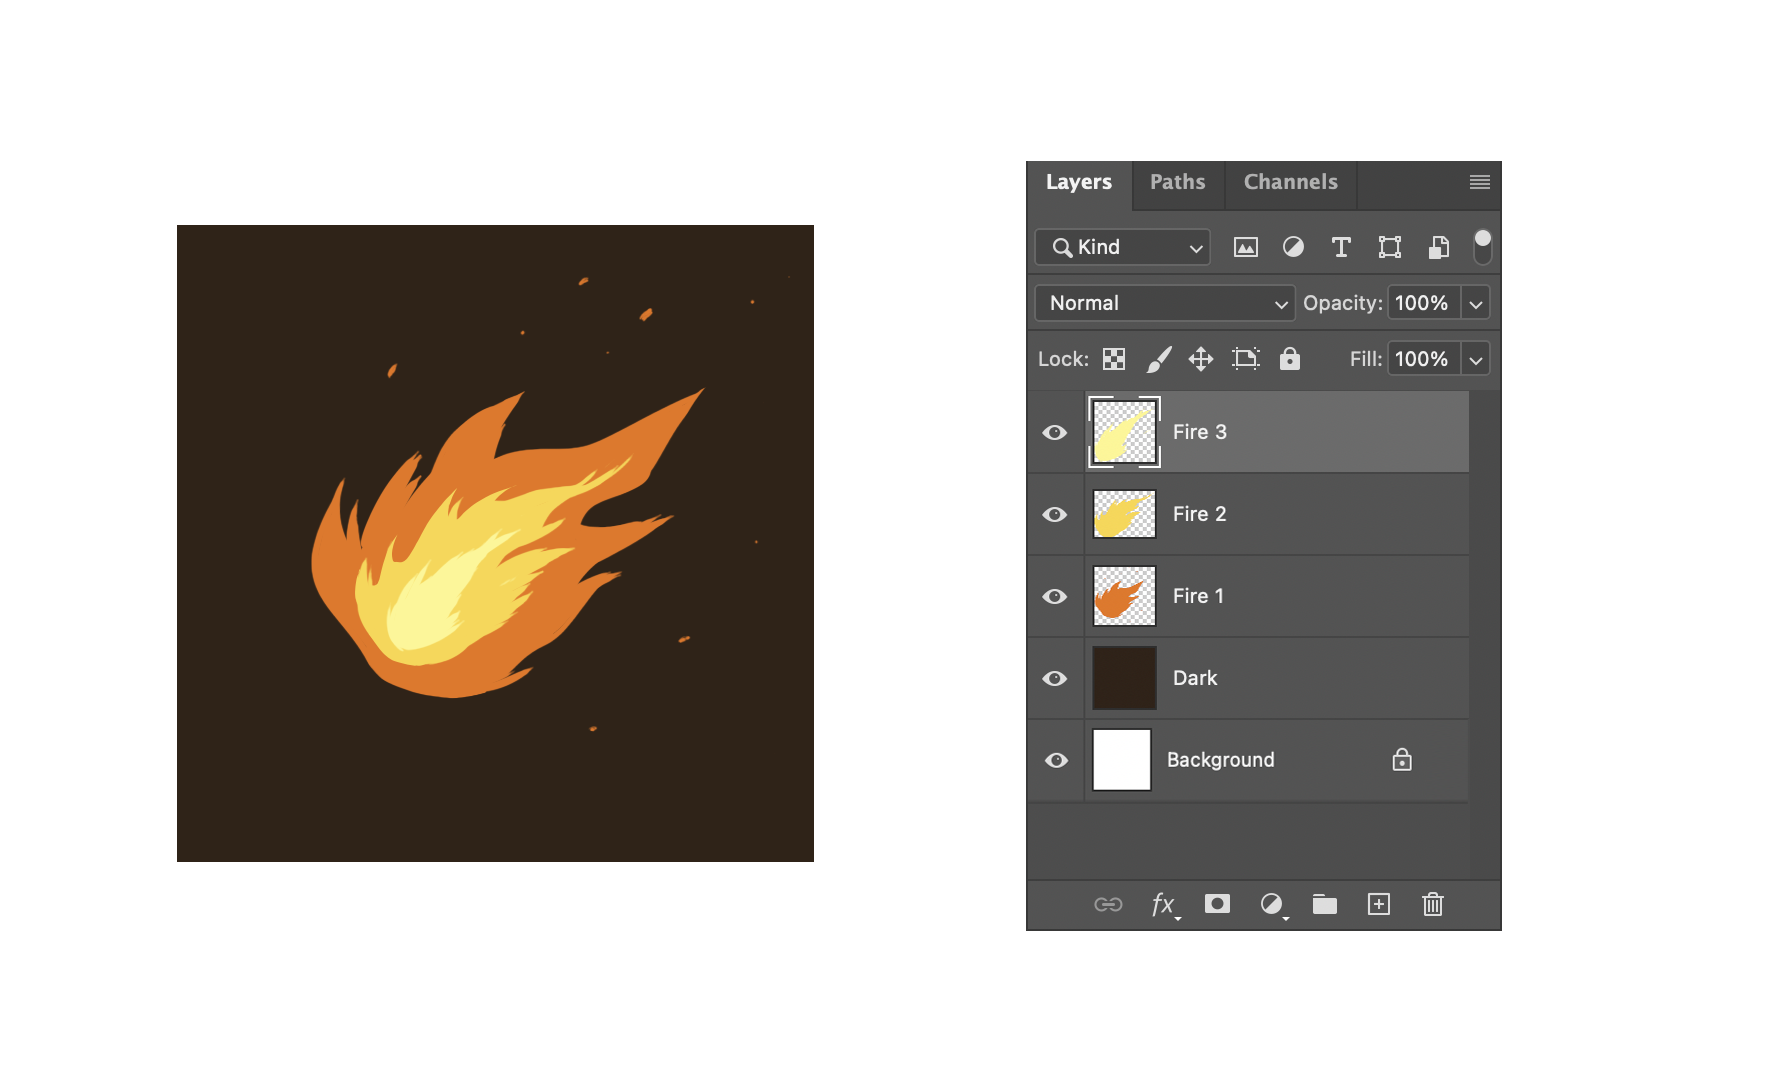
- First, draw fire-like shapes in a new layer using orange. Rename the layer to "Fire 1".
- Draw a smaller fire shape on another layer on top of Fire 1 using yellow. Rename it to "Fire 2".
- Draw an even smaller fire shape on another layer using light yellow. Rename the layer to "Fire 3".
- The glow can not be seen clearly on a white background. Create a new layer below all the previous layers and fill it with a dark colour. Rename it to "Dark".
- Double-click on Fire 3 layer to open Layer Style.
- Click on Outer Glow and change the Blend mode to Screen.
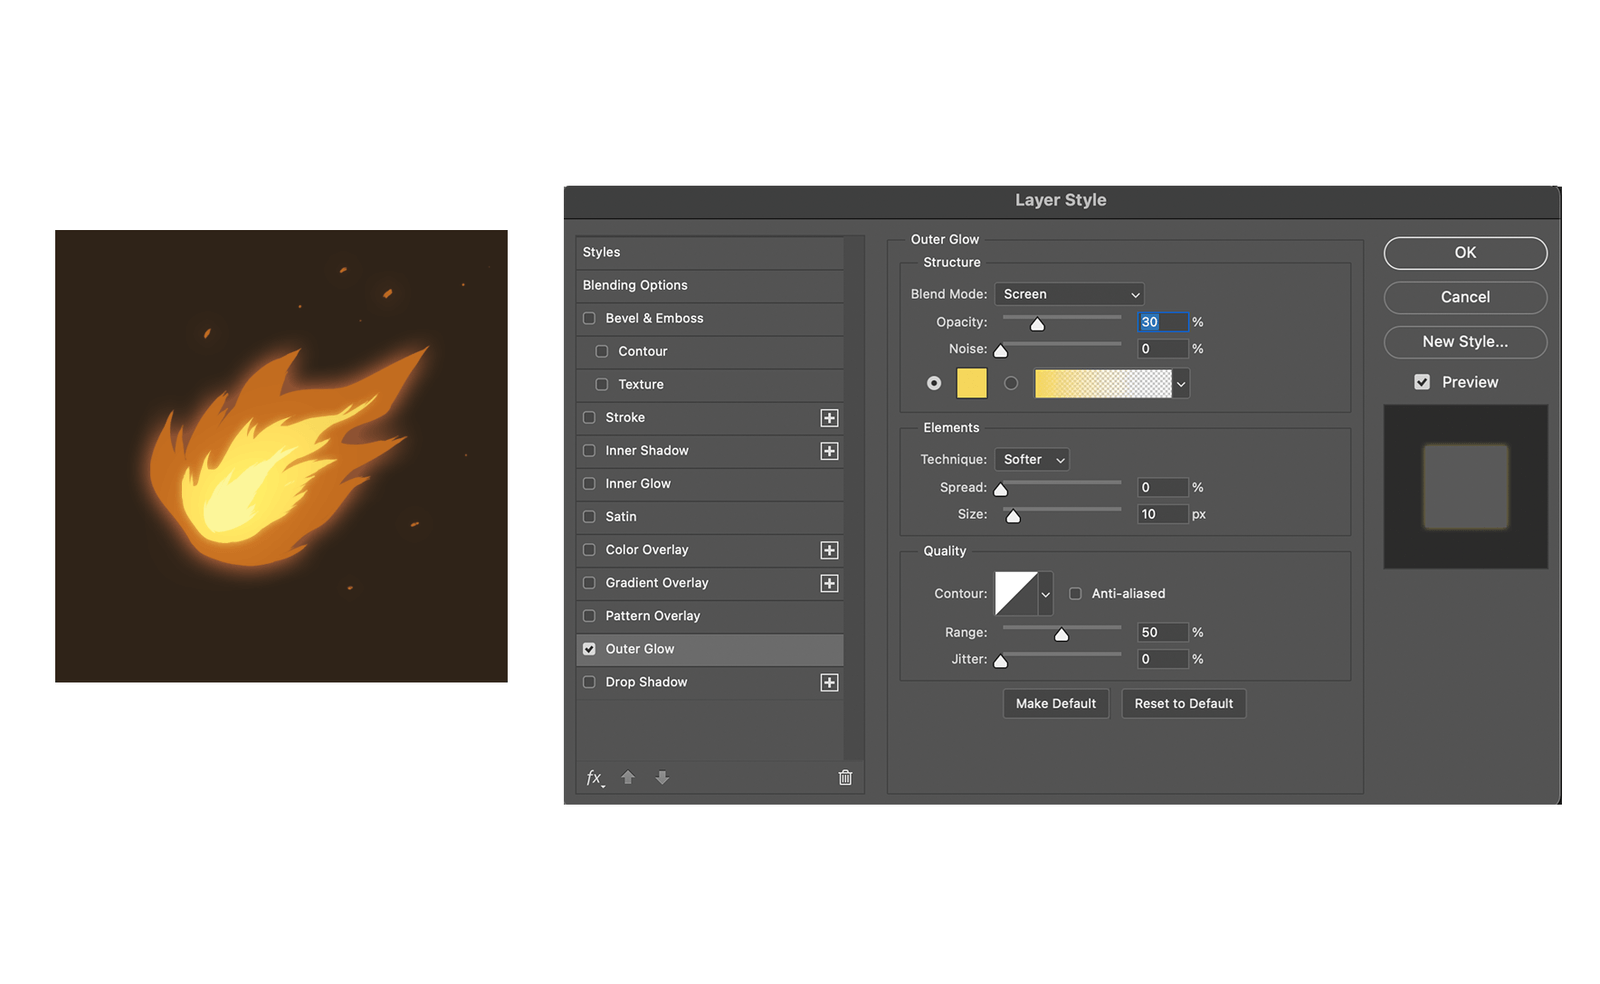
6. Change the opacity, spread and size to match the values above.
7. Pick the yellow you used before to make it appear as if the light is coming from the object instead of another light affecting it. You can also pick gradients from the box on the right.
8. Repeat these same steps on layers Fire 1 and Fire 2.
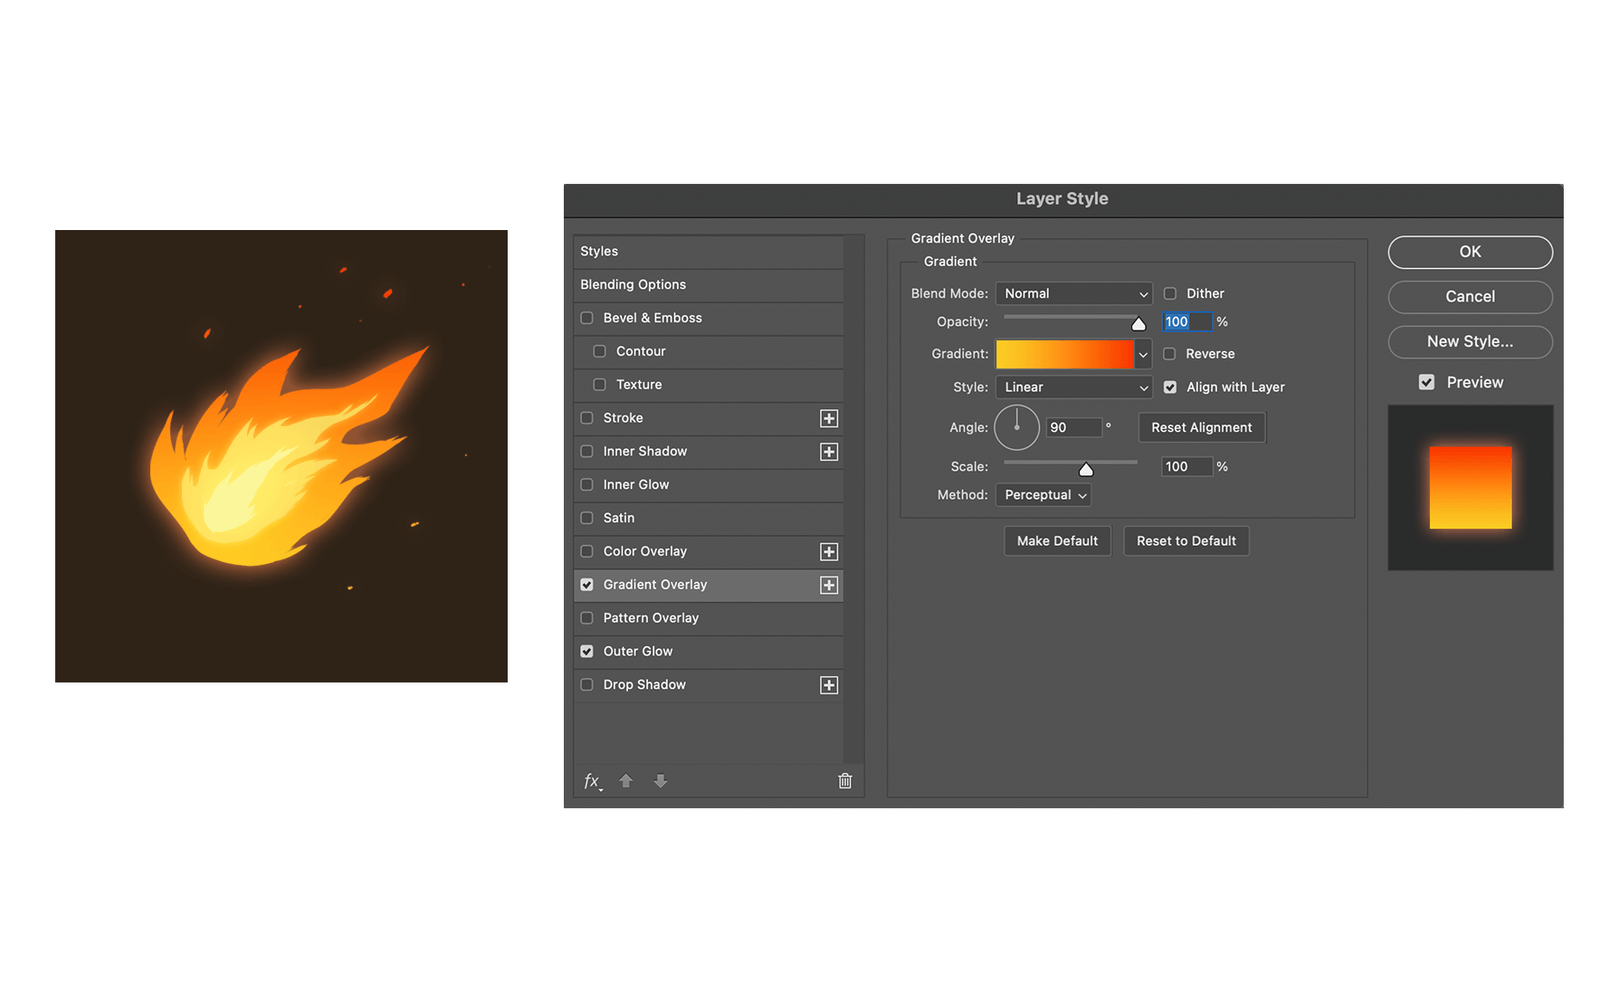
9. Double-click on Fire 1 layer to open Layer Style. Click on Gradient Overlay.
10. Pick the Gradient colours to be yellow and dark orange. Change the Style to Linear.
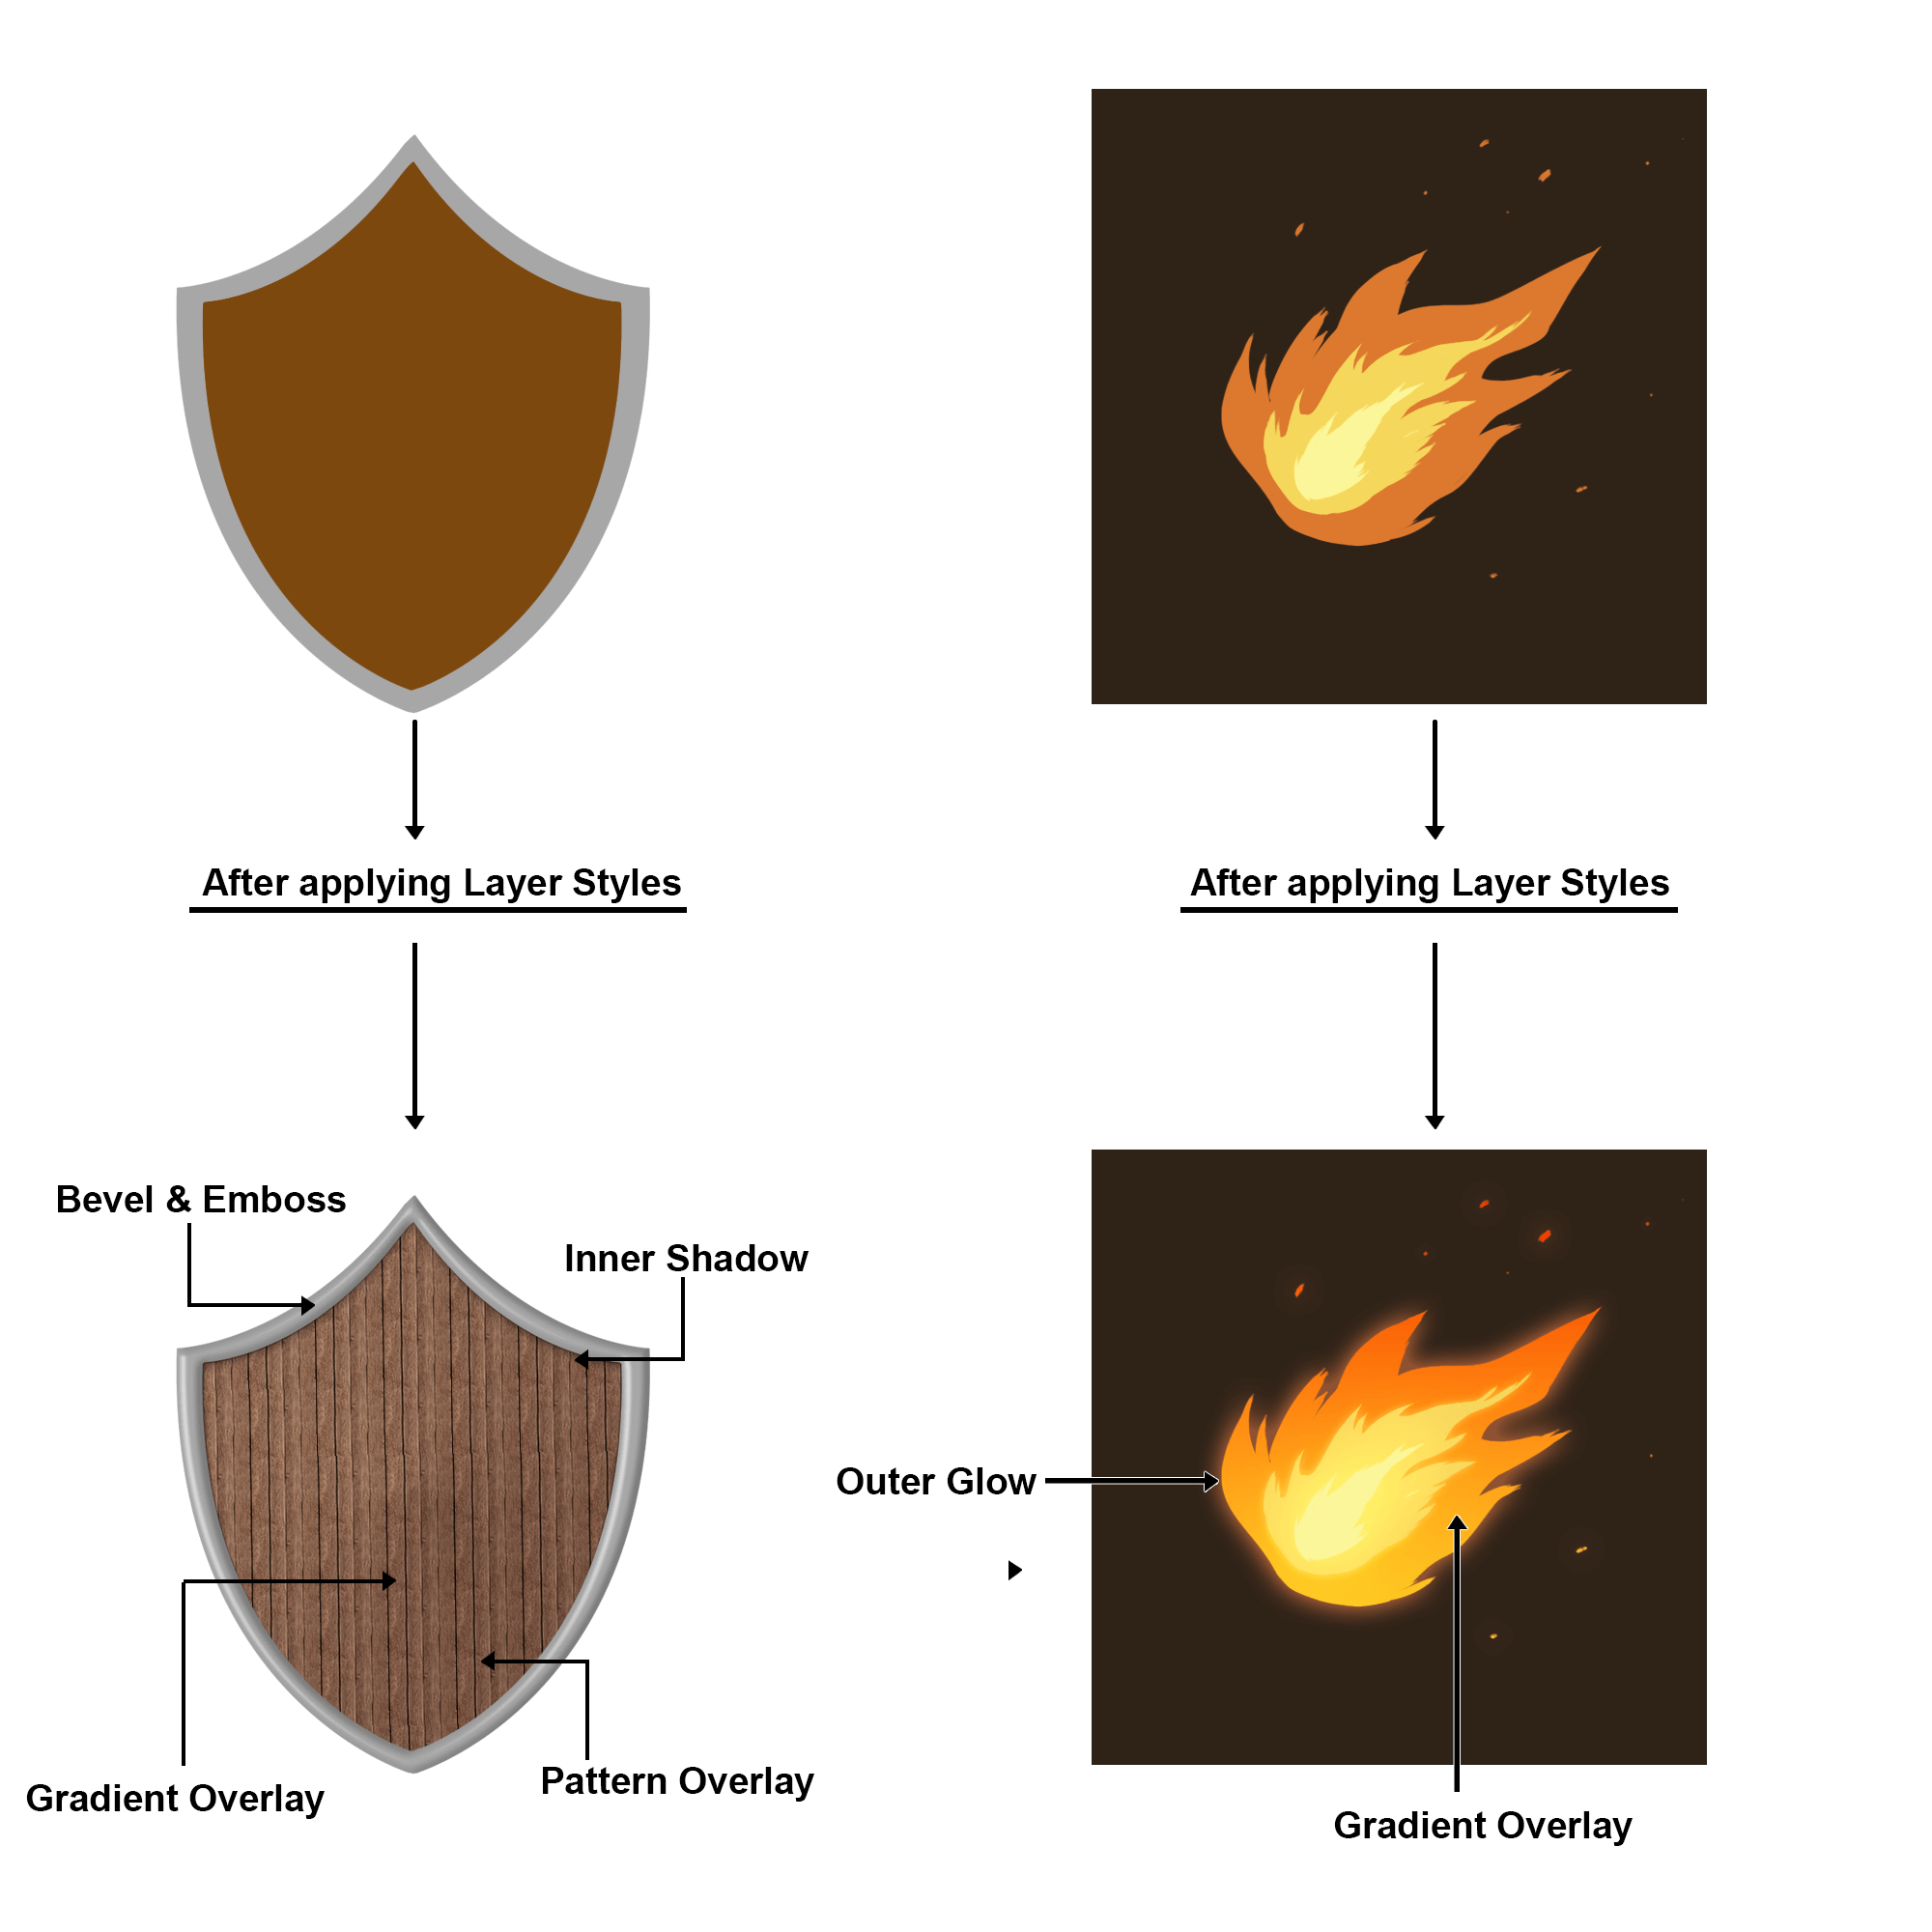
These were the steps to create simple effects on drawings with Layer Style. You can use a similar Bevel style for windows, photo/painting frames, monitors or signboards. You can use the Outer Glow style for glowing objects like stars, sun, light bulbs, mobile screens, lightning, etc.
Hope you found this article useful! Comment below if you have any related questions!