
Nodes in Blender can be quite intimidating in the beginning but they are one of the most powerful tools that Blender provides. Today, we will be using a simple bump node to create an engraving effect. This kind of effect is useful in creating coins or rings or anything with detailed engravings if you are not going for full-on modeling or sculpting the details.
Getting started:
First things first, we are going to need an image of the engraving. The image is fed into the bump node as height info, which is then fed into the normal node. So the image translates into height information, which is how the engraving works.
Designing the Coin Stencil
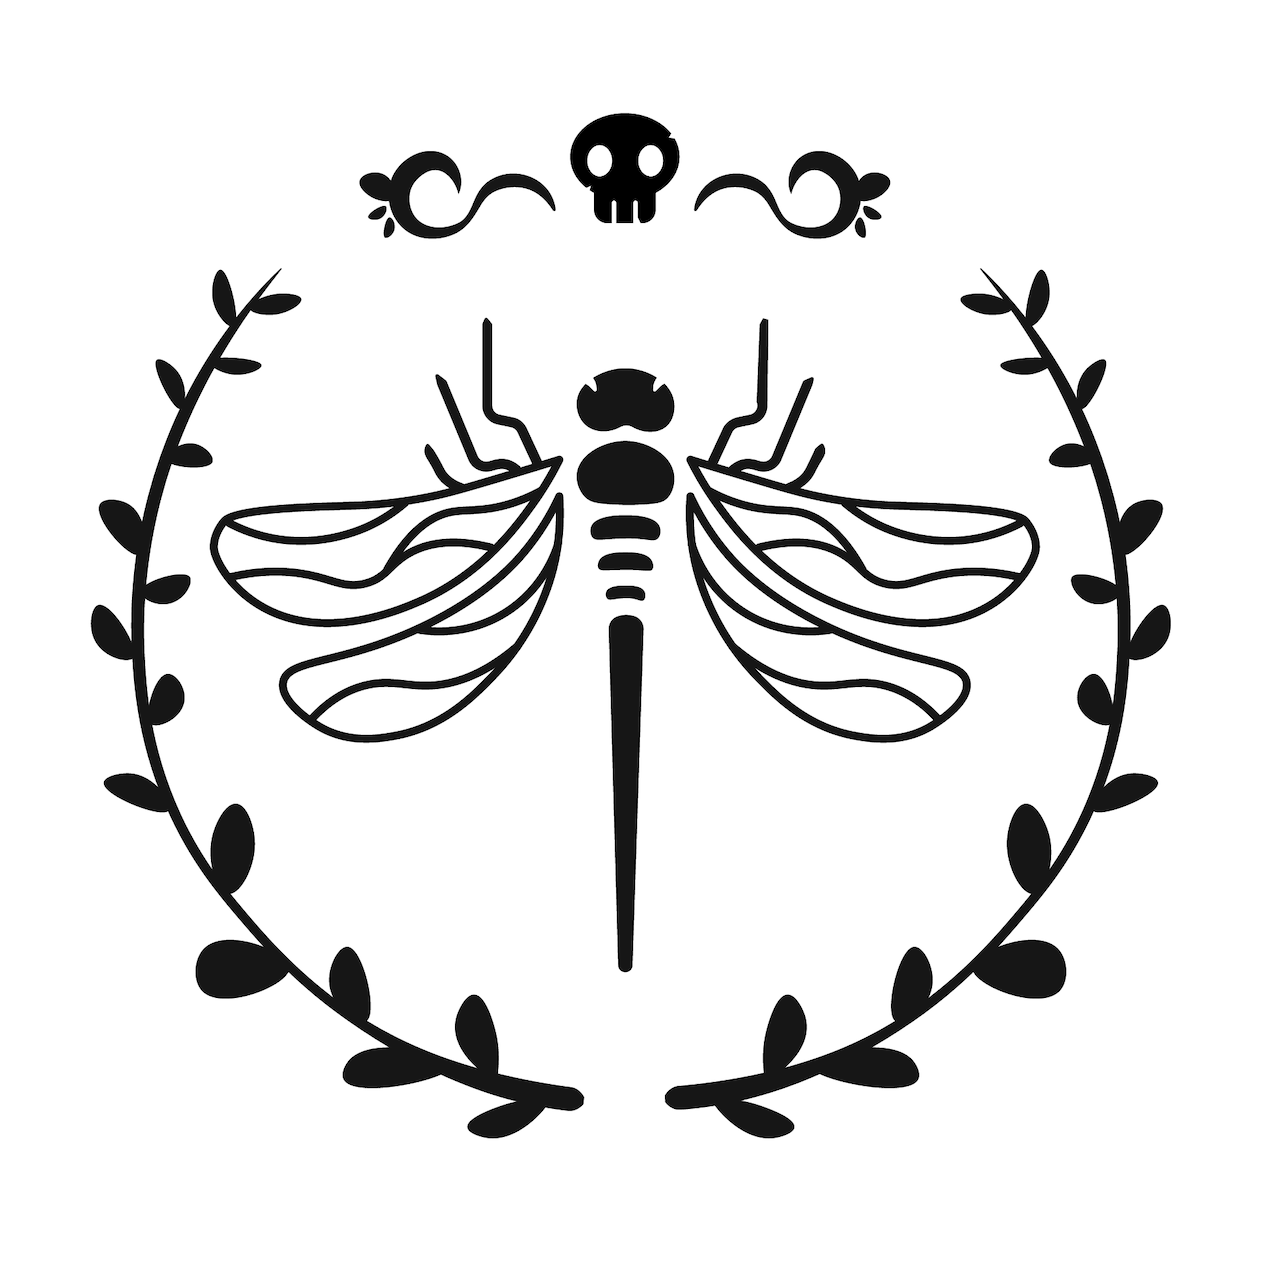
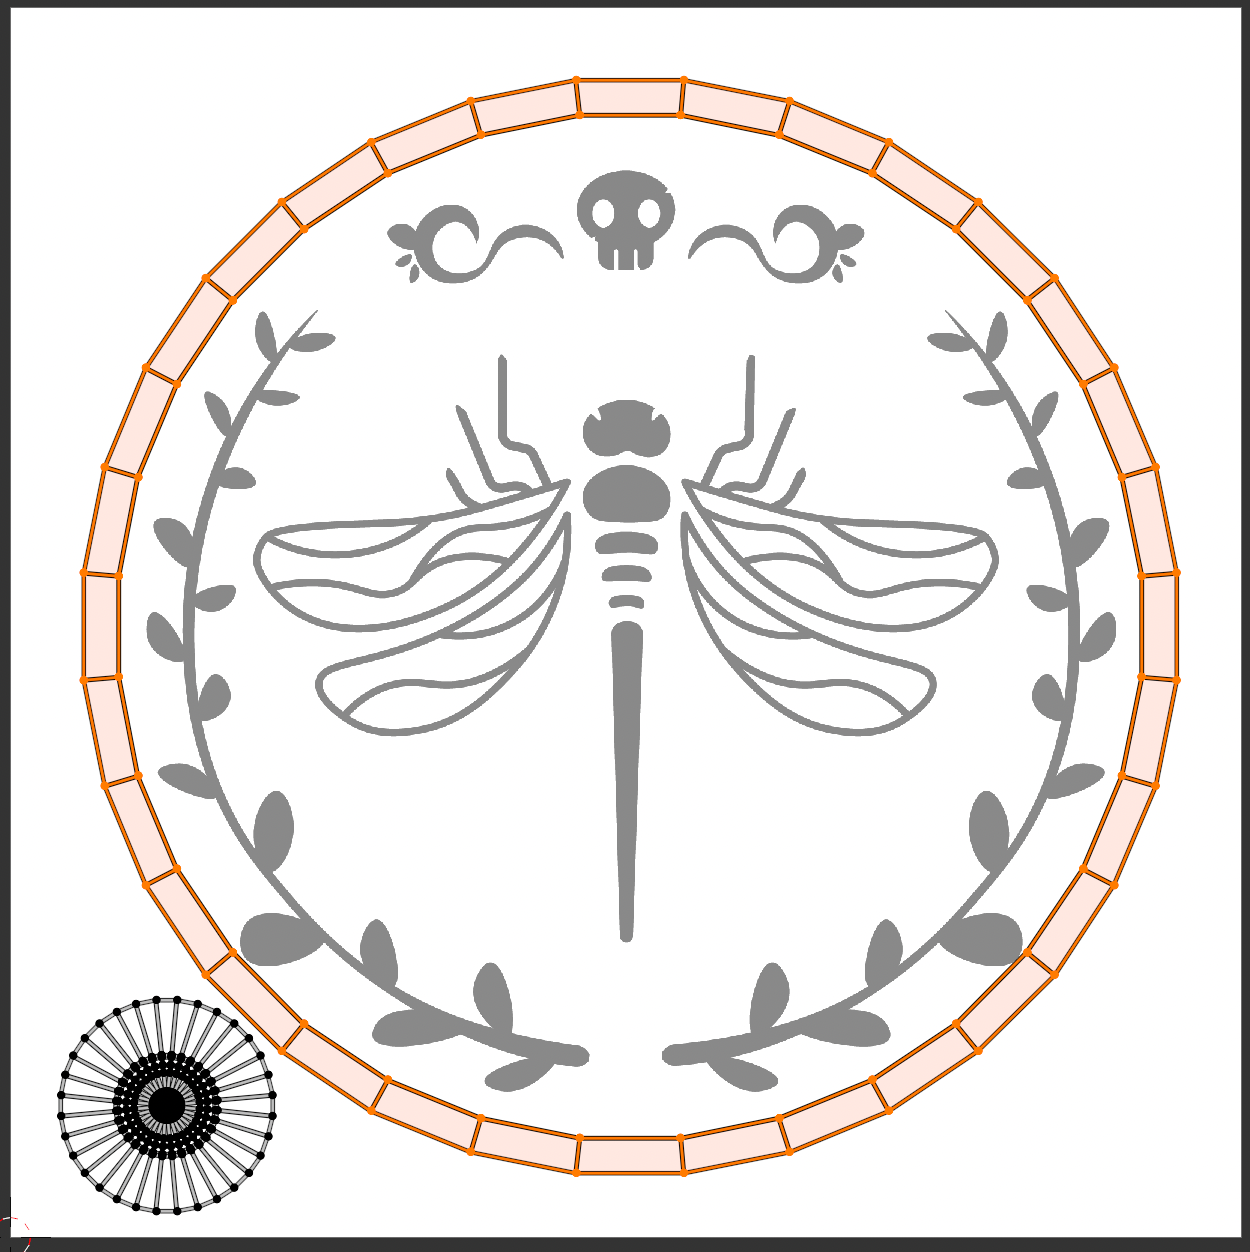
The image that we use is going to turn into height info, so we need a stencil i.e. a black and white image with clear outlines. If you don’t want to create your own design/ stencil, you can do a quick google search for images and I am sure there will be tons of free image resources that can be used as the image texture.
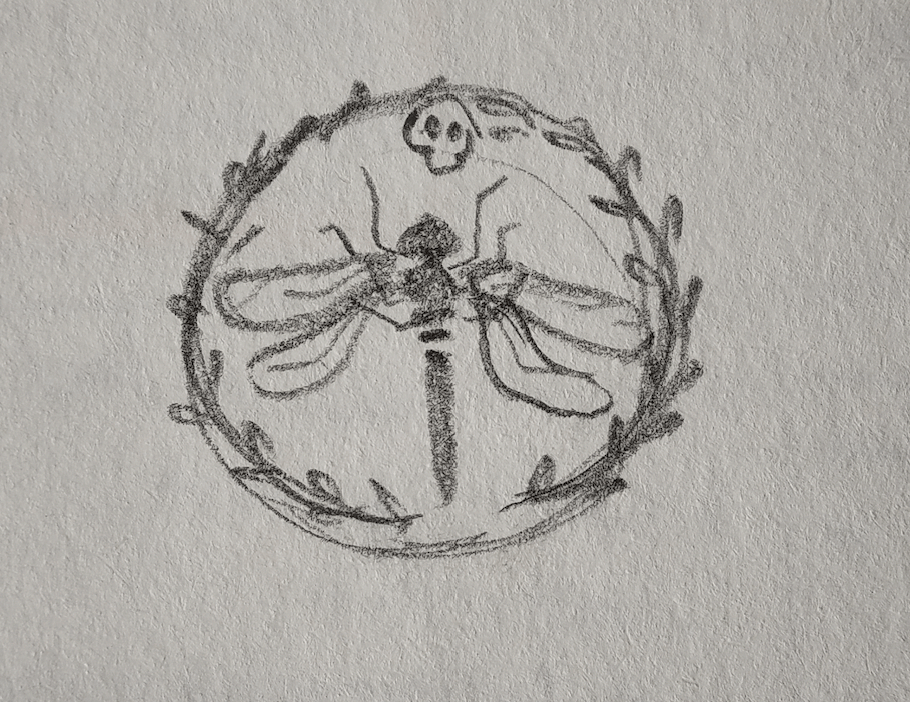
I wanted to design a coin with a dragonfly. I quickly sketched a rough idea for the coin and then moved on to Adobe Illustrator to create the stencil.
Modelling the Coin
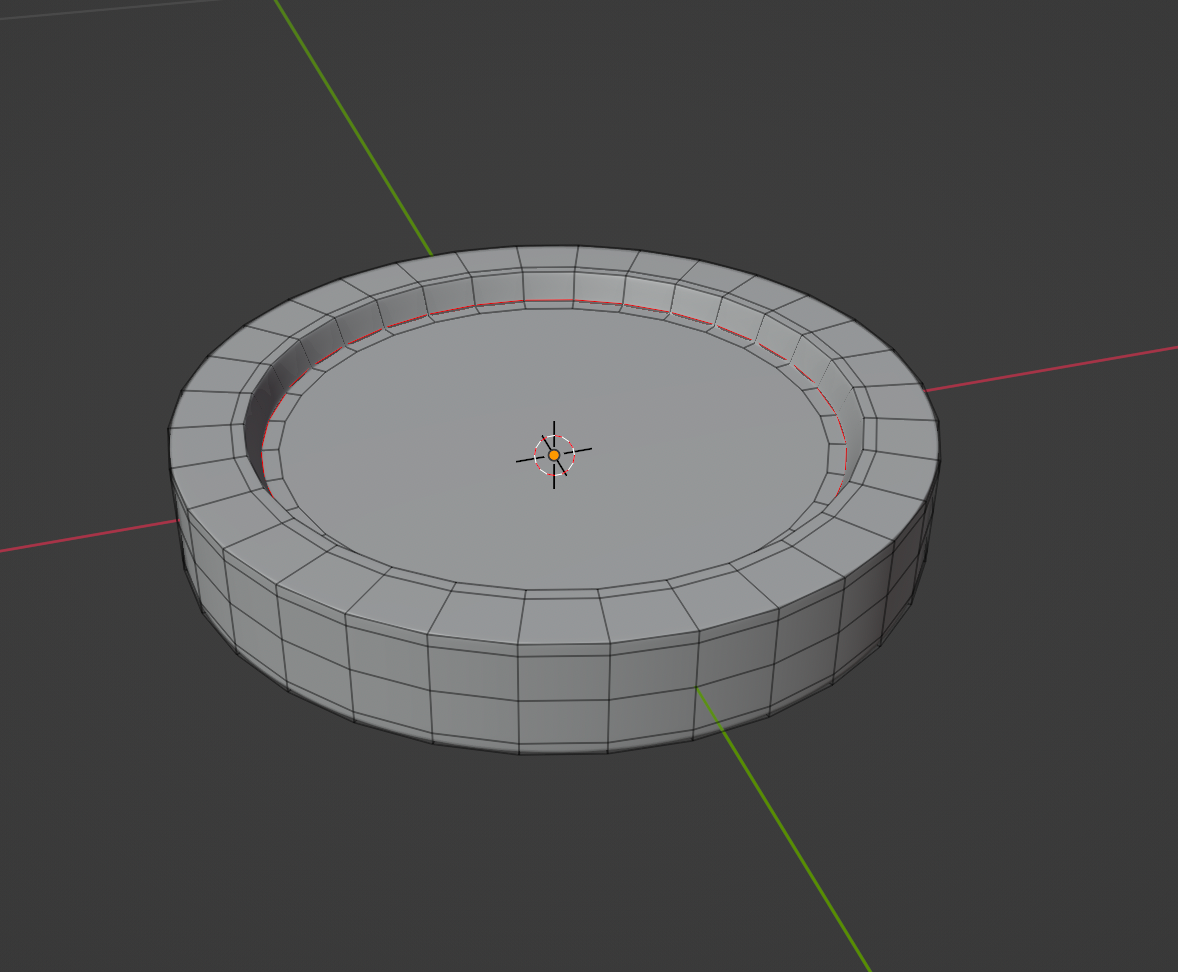
For the coin, it was pretty straightforward. I used a cylinder and scaled it down to the size I wanted the coin to be.
With a few loop cuts, I defined the shape of the coin. Then insert the top and bottom faces to create the inner indent of the coin, then scale them down on the Z-axis.
Adding the Engraving
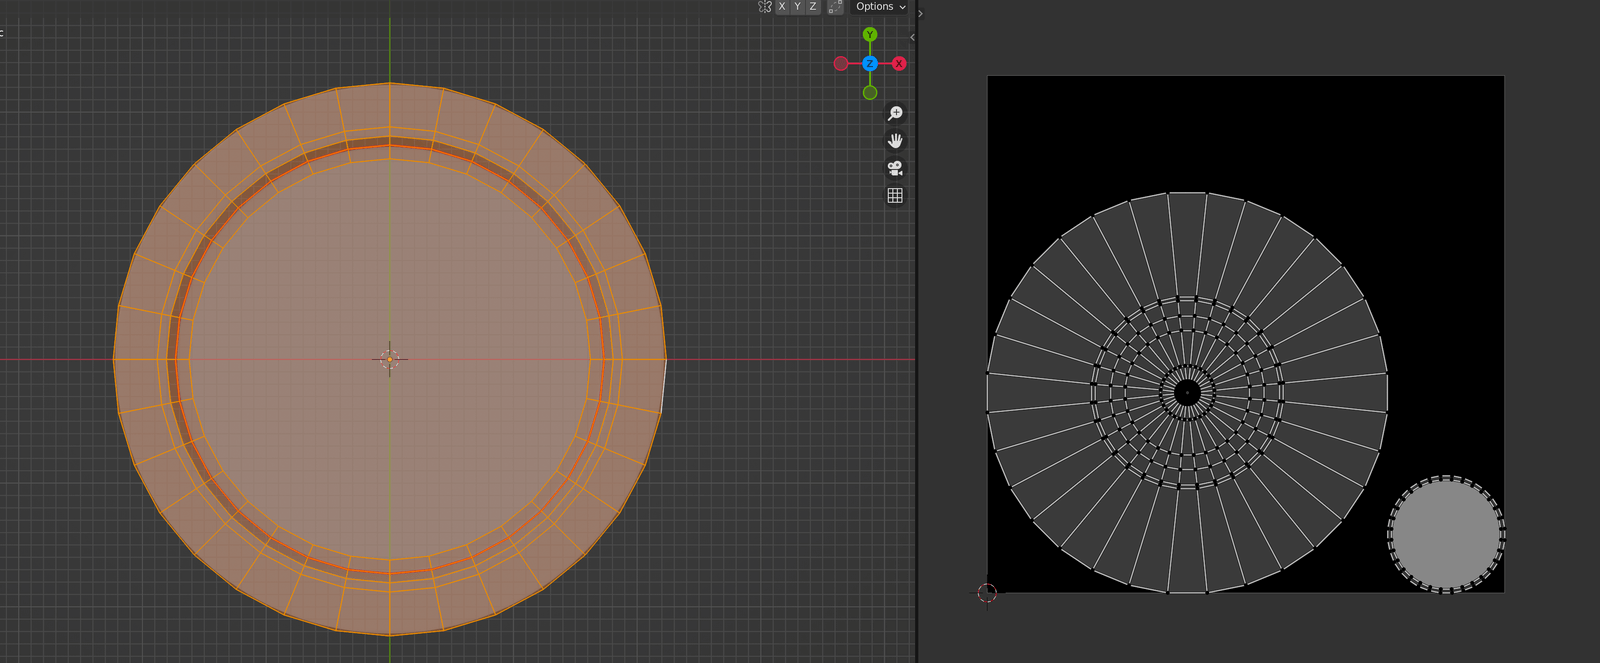
Now, we can create the engraving effect. Before we do that, we need to define a UV map. So that blender can map exactly where to put the engraving on the coin.
A. UV unwrapping the coin
- Select the inside edge loop of the coin and right-click > mark seam.
- Select all edges by pressing A, then press U> unwrap. You should have something that looks like this:
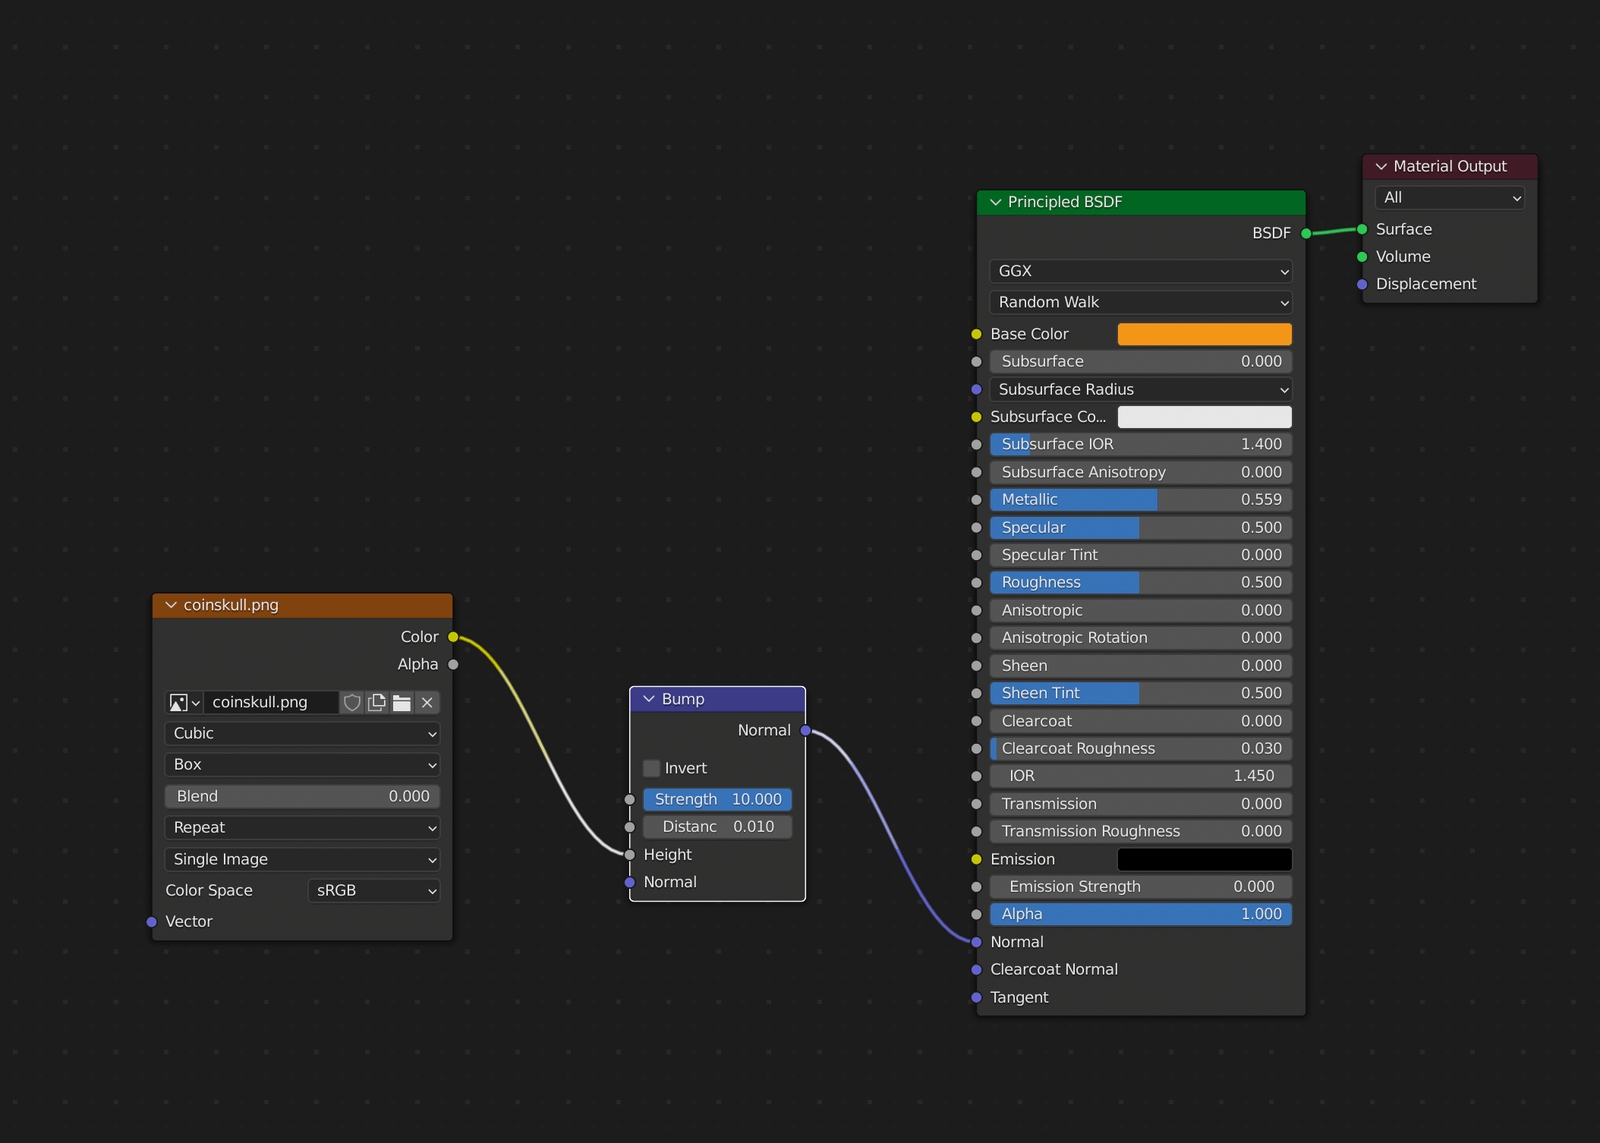
B. Adding the material
- Now, create new material for the coin, naming it appropriately. I added a yellowish colour and changed the roughness and metallic property to make it look more like a coin.
- In the Shader editor tab, add a new image texture node and add the engraving stencil image. And add the bump node.
- Next, pass the Color output to the bump node as Height. Then pass the bump node Normal output to the principled BSDF as normal.
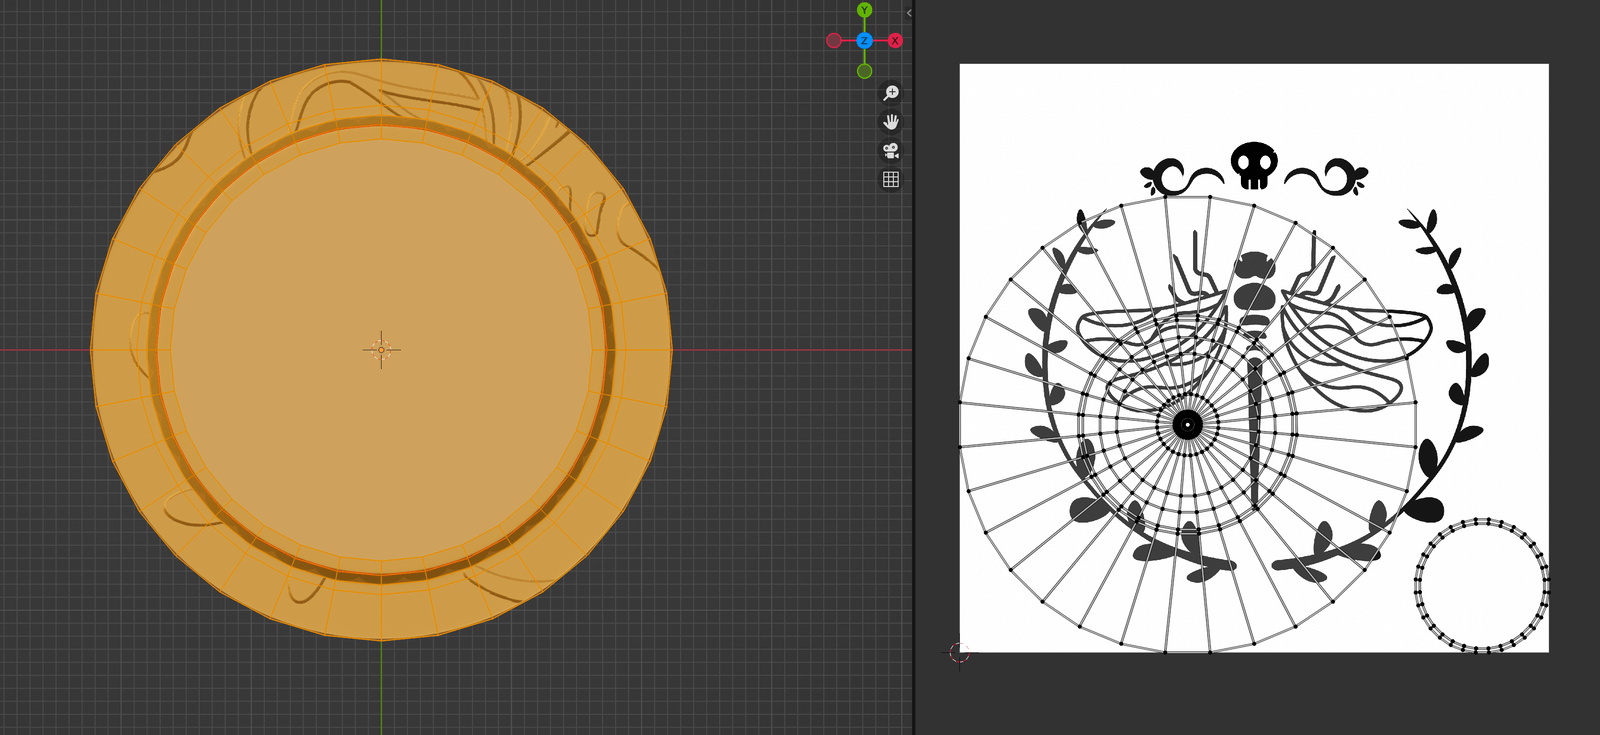
Now, all we have to do is align the UV map to the stencil.
Polishing the details
The bump node variables can be changed to change some of the engraving details of the coin. If we activate the invert mode in the bump node, the stencil will look engraved instead of the embossed effect that it currently has.
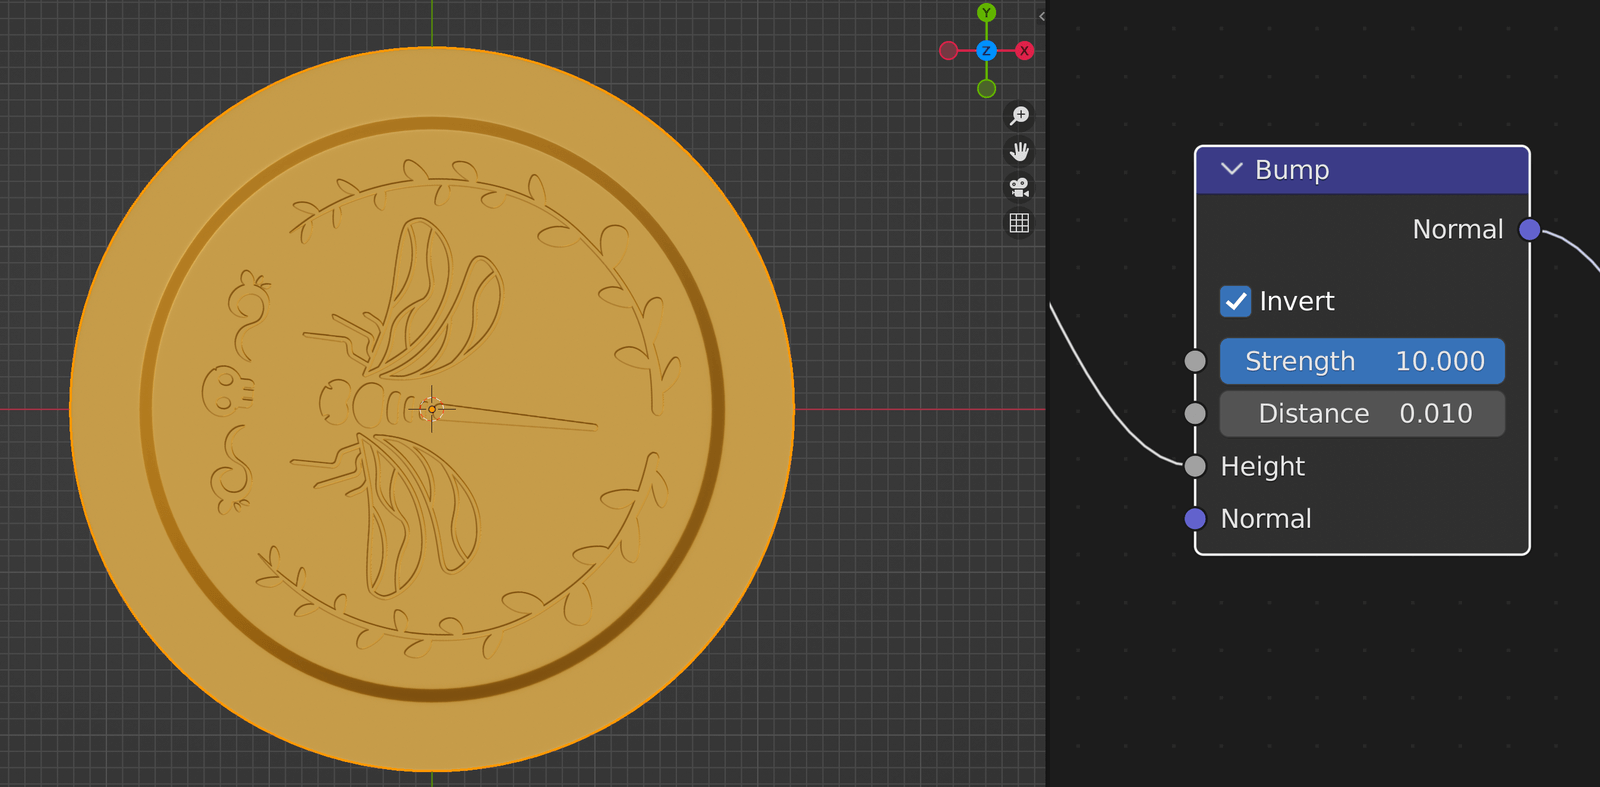
A quick tip: If the details appear hazy or pixelated, then reduce the distance variable down to 0.010 the least possible. It should give the best possible result.
High-quality image results in sharper details.
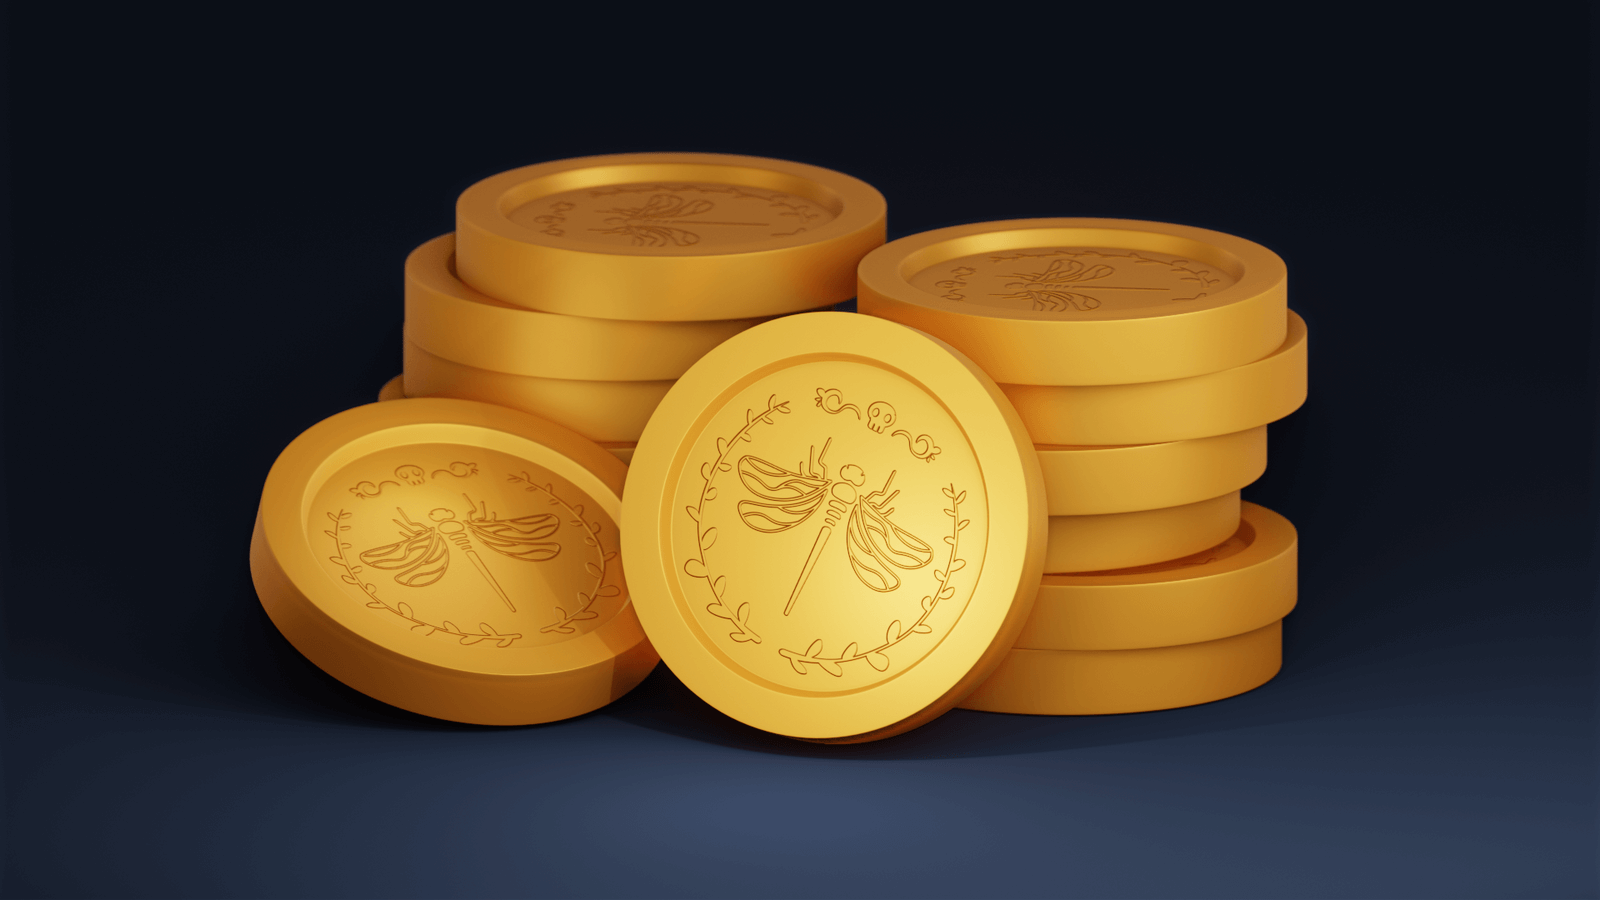
And we have ourselves an engraved coin! This method doesn't really give the best depth effect, but it's a great way to get some quick detailing done, without having to sculpt out the engravings. And it's also pretty lightweight in terms of vertex count since we don't need a ton of subdivisions.