
Today, we will be creating a piston rig in Blender using animation constraints. The rig will be accurate to real life, making animating it easier. We can use this method to create parts of other mechanical rigs as well.
Step 1: Modeling Piston Base Mesh
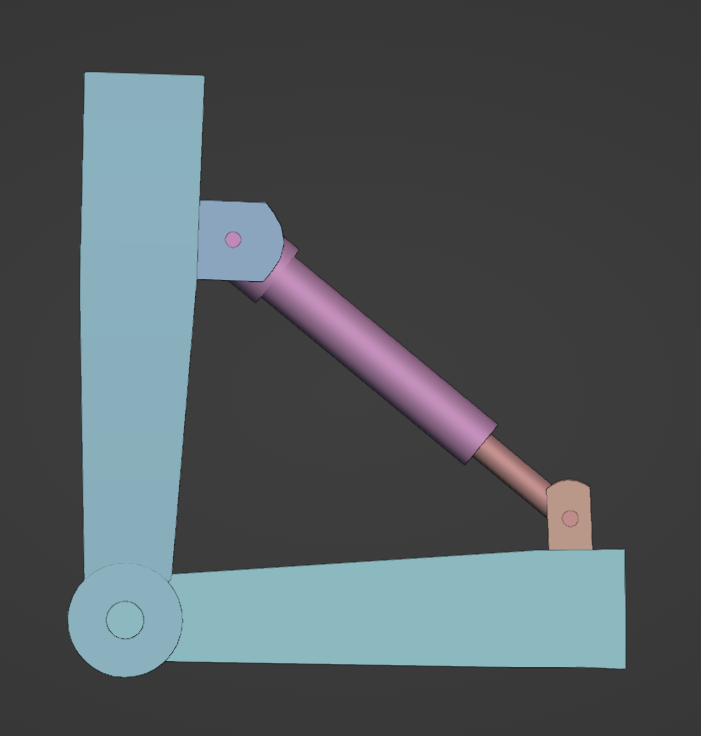
Let's start by modelling a simple piston mechanism. Modelling the piston at an angle will help with the rigging later on.
Here is what my mesh looks like:
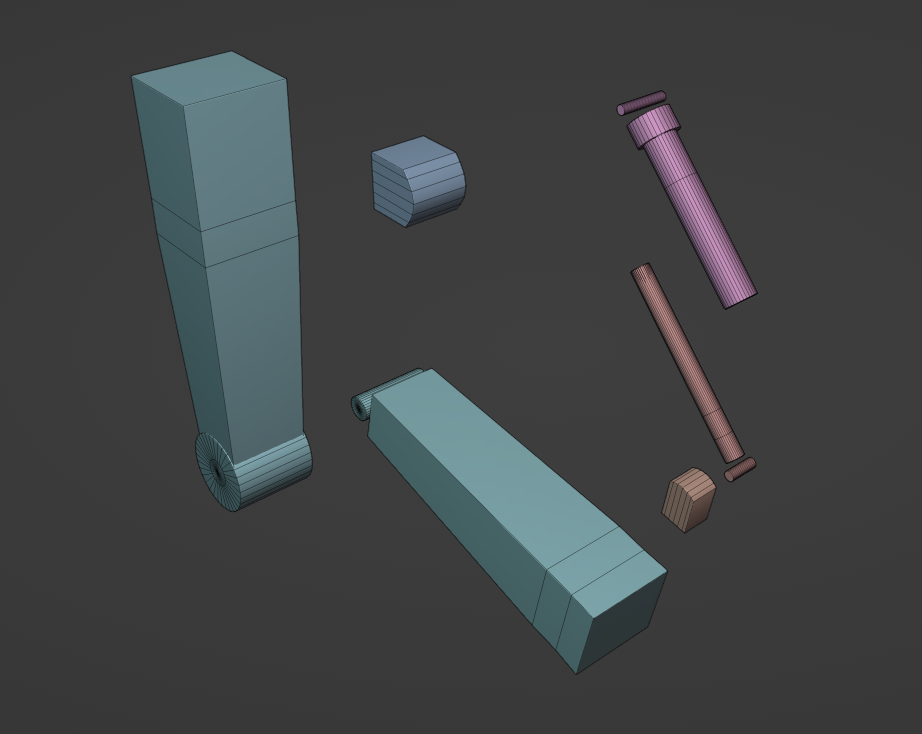
I used primitive meshes like cubes and cylinders and modified them to achieve this. Bevel, extrude and transform the mesh when needed.
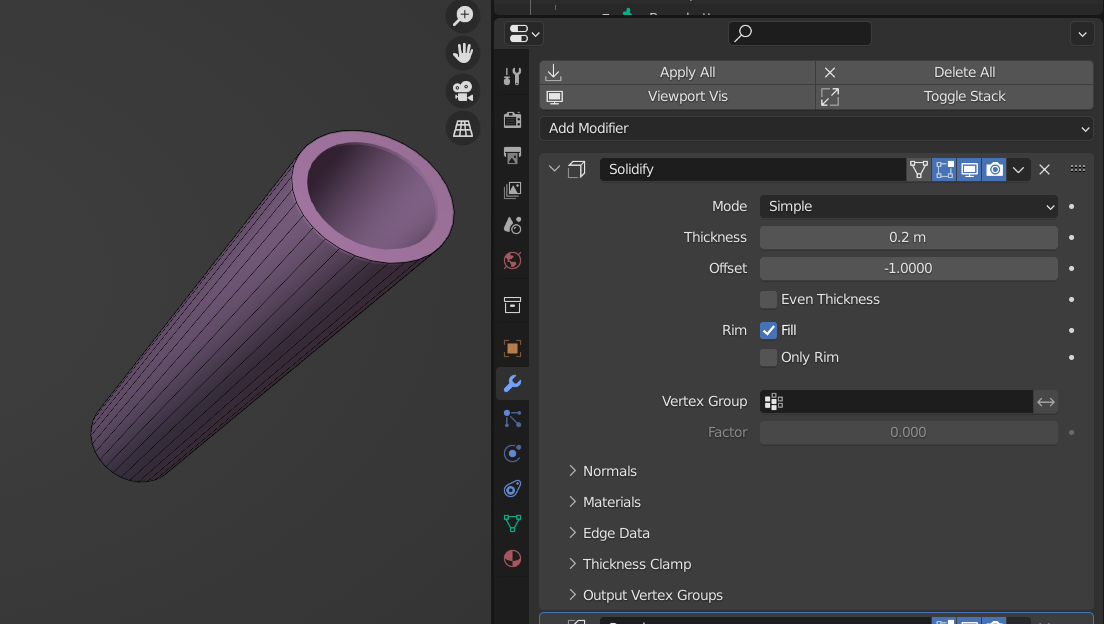
To get a cylinder with a hole, delete the faces at the top and bottom of the cylinder. Then add a Solidify modifier to the cylinder. The thickness can be adjusted using the Thickness slider of the modifier.
Join the parts that move together using Ctrl + J. You can refer to the figure below for parts I have joined together. Parts with the same colours should be joined.
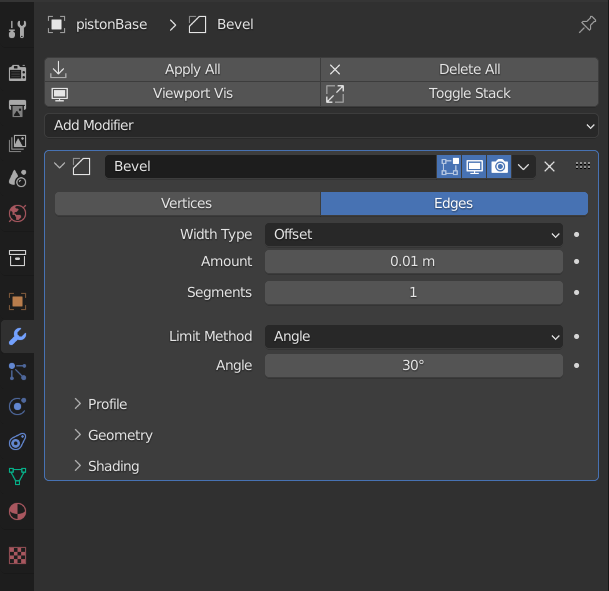
Using a Bevel modifier can help with the edge appearing less sharp. So I added a bevel modifier to all of my meshes. You can play around with the number of segments to add and the bevel amount to get your desired result.
Step 2: Set Up Bones with the Piston Mesh
Now that the mesh is done let's add bones to control the mesh. Place your 2D cursor at the connecting rod and place a bone there. In edit mode, duplicate and repeat this process for all connecting rods where rotation is possible.
Skinning the mesh is very simple. Align the bone to the mesh and parent the bone to its related mesh. The bone's transformation will now affect the mesh.
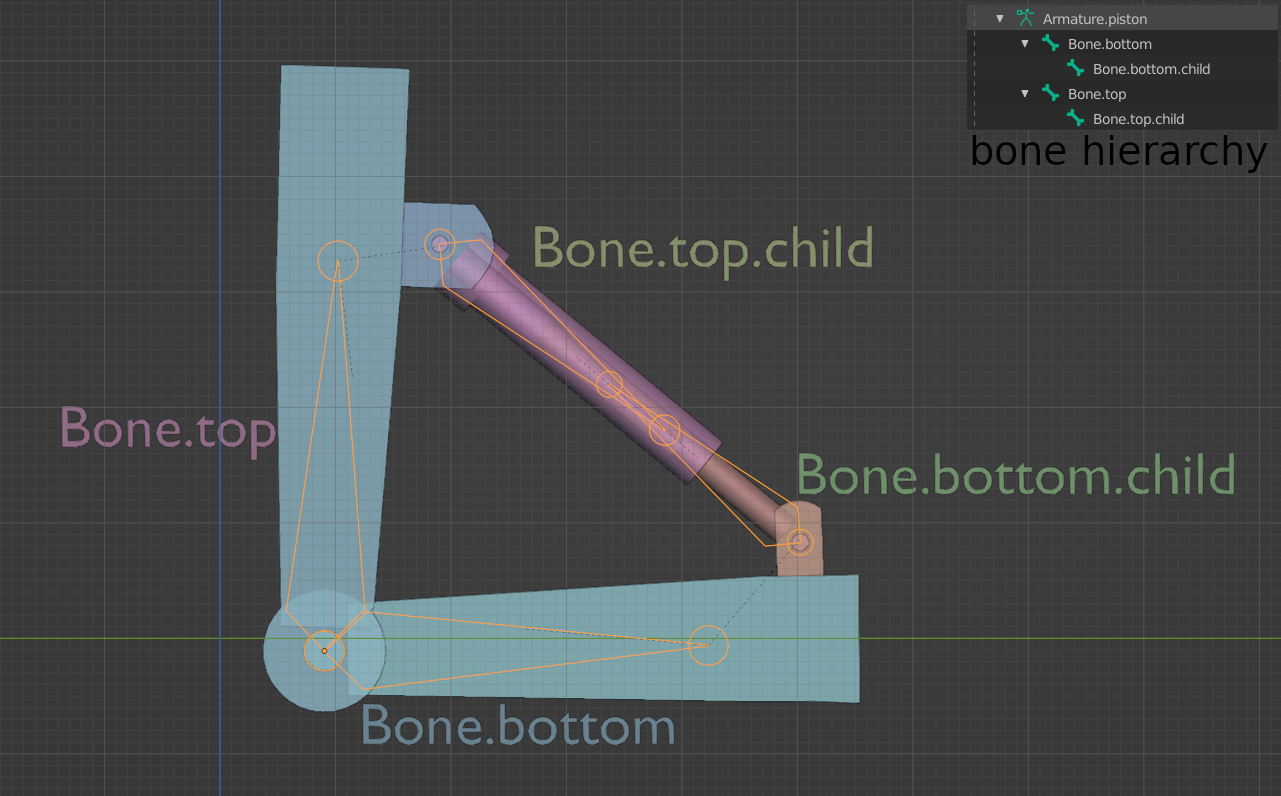
You can refer to the figure below on the position and hierarchy of bones.
Step 3: Setup Animation Constraint
To make the rig accurate to the real world, we will be using animation constraints.
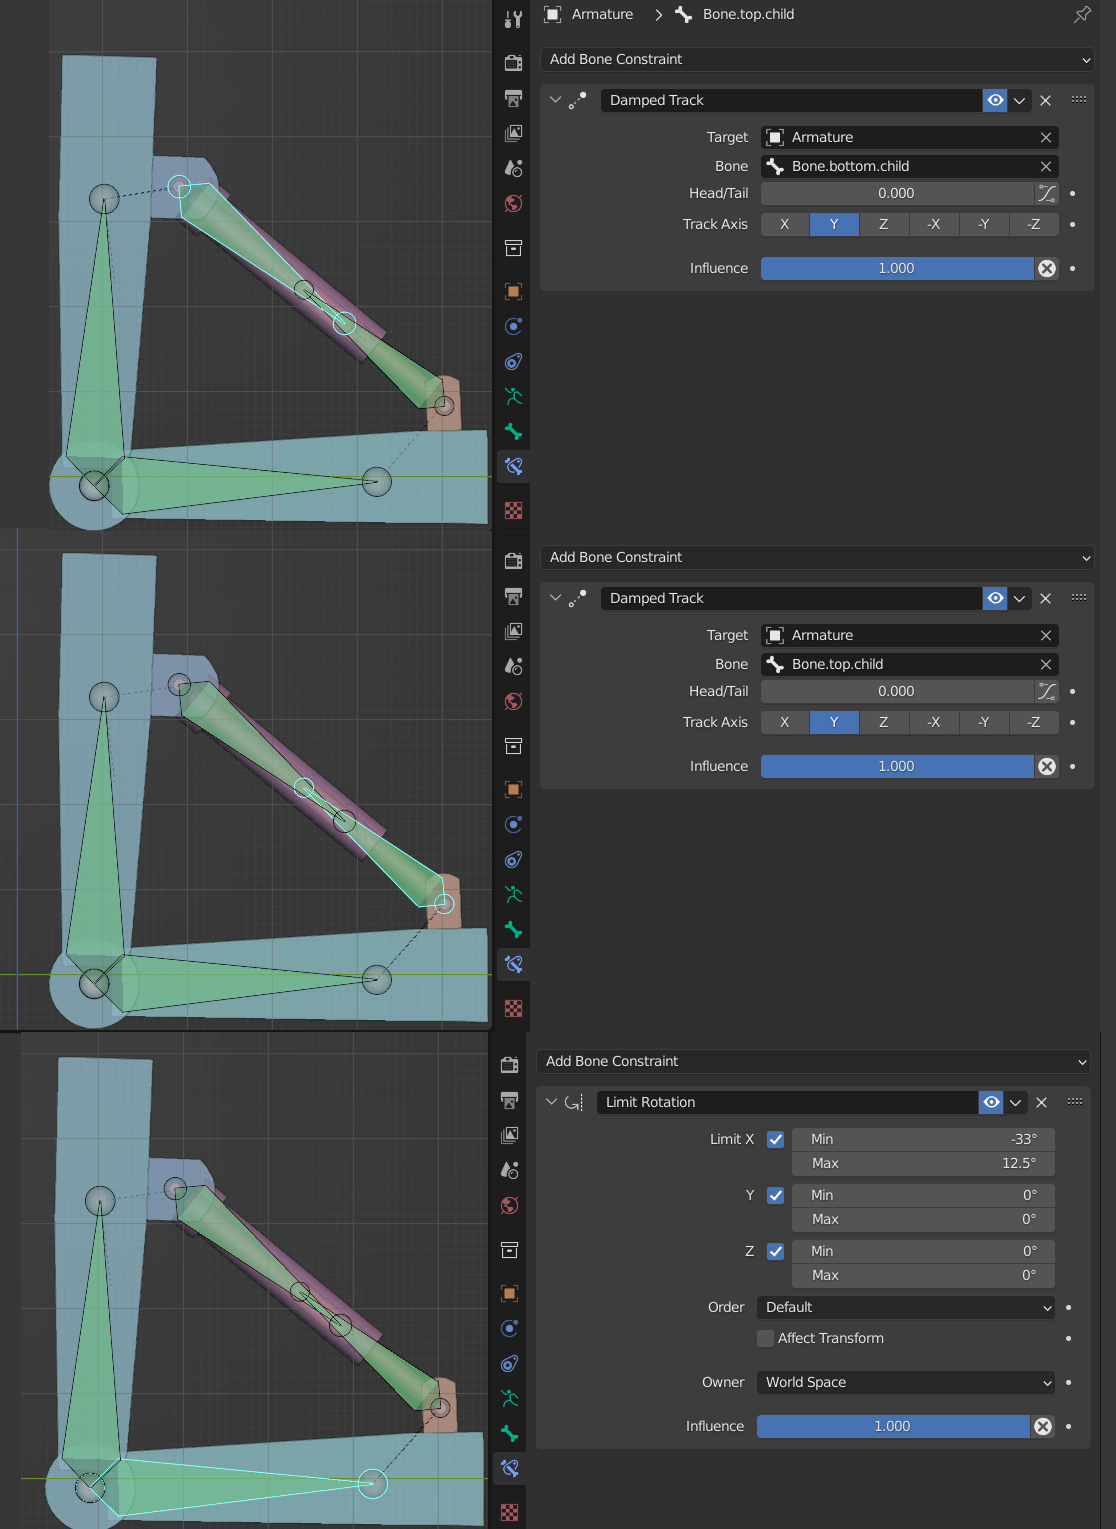
Add a Damped Track constraint to both of the child bones. Select your rig's name in Target and another child bone in Bone in their options.
This will make the two bones face each other.
Also, add a Limit Rotation constraint to limit the angle and axis of rotation. You will need to play around with the constraint's value to find the sweet spot for your mesh.
The rig is now ready. Select the bone and go to pose mode, then rotate or move the bone as needed to animate. Here is a demo of how the rig will animate:

Hope you enjoyed making and animating this rig. And don't forget to integrate this system on your future rig when needed.
I will be writing on how to create different types of mechanical and organic rigs in the near future, so stay tuned for that.