
Introduction
One of the main reasons Flutter is a step ahead of its competition is its ability to control each pixel. A developer has full access to each pixel, allowing them to create desired smooth user interface along with fluent animation. This has been one of the key points of Flutter compared to other cross-platform technology.
In native Android and iOS development, working on custom designs may be very hard and time-consuming. Forget about these troubling times, as Flutter's custom Paint Widget and Hot Reload feature make it easy and quick to make changes to the project. Many developers prefer Flutter over native as they can develop complex to simple custom designs per their needs.
Basics of Custom Paint
To use a custom painter, we must first implement Custom Paint widget and pass the Custom Paint class to the painter parameter.
Custom paint normally takes two parameters: a painter and a child. A simple demo is given below on how to use the custom painter in the code snippet.
CustomPaint(
  painter: MyPainter(), // Your custom painter class
  child: const Center(
    child: Text(
      'Hello World!'
    ),
  ),
)We must initialize our custom painter class as shown below in the code snippet. We create a MyPainter class that extends CustomPainter class, which is an abstract class. This class must be implemented with two methods: -
1. paint
Paint is the first method to override, which helps to paint the UI (User Interface) whenever the method is called.
2. shouldRepaint
When a new instance of the class is given, the shouldRepaint function is invoked to determine whether the new instance truly represents new information.
class MyPainter extends CustomPainter {
  @override
  void paint(Canvas canvas, Size size) {}

  @override
  bool shouldRepaint(CustomPainter oldDelegate) {
    return null;
  }
}Drawing Basic Shapes
Custom painter is a very powerful tool that can be used to create extremely complex UI and animations. However, we will create some basic shapes using a custom painter to make them simple. We will create a straight line, rectangle, circle and stroke property.
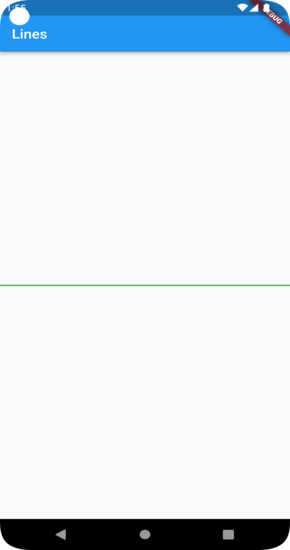
i. Drawing a Straight Line
The snippet given below creates a straight green line. We define our shapes to be drawn inside the paint method along with other properties like offset and color. The first offset creates a point at the x-axis of the device screen, and the second offset creates a line from the first offset till the end of the centre screen width y-axis.
void paint(Canvas canvas, Size size) {
  final paint = Paint()
    ..color = Colors.green
    ..strokeWidth = 2;
  Offset point1 = Offset(0, size.height / 2);
  Offset point2 = Offset(size.width, size.height / 2);
  canvas.drawLine(point1, point2, paint);
}
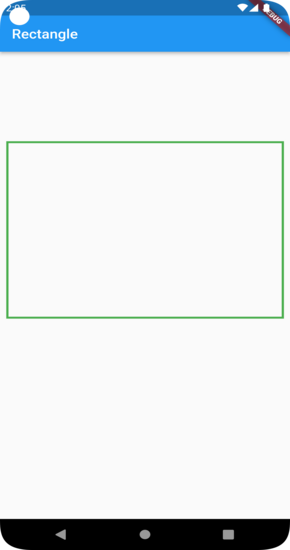
ii. Drawing a Rectangle
The snippet below creates a rectangular box. The paint method has a drawRect method which is accessible using the canvas class. This method takes four points to draw a rectangle on the screen easily. We can give styling, stroke width, and colour fill per our requirements.
  void paint(Canvas canvas, Size size) {
    Paint paint = Paint();
    canvas.drawRect(
      Rect.fromLTRB(10, size.height / 2, 400.0, 40.0),
      paint
        ..color = Colors.green
        ..style = PaintingStyle.stroke
        ..strokeWidth = 3,
    );
  }
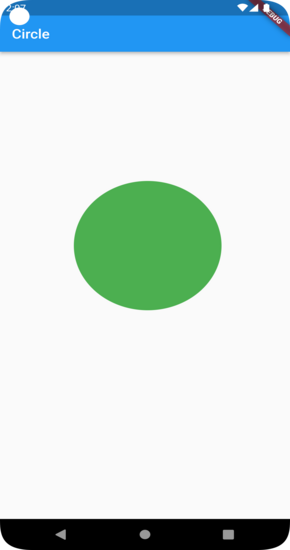
iii. Drawing a Circle
Just like a rectangle, we can easily create a circle using paint. In the paint method, using canvas, we get access to the drawCircle method to create a circle easily. drawCircle takes offset, radius and paint as a parameter.
  void paint(Canvas canvas, Size size) {
    var paint1 = Paint()
      ..color = Colors.green
      ..style = PaintingStyle.fill;
    canvas.drawCircle(Offset(200, 200), 100, paint1);
  }
Application of Custom Painter
i. Drawing Complex Shapes
There comes a situation when a developer needs to create complex UI as per the designs, and Flutter's default widget might not be sufficient to create the required UI design. For creating complex shapes with curves and lines, we need custom paint to create multiple points and curves per the design requirement.
ii. Drawing Text
The text widget in Flutter uses paint to draw text by default. We can overcome that and use text painter in custom paint to draw text from scratch using paint. There is no such vast difference between text widget and text painter, but by using text painter, we have access to the text's actual height and width in pixels. Properties like maxLines, style and textAlign are also available for flexibility.
iii. Drawing Images
There may be situations where image processing is involved in projects, and complex tasks must be performed. Using custom paint to paint images on canvas and performing further operations helps to reduce memory pressure and improve performance. We can edit images, add filters, and add text or borders to the image.
iv. Creating Complex Animations
We sometimes need to create complex and pixel-perfect animation in the app, which can be achieved using custom paint. Creating an attractive app requires animations that are jank-free and smooth. We must work with custom paint to maintain better fps and jank-free animation.
Conclusion
Custom paint is of great help to Flutter developers as it is very powerful and versatile, using which developers can perform complex tasks. As you read in this article, custom paint is easy and helps to optimize application performance. There is more to this topic. Go ahead and explore more and create beautiful things with paint in Flutter.
Thank you for reading. Subscribe and share it with your friends if you found this article helpful.