

Ensuring all users have access to appropriate resources while safeguarding sensitive data and preserving data integrity can be complex. Misconfiguration in such implementation will often have devastating results. As such, effective authorisation testing is a critical step in development.
However, testing for authorisation issues isn't always straightforward, especially in large applications, as it often involves navigating intricate access control mechanisms of multiple roles with complex permission structures. In this series of blogs, we will discuss how Burp can be utilised to make authorisation testing more efficient, reduce manual effort, and automate certain tasks.
BurpSuite and Its Extensions
BurpSuite is one of the leading/popular web application security testing tools developed by Portswigger. It has been a go-to choice for security professionals as it is packed with robust features. One is the ability to create/install extensions as the user requires. Today, we will highlight those useful extensions when testing for authorisation issues.
Autorize
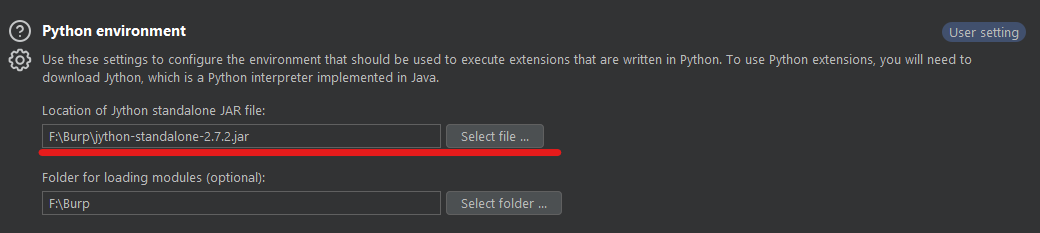
Autorize is a free extension available from the Bapp store. It requires Standalone Python, so make sure you have it configured. Once installed and loaded, you will notice the Autorize tab. Click on it, and you should see something like the image below.
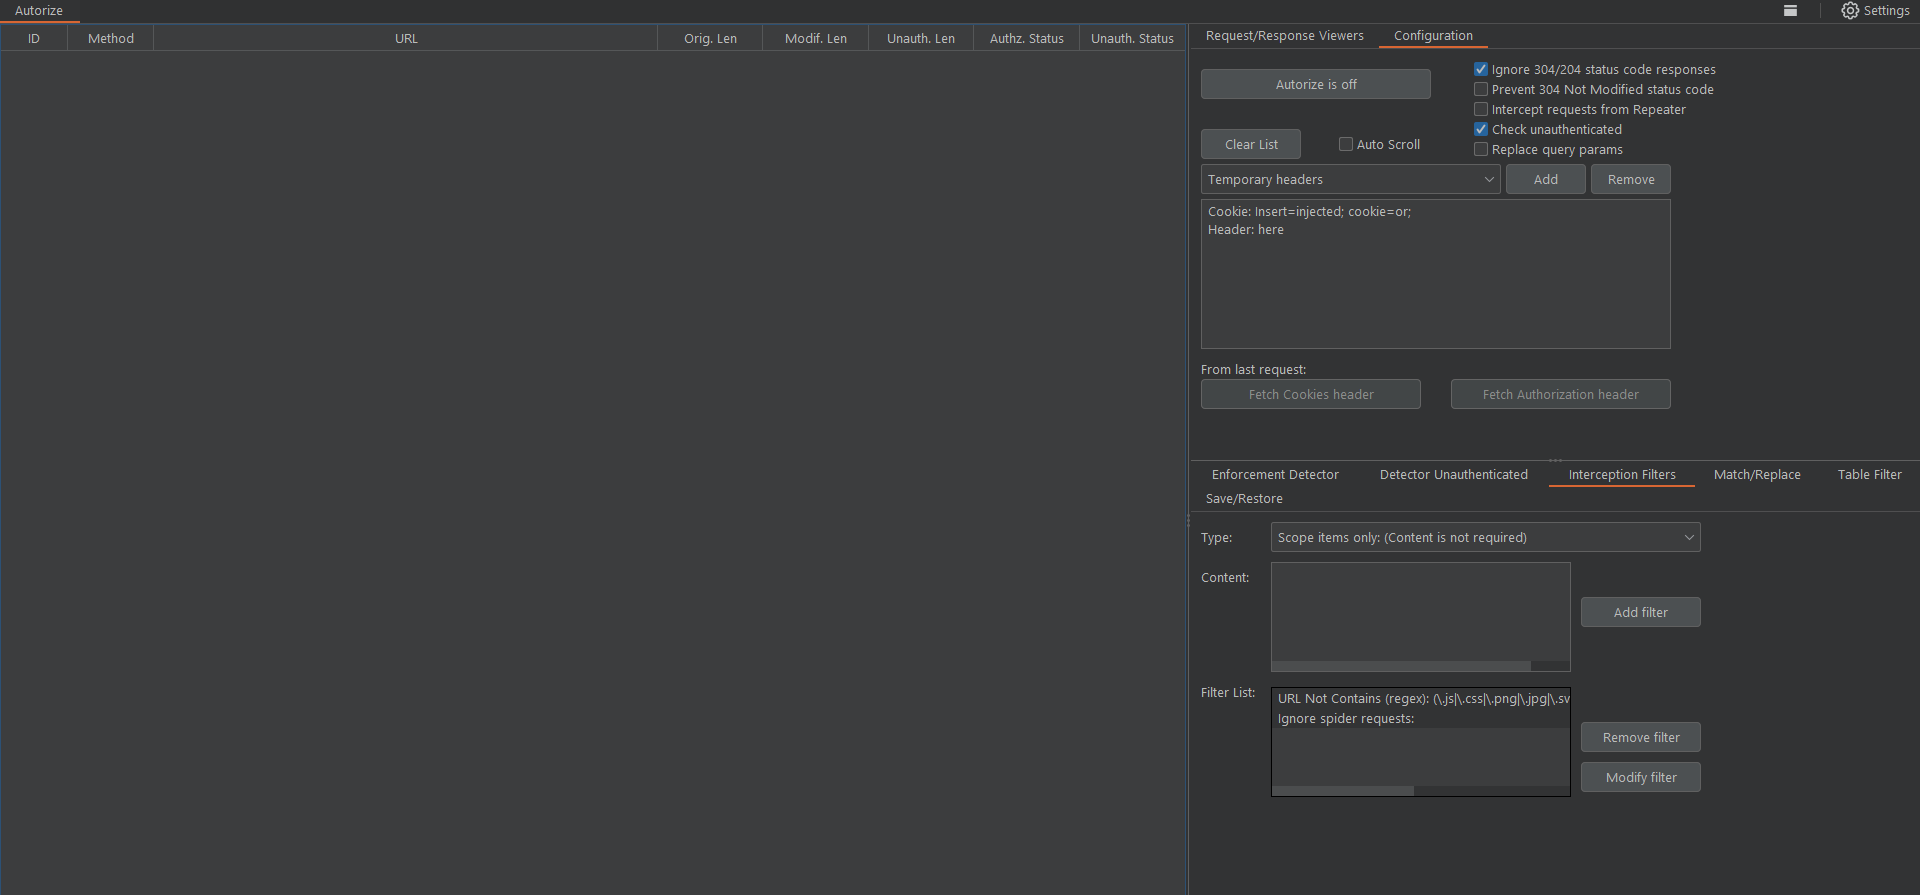
Setting up Autorize
Using Autorize is pretty simple and easy to configure as well. At the most basic, you just need to configure session tokens for low-privileged users and browse the application as a high-privileged user. Autorize will repeat the requests made by high-privileged users, replacing the session tokens with those of low-privileged users. You will be able to monitor the responses, which are colour-coded according to different enforcement statuses (see the image below for reference).
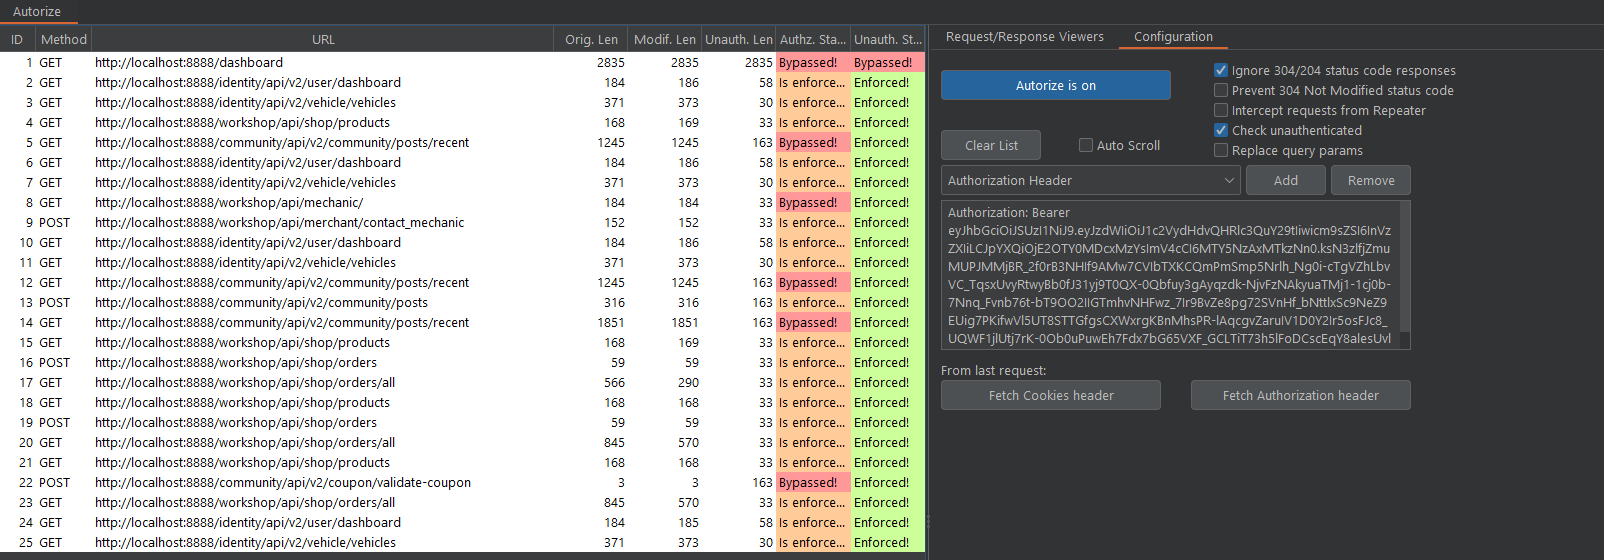
Enforcement Filter
Autorize uses 3 statuses as indicators, i.e.:
- Bypassed 🔴: Usually, it means a low-privileged user can access something that isn't allowed.
- Enforced 🟢: Authorisation schema is working as intended.
- Is Enforced??? 🟠: Autorize could not determine the authorisation status and needs more configuration.
The Is enforced??? status means the enforcement detector requires more configuration as Autorize couldn't accurately determine the authorisation status. For this, you should review the modified responses and check if anything can be used as indicators, i.e. response body might contain strings such as "not authorised" or "invalid action", which you can add to the filter list.

It can be configured to look for a simple string as well as complex regex or to look for different things, such as the content length of the response, headers, status codes, etc. So, do go through the filters and experiments yourself to find what works for you.
Interception Filters
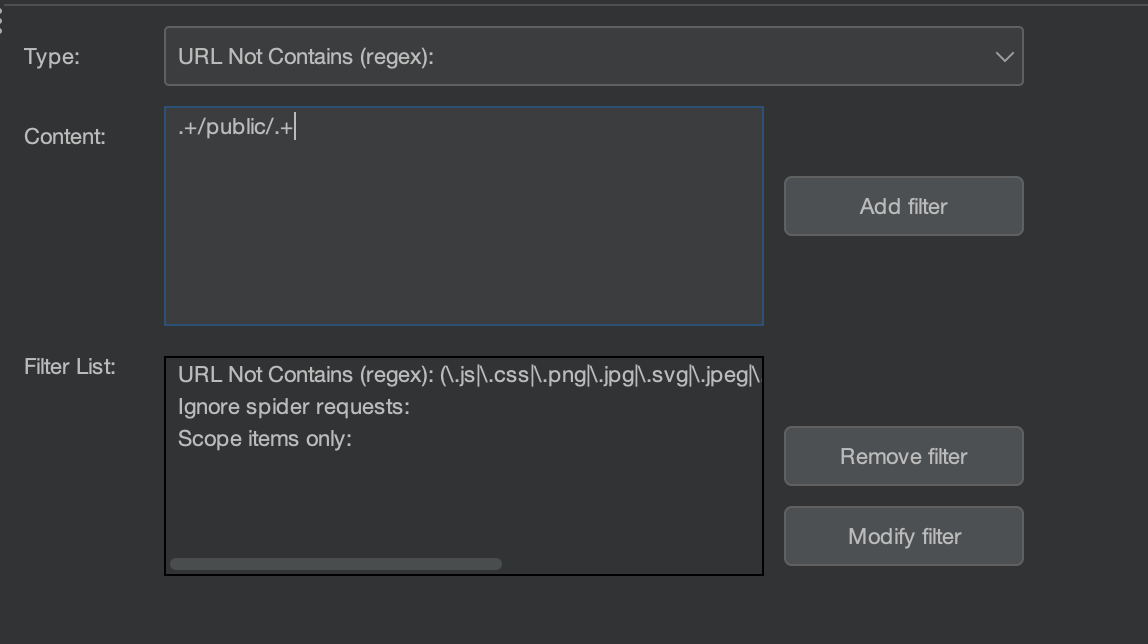
Autorize can be configured to only allow certain domains/endpoints to go through the plugin using interception filters. This allows you to reduce noise and actually focus on what's important. There are various ways you can achieve this. For example, you can limit the requests to Scope Items only or filter endpoints using "URL Contains/Not Contains," etc.
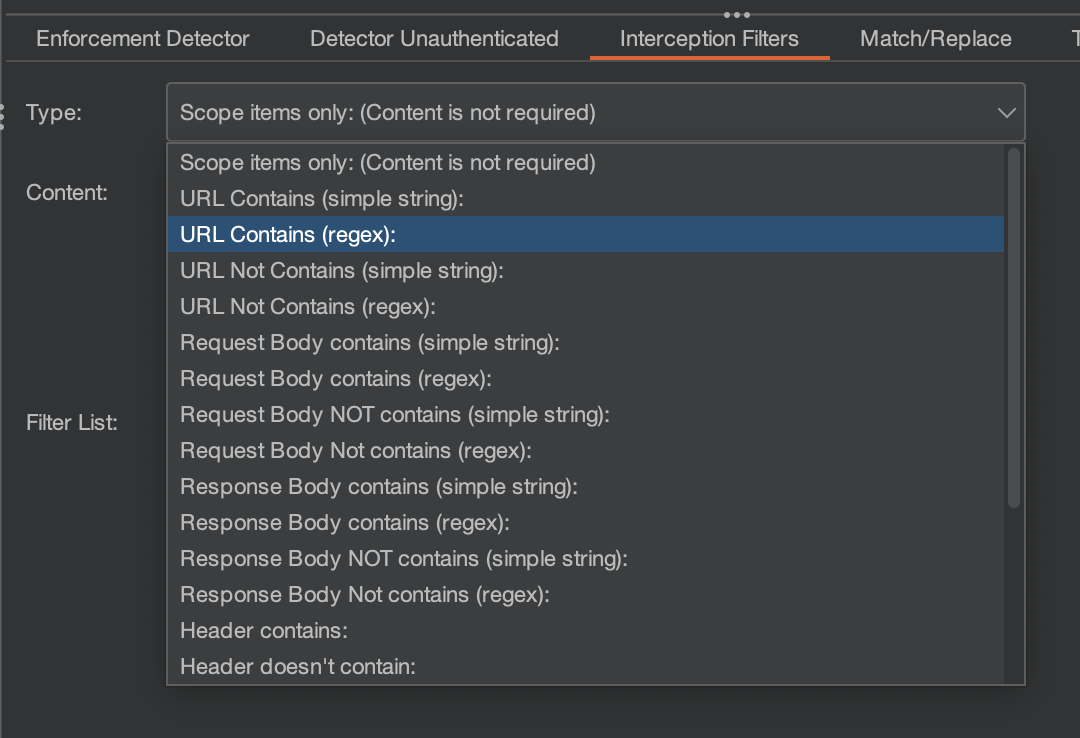
If an endpoint is available for everyone, irrespective of their role, we might not want those requests to populate our authorisation. We can simply prevent the endpoint from appearing using the "URL Not Contains (regex)" filter with the regex .+/public/.+ . Just click Add filter and browse the application, you will notice that the blacklisted endpoint will not be present in Autorize anymore.
Once configured properly, you can forget about it and focus all your attention on testing the application for other issues. You will still be able to find broken access controls present in the application. Running in the background reduces the time and manual effort required.
Auth Matrix
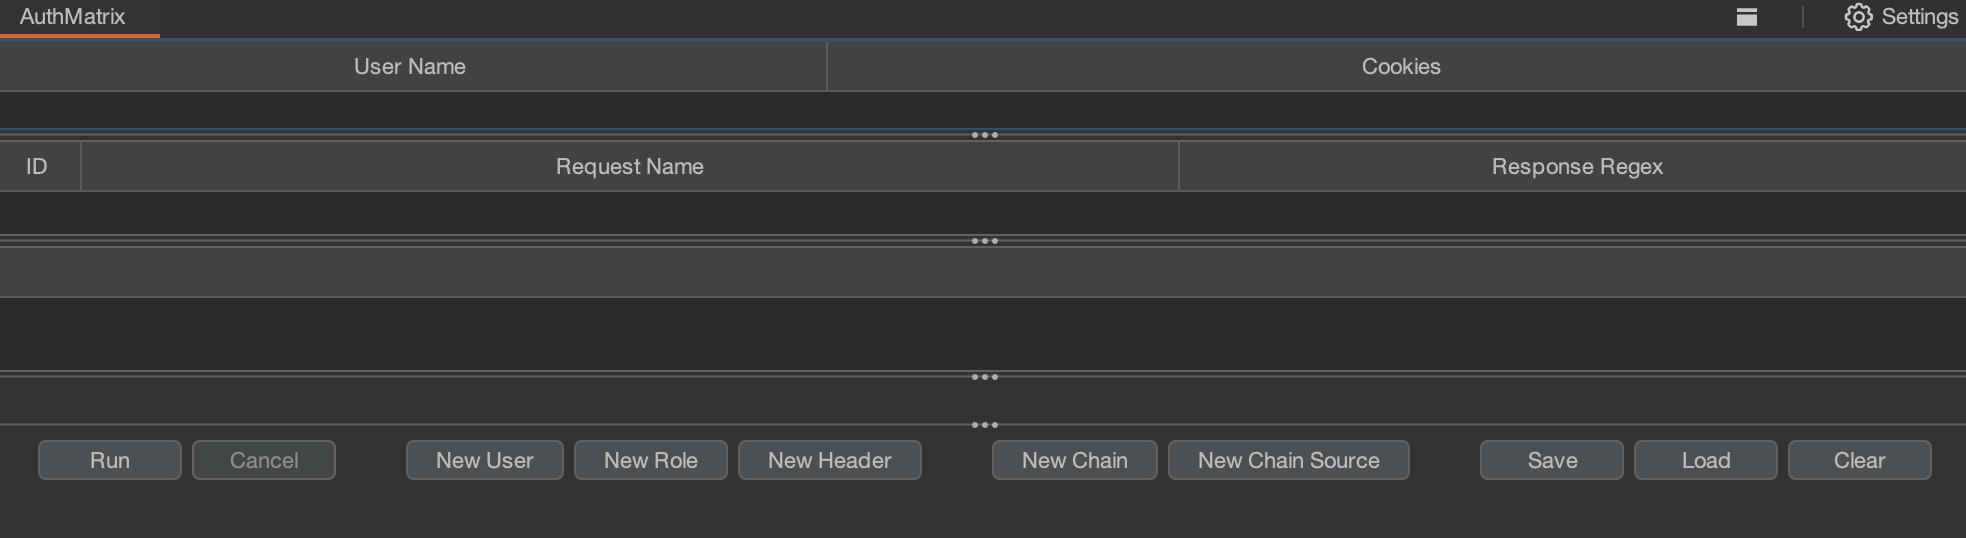
While Autorize is great, it falls short when you want to test an application with multiple roles and a complex authorisation schema. This is where Authmatrix comes in. Authmatrix is also a free extension that you can get from the Bapp store, similar to Autorize. Once installed, go to the Authmatrix tab, and you should see a screen like the image below.
Setting up Auth Matrix
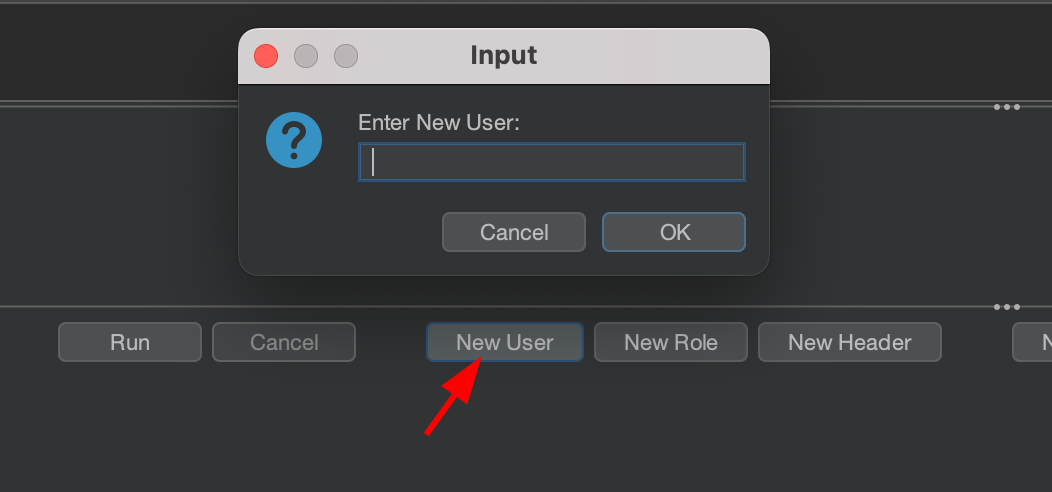
First, we need to create Users and Roles. To create a user, simply click on New User.
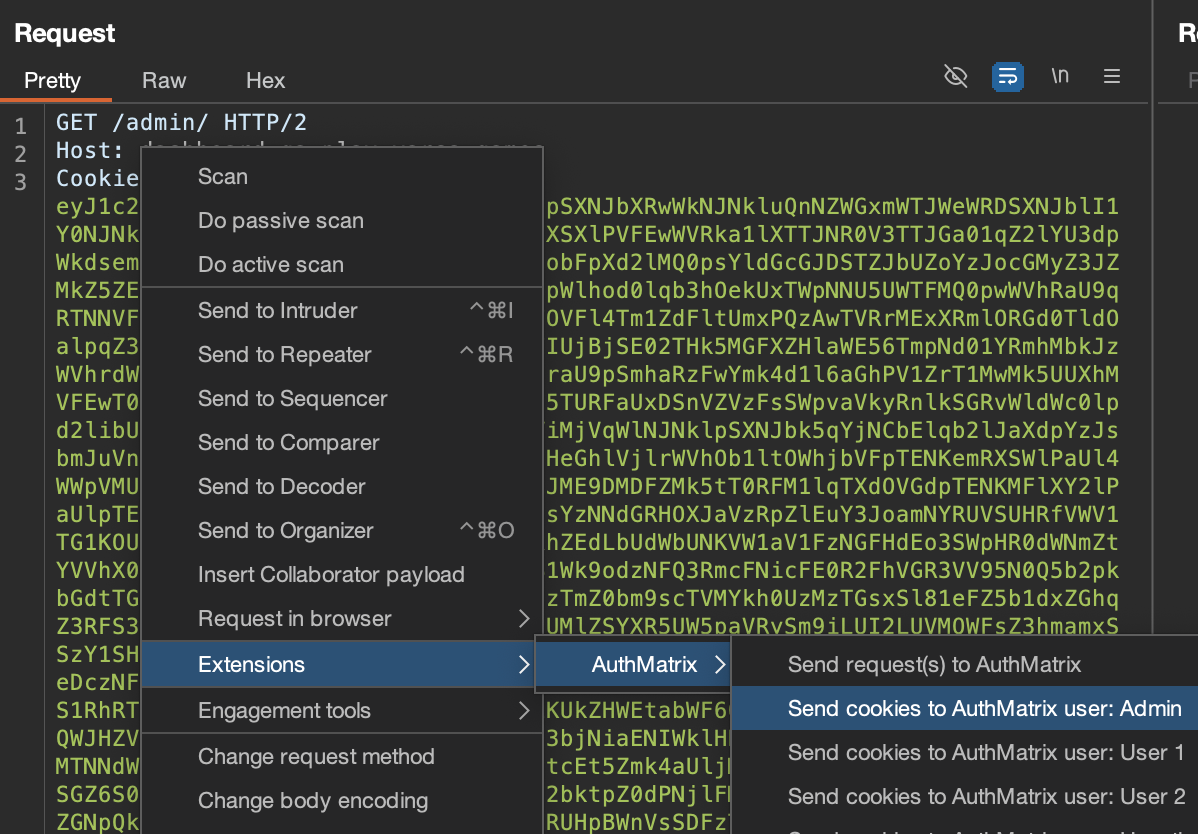
You can send the user's cookies from the request directly to Authmatrix, as shown below.
You create the role similarly and assign each user to their respective role as shown.

Our target application will have 3 users with different roles in this demo.
The authorisation matrix looks like the following.
| Admin | User 1 | User 2 | Unauthenticated | |
|---|---|---|---|---|
| /dashboard | ✅ | ✅ | ✅ | ❌ |
| /admin | ✅ | ❌ | ❌ | ❌ |
| /organization-one | ✅ | ✅ | ❌ | ❌ |
| /organization-two | ✅ | ❌ | ✅ | ❌ |
On Authmatrix, once you select the checkboxes for all roles according to the authorisation matrix in a request table, it will look like below.

Now, you can simply start the test by clicking the Run button.

Enforcement Status
Authmatrix also uses 3 different colour codes to represent the result.
- 🔴 : Request may be vulnerable
- 🟢 : Request is not vulnerable
- 🔵 : Unable to determine / Requires manual testing and further configuration
Authmatrix "Response Regex" works similarly to Autorize "Full response (regex): (enforced message contains)". By default, Authmatrix simply looks for HTTP 200 a response to determine authorisation status. You can modify it to look for strings or other indicator forms to improve detection.
Also Read: Configuring Burp Suite with Android Emulators
Chains

Chain functionality allows copying dynamic values for e.g., user-specific data such as anti-CSRF tokens. This allows us to bypass situations where the request would have failed due to a required unique token by modifying the request before sending it. It is like the match/replace of Autorize on steroids. We will dive deeper into this functionality in the next blog.
Pros and Cons
Unlike Autorize, depending upon the complexity of an application's authorisation matrix, you will spend much time configuring before testing. While highly configurable, understanding and utilising its 'chains' feature to its fullest can be challenging, making the learning curve a bit steep.
But once you are done configuring, you can save the configuration files for future use. So, whenever a new change has been made, you can keep on retesting for any potential broken access control.
Wrapping up
BurpSuite and its extension simplify authorisation testing. By incorporating them into our daily arsenal, we can make the testing process smoother and more efficient and reduce manual effort. In our next blog, we will cover similar tools/extensions, so stay tuned!
Love what you read? Don't miss out on future posts—subscribe today!