
While testing mobile applications, we need to set up a proxy to monitor the app's requests behind the pretty GUI. This article will show you how to set up a Burp Suite Proxy to work with an Android emulator.
Creating AVD with Android Studio
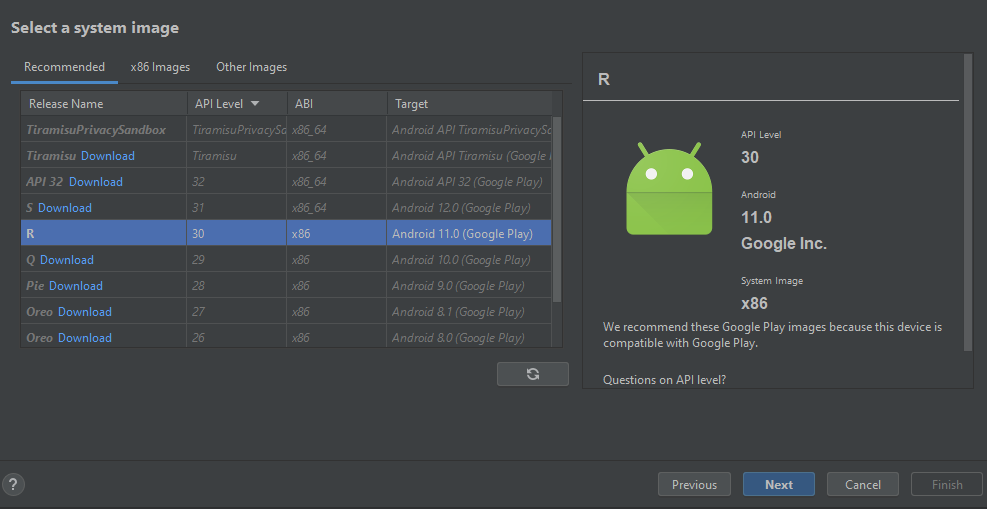
We are using a Pixel 4 AVD image with Playstore enabled for this tutorial.

Select Android 11 (API 30) as a system image.
Related article: Setup a Web Attack Surface Monitoring System
Setting Up Proxy
If you have Burp installed, go to the Proxy tab and then click Options.
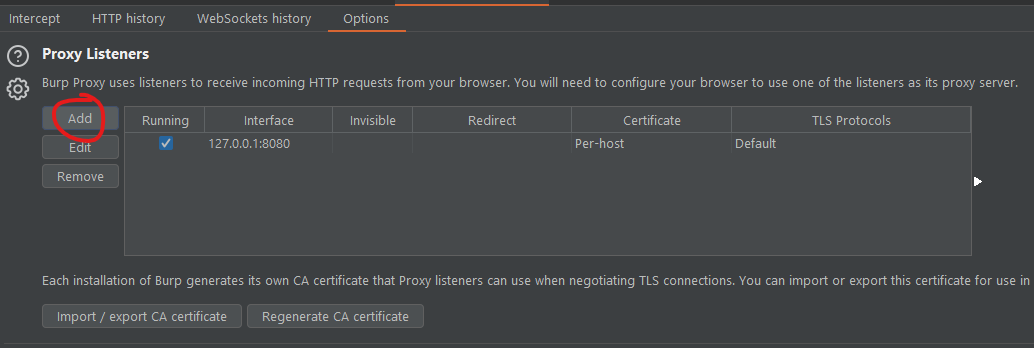
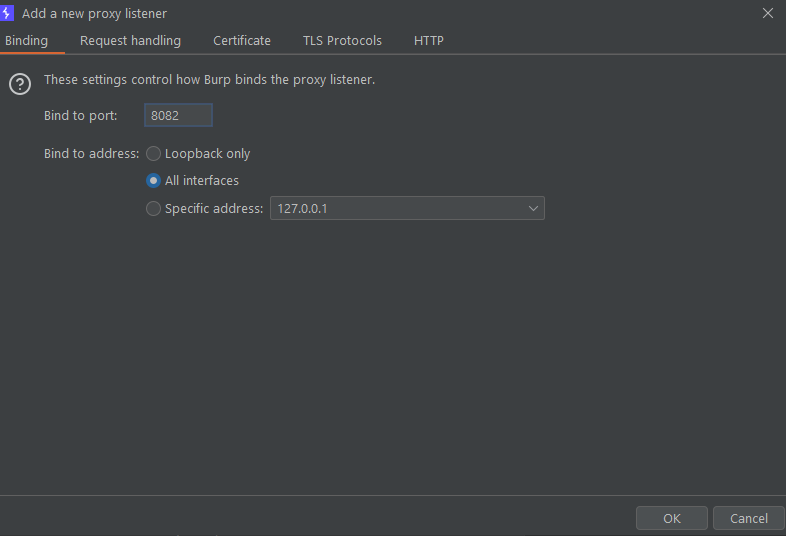
Under Proxy Listeners, click the Add button to create a new proxy listener. Choose the port you desire and click ok.
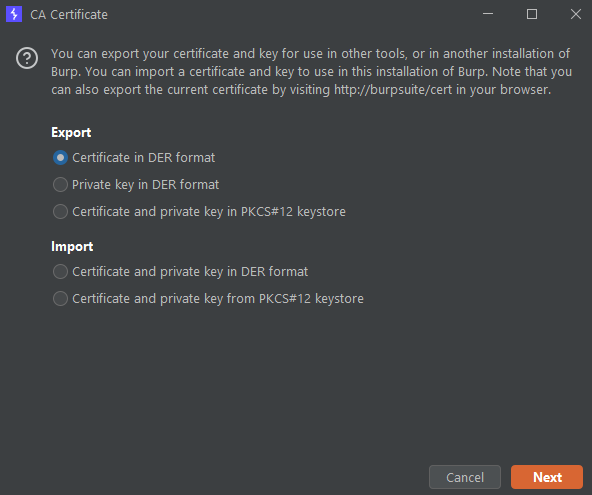
Export CA cert
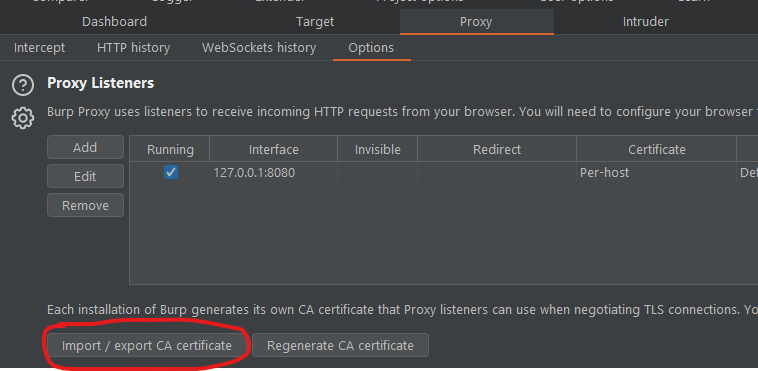
Now, we will export the CA certificates from burp.
Under the same tab, click on the "Import / export CA certificate" button.
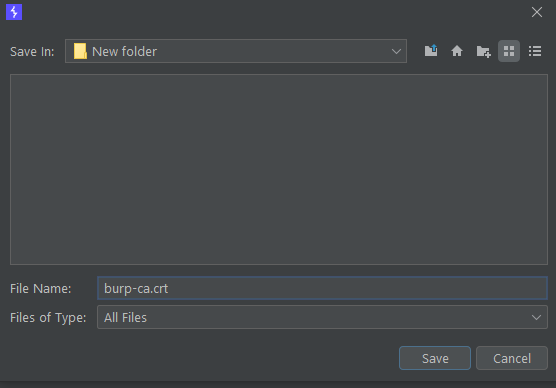
Export it as DER format but save it with the .crt extension.
.crt extensionConfigure Proxy Settings for Emulator
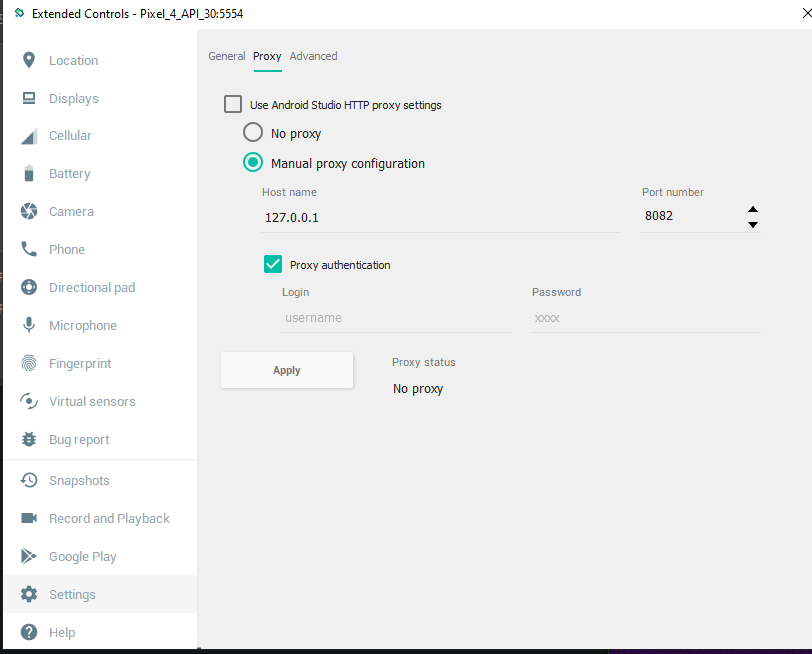
On your emulator, click on the ... icon, then go to Settings.
Under the Proxy tab, configure the following settings, then click apply.
Installing Burp CA Cert
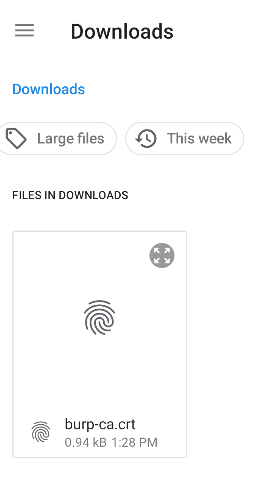
To transfer the certs into your device for installation, you can simply drag and drop the .crt certificate into the emulator, or you can use adb to push the file to the AVD.
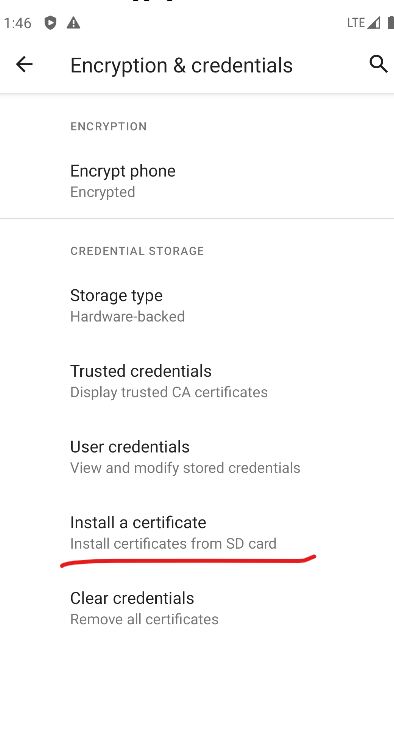
Once you transfer the certificate, go to Settings > Security > Encryption & Credentials. Then click on the "Install certificates from SD card" option.
Select the Certificate file. If you dragged and dropped the file, it will be under /sdcard/Downloads.
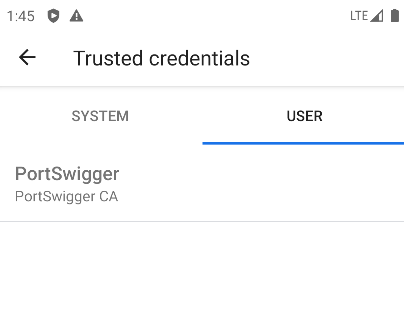
Once installed, you can check your certificate under the Trusted credentials tab.
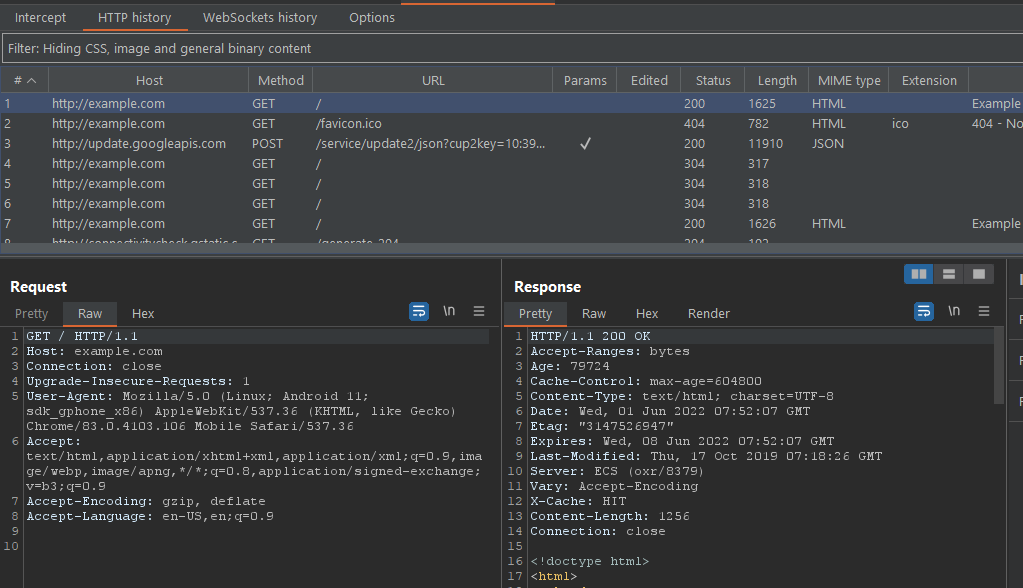
With this, you can start browsing the web through chrome and fill up the request in burp.
Also read: Automating Mobile Game Testing
Adding Certificates to System Trust Store
But we are not done yet. From Android 7 and upwards, Android uses 2 different Trust Stores, the user trust store and the system trust store. Chrome is one of the few apps that trust custom root CA certificates installed by the user. However, unlike chrome, most apps nowadays don't trust the certificates that are not from the System Trust Store.
We will have to inject our CA cert into the System Trust Store to solve this. There are various ways to do this, but one of the easiest ways is to use magisk and a module.
Rooting the AVD
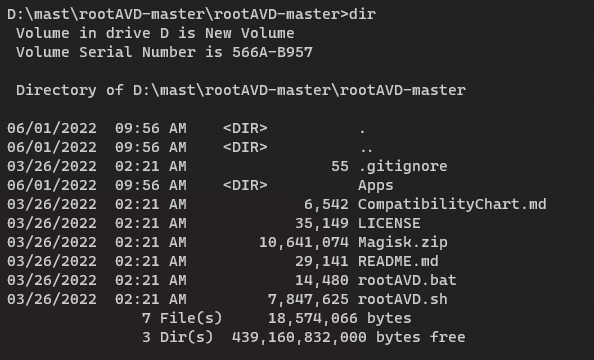
You can get the script from the Github repo of newbit . This script will root the AVD (supports Android 11, 10, 12, 7 and maybe a few others) and install magisk on your AVD.
Once you extract the downloaded content, you will have the following file.
If you are on a Windows machine, run the .bat script, or if you are on a Unix machine, then run .sh.
Rooting Preconditions
- the AVD is running
- a working Internet connection for the Menu
- a command prompt/terminal is opened
adb shellwill connect to the running AVD
Rooting
Now run the script with ListALLAVDs argument. You will get something like this.

We know our AVD image is API-30 with the Play Store enabled
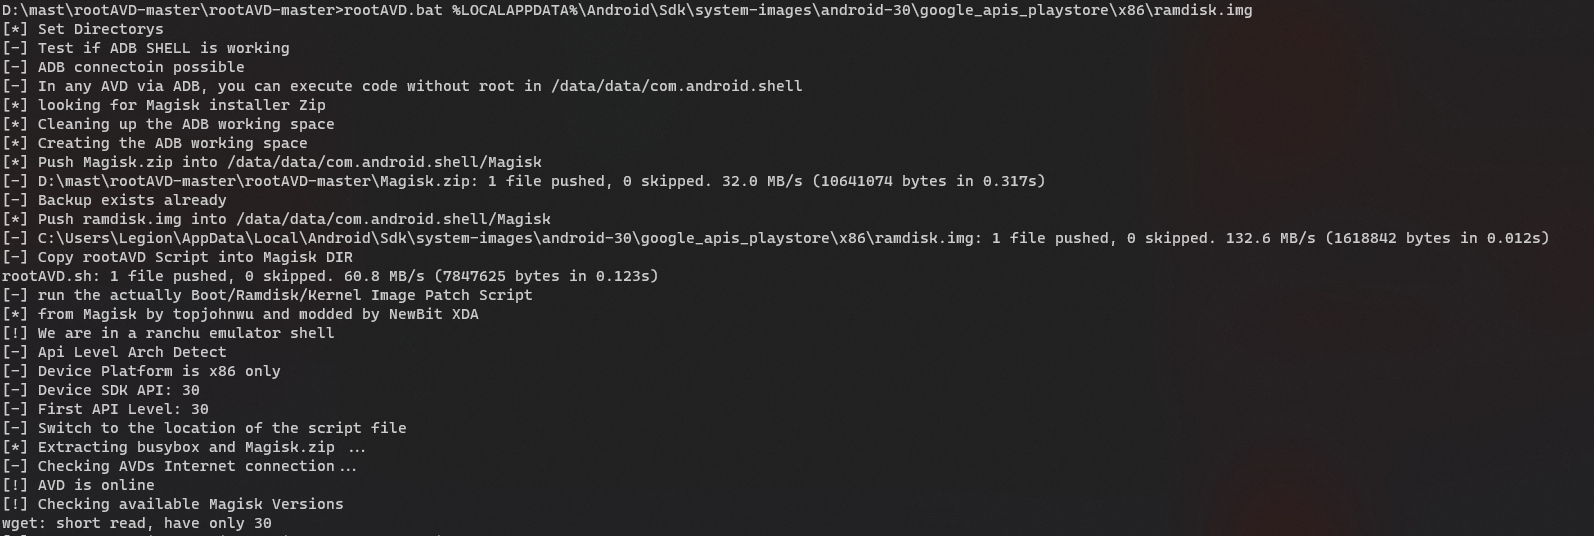
The AVD will shut down once the script is done. Boot the AVD again and check if the magisk is installed. When you open the app for the first time, it will ask for a reboot since additional setup is required. Reboot the device.

Injecting Custom CA Certificates to System Store
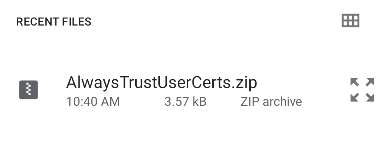
While the AVD is being rebooted, download the module called Magisk Trust User Certs. This module ( developed by NVISO Security) makes all installed user certificates part of the system certificate store, so that they will automatically be used when building the trust chain. This module makes it unnecessary to add the network_security_config property to an application's manifest. It is available in their Github repository. Drag and drop the downloaded zip file (or use adb) to put the zip file into your device. Once the AVD is rebooted, open the Magisk app and click on "Modules".
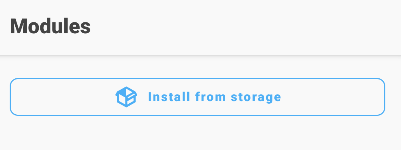
Under the Module tab, click on Install from storage and select the zip file.
Once the installation is finished, reboot the AVD.

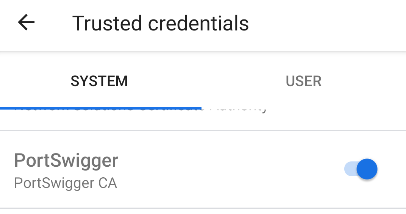
After rebooting the AVD, check your trusted credentials. The custom CA cert we installed will be under the system tab. With this, you can now use burp to intercept the HTTP traffic of apps that only accept system certificates.
If you still can't intercept the request, the app developer might have adopted the SSL Pinning security measure. There are ways to bypass that as well, but that's the topic for another time.
See you next time!