
Do you need the apk of an android application for your Anbox but don't want to use shady websites to download one? Well, you have come to the right place. This blog will guide you step by step to extract the apk of your desired application from your phone to your laptop/PC for use on Anbox.
Requirements
- Any laptop/PC with any OS (Windows/Linux/Mac)
- An android phone (Root not required)
- A cable to connect your PC and phone
1. Enable USB Debugging on Android
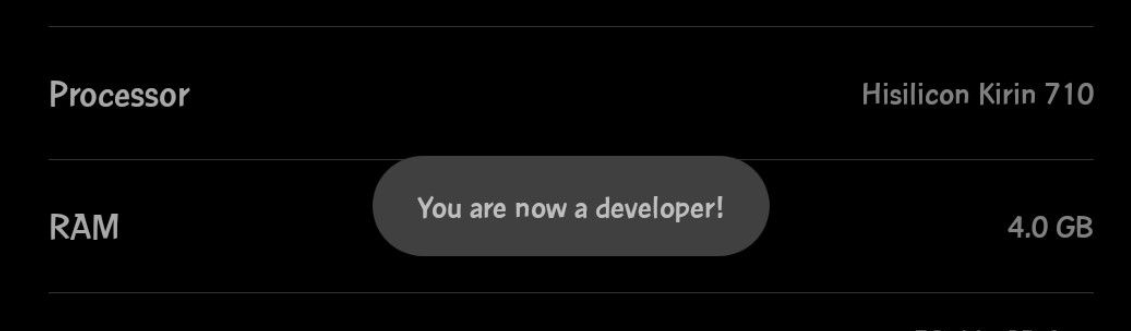
First, you will need to enable Developer Mode on your mobile device. You can enable developer mode on android devices by clicking on Build Number (Found under About Phone) around 6 or 7 times until you see the following message.
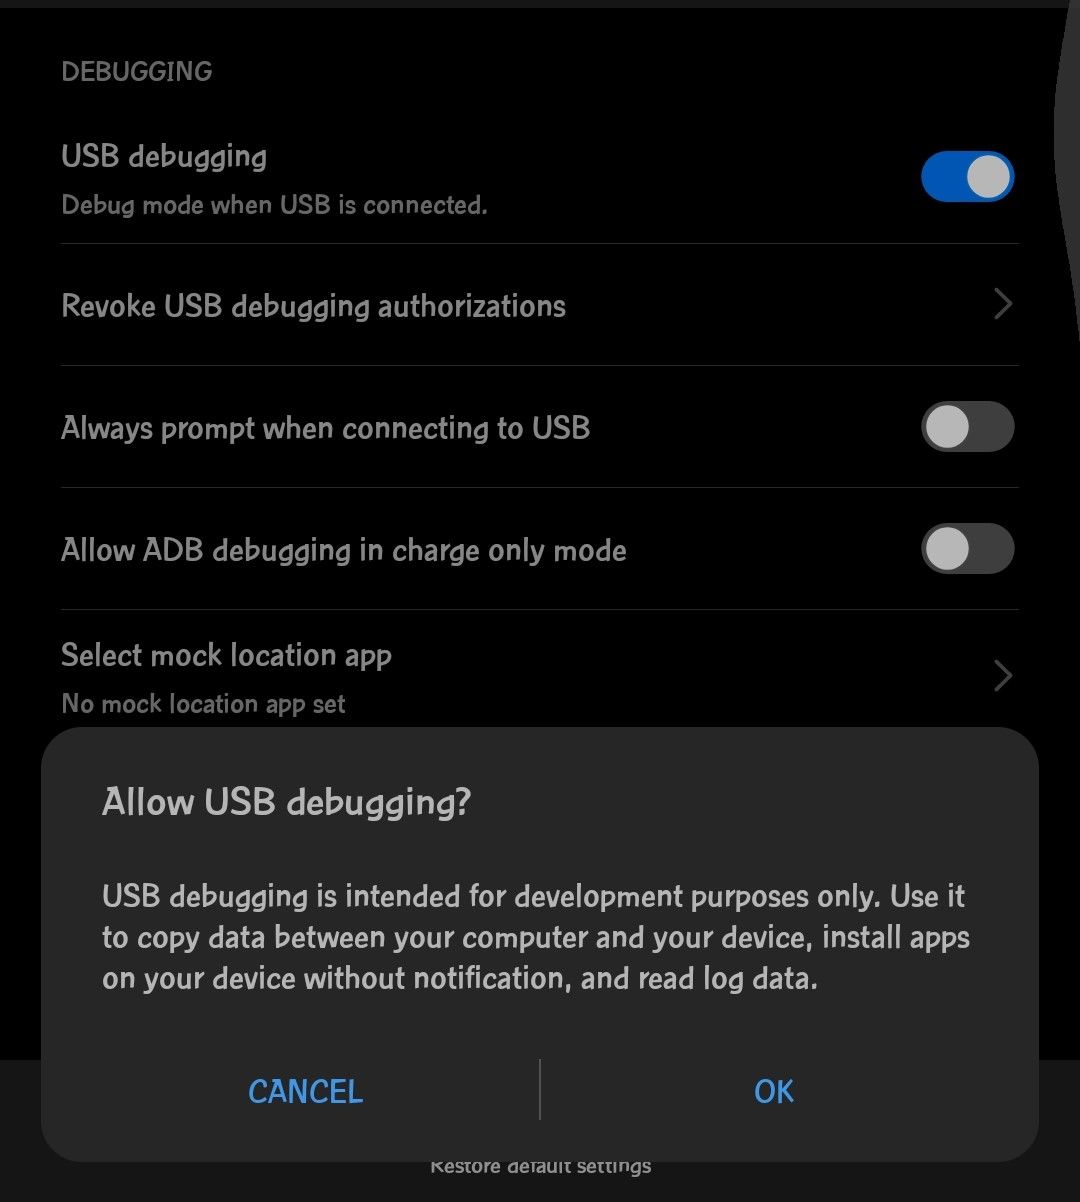
Now, go to Developer Options in your settings menu and enable USB Debugging Mode.
2. Install Android Debug Bridge(ADB) on Your PC
Now, you need to install adb on your machine.
Installing and Setting Path on Windows and Mac
Download the SDK Platform Tools here. Extract the downloaded file and copy it to any directory of your choice. Now, you will need to add the directory which contains ADB binary to the 'path' environment variable.
There are various methods to add adb paths to your terminal or command line.
A. Windows GUI
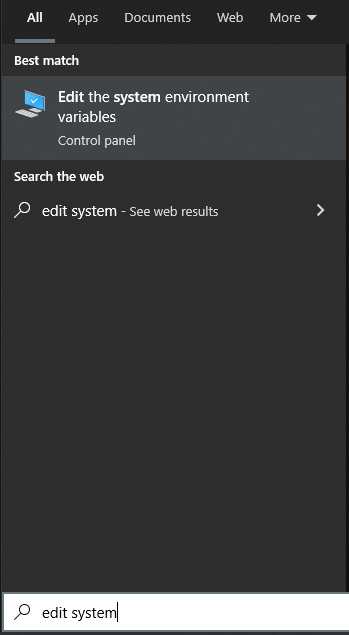
Press Windows Key + R, type sysdm.cpl then press Enter, or you can just search for 'Edit system environment variables' on the start menu.
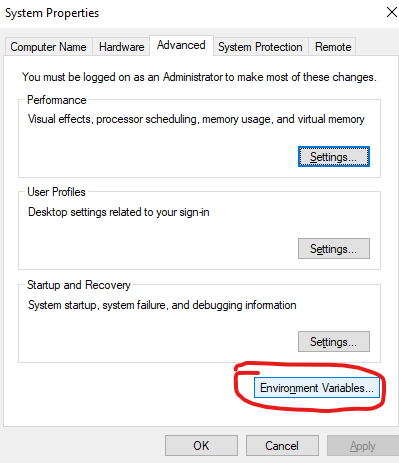
On the window that opens, go to the Advanced tab and click on 'Environment Variables'.
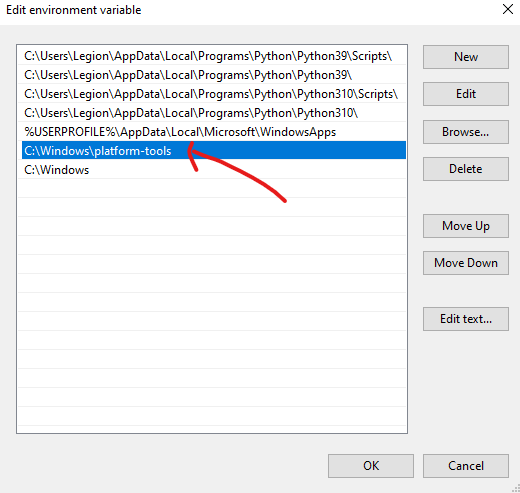
You can either export the path to the System variable or just the user environment variable. I will be exporting it to my USER variable. To do that, click on Path then click on Edit.
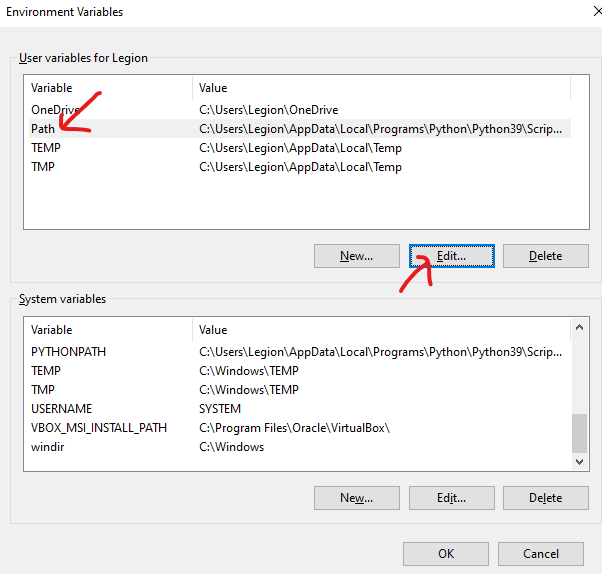
Then add the path as follows, click ok and you should be good.
For those who want to update the path variable using the command line or terminal.
B. Windows Commands
# This is temporary and will only effect your current command line session
set PATH=%PATH%;C:\your\path\here\

# This is permanent but it will mess up with your previous User and Sytem Path variable and truncate your path to 1024 Charecters. Backup your previous Path values before doing this
setx /M path "%path%;C:\your\path\here\"
C. Mac Commands
# This is temporary and will only effect your current terminal session
export PATH=$PATH:/path/to/your/platform-tools
To make it permanent on Linux and mac, add the command above to the last of .bash_profile or .bashrc and restart the terminal.
Installing on Linux
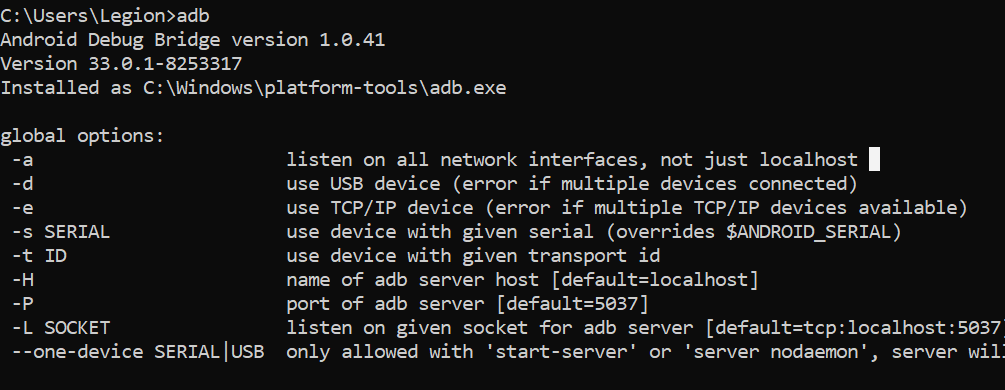
On Linux, you can simply install adb with
sudo apt install android-tools-adbIf you run the adb command and see the following, you have successfully installed ADB on your machine.
3. Pulling the APK From Your Device
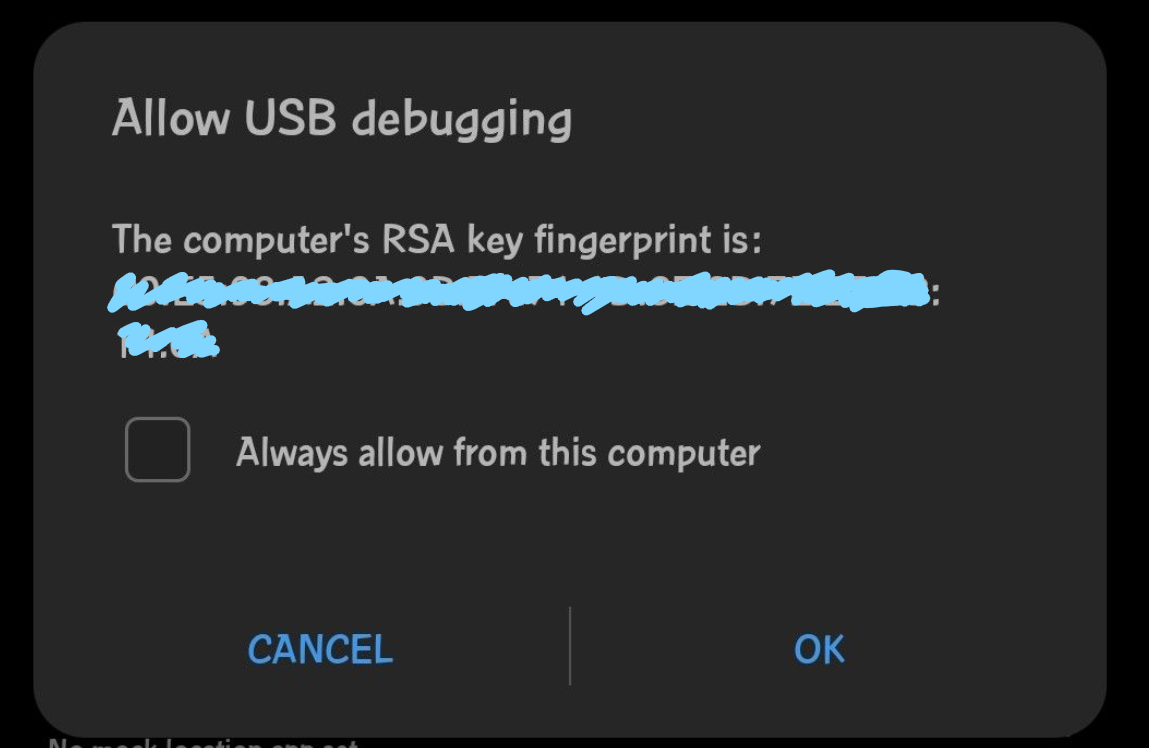
First, connect your android device to your system using the USB cable. Then, click on OK once you see the following pop-up.
Install the application you want the apk of using the play store if it is not already installed. Once the app is installed, list and pull the package on your command line by using the following commands.
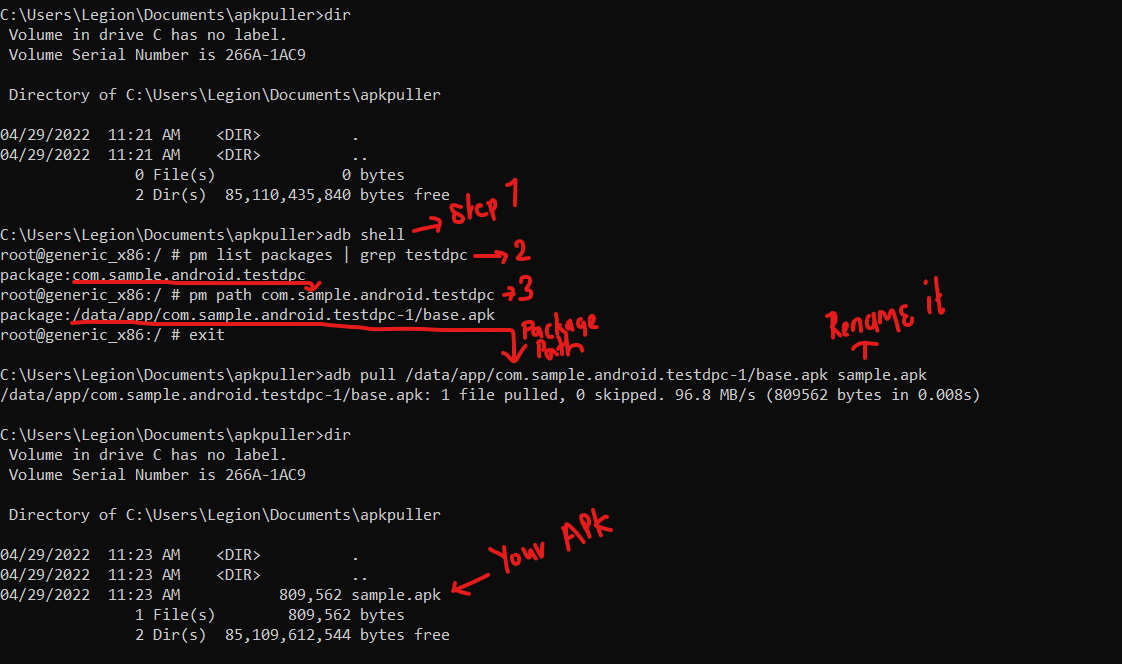
Step 1: Initiate adb shell
adb shell

Step 2 : List out installed packages
pm list packages | grep package_name

## Make sure to replace the 'package_name' part with the name of your desired application

Step 3: Get the path of your desired package

pm path package_name
# copy the package name from the step 2 command's output.

exit # exit the adb shell

Step 4: Pull the package to your system

adb pull /path/to/your/desired_package /path/to/your/desired/folder
See the screenshot below for reference.
Enjoy the apk file that you can now use wherever you wish! Maybe on an anbox machine that you can see up with this tutorial perhaps?
ADB is a powerful tool that can be used for all kinds of things, stay tuned for more!