
Blender is my go-to application for 3D modelling and animation. Being able to quickly whip up a model in Blender is essential in my workflow, which is why I have compiled a list of helpful tricks and tips that might be able to do the same for you.
1. Use Keyboard Shortcuts
Using keyboard shortcuts is the easiest way to speed up your workflow in Blender. You can use them for quick access to your frequently used tools and commands and navigate the menus or tools. Here are some of the keyboard shortcuts that I use most often.
A: Select all objects (pressingAtwice deselects all objects)G: Grab and move objectsS: Scale objectsR: Rotate objectsCtrl+Z: UndoCtrl+Alt+Z: RedoShift+D: Duplicate objectsTabto switch between Edit mode and Object mode
Tab for Pie Menu
To switch between different editing modes in Blender quickly, you can enable the Tab for Pie Menu from Blender's preferences.
Go to Edit > Preferences > Select Keymap from the left nav > Click to activate Tab for Pie Menu.
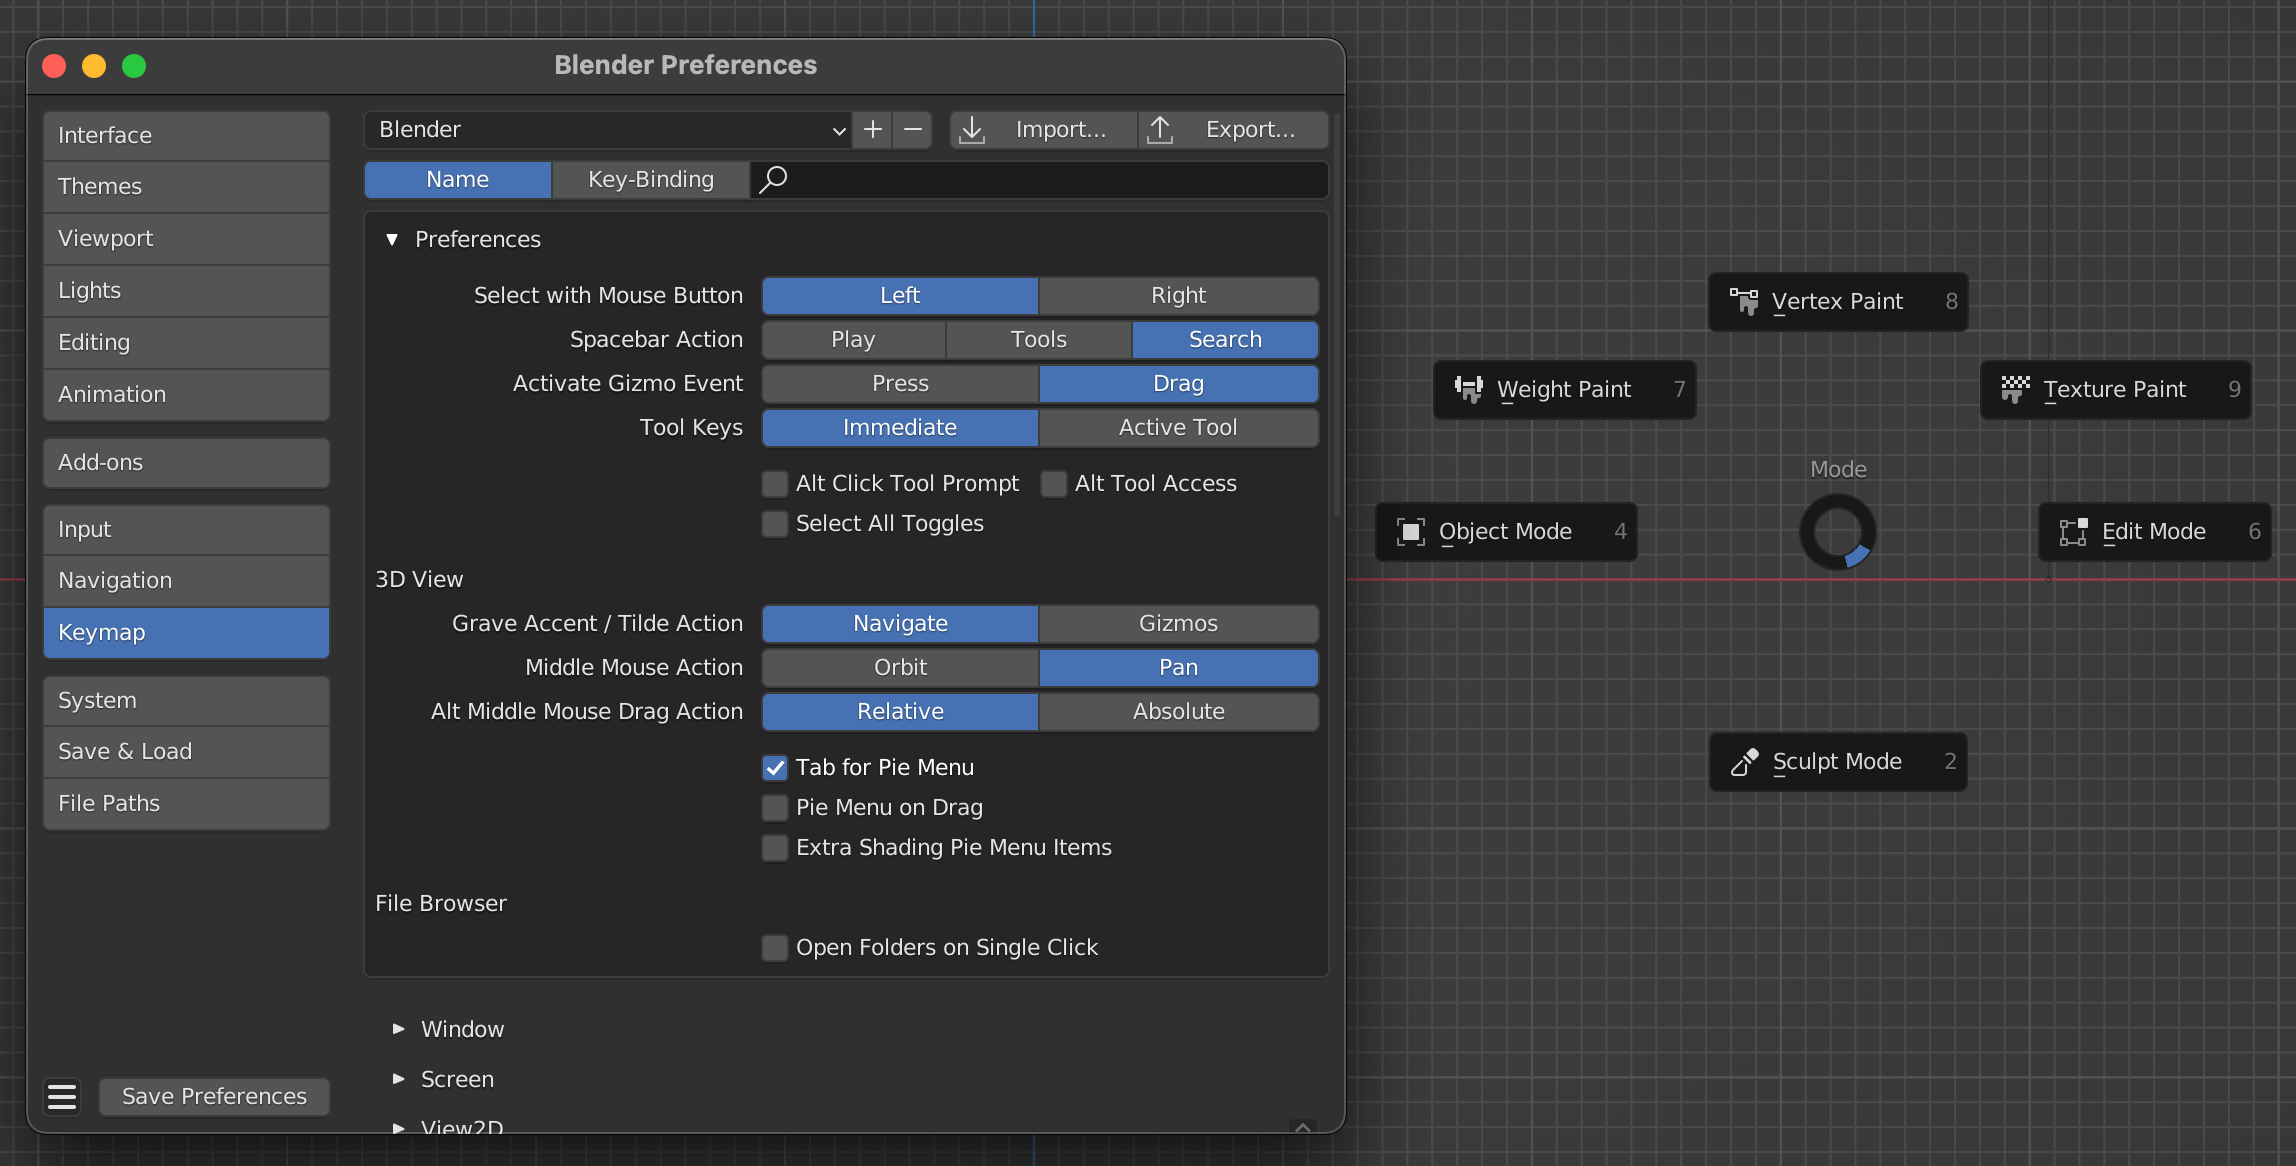
Tab for Pie Menu enabledNow when you press Tab, you can switch between the different modes by pressing different numbers on your keyboard or simply clicking the option you want.
The various Tab for Pie Menu options are:
i. Tab > 2 for Sculpt Mode
ii. Tab >4 for Object Mode
iii. Tab > 6 for Edit Mode
iv. Tab > 7 for Weight Paint
v. Tab > 8 for Vertex Paint
vi. Tab > 9 for Texture Paint
Many more shortcuts are available in Blender, which can also be customised accordingly to match your workflow.
2. Customise Your HotKeys
Creating custom hotkeys is another powerful way to increase your efficiency in Blender. Assigning the most commonly used tools and functions to specific keys can accelerate your workflow and save time.
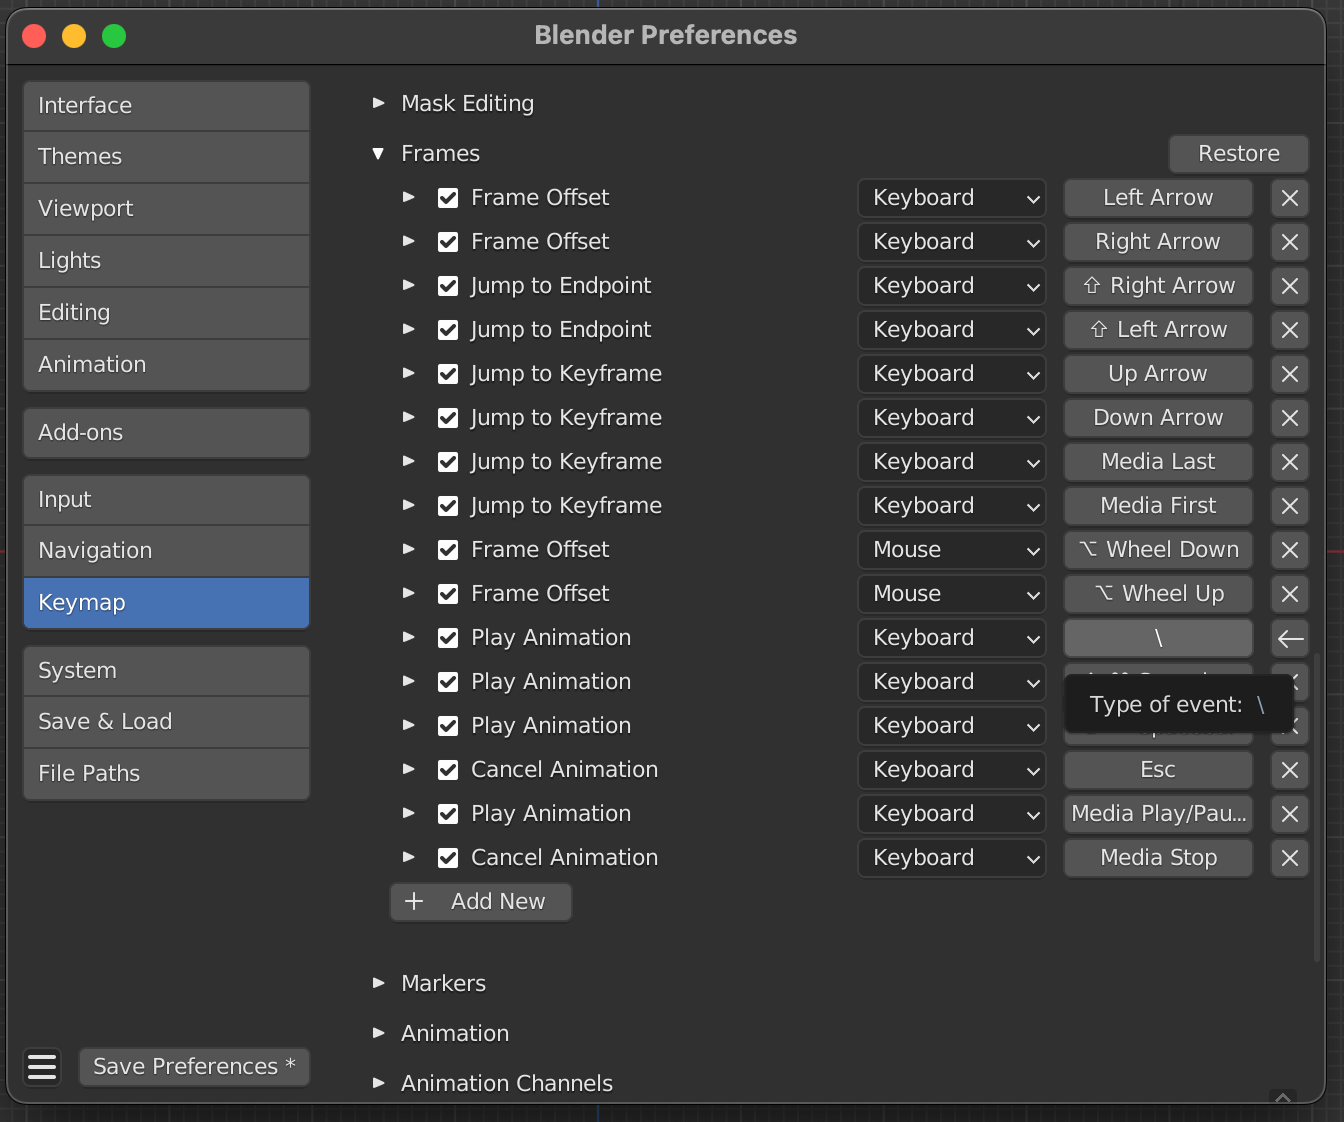
When using my keyboard for modelling, I found it terribly annoying to repeatedly press the spacebar by accident, which started the animation timeline. So, I assigned the \ key to start and stop the animation timeline.
Go to Edit > Preferences > Keymap > Scroll and search the event you want to assign a hotkey to > Click and add a new hotkey.
3. Customise Your Workspace
Blender's interface can be easily customised to suit your needs and preferences. You can rearrange almost all of the panels and even change the colours of the UI to create the layout you want. With customisation, the tools you use the most are quicker to your reach, speeding up your workflow.
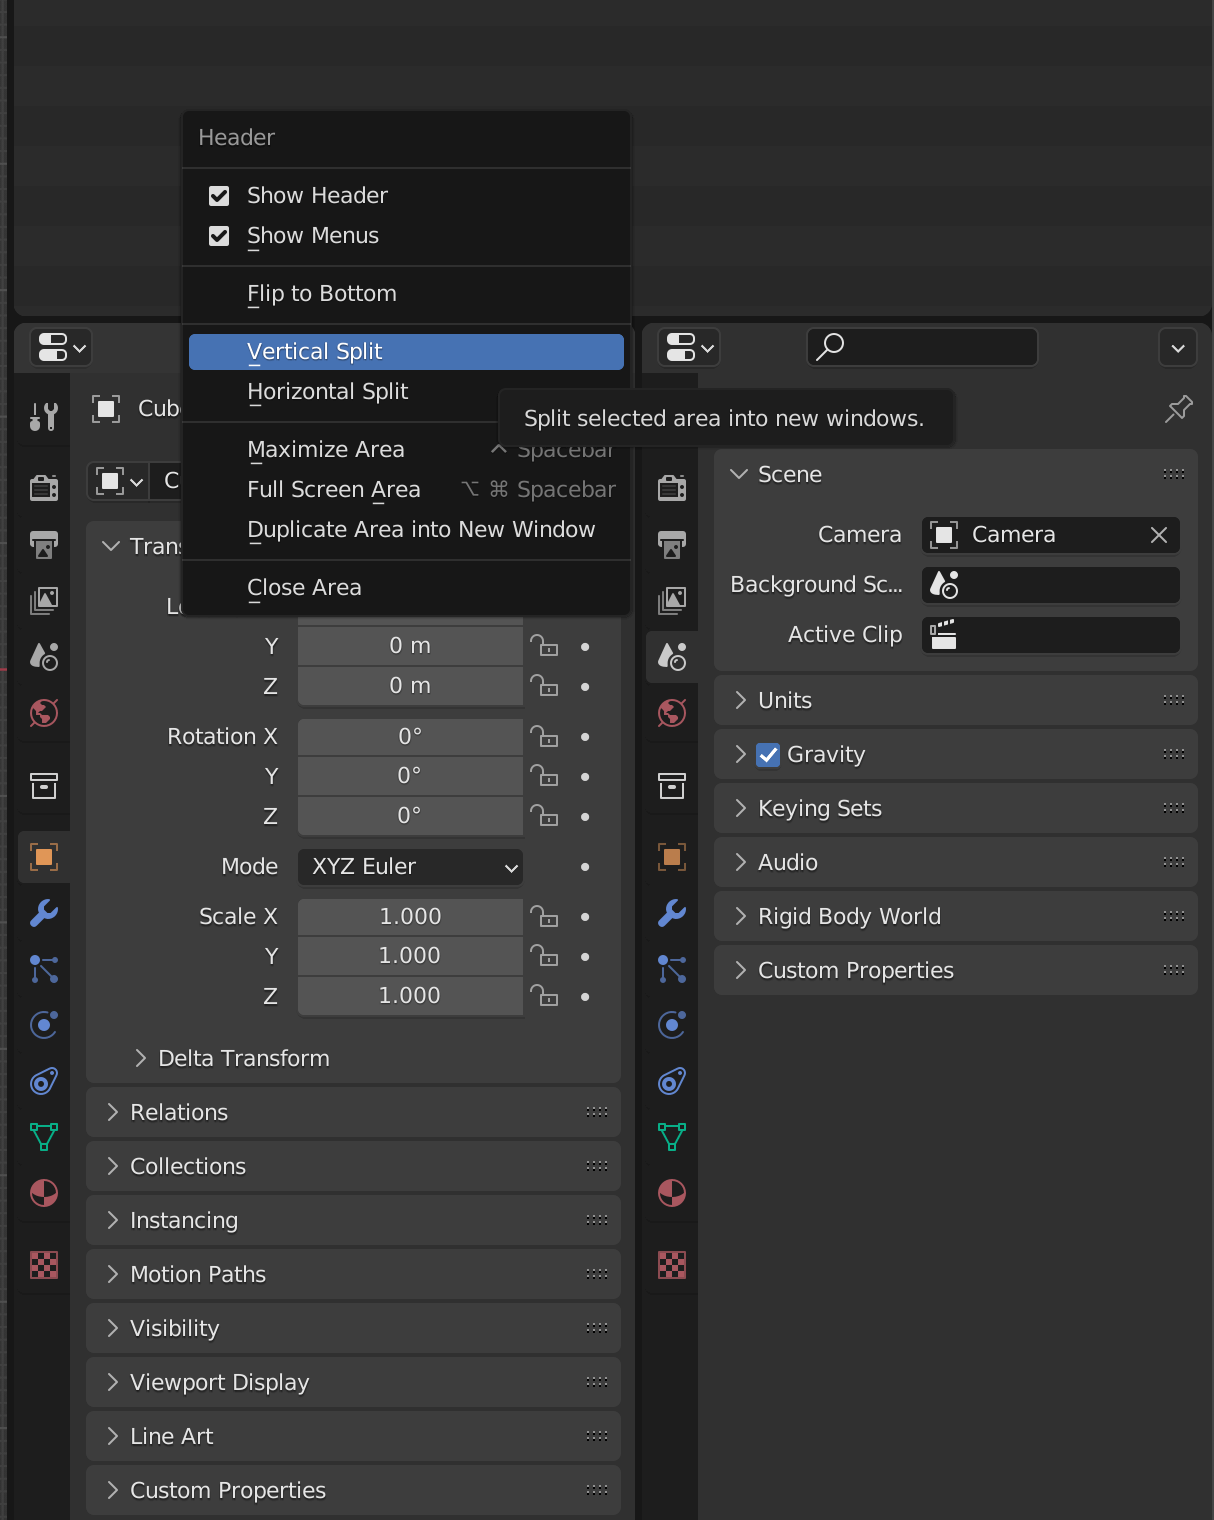
You can right-click on a panel that will bring a pop-up menu from where you can select how to split the panel. Hover on edge to click and resize the panels. You can also hover on the top edges of a panel until a + (plus) sign appears on the cursor. Then click and drag to pop up a new panel.
4. Work with Multiple Screens
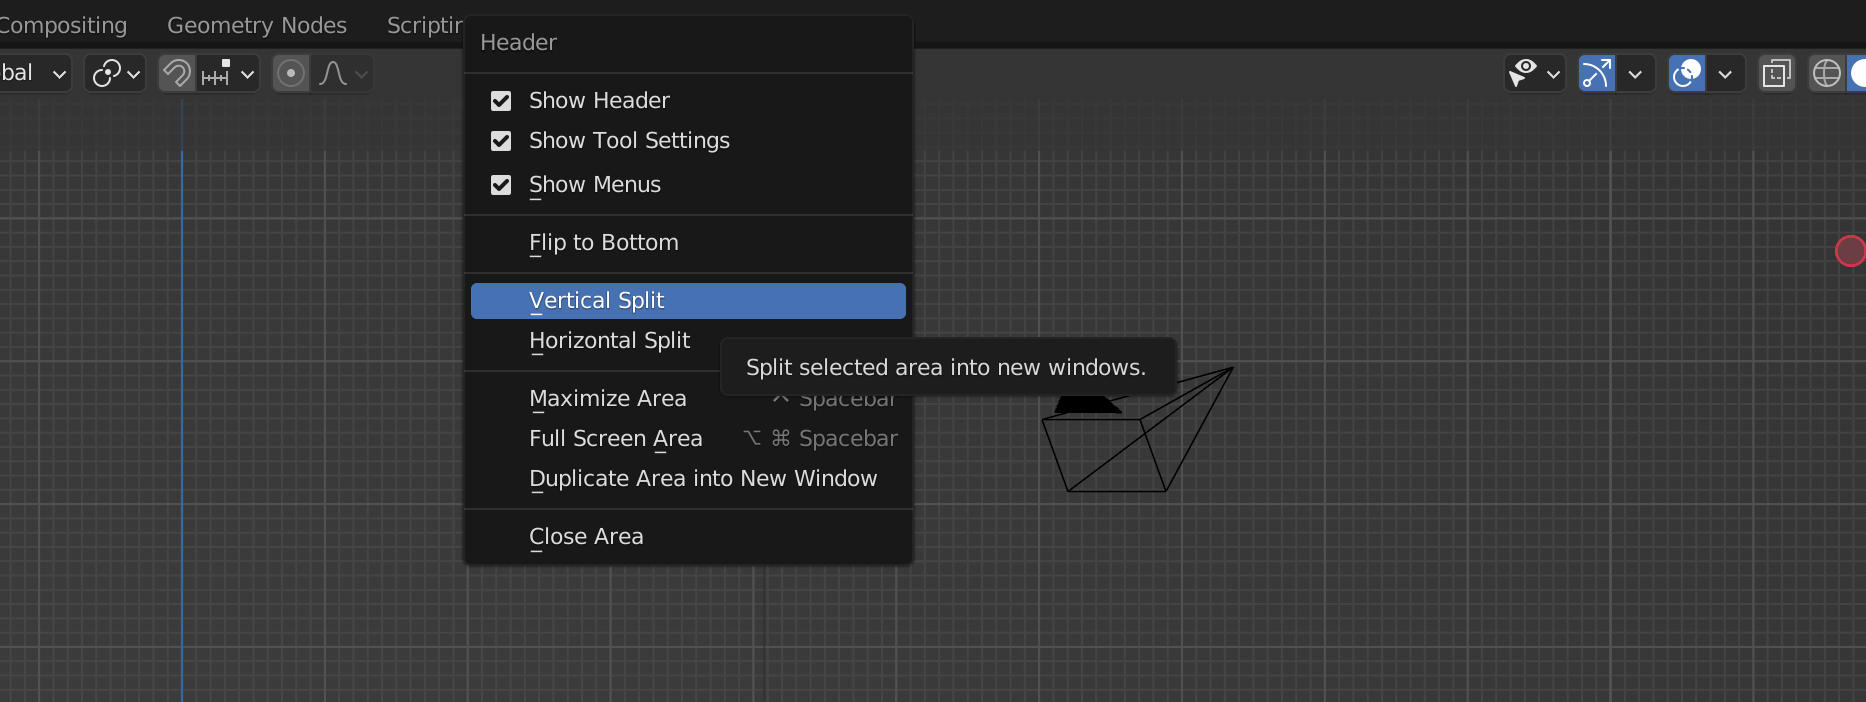
You can customise the 3D viewports to create multiple screens, similar to customising the different panels. It is extremely helpful when you need multiple views of your scene or are working on a large project.
Creating a new screen is done in the same way as splitting the panels. Right-click on the panel header, or hover on the top edge until a + (plus) sign appears, then click and drag a new screen. This allows you to have multiple views of your scene or access different tools and panels without switching between screens.
I usually have a camera view on the second screen to see how my model or scene will look once I finish rendering.
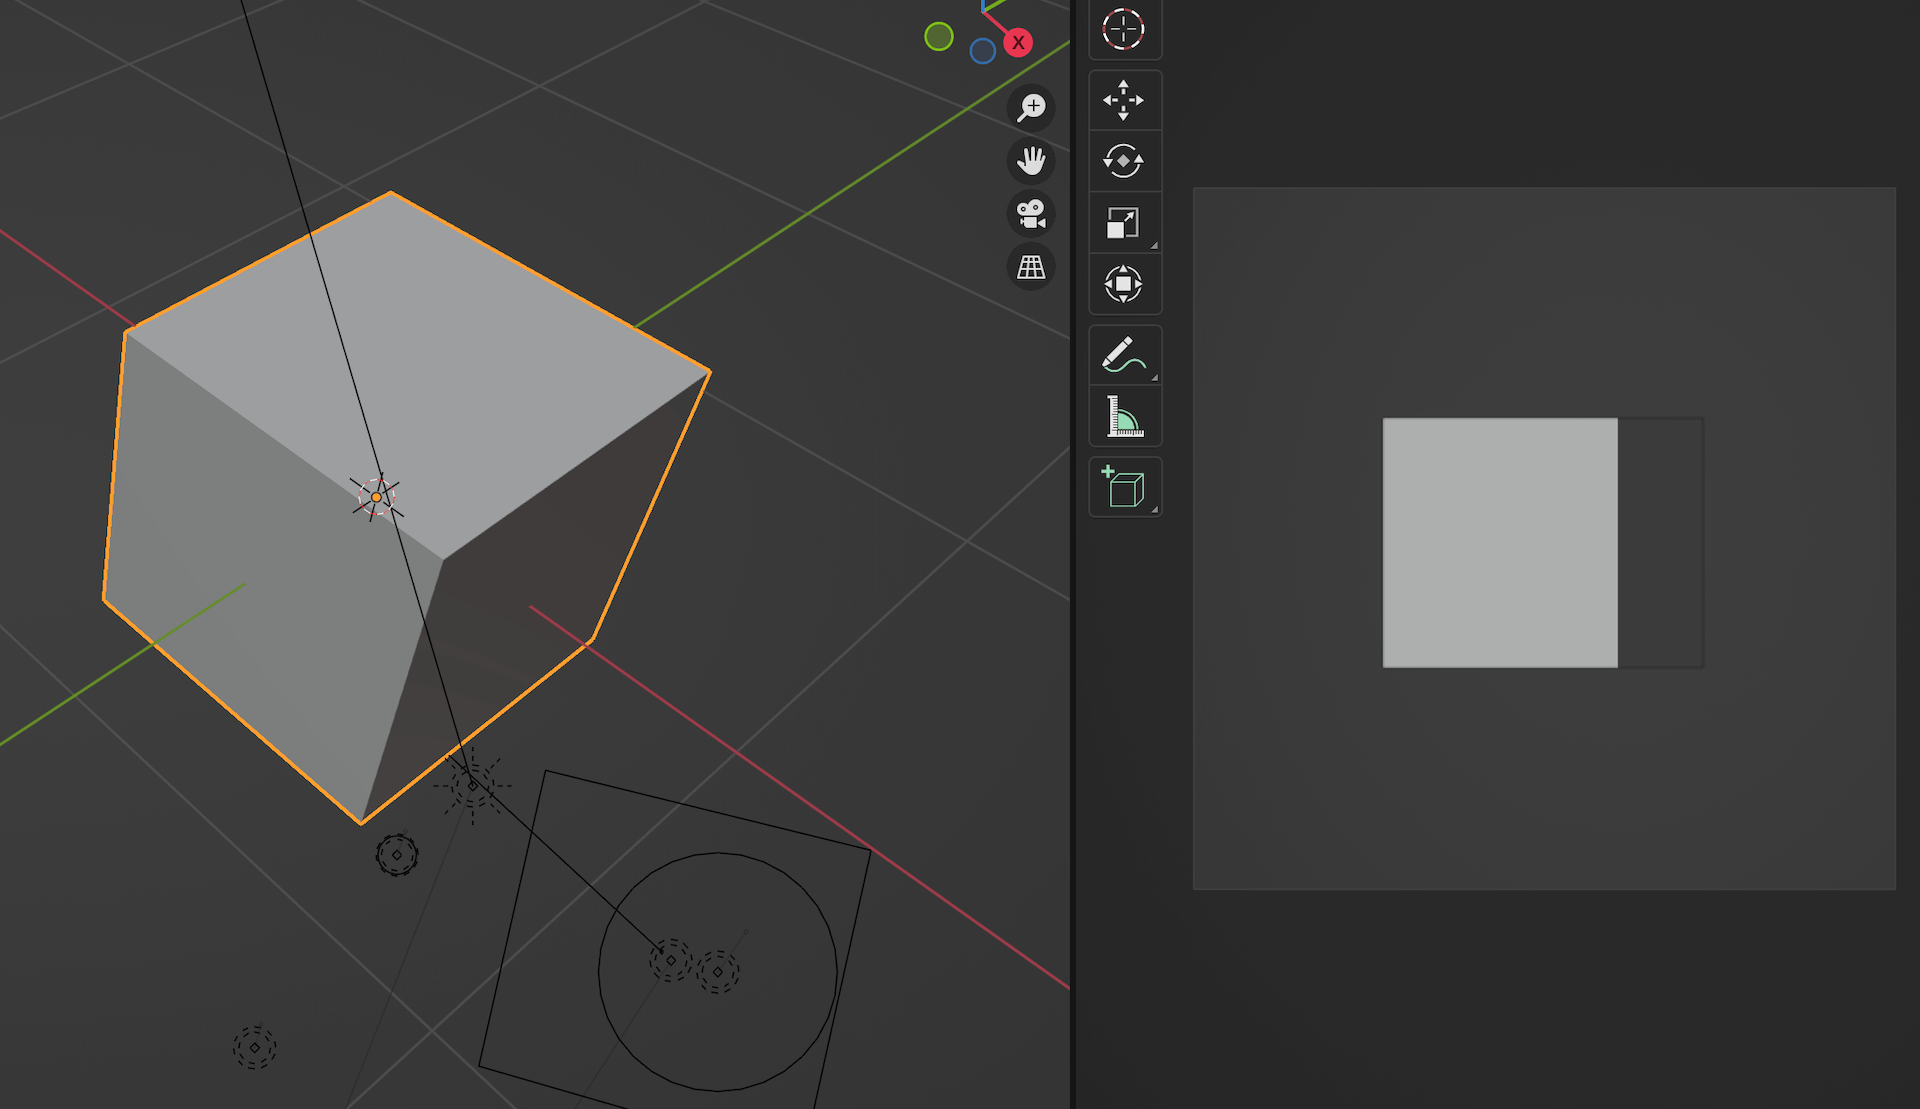
5. Use the 3D Cursor
The 3D Cursor is a small red and white circle, the World Origin for your scene. It is the spawn point for any new object you add to your scene. You can use the 3D Cursor to not only set the location and orientation of objects but also to position them precisely where you want them.
The 3D Cursor snapping menu is accessed with the shortcut Shift + S. It will bring a pop-up menu, which can be used to snap objects and the 3D Cursor itself.
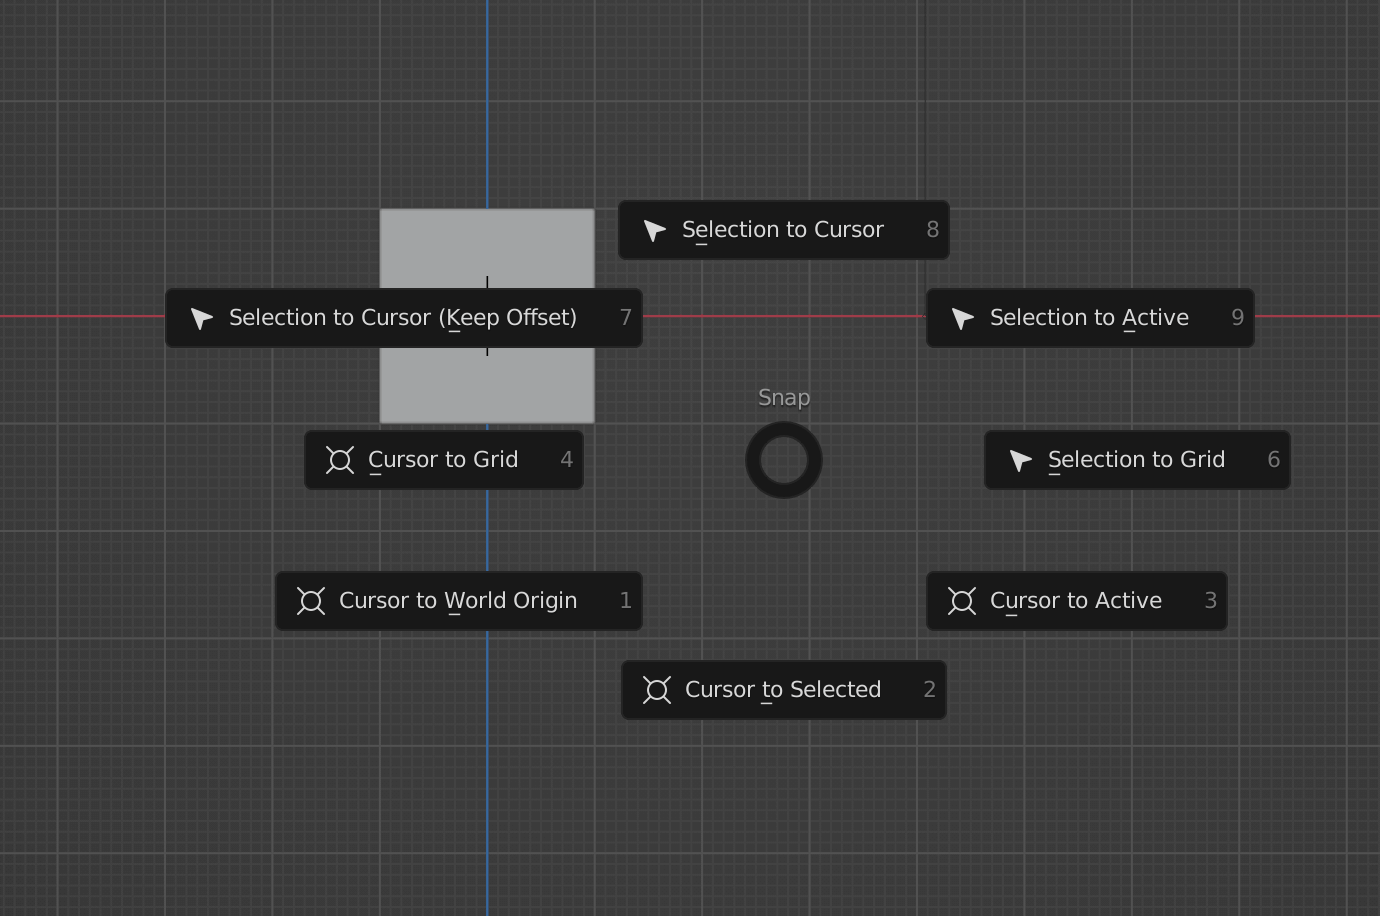
You can hover your mouse where you want the 3D Cursor, then hit Shift + Right-click to position the 3D Cursor. Then bring the snapping menu with Shift + S to snap objects to a specific location. You can also reset the 3D cursor with the snapping menu.
6. Keep Your Scene Organised
Organising your scene is the best thing you can do to avoid confusion and save time. As you continue modelling and adding new objects to your scene, everything looks like a huge mess of cubes and cylinders. Good thing Blender has an outliner to help you organise everything in your scene.
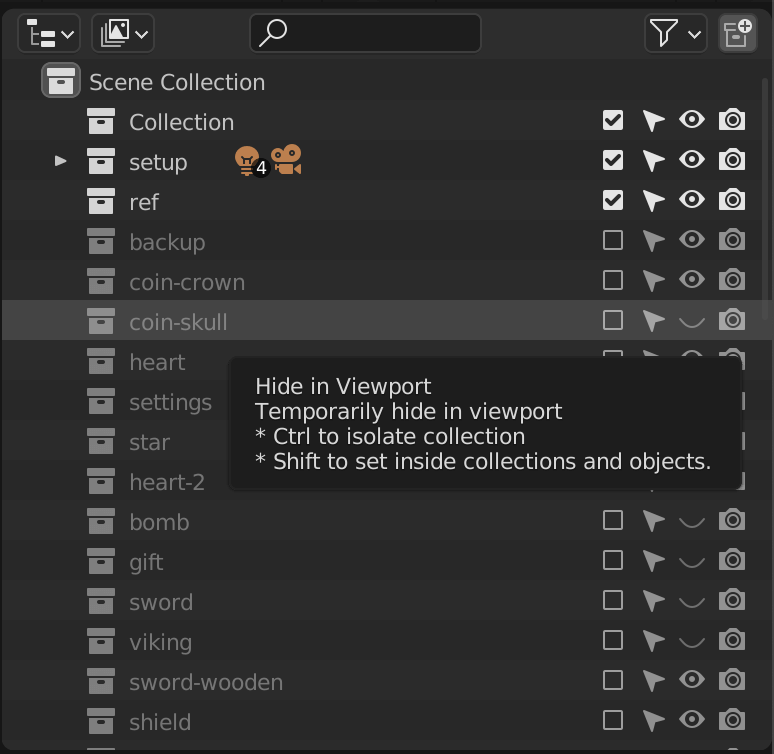
The outliner is a panel where you can view and manage all the objects and data in your scene. It is usually on the top right corner of the Blender window by default. There you can create collections to keep your scene organised by right-clicking on the outliner panel, then clicking on New Collection. It is important to properly name and maintain hierarchy in your collections to save your future self some headaches.
You can also quickly select and manipulate the properties of the objects from the outliner – hide the objects in Viewport, disable them in Renders, disable Selection, and much more.
Using the outliner is a must when working with a complex scene. It makes your project much easier to navigate and keeps everything well organised.
I hope these tips and tricks will help you increase your productivity with Blender! Remember to have fun with your projects and catch you in the next one.
Subscribe, and don't forget to leave a comment below.