

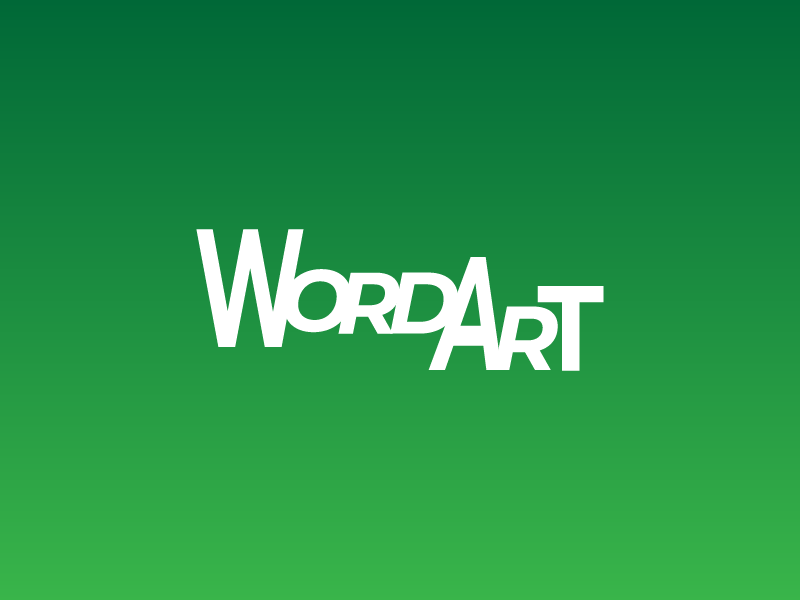
Do you remember the classic "WordArt" style from the older versions of Microsoft Word? I do, and I was very fond of it and used it a lot. There was no internet plan, design courses, or software available at our place. All we could do was copy or draw pictures on our sketchbook. I wasn't even aware of any other design tools except for MSPaint.
Due to this lack of availability and knowledge, I barely knew about the fonts and typefaces then. So, the comic sans font and the WordArt style were enough to keep me entertained in random documents while learning Microsoft Word.
With the growth of the internet, people have access to millions of fonts on the go, and with the availability of many powerful tools like Photoshop and Illustrator, stylised texts are very easy to create.
Vector-based WordArt
I have seen many Photoshop tutorials on creating stylised text with a million options, but the problem is that the images cannot be exported to vector formats. So, Illustrator, as a vector-based tool, offers many efficient ways to create such scaleable word art styles.
There are hundreds and thousands of ways to create stylised text or WordArt using only Illustrator. However, for the purposes of this blog, I will guide you through the easiest steps to create and develop stylised text easily in Illustrator.
Using the Touch Type Tool
The Touch Type Tool is one of the simplest tools found in the text drop-down section in Illustrator. You can fiddle around with individual text sizes, kerning, leading, rotation, and spacing with ease using this tool.
The key to achieving the best result depends on the type of font you are using and the post-effects and appearances you apply to the customised text.

By default, this method helps you arrange the text using individual meshes, thereby maintaining text-editing abilities. The editing abilities end on expanding the text to outlines.
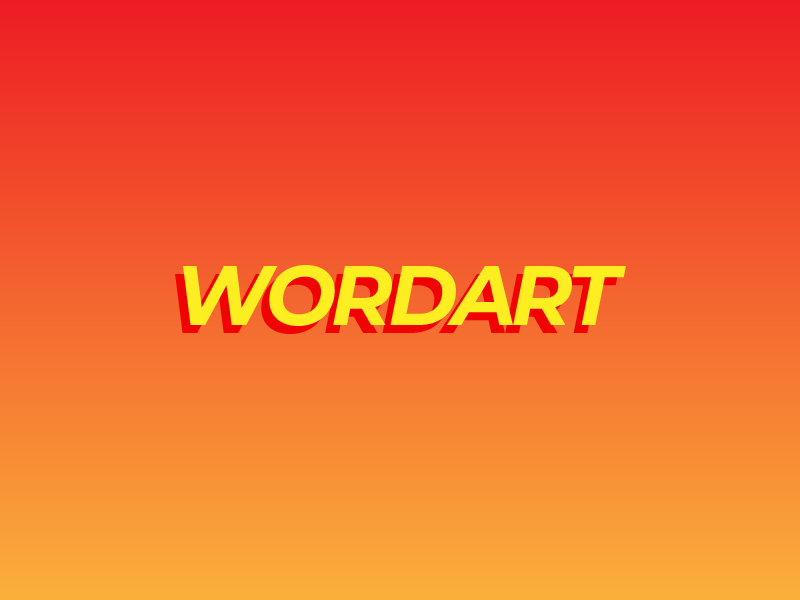
Drop Shadow Effects
Drop Shadows can also be applied to add 3D effects and depth to texts in Illustrator. This is a commonly used method of enhancing "material design".
To add this effect, simply select the text and go to Effects > Stylize > Drop Shadow. This pops up in the drop shadow effect panel, where you can edit the shadow coordinates, blend modes, opacity and blurriness.
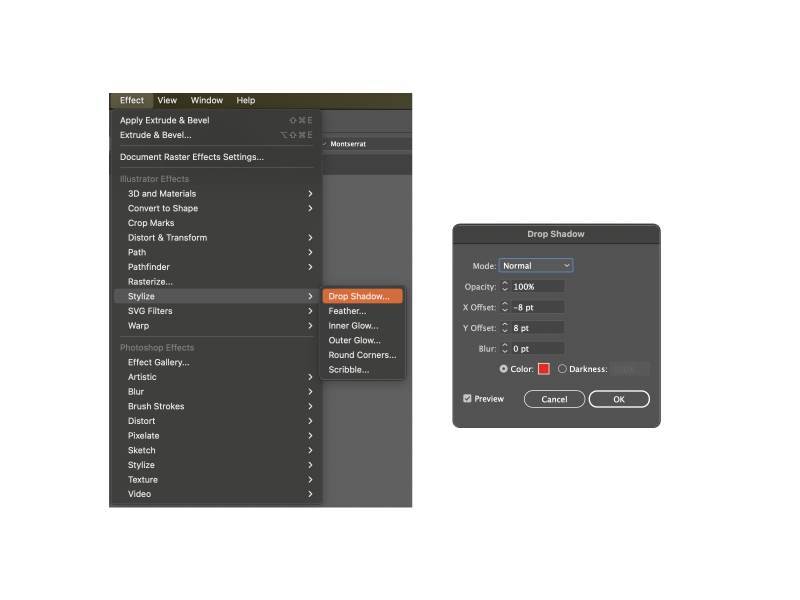
I use 100% opacity and 0% blurriness for the WordArt style graphics to achieve a thick and sharp shadow around the text.
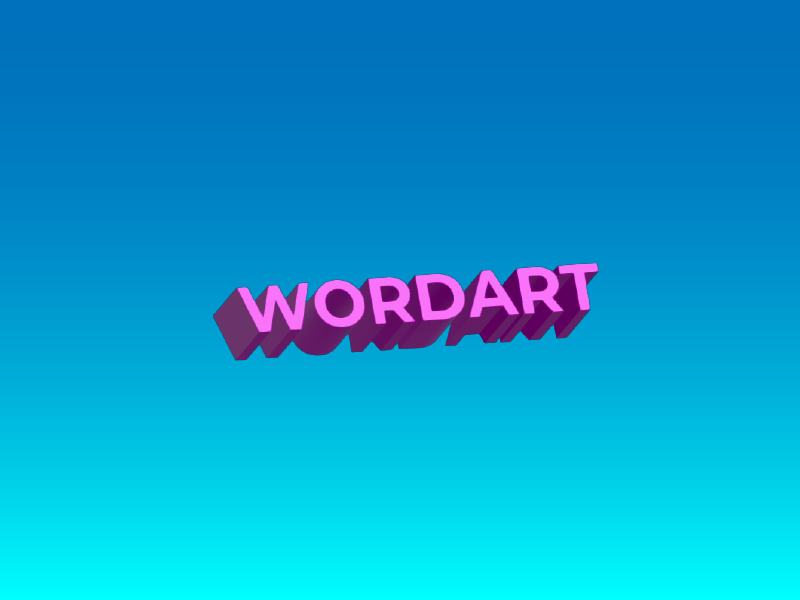
Blend Tool
The Blend Tool is also very effective when creating WordArt. Many people might not have used this tool for something so simple due to its heavy ram usage, but the Blend Tools is one of the most effective methods of creating stylised text.
Unlike Drop Shadow, this effect can add a clear and superior 3D stylisation to the text with multiple colour and path distortions. To add this effect, you must duplicate the text layer and place it in the desired position. Once you have done this, select both layers and navigate to Object > Blend > Make.
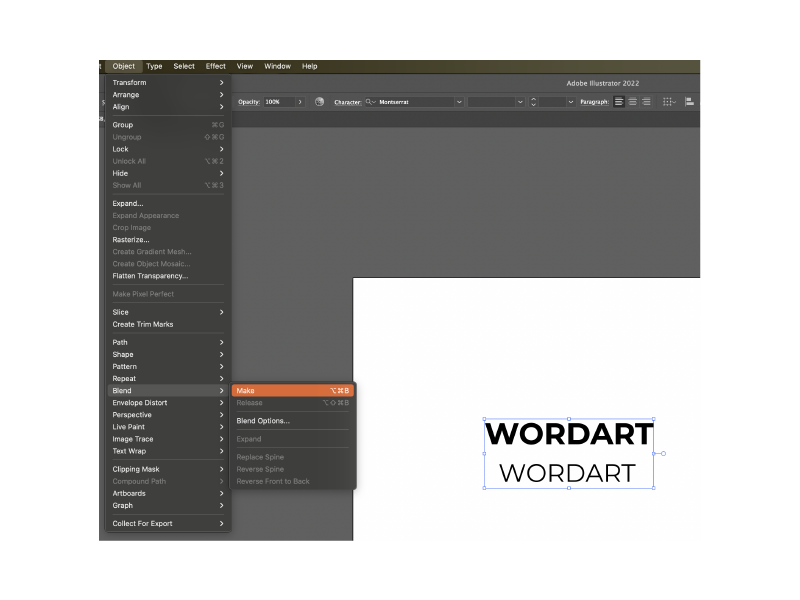
This will add the blend effect to the text layer. Now, with the layers selected, navigate back to Object > Blend > Blend Options to edit its appearance.
To add the 3D stylised effect I mentioned above, select the Specified Distance mode under the spacing drop-down menu and edit the spacing value to 0.1.
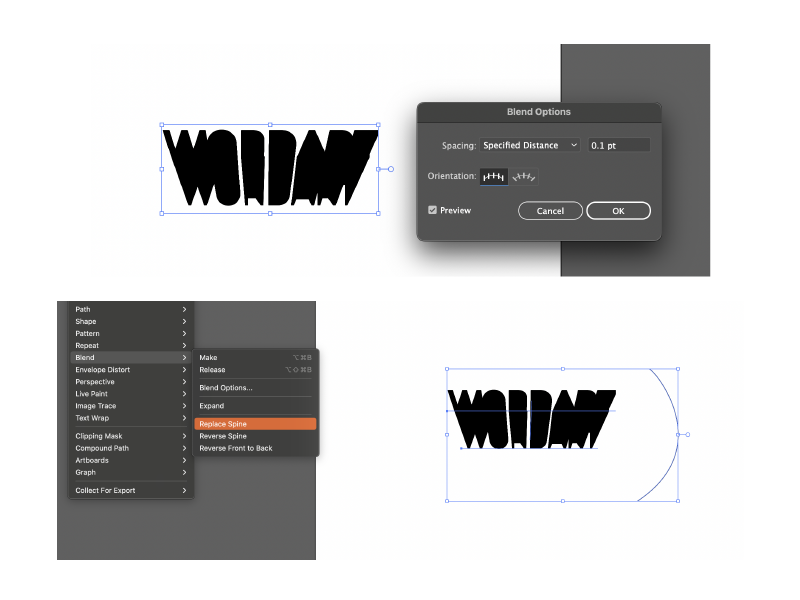
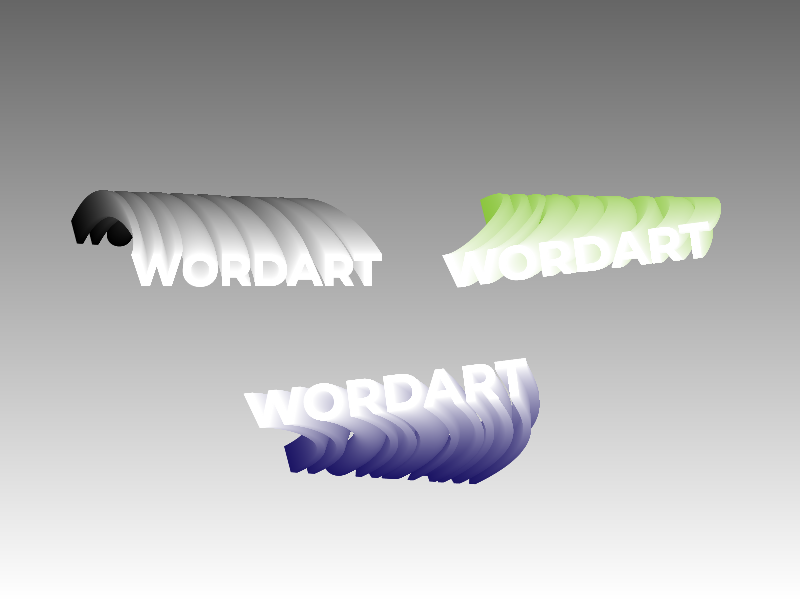
This adds a 3D-type effect to the text. You can also edit the text letters and colours to get different effects. Another cool feature is that by using the Pen tool to create an arc and selecting both the arc and blended text, you can navigate to Object > Blend > Replace Spine and apply a directional arc effect to the blend.
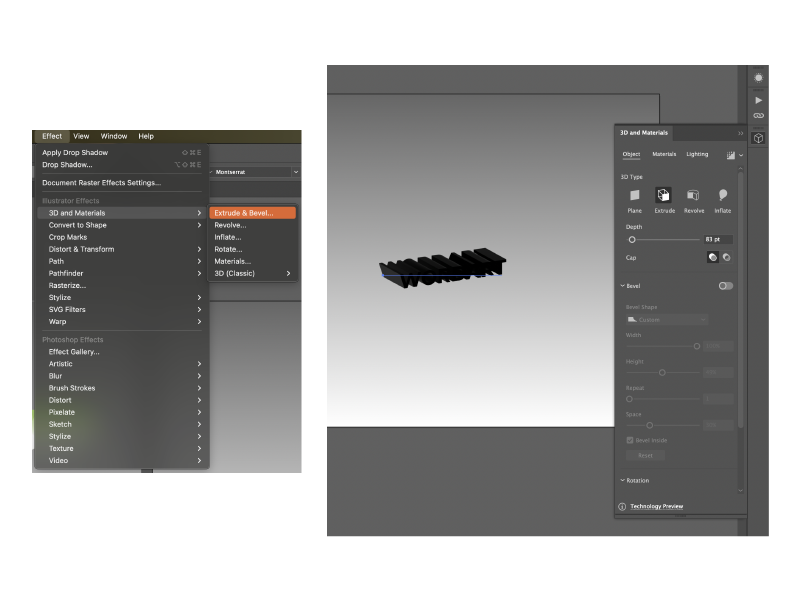
Extrude and Bevel
Text stylisation can also be done using the 3D Extrude and Bevel effect. You can find this effect in Effects > 3D and Materials > Extrude and Bevel.
After it is applied, the Extrude and Bevel menu helps you easily add and edit 3D values to the text.
Illustrator recently changed the Extrude and Bevel settings menu. So, if you find the newer menu limited and are familiar with the older tool, you can find a 3D (Classic) menu option under the 3D and Materials Effect menu in the latest versions of Adobe Illustrator. This also has a set of 3D effects similar to the new ones, only the interface is different.
However, the new editing panel is very user-friendly and coherent than the previous 3D editing panel. The previous 3D panel required checking the preview option to preview the effects, while the new interface allows you to quickly add and edit the effect with a live preview.
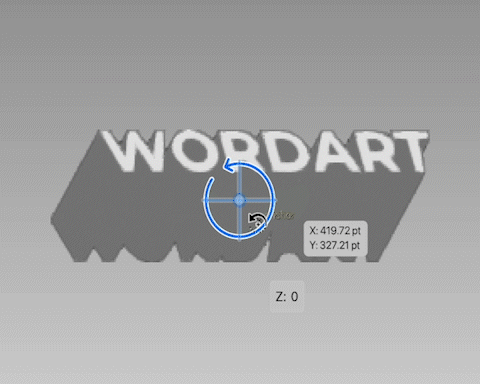
Once you have applied this effect, fiddle around with the axis, bevel and lighting to achieve your desired 3D-stylized text. You can also add multiple colours, gradient layers, etc., to add more style to your WordArt. This effect also retains text editing features.
We have discussed quite a lot of methods of creating WordArt in Illustrator. The great thing about these methods is that you can use these effects in conjunction with each other to create more dynamic text effects.
Hope this was helpful. Let me know if you have any questions about this topic in the comments below. Don't forget to subscribe if you liked the article!