
Vector animation, or vector graphic animation technique, is one of the most popular and easiest ways to create motion graphics using Adobe Illustrator and After Effects. Vector graphics consist of pixel-independent scalable graphics that are created in Adobe Illustrator, or other vector editing software like Corel Draw, Vectornator, Affinity Designer, etc. Just like vector graphics, vector animations can be scaled and adapted to different sizes and media without pixelation, as they are pixel independent. This blog will guide you through the creative process of building motion graphics by merging the Adobe Illustrator and Adobe After Effects workflow.
To help you understand this process better, I have created a 4-step instruction to build a looping wave loader.
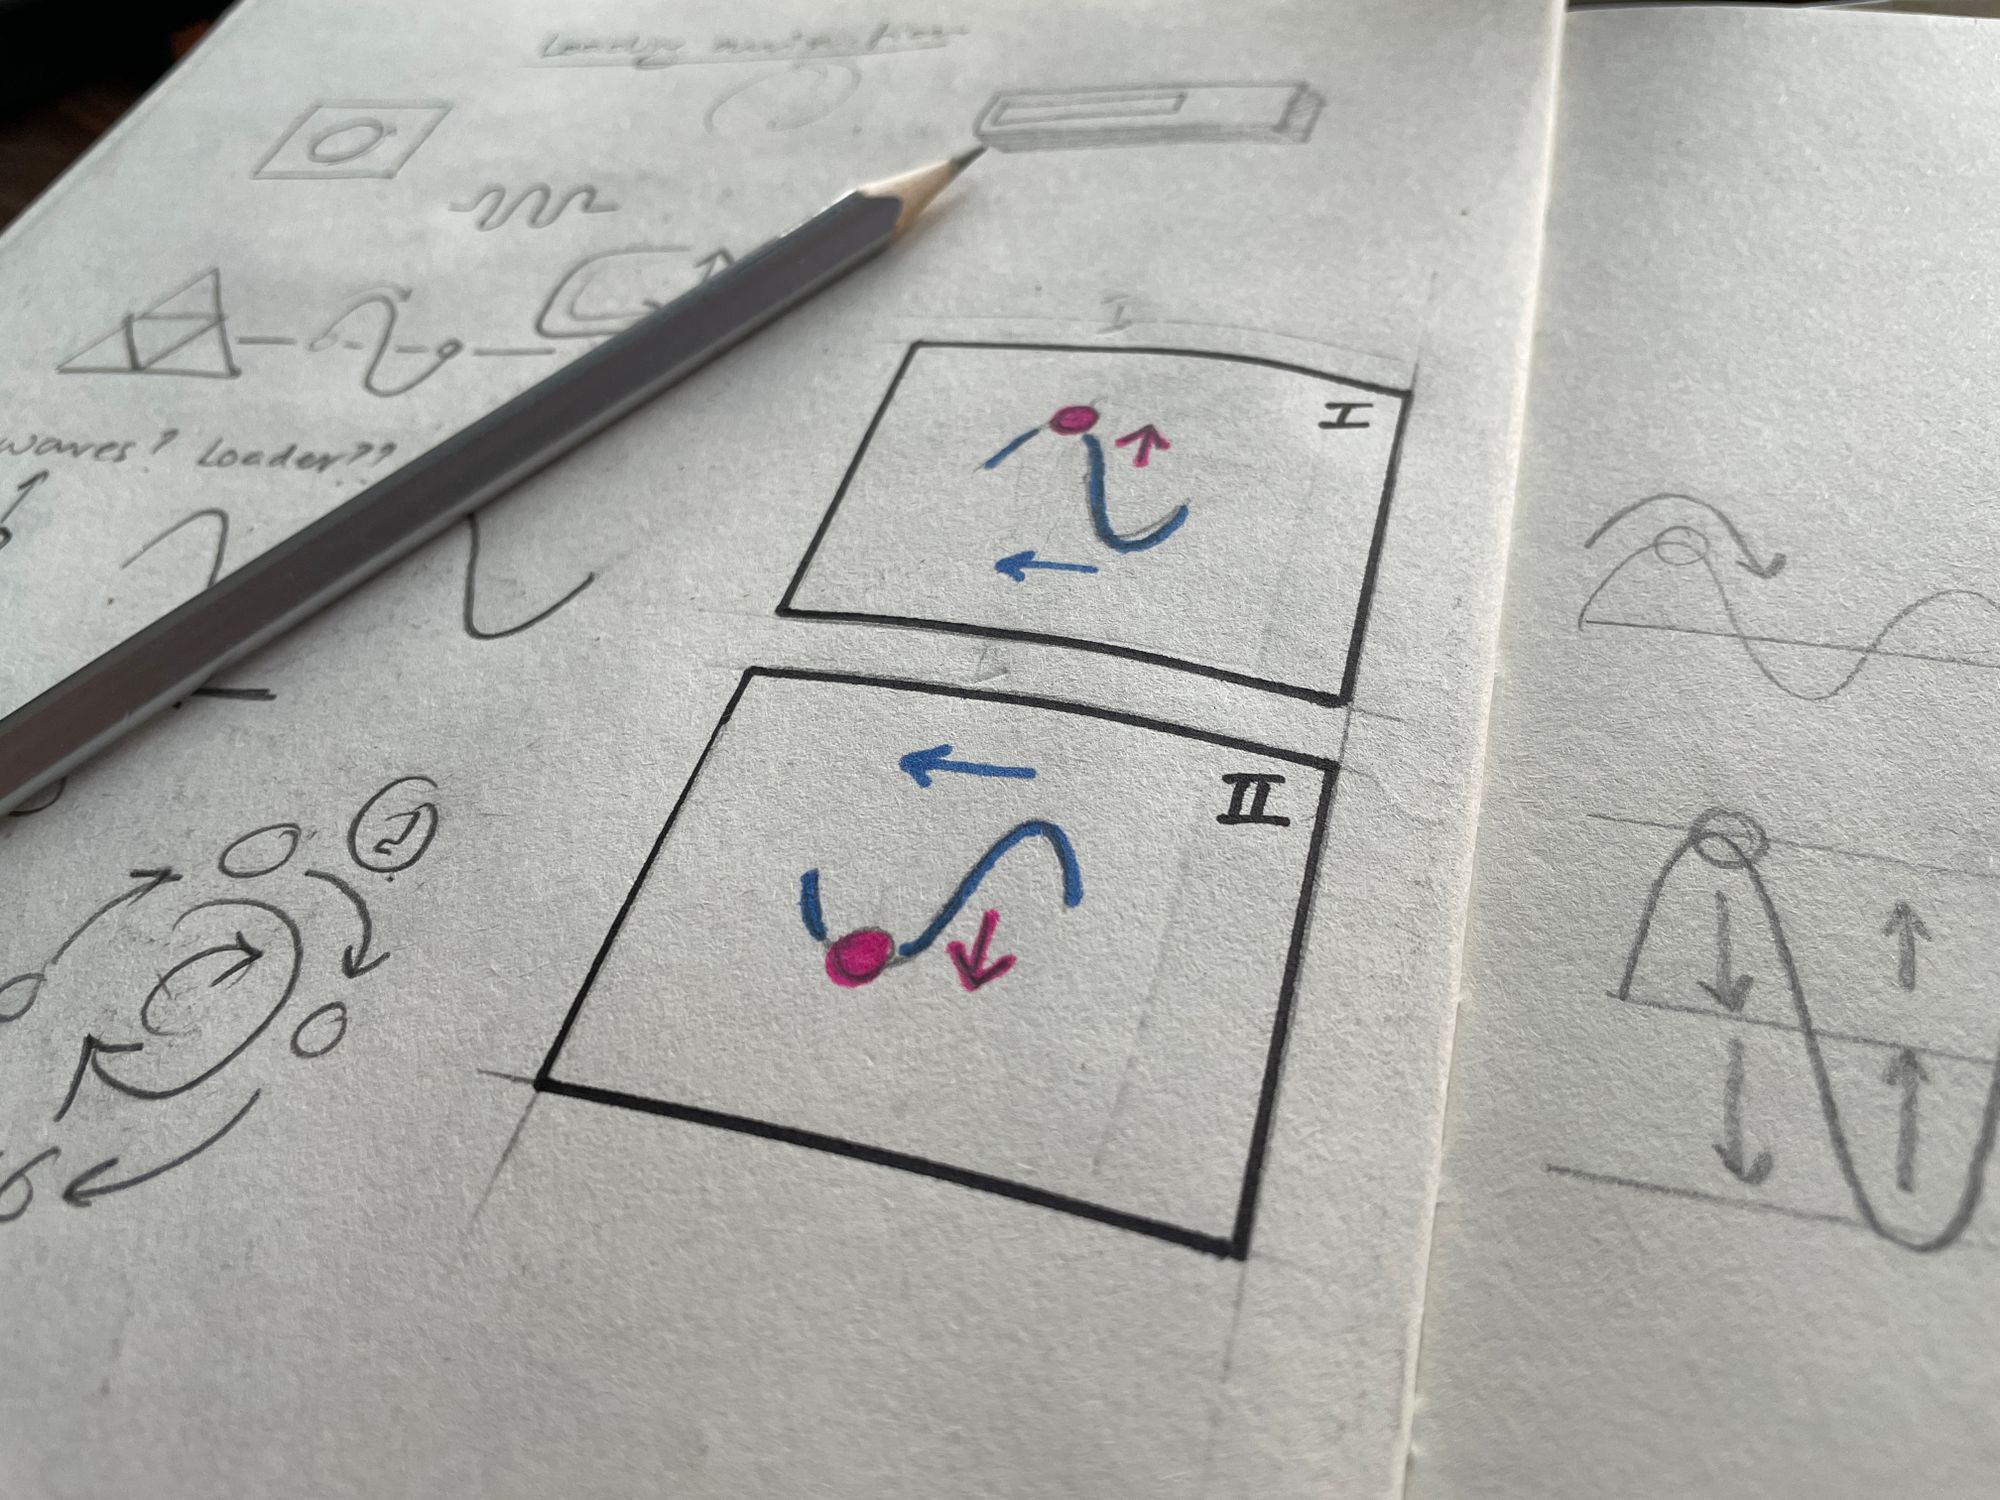
1) Storyboarding
Storyboarding is the first step when animating. It serves as a guideline for creating assets, as well as for maintaining animation sequences in the desired manner and order. You can start by brainstorming ideas and sketching out thumbnails on paper that map out the sequences and the objects you want to animate. It doesn't matter if it is low fidelity or high fidelity; just make sure you understand your objective. You can add arrows to determine motion paths and colours to identify the object types.
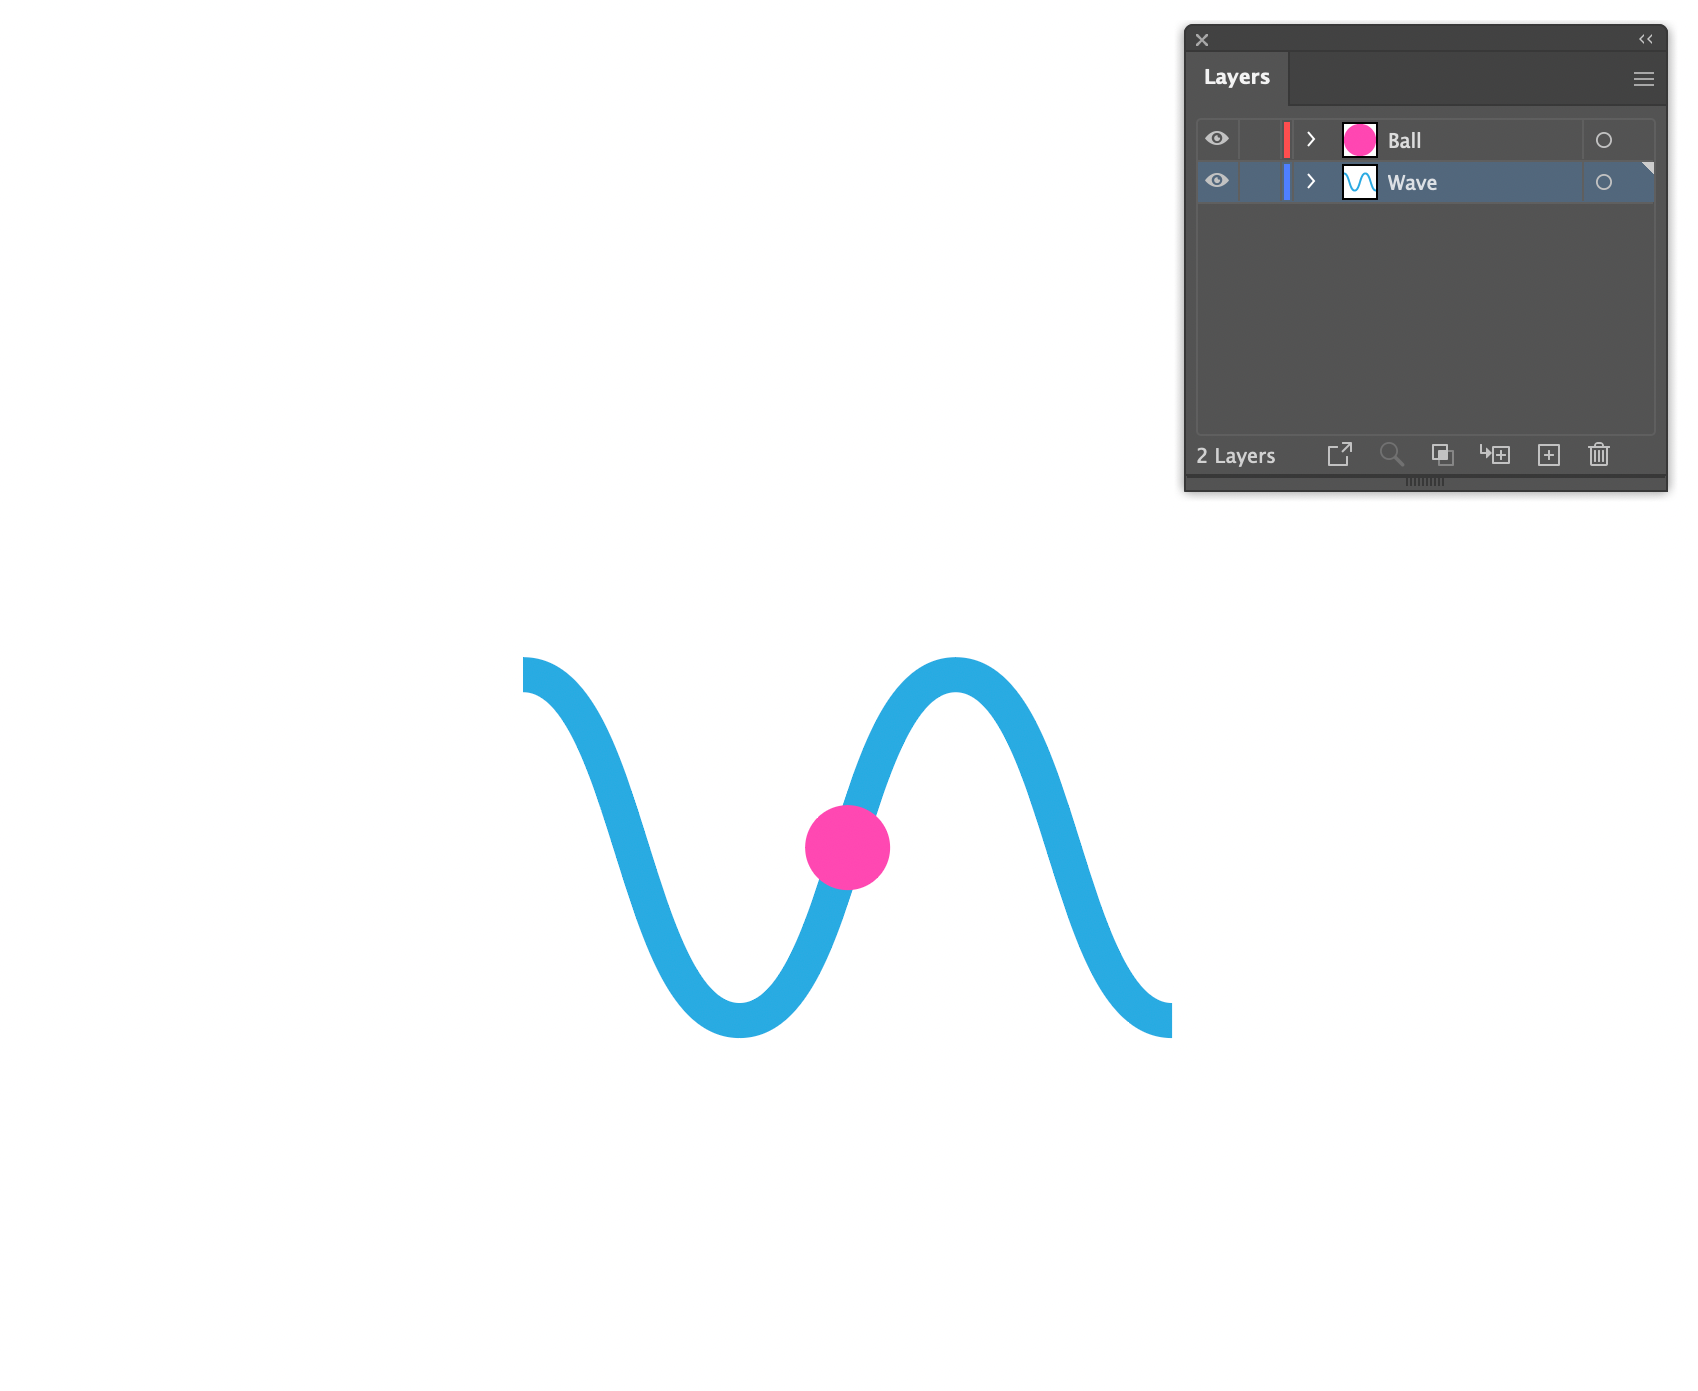
2) Creating Vector Assets in Illustrator
The next step is to use the storyboard and stills you created in Step 1 as a reference when making your assets. Illustrator has a multitude of tools to help in their creation. Basic shape tools and pen tools are generally the easiest to use. Feel free to let your creative juices flow. However, make sure you keep art-board size in mind while creating objects because the same parameter is also used as the canvas size of the animation.
Once you are done with your assets, start managing their layers. If you have multiple shapes and objects animation, every object has to be layered to avoid the merging that happens when you import them later in After Effects.
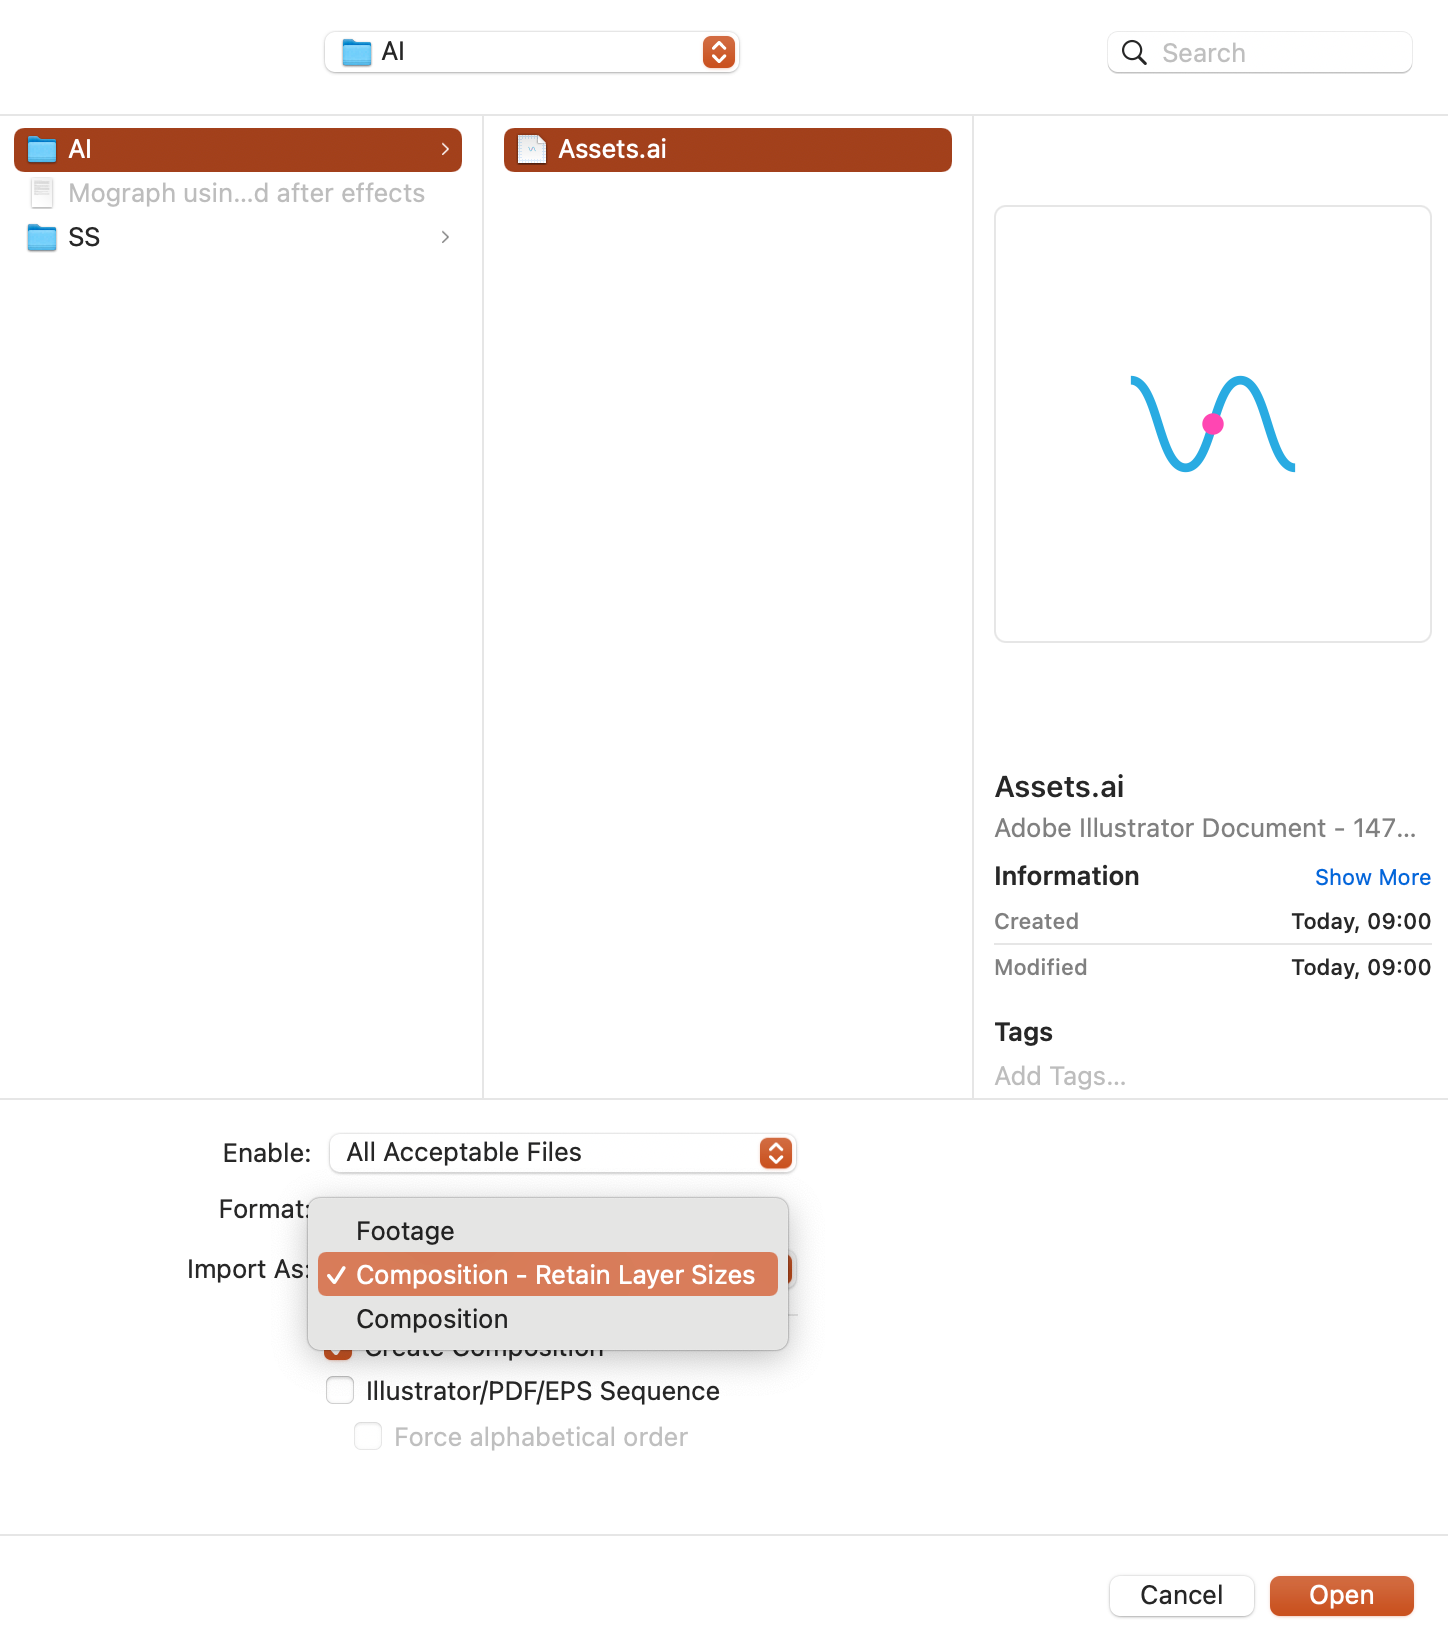
3) Exporting and Importing
After your creation process is complete, the next thing to do is to export the Illustrator file so you can import the shape to After Effects. To export your Illustrator graphics, go to File -> Save As then type in your desired file name, e.g. your_file_name.ai. The export format has to be in the .ai (Adobe Illustrator file) format. After your export is complete, launch After Effects, and import the created Illustrator file by navigating to File -> Import -> File or by simply hitting CMD⌘+I (in mac) to bring up the selection window. Make sure you import it as "Composition-Retain Layer Size". This will import the Illustrator file as a composition, thereby retaining the layer and composition size.
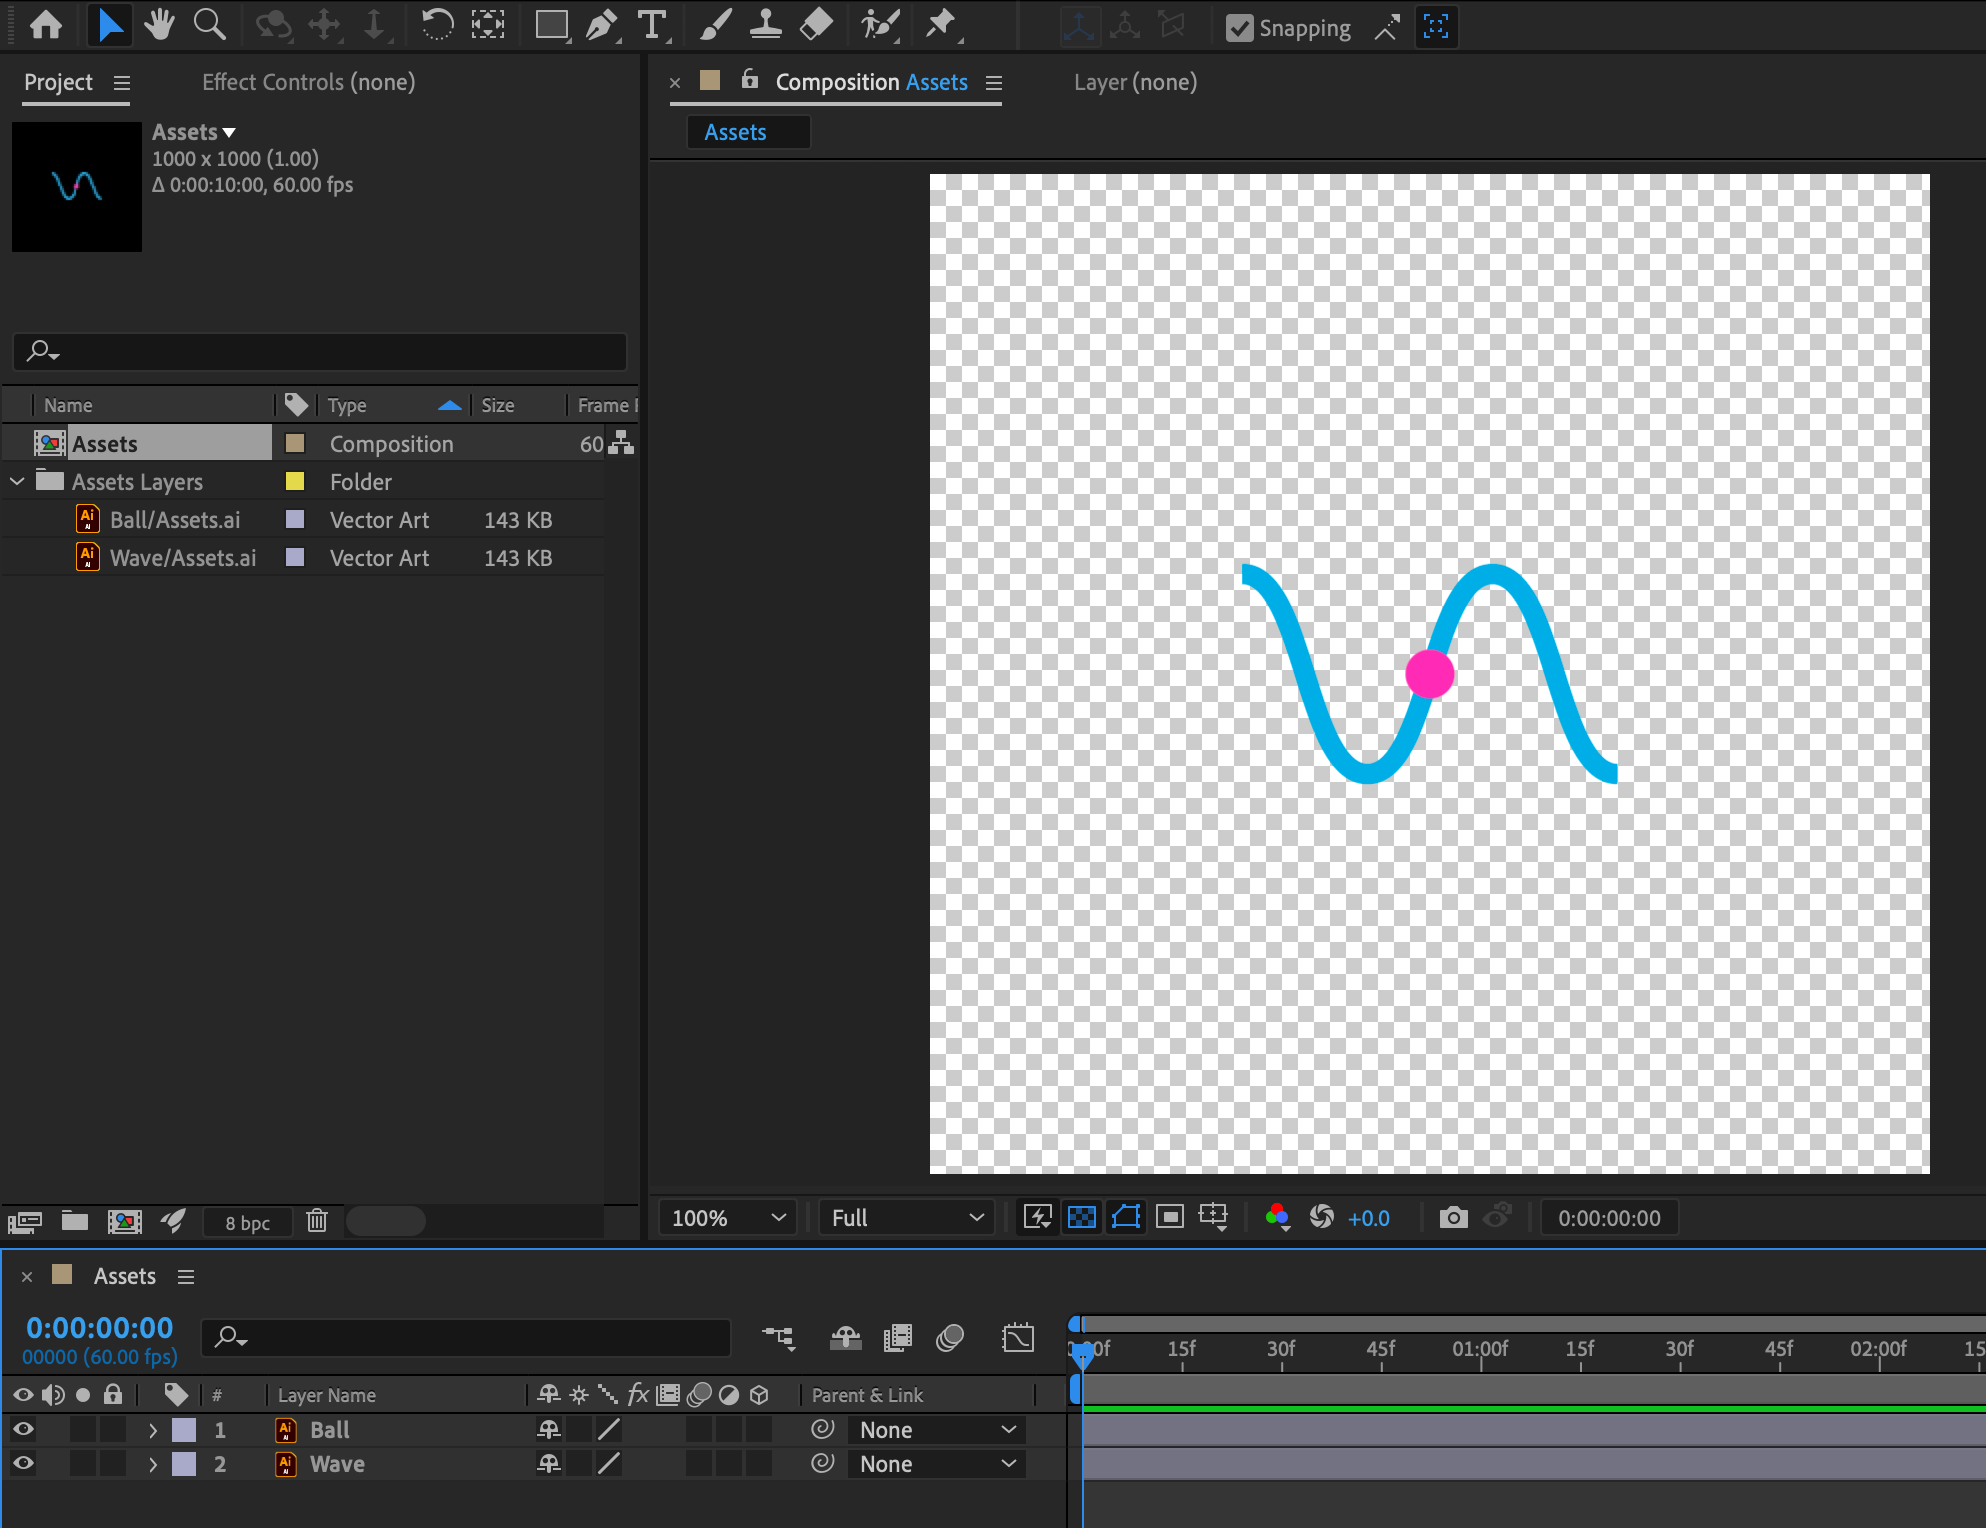
After your import is complete, double click the composition from the Project panel to open it with the asset layers that you previously exported from Illustrator. After Effects will automatically create the composition with the prescribed layers on your timeline.
4) Animating
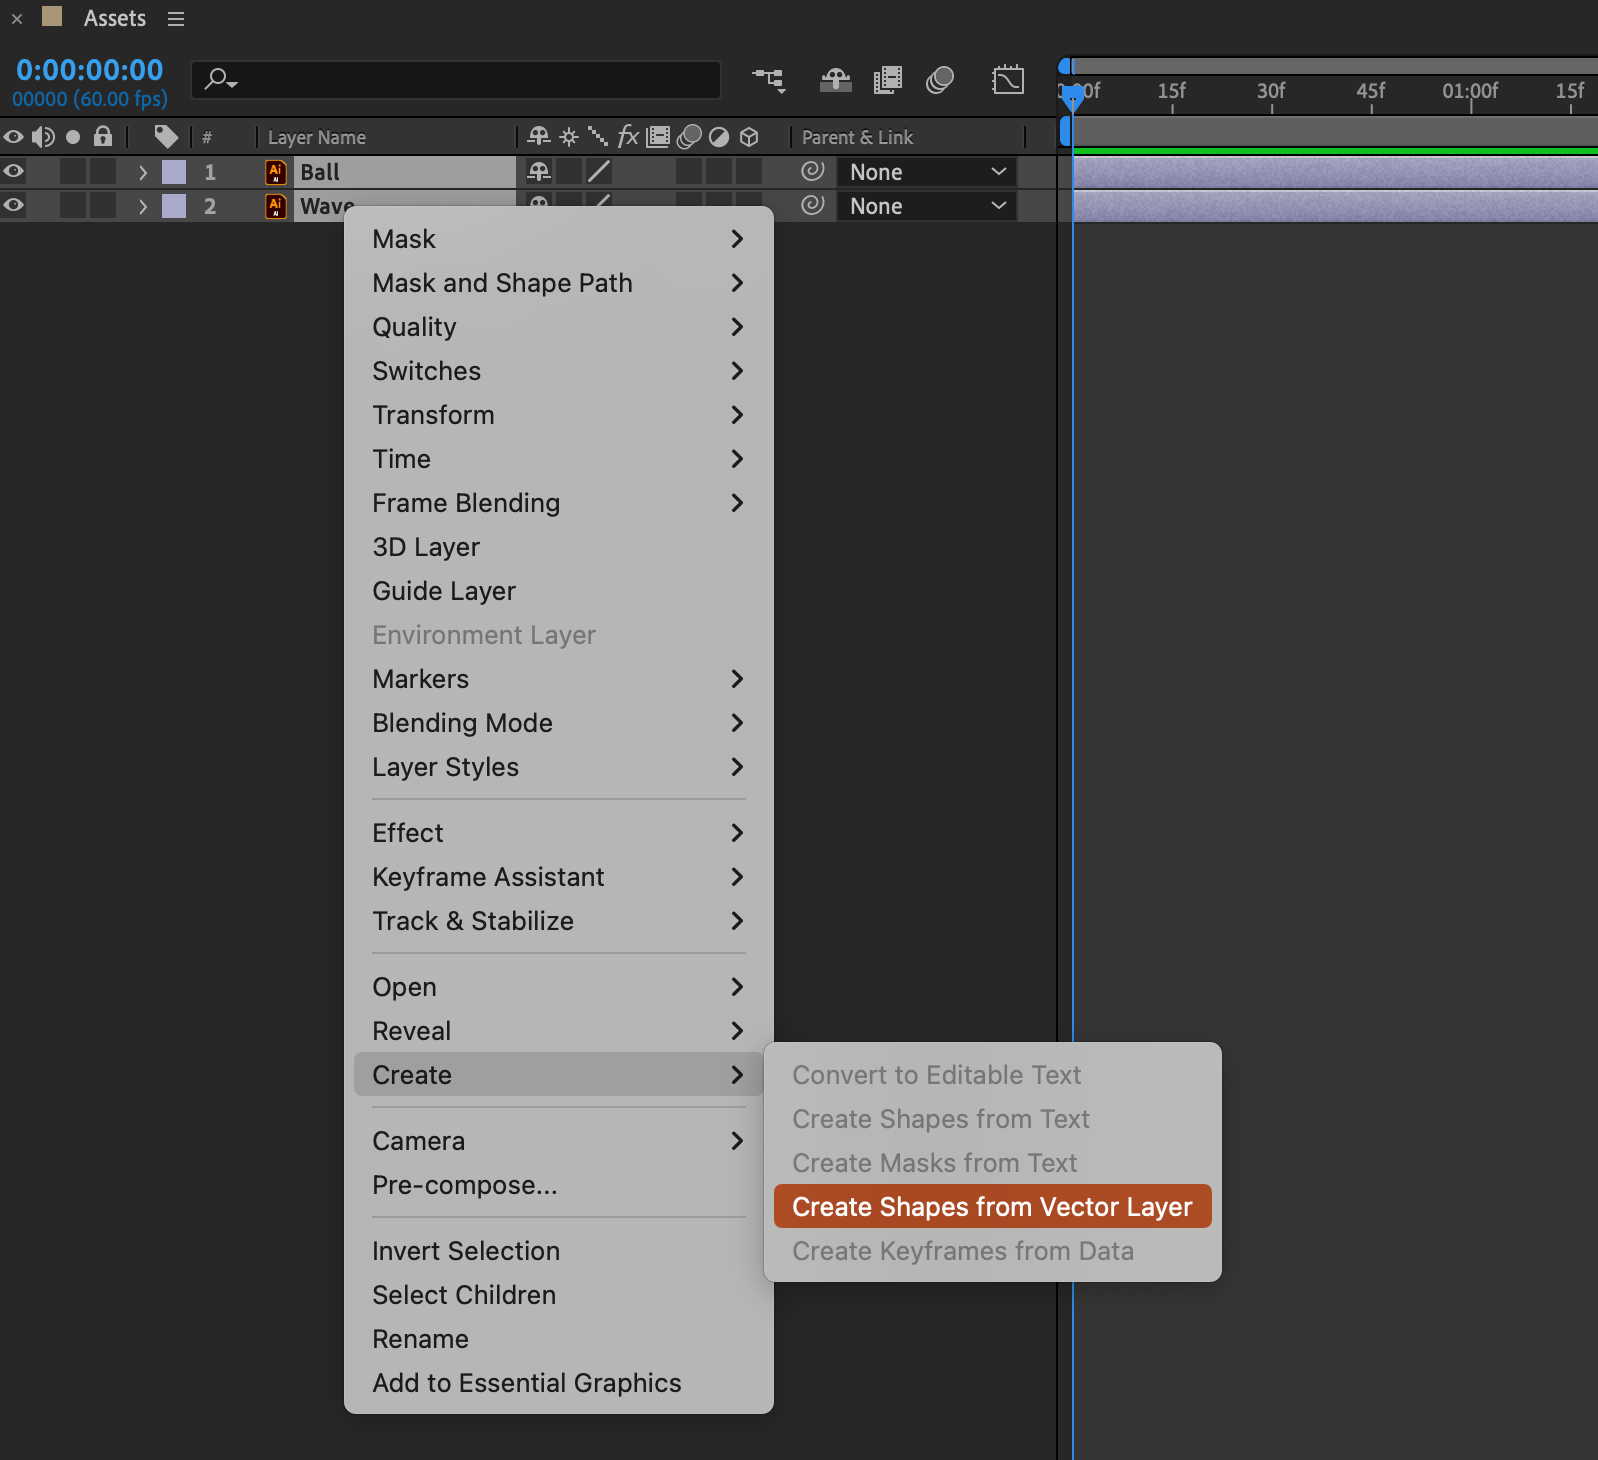
Finally, once the import process is done, it is time to start creating the vector animation. Before we can begin, right-click the layer you are working on and select Create-> Create Shapes from Vector Layer. This will convert the Illustrator object into editable vector shapes, which are native to After Effects.
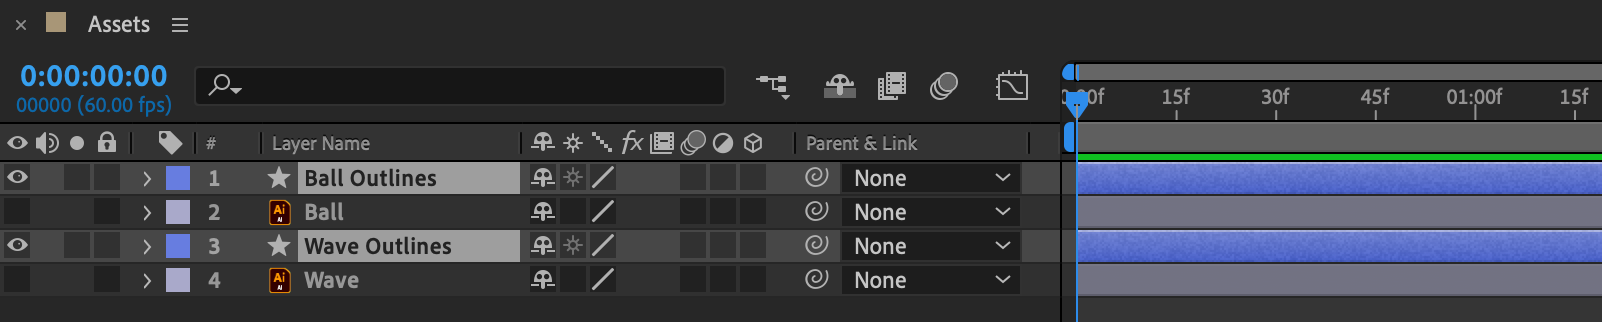
You can now delete the Adobe Illustrator layers if you want and begin tweaking the created shape layers that are ready for animating. You can edit their paths, add motion tweens, add effects, etc., just like the native shapes in After Effects. You can now create vector animations with the shapes you started with.

I hope this merge of illustrator and after effects workflow to create vector animation was helpful for you!