
Introduction to Docker
Docker is a straightforward tool to containerize applications and efficiently deploy them. Containers are one of the hottest topics in the tech world right now. They solve a specific purpose in Software Development Life Cycle – shortening the feedback loop. The amount of time spent building and deploying the application is significantly shortened by container solutions compared to traditional deployment methods.
The docker runtime is minimal, but some large applications can cross upwards of 1 GB in size, increasing the build and deployment time. This brings us to the main topic for today – Multi-Stage Builds.
Prerequisites
- Linux System with Docker installed
Multi-Stage Docker Builds
As simple as writing a Dockerfile; many things are unknown to us until we need them. Multi-Stage is quite the same. If a simple Dockerfile can do the trick, you'll never have to explore available deployment optimization methods.
Why is Multi-Stage Docker Build needed?
Docker image sizes can range somewhere between 1 MB to ~1000 MB. Depending on the application files, dependencies and the underlying base image, the final image size may catapult up to gigabytes. This is where a multi-stage build is needed.
As the name suggests, Multi-Stage Build is a method in which the first build stage will build the application, and the second stage will take the built application and run it to produce the final deploy-ready image.
What's a Docker Image?
In simple terms, a Docker image is a set of layers. The layers are formed due to the different steps in a docker file, wherein every step will create a new layer which will later be made into a single image. Any changes to the upper layer will require the layers below it to be built again; such is the working mechanism of docker.
We'll compare two variants of a Golang-based docker image. There's a normal image which is large in size but has Alpine Linux-based variants, which considerably lowers the size. There's also the distroless variant which is based on Debian Linux. It is extremely small in size because the software that does not play a part in building the Golang application is completely removed from the base image.
Golang Docker Image
I have taken a GO image capable of building and deploying applications here.
FROM golang-1.18
Let's have a look at its size:
docker images | grep golangREPOSITORY TAG IMAGE ID CREATED SIZE
golang 1.18 3e1bfa962ac0 5 days ago 819MB
golang 1.18-alpine3.16 3cb4fa46c0ae 5 days ago 325MBThe Golang image is 819 MB, but the alpine variant is 325 MB in size. This is one way to lower the size of the docker image, but in any environment where seconds and MBs matter, this will not be feasible.
Distroless Golang Docker Image
Let's have a look at the distroless image. Distroless in the context of a docker container means that it only contains the minimum required dependencies and files to successfully run an already-built application.
docker images | grep distrolessREPOSITORY TAG IMAGE ID CREATED SIZE
gcr.io/distroless/static-debian11 latest 66be18d6c7f3 52 years ago 2.36MBLet's build the above example into a docker file.
#Builder
FROM golang:1.18-alpine3.16 as builder
WORKDIR /go/src/hello-world/
RUN go mod init && go mod download
COPY hello-world.go ./
RUN CGO_ENABLED=0 GOOS=linux go build -a -installsuffix cgo -o app .
#Server
FROM gcr.io/distroless/static-debian11 as Server
WORKDIR /app/
COPY --from=builder /go/src/hello-world ./
CMD ["./app"]Multi-Stage Builds in Different Images
GO Image
In the code below, we can see that we have an alpine-based GO image on which we are copying our application files, installing dependencies and building the GO binary. In the next stage, we're using the distroless build to copy and run the GO binary.
package main
import "fmt"

func main() {
    fmt.Println("hello world")
}
Let's build the image:

docker build -t simple-docker . -f Dockerfile
REPOSITORY                              TAG              IMAGE ID       CREATED        SIZE
simple-docker                           latest            dd25ddfa32e6   37 seconds ago   4.16MB
If we run the above Dockerfile, this is the image we end up with. Although this is a simple hello world container, using the multi-stage build has considerably shortened its size. It sits around 5 MB compared.
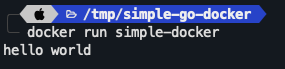
Below is the output when the Docker image runs!
Let's build and check if the image size increases after the second stage of the Dockerfile is removed.
docker images | grep single-stage
REPOSITORY                              TAG              IMAGE ID       CREATED        SIZE
simple-docker-single-stage              latest            eea6157f8a7e   4 minutes ago   348MB
We can see that the size is a whopping 348 MB for a simple application that prints hello world.
GO Image (Non-alpine Variant)
If we try the same with a non-alpine variant of the GO image, we get an even bigger size of 842 MB.
REPOSITORY                              TAG              IMAGE ID       CREATED        SIZE
simple-docker-single-stage-non-alpine   latest            2e2539f572ea   5 seconds ago   842MB
This is the main concept of a multi-stage build, to shrink image size as much as possible for fast deployment and, subsequently, quick user feedback.
Note that this should be used only when you need it because it's overkill for anything around 100-500 MB size unless it's GO-based.
Multi-Stage Dockerfile for NodeJS-based application
Here is another example of a Multi-Stage Dockerfile for a NodeJS-based application.
#Builds
FROM node:lts-alpine3.16 AS build-env
WORKDIR /app/
COPY package.json package-lock.json /app/
RUN npm install
COPY . /app/
RUN npm run build
#Serve
FROM gcr.io/distroless/nodejs:16 AS server
COPY --from=build-env /app/ /app/
WORKDIR /app/
EXPOSE 3000
CMD [ "dist/index.js"]CMD as the entry point for this distroless image is node.The same goes for the GO distroless image, where the entry point is already
go runIn this article, we've learnt about Multi-Stage Docker Builds, different base images, distroless images and built our own application using a Multi-Stage Docker Build.
Thank you for reading. Comment down below if you have ideas on other ways of optimizing docker builds.