
Navmeshes are used by Artificial Intelligence to find the optimal path to a certain destination. In this article, we will be discussing how you can implement such a pathfinding system into your Unity project.
Navmeshes
So why use navmeshes? The simple answer: it makes AI movement easier to implement. Without using navmeshes, we need to specify every condition for the AI to reach a certain point. For example, we might use a waypoint system that dictates where our AI needs to be. When the AI reaches a certain point, the next waypoint is allocated.
While this navigation system will make the AI move from one place to another, we will eventually encounter a very serious issue. What if there are obstacles in between waypoints? In that case, our simple waypoint system becomes way too basic. Alternatively, navmeshes help AI find paths while also avoiding obstacles along the way.
Baking the Navmesh
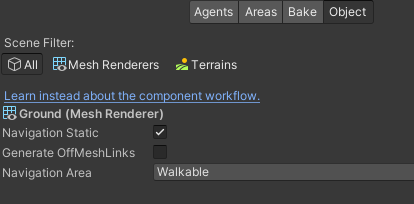
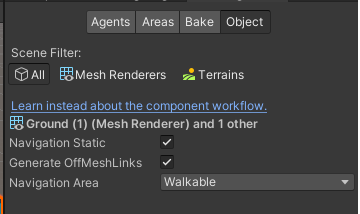
First of all, we need to bake the navmesh in our environment. This baked area will be a valid area for the AI to move. For baking to happen, we need to first mark our mesh renderer component as Navigation Static which can be done as follows:
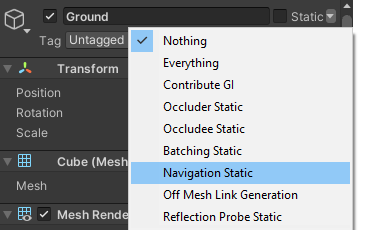
An alternative way of making geometry navigation static is by opening Windows -> AI -> Navigation and then opening the Object tab. There we can mark objects as navigation static.
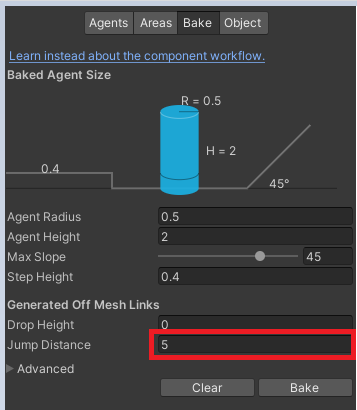
Once the object is marked navigation static, we need to bake a navmesh into it. This can be done by switching to the Bake tab and pressing Bake. This tab contains various settings for baking navmeshes.
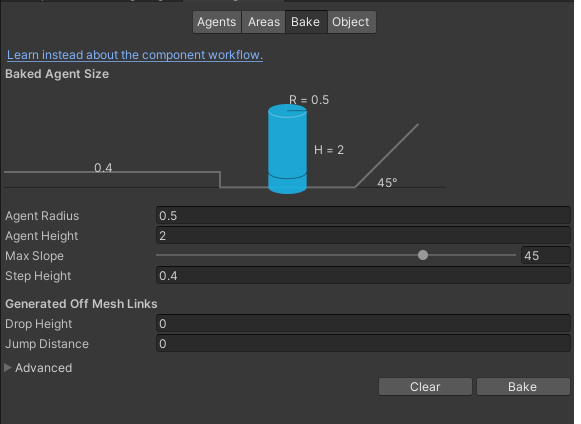
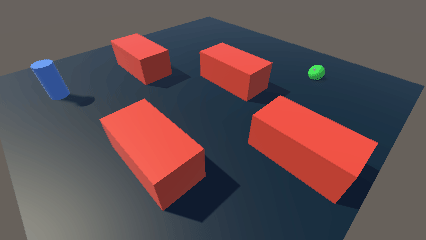
After configuring these settings and baking, it will generate a walkable area that can be identified by the bluish colour present in the geometry. The AI agent will now be able to walk anywhere within this area.
Creating AI
Now that the simple navmesh is set up, we need a simple AI that can walk onto that surface. We create a simple cylinder and attach the Navmesh Agent component. All we need for this AI to move is to assign the destination for this agent. A simple example is shown below.
using UnityEngine;
using UnityEngine.AI;

public class AIPlayer : MonoBehaviour
{
   [SerializeField] private Transform destination;
   private NavMeshAgent _navMeshAgent;

   private void Start()
   {
      _navMeshAgent = GetComponent<NavMeshAgent>();
   }

   private void Update()
   {
      _navMeshAgent.SetDestination(destination.position);
   }
}
Testing
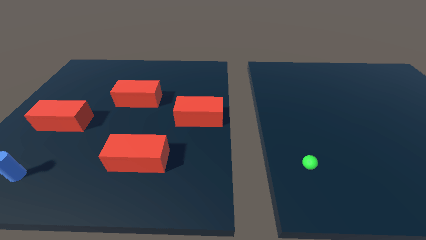
Now, let's change the destination of the AI. In my example below, I have set the destination to another platform to see how AI reacts.

It seems that the AI tries to go near its destination but stops when it reaches the edge as nothing is connecting these 2 platforms.
To fix this, we need to have offMeshLinks generated for both platforms. We can enable offMeshLinks by selecting 2 grounds and enabling Generate OffMeshLinks.
After enabling offMeshLinks, we need to rebake the navmesh. Baking with the default settings won't generate the offMeshLinks, so we need to increase jump distance. I have set it to 5 in my example below.
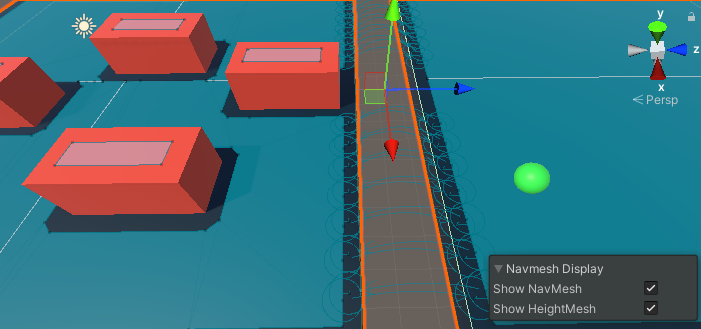
Navmesh Links are denoted by the arrows in-between platforms. One arrow means one-directional, and two means bidirectional. In my example, the arrow is bidirectional, which means AI can move from both platforms to one another. The demo is shown below.
Hurray! Now the AI can navigate from one platform to another easily.
I made a simple navmesh showcasing how AI can properly navigate around the world and how it can travel from one area to another. In my next article, I will implement real characters with animation and a jump system for travelling between 2 platforms. I will also so how you can use obstacle avoidance in moving objects.
I'll see you in the next one!